Page 241 of 274
3.Push the connector (C) to disconnect and re-
move the fog lamp.
4. Remove the entire socket and bulb assembly
(D) by turning it anticlockwise.
5. To install the bulb, perform the removal
steps in reverse.
NOTE
l When mounting the lamp unit, align the
holes in the lamp unit with the pins (E) on
the vehicle body.CAUTIONl Handle halogen lamp bulbs with care.
The gas inside halogen lamp bulbs is high-
ly pressurized, so dropping, knocking, or
scratching a halogen lamp bulb can cause
it to shatter.
l Never hold the halogen lamp bulb with a
bare hand, dirty glove, etc.
The oil from your hand could cause the
bulb to break the next time the fog lamps
are operated.
If the glass surface is dirty, it must be
cleaned with alcohol, paint thinner, etc.,
and refit it after drying thoroughly.Rear combination lamps E01004201382
3-door models
1.Remove the screws (A) (2 locations), and
then remove the lamp unit.
Maintenance
8-27
8
Page 242 of 274
2.Pull out the connector (B) while pressing the
tab (C).
3. Undo the clips (D) (4 locations) one by one
(pull each clip in the direction of the arrow),
and then remove the bulb holder.
4. Remove the bulb by turning it anticlockwise
while pressing in.
E- Rear turn-signal lamp
F- Stop lamp
5. To install the bulb, perform the removal
steps in reverse.
NOTE l When mounting the lamp unit, align the pins
(G) on the lamp unit with the holes in the body.
5-door models
1.Remove the screws (A) (2 locations), and
then remove the lamp unit.
2. Push the tab (B) inward with a straight blade
(or minus) screwdriver, and undo the lock in
the direction of the arrow (C), thereby free-
ing the rear combination lamp unit from the
connector.
Maintenance
8-28
8
Page 243 of 274
3.Undo the clips (D) (6 locations) one by one,
starting at the top and finishing at the bot-
tom. (Pull each clip in the direction of the ar-
row to undo it.) Then, remove the bulb holder.
4. Remove the bulb by turning it anticlockwise
while pressing in (except for stop lamp) or
by pulling out (stop lamp).
E- Stop lamp
F- Rear turn-signal lamp
G- Tail lamp
H- Rear fog lamp (driver’s side)
Reversing lamp (passenger’s side)
5. To install the bulb, perform the removal
steps in reverse.
NOTE l When mounting the lamp unit, align the pins
(I) on the lamp unit with the hole and the clip
in the body.Reversing lamp (passenger’s side)/
Rear fog lamp (driver’s side) E01004400228
3-door models 1. Press the tab (A) and remove the cover (B).
2.Remove the socket and bulb assembly (C) to-
gether by turning it anticlockwise, and then
remove the bulb by turning it anticlockwise
while pressing in.
Maintenance
8-29
8
Page 244 of 274
3.To install the bulb, perform the removal
steps in reverse.High-mounted stop lamps E01004500519
3-door models
1.Open the tailgate and remove the clips (A) (2
locations).
To remove each clip, press part (B) of the
clip then pry around the clip to get the clip out.
2. Remove the screws (C) (2 locations) and re-
move the bulb holder, then pull out the bulb.
To reinstall
Reverse the above removal procedure. When refit-
ting each of the clips of the lid, push the clip into
the lid with the pin pressed inward (as illustrated).
Then, push in the pin to lock the clip in place.5-door models
1.Open the tailgate and remove the covers (A)
(2 locations).
2. Push the hooks (B) (2 locations) into the
holes and remove the high-mounted stop
lamp. (Close the tailgate to cause the lamp as-
sembly to come out.)
Maintenance
8-30
8
Page 245 of 274
3.Gently close the tailgate, remove the lamp as-
sembly, and remove the connector (C), then
remove the lamp body.
4. Undo the clips (D) and remove the bulb hold-
er, then pull out the bulb.
5. To install the bulb, perform the removal
steps in reverse.
Licence plate lamps E01004600800
1. Remove the lamp assembly by levering it out
with a straight blade (or minus) screwdriver.
2. Remove the socket and bulb assembly togeth-
er by turning it anticlockwise, and then re-
move the bulb by pulling out.
3. To install the bulb, perform the removal
steps in reverse.
NOTE
l When installing the lamp, insert tab (A) first,
then align and insert tab (B).Room lamps & map lamps E01004700478
1.Insert a straight blade (or minus) screwdriver
into the notch of the lens and pry gently to re-
move the lens.
2. Turn the lamp bulb anticlockwise to remove
it from the lamp bulb holder.
Maintenance
8-31
8
Page 246 of 274
NOTEl Wrap a piece of cloth around the tip of the
screwdriver in order to avoid scratching the
lens.
3. To install the bulb, perform the removal
steps in reverse.Luggage compartment lamp E01005300370
1.Insert a straight blade (or minus) screwdriver
with a cloth over its tip into the notch of the
lens and pry gently to remove the lens.
2. Remove the bulb from the lamp holder.
3-door models5-door modelsNOTE
l Wrap a piece of cloth around the tip of the
screwdriver in order to avoid scratching the
lens.
3. To install the bulb, perform the removal
steps in reverse.
Maintenance
8-32
8
Page 247 of 274

Vehicle labeling............................................................................ 9-02
Vehicle dimensions.......................................................................9-04
Vehicle performance.....................................................................9-06
Vehicle weight .............................................................................. 9-07
Engine specifications .................................................................... 9-09
Transmission specifications .......................................................... 9-10
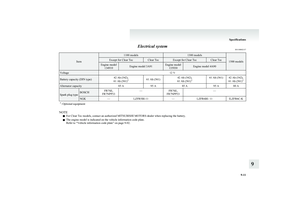
Electrical system ........................................................................... 9-11
Tyres and wheels .......................................................................... 9-12
Other specifications ...................................................................... 9-13
Fuel consumption ......................................................................... 9-14
Refill capacities ............................................................................ 9-16Specifications9
Page 248 of 274
Vehicle labelingE01100102831
Vehicle identification number: (VIN)
The vehicle identification number (VIN) is stam-
ped as shown in the illustration.
Vehicle information code plate
The vehicle information code plate is riveted as
shown in the illustration.
3-door models5-door models
The plate shows model code, engine model, trans-
mission model and body colour code, etc.
Please use this number when ordering replacement
parts.
1- Model code
2- Engine model code, Exterior code
3- Transmission model code
4- Approval number
5- Chassis number
6- Maximum gross vehicle weight
7- Body colour code, Interior code,
Option code
8- Gross combination weight
9- Maximum axle weight (Front)
10- Maximum axle weight (Rear)
Specifications
9-02
9