2011 MERCEDES-BENZ SLS lock
[x] Cancel search: lockPage 263 of 436

If the extent of the damage cannot be
determined:
XContact an authorized Mercedes-Benz
Center or call Roadside Assistance.
If no damage on major assemblies, fuel
system, and engine mount can be
determined:
XStart the engine in the usual manner.
Parking
GWarning!
Do not park in areas where the hot exhaust
system could come into contact with
combustible materials. Combustible
materials such as grass, hay or leaves could
be ignited and cause a vehicle fire.
Unintended vehicle movement could cause
serious personal injury or damage to the
vehicle or the vehicle drivetrain. To reduce
such risks, always do the following before
turning off the engine and leaving the vehicle:
RKeep right foot on the brake pedal.
REngage the electronic parking brake.
RShift the transmission into park position P.
RSlowly release the brake pedal.
RWhen parked on an incline, always turn the
front wheels towards the road curb.
RPress the KEYLESS-GO start/stop button,
or turn the SmartKey in the starter switch
to position 0 and remove the SmartKey
from the starter switch.
RTake the SmartKey with you and lock the
vehicle when leaving.
Electronic parking brake
GWarning!
When leaving the vehicle, always remove the
SmartKey from the starter switch, take it with
you, and lock the vehicle. Do not leave
children unattended in the vehicle, or with
access to an unlocked vehicle. Children could
release the electronic parking brake and/or
shift the transmission out of park position P,
either of which could result in an accident
and/or serious personal injury.
Engaging electronic parking brake
XPress handle :.
The red indicator lamp F (USA only)
or ! (Canada only) in the instrument
cluster comes on.
iYou can engage the electronic parking
brake even when the SmartKey is removed
from the starter switch.
Releasing electronic parking brake
manually
XSwitch on the ignition.XPull handle :.
The red indicator lamp F (USA only)
or ! (Canada only) in the instrument
cluster goes out.
Releasing electronic parking brake
automatically
The electronic parking brake releases
automatically when all of the following
conditions are fulfilled:
RThe engine is running.
RThe transmission is in drive position D or
reverse gear R. With the transmission in
reverse gear R the trunk lid must be closed.
RThe hood is closed.
RYou have fastened your seat belt.
RYou depress on the accelerator pedal.
Driving and parking261Controls in detailBA 197 USA, CA Edition A 2011; 1; 27, en-UShereepeVersion: 3.0.3.52010-03-24T15:31:10+01:00 - Seite 261Z
Page 267 of 436
Transmission positions
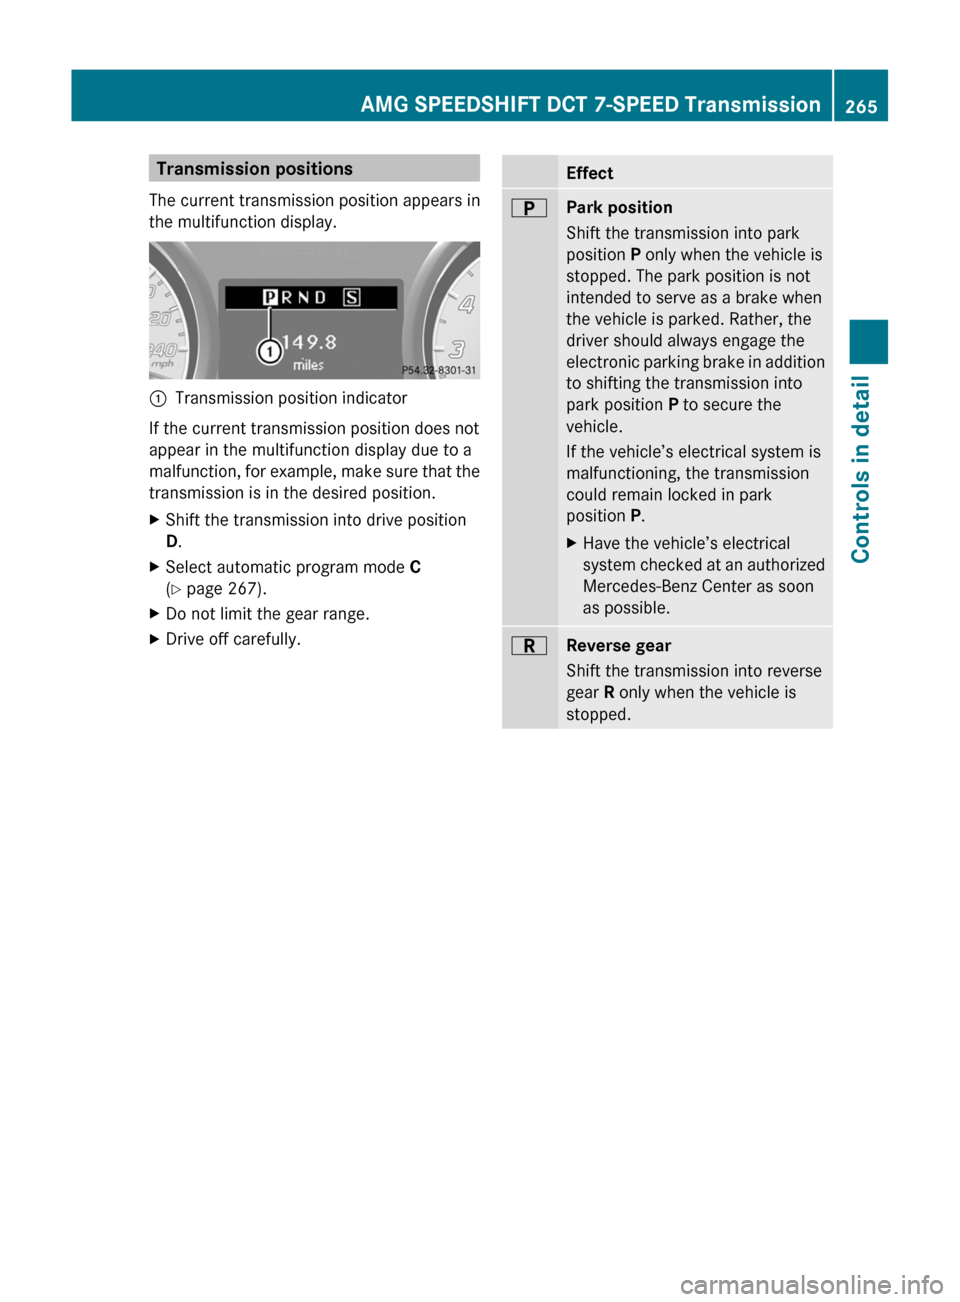
The current transmission position appears in
the multifunction display.:Transmission position indicator
If the current transmission position does not
appear in the multifunction display due to a
malfunction, for example, make sure that the
transmission is in the desired position.
XShift the transmission into drive position
D .XSelect automatic program mode C
( Y page 267).XDo not limit the gear range.XDrive off carefully.EffectBPark position
Shift the transmission into park
position P only when the vehicle is
stopped. The park position is not
intended to serve as a brake when
the vehicle is parked. Rather, the
driver should always engage the
electronic parking brake in addition
to shifting the transmission into
park position P to secure the
vehicle.
If the vehicle’s electrical system is
malfunctioning, the transmission
could remain locked in park
position P.XHave the vehicle’s electrical
system checked at an authorized
Mercedes-Benz Center as soon
as possible.CReverse gear
Shift the transmission into reverse
gear R only when the vehicle is
stopped.AMG SPEEDSHIFT DCT 7-SPEED Transmission265Controls in detailBA 197 USA, CA Edition A 2011; 1; 27, en-UShereepeVersion: 3.0.3.52010-03-24T15:31:10+01:00 - Seite 265Z
Page 276 of 436

?Line for main menusADigital clock/outside temperature
indicator
Settings, functions, submenus as well as any
malfunctions appear in the text field.
For more information on menus displayed in
the multifunction display, see “Menus and
submenus” ( Y page 275).
274Control systemControls in detail
BA 197 USA, CA Edition A 2011; 1; 27, en-UShereepeVersion: 3.0.3.52010-03-24T15:31:10+01:00 - Seite 274
Page 285 of 436
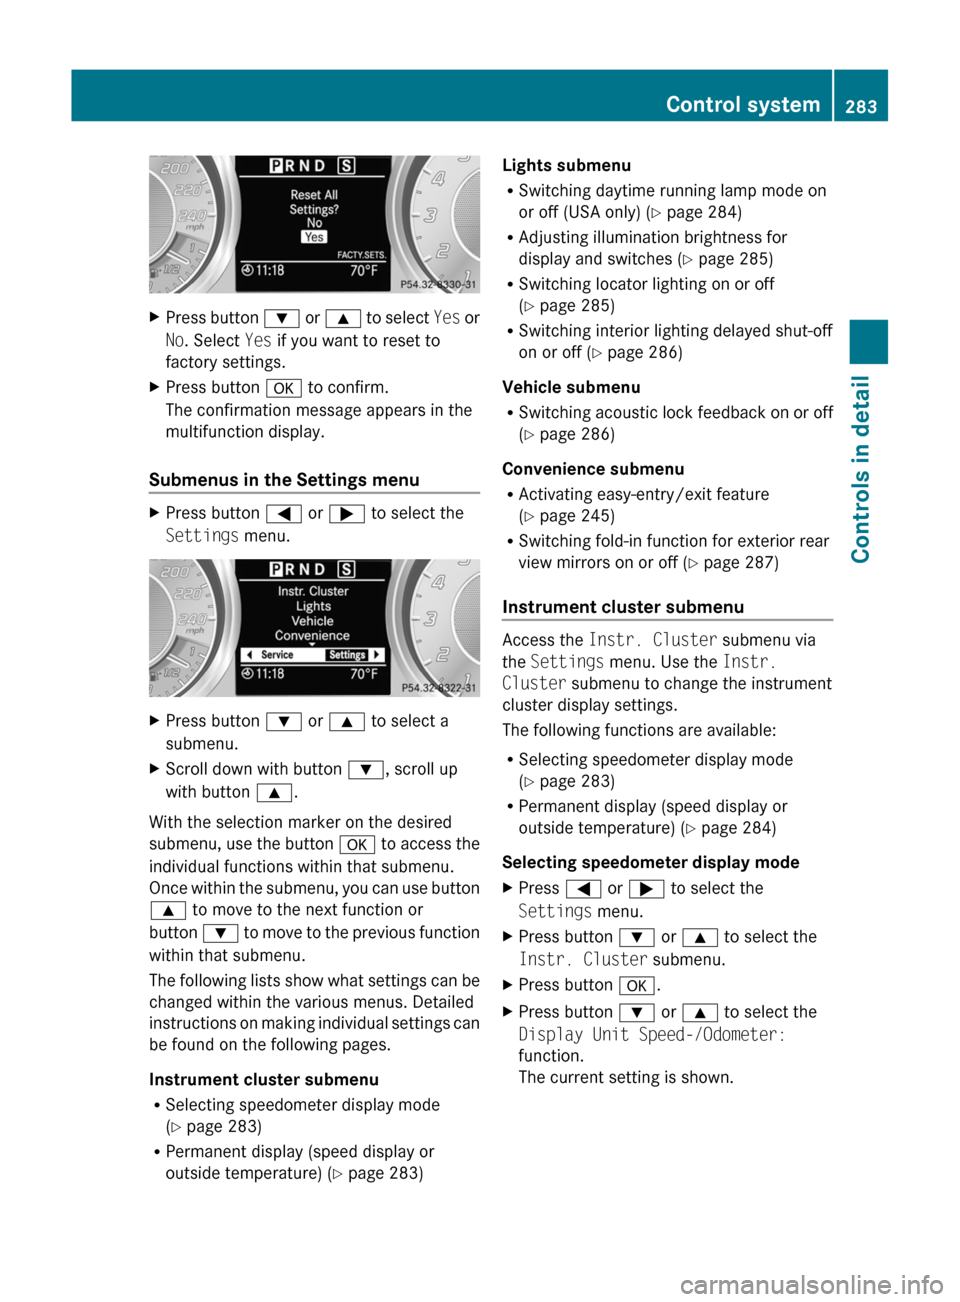
XPress button : or 9 to select Yes or
No . Select Yes if you want to reset to
factory settings.XPress button a to confirm.
The confirmation message appears in the
multifunction display.
Submenus in the Settings menu
XPress button = or ; to select the
Settings menu.XPress button : or 9 to select a
submenu.XScroll down with button :, scroll up
with button 9.
With the selection marker on the desired
submenu, use the button a to access the
individual functions within that submenu.
Once within the submenu, you can use button
9 to move to the next function or
button : to move to the previous function
within that submenu.
The following lists show what settings can be
changed within the various menus. Detailed
instructions on making individual settings can
be found on the following pages.
Instrument cluster submenu
R Selecting speedometer display mode
( Y page 283)
R Permanent display (speed display or
outside temperature) ( Y page 283)
Lights submenu
R Switching daytime running lamp mode on
or off (USA only) ( Y page 284)
R Adjusting illumination brightness for
display and switches ( Y page 285)
R Switching locator lighting on or off
( Y page 285)
R Switching interior lighting delayed shut-off
on or off ( Y page 286)
Vehicle submenu
R Switching acoustic lock feedback on or off
( Y page 286)
Convenience submenu
R Activating easy-entry/exit feature
( Y page 245)
R Switching fold-in function for exterior rear
view mirrors on or off ( Y page 287)
Instrument cluster submenu
Access the Instr. Cluster submenu via
the Settings menu. Use the Instr.
Cluster submenu to change the instrument
cluster display settings.
The following functions are available:
R Selecting speedometer display mode
( Y page 283)
R Permanent display (speed display or
outside temperature) ( Y page 284)
Selecting speedometer display mode
XPress = or ; to select the
Settings menu.XPress button : or 9 to select the
Instr. Cluster submenu.XPress button a.XPress button : or 9 to select the
Display Unit Speed-/Odometer:
function.
The current setting is shown.Control system283Controls in detailBA 197 USA, CA Edition A 2011; 1; 27, en-UShereepeVersion: 3.0.3.52010-03-24T15:31:10+01:00 - Seite 283Z
Page 287 of 436
position $ or c , the daytime running
lamps are switched on when the engine is
running.
In low ambient light conditions the following
lamps will come on additionally:
R Low-beam headlamps
R Parking lamps
R Tail lamps
R License plate lamps
R Side marker lamps
For more information on the daytime running
lamp mode, see ( Y page 251).
i Make sure the exterior lamp switch is set
to M or c when you switch off the
daytime running lamps while driving at
night.
For safety reasons, resetting all the functions
of all submenus to the factory settings while
driving ( Y page 282) will not deactivate the
daytime running lamp mode.
The following message appears in the
multifunction display:
Cannot Be Completely Reset to
Factory Settings while Driving. .
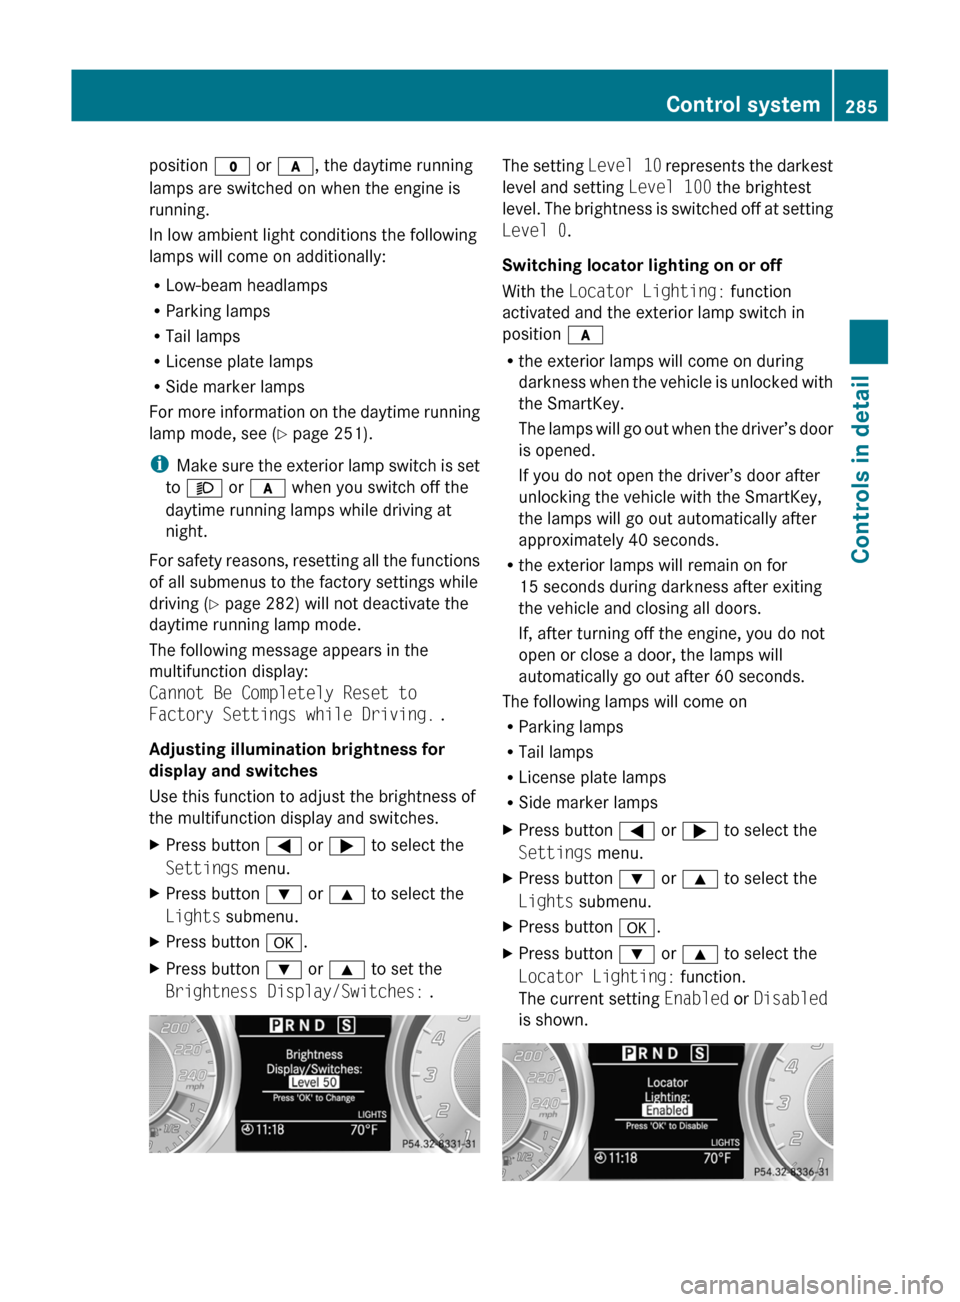
Adjusting illumination brightness for
display and switches
Use this function to adjust the brightness of
the multifunction display and switches.XPress button = or ; to select the
Settings menu.XPress button : or 9 to select the
Lights submenu.XPress button a.XPress button : or 9 to set the
Brightness Display/Switches: .The setting Level 10 represents the darkest
level and setting Level 100 the brightest
level. The brightness is switched off at setting
Level 0 .
Switching locator lighting on or off
With the Locator Lighting: function
activated and the exterior lamp switch in
position c
R the exterior lamps will come on during
darkness when the vehicle is unlocked with
the SmartKey.
The lamps will go out when the driver’s door
is opened.
If you do not open the driver’s door after
unlocking the vehicle with the SmartKey,
the lamps will go out automatically after
approximately 40 seconds.
R the exterior lamps will remain on for
15 seconds during darkness after exiting
the vehicle and closing all doors.
If, after turning off the engine, you do not
open or close a door, the lamps will
automatically go out after 60 seconds.
The following lamps will come on
R Parking lamps
R Tail lamps
R License plate lamps
R Side marker lampsXPress button = or ; to select the
Settings menu.XPress button : or 9 to select the
Lights submenu.XPress button a.XPress button : or 9 to select the
Locator Lighting: function.
The current setting Enabled or Disabled
is shown.Control system285Controls in detailBA 197 USA, CA Edition A 2011; 1; 27, en-UShereepeVersion: 3.0.3.52010-03-24T15:31:10+01:00 - Seite 285Z
Page 288 of 436
XPress button a to change the current
status.
Depending on the previous status, the
Locator Lighting: function will be
Enabled or Disabled .
You can temporarily deactivate the
headlamps delayed shut-off feature:
XBefore exiting the vehicle, set the starter
switch to position 0 using the KEYLESS-GO
start/stop button.XSet the starter switch to position 2 and
back to position 0 using the KEYLESS-GO
start/stop button.
The headlamps delayed shut-off feature is
deactivated. It will reactivate as soon as
you start the engine.
Switching interior lighting delayed shut-
off on or off
Use this function to set whether you would
like the interior lighting to remain on for
10 seconds during darkness after you have
set the starter switch to position 0 using the
KEYLESS-GO start/stop button.
XPress button = or ; to select the
Settings menu.XPress button : or 9 to select the
Lights submenu.XPress button a.XPress button : or 9 to select the
Interior Lighting Delay: function.
The current setting Enabled or Disabled
is shown.XPress button a to change the current
status.
Depending on the previous status, the
interior lighting delayed shut-off feature
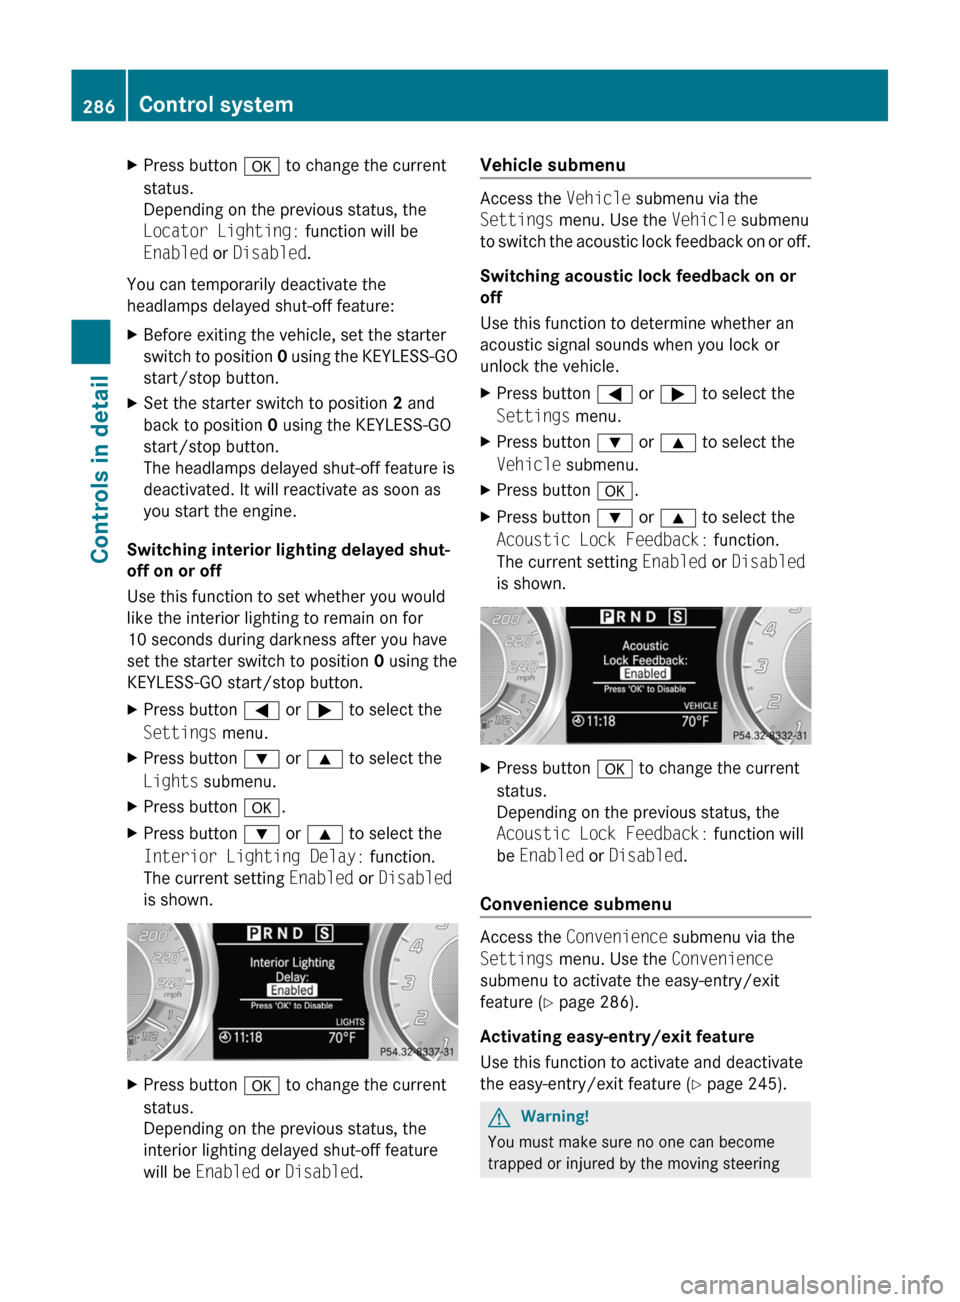
will be Enabled or Disabled .Vehicle submenu
Access the Vehicle submenu via the
Settings menu. Use the Vehicle submenu
to switch the acoustic lock feedback on or off.
Switching acoustic lock feedback on or
off
Use this function to determine whether an
acoustic signal sounds when you lock or
unlock the vehicle.
XPress button = or ; to select the
Settings menu.XPress button : or 9 to select the
Vehicle submenu.XPress button a.XPress button : or 9 to select the
Acoustic Lock Feedback: function.
The current setting Enabled or Disabled
is shown.XPress button a to change the current
status.
Depending on the previous status, the
Acoustic Lock Feedback: function will
be Enabled or Disabled .
Convenience submenu
Access the Convenience submenu via the
Settings menu. Use the Convenience
submenu to activate the easy-entry/exit
feature ( Y page 286).
Activating easy-entry/exit feature
Use this function to activate and deactivate
the easy-entry/exit feature ( Y page 245).
GWarning!
You must make sure no one can become
trapped or injured by the moving steering
286Control systemControls in detail
BA 197 USA, CA Edition A 2011; 1; 27, en-UShereepeVersion: 3.0.3.52010-03-24T15:31:10+01:00 - Seite 286
Page 289 of 436
wheel when the easy-entry/exit feature is
activated.
To stop steering wheel movement, move
steering wheel adjustment stalk or press one
of the memory position buttons.
Do not leave children unattended in the
vehicle, or with access to an unlocked vehicle.
Children could open the driver’s door and
unintentionally activate the easy-entry/exit
feature, which could result in an accident
and/or serious personal injury.XPress button = or ; to select the
Settings menu.XPress button : or 9 to select the
Convenience submenu.XPress button a.XPress button : or 9 to select the
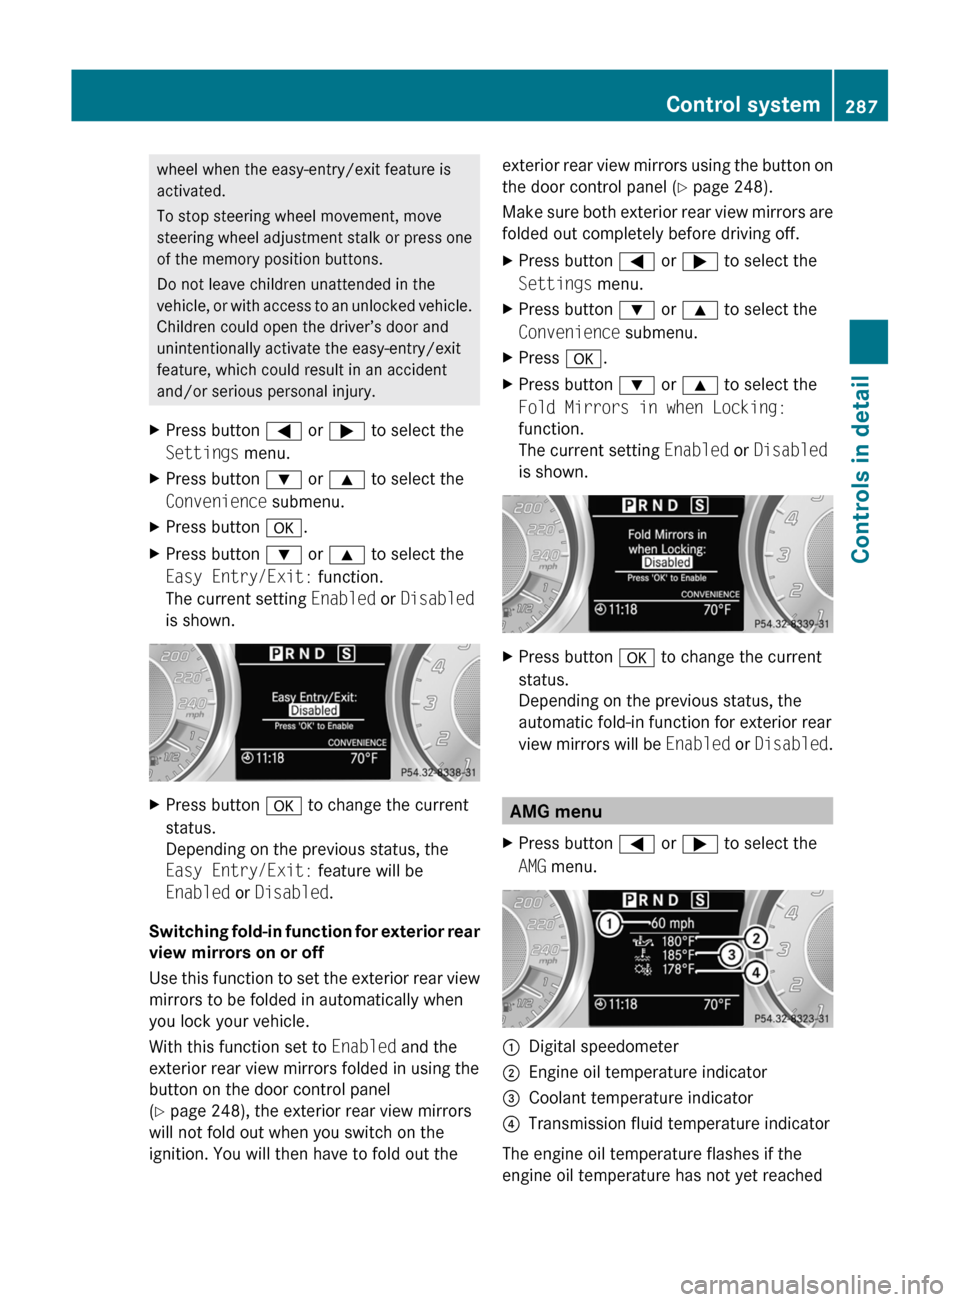
Easy Entry/Exit: function.
The current setting Enabled or Disabled
is shown.XPress button a to change the current
status.
Depending on the previous status, the
Easy Entry/Exit: feature will be
Enabled or Disabled .
Switching fold-in function for exterior rear
view mirrors on or off
Use this function to set the exterior rear view
mirrors to be folded in automatically when
you lock your vehicle.
With this function set to Enabled and the
exterior rear view mirrors folded in using the
button on the door control panel
( Y page 248), the exterior rear view mirrors
will not fold out when you switch on the
ignition. You will then have to fold out the
exterior rear view mirrors using the button on
the door control panel ( Y page 248).
Make sure both exterior rear view mirrors are
folded out completely before driving off.XPress button = or ; to select the
Settings menu.XPress button : or 9 to select the
Convenience submenu.XPress a.XPress button : or 9 to select the
Fold Mirrors in when Locking:
function.
The current setting Enabled or Disabled
is shown.XPress button a to change the current
status.
Depending on the previous status, the
automatic fold-in function for exterior rear
view mirrors will be Enabled or Disabled .
AMG menu
XPress button = or ; to select the
AMG menu.:Digital speedometer;Engine oil temperature indicator=Coolant temperature indicator?Transmission fluid temperature indicator
The engine oil temperature flashes if the
engine oil temperature has not yet reached
Control system287Controls in detailBA 197 USA, CA Edition A 2011; 1; 27, en-UShereepeVersion: 3.0.3.52010-03-24T15:31:10+01:00 - Seite 287Z
Page 295 of 436
Activating RACE STARTXDepress the brake pedal with your left foot
and keep it depressed.XTurn the program mode selector dial
clockwise ( Y page 267) until the RS lamp
on the dial comes on.
The message RACE START Confirm:
Paddle UP Cancel: Paddle DOWN
appears in the multifunction display.
i When the activation conditions are not
fulfilled anymore, RACE START is canceled.
The message RACE START Canceled
appears in the multifunction display.
XTo cancel: Pull left steering wheel gearshift
control ( Y page 267).
or
XTo confirm: Pull right steering wheel
gearshift control ( Y page 267).
The message RACE START Available
Depress gas pedal. appears in the
multifunction display.
i If you do not depress the accelerator
pedal within a few seconds, RACE START is
canceled. The message RACE START Not
Possible See Operator’s Manual
appears in the multifunction display.
XDepress the accelerator pedal fully.
The engine speed increases.
The message RACE START Release
brake to start appears in the
multifunction display.
i If you do not release the brake pedal
within a few seconds, RACE START is
canceled. The message RACE START
Canceled appears in the multifunction
display.
XTake your foot off the brake pedal while
keeping the accelerator pedal depressed.
The vehicle pulls away at maximum
acceleration.
The message RACE START Active appears
in the multifunction display.
RACE START deactivates at a vehicle speed
of approximately 30 mph
(Canada: 50 km/h). The transmission
switches to program mode S+. ESC SPORT
remains switched on.
RACE START is canceled immediately if you
release the accelerator pedal while RACE
START is active or when the activation
conditions are not fulfilled anymore. The
message RACE START Not Possible See
Operator’s Manual appears in the
multifunction display.
i If RACE START is used repeatedly in a
short period of time, it is only available
again after having driven the vehicle a
certain distance.
Hill-start assist system
On uphill grades, the hill-start assist system
maintains the pressure in the brake system
for approximately 1 second after you have
released the brake pedal. Therefore, you can
start off smoothly without the vehicle moving
immediately after releasing the brake pedal.
GWarning!
The hill-start assist system is not designed to
function as a parking brake. It does not
prevent the vehicle from moving when parked
on an incline.
Always engage the electronic parking brake
in addition to shifting the transmission into
park position P.
XDepress the brake pedal.XShift the transmission into drive position
D or reverse gear R.XRelease the brake pedal.XCarefully depress the accelerator pedal.
The hill-start assist system is inactive
R when starting off on a level road or downhill
grades
R with the transmission in neutral position N
R with the electronic parking brake engaged
R if the ESC has switched off due to a
malfunction
Driving systems293Controls in detailBA 197 USA, CA Edition A 2011; 1; 27, en-UShereepeVersion: 3.0.3.52010-03-24T15:31:10+01:00 - Seite 293Z