2011 MERCEDES-BENZ SLS ESP
[x] Cancel search: ESPPage 360 of 436
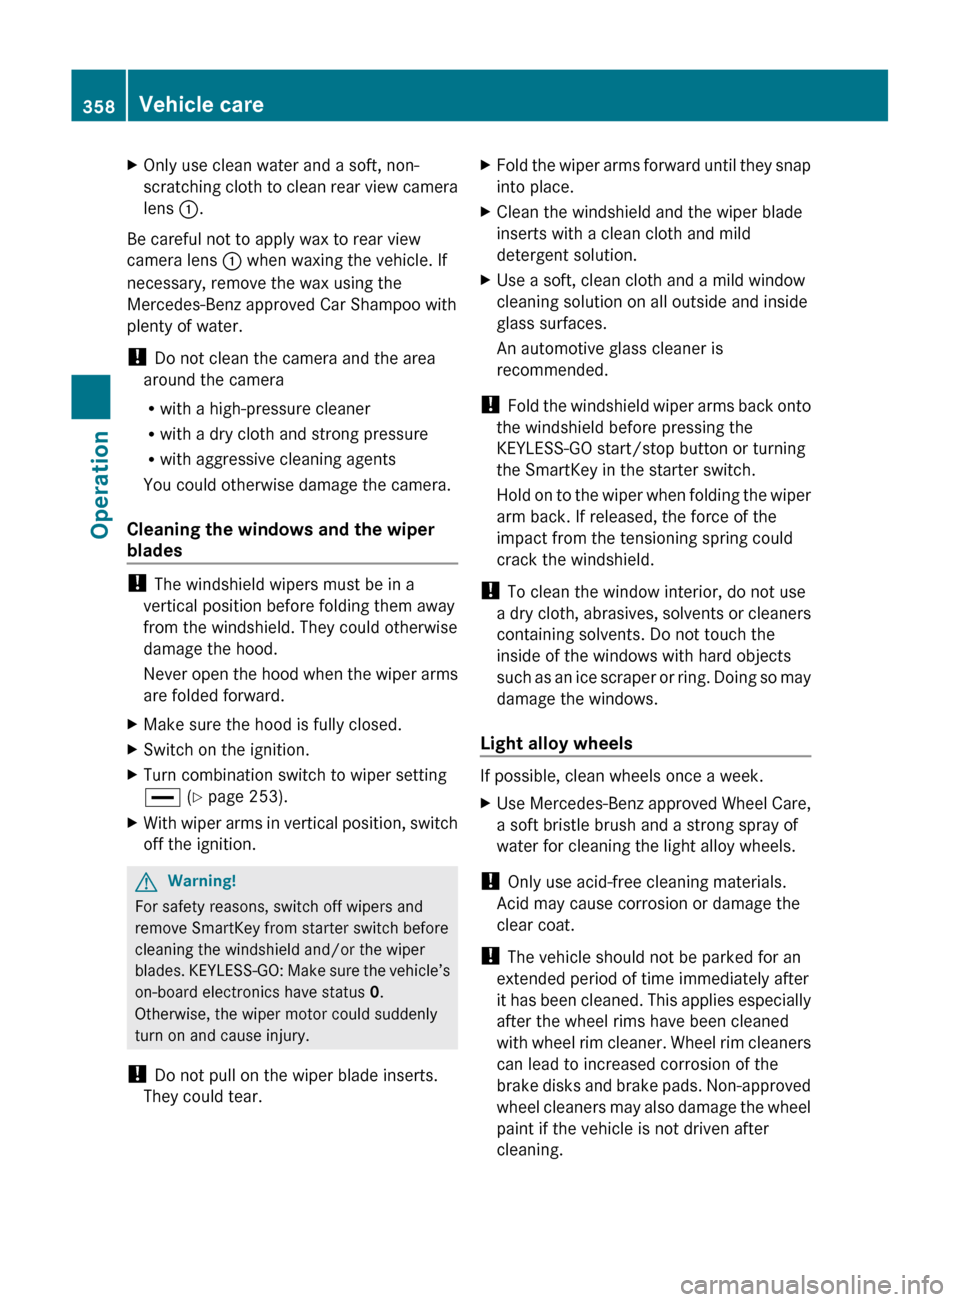
XOnly use clean water and a soft, non-
scratching cloth to clean rear view camera
lens :.
Be careful not to apply wax to rear view
camera lens : when waxing the vehicle. If
necessary, remove the wax using the
Mercedes-Benz approved Car Shampoo with
plenty of water.
! Do not clean the camera and the area
around the camera
R with a high-pressure cleaner
R with a dry cloth and strong pressure
R with aggressive cleaning agents
You could otherwise damage the camera.
Cleaning the windows and the wiper
blades
! The windshield wipers must be in a
vertical position before folding them away
from the windshield. They could otherwise
damage the hood.
Never open the hood when the wiper arms
are folded forward.
XMake sure the hood is fully closed.XSwitch on the ignition.XTurn combination switch to wiper setting
° (Y page 253).XWith wiper arms in vertical position, switch
off the ignition.GWarning!
For safety reasons, switch off wipers and
remove SmartKey from starter switch before
cleaning the windshield and/or the wiper
blades. KEYLESS-GO: Make sure the vehicle’s
on-board electronics have status 0.
Otherwise, the wiper motor could suddenly
turn on and cause injury.
! Do not pull on the wiper blade inserts.
They could tear.
XFold the wiper arms forward until they snap
into place.XClean the windshield and the wiper blade
inserts with a clean cloth and mild
detergent solution.XUse a soft, clean cloth and a mild window
cleaning solution on all outside and inside
glass surfaces.
An automotive glass cleaner is
recommended.
! Fold the windshield wiper arms back onto
the windshield before pressing the
KEYLESS-GO start/stop button or turning
the SmartKey in the starter switch.
Hold on to the wiper when folding the wiper
arm back. If released, the force of the
impact from the tensioning spring could
crack the windshield.
! To clean the window interior, do not use
a dry cloth, abrasives, solvents or cleaners
containing solvents. Do not touch the
inside of the windows with hard objects
such as an ice scraper or ring. Doing so may
damage the windows.
Light alloy wheels
If possible, clean wheels once a week.
XUse Mercedes-Benz approved Wheel Care,
a soft bristle brush and a strong spray of
water for cleaning the light alloy wheels.
! Only use acid-free cleaning materials.
Acid may cause corrosion or damage the
clear coat.
! The vehicle should not be parked for an
extended period of time immediately after
it has been cleaned. This applies especially
after the wheel rims have been cleaned
with wheel rim cleaner. Wheel rim cleaners
can lead to increased corrosion of the
brake disks and brake pads. Non-approved
wheel cleaners may also damage the wheel
paint if the vehicle is not driven after
cleaning.
358Vehicle careOperation
BA 197 USA, CA Edition A 2011; 1; 27, en-UShereepeVersion: 3.0.3.52010-03-24T15:31:10+01:00 - Seite 358
Page 362 of 436

Leather upholstery
Please note that leather upholstery is a
natural product and is therefore subject to a
natural aging process. Leather upholstery
may also react to certain ambient influences
such as high humidity or high temperature by
showing wrinkles for example.
XWipe leather upholstery with a damp cloth
and dry thoroughly or clean with Mercedes-
Benz approved Leather Care.
! To avoid damage to leather upholstery:
RWipe with light pressure only.
RDo not clean with abrasive cleaning
agents such as scouring milk or powder.
RDo not soak the leather upholstery.
As leather is a natural product, it could
otherwise harden or become porous.
RExercise particular care when cleaning
perforated leather as its underside
should not become wet.
Chrome-plated exhaust tip
Regular cleaning and care of chrome-plated
exhaust tips will help to maintain their shine
and the classy appearance.
XUse Mercedes-Benz approved Chrome
Polishing Paste each time the vehicle has
been washed, especially during the winter.
! Do not use alkaline cleaners such as
wheel cleaners as they could cause
corrosion.
Trunk Wing
You can extend and retract the Trunk Wing
manually for cleaning.
GWarning!
Make sure that nobody can become trapped
when you retract the Trunk Wing manually. If
there is a risk of entrapment, release the
Trunk Wing switch to stop the retraction
process. The Trunk Wing will then extend
again.
Never leave children unattended in the
vehicle. They could inadvertently retract the
extended Trunk Wing. Somebody could
become trapped and be seriously injured.
! Do not enter an automatic car wash with
the Trunk Wing extended. Otherwise, the
Trunk Wing could be damaged.
Only extend the Trunk Wing in order to
clean it by hand. Retract it again after
cleaning.
XClose the trunk lid (Y page 240).XSwitch on the ignition.XTo extend: Press Trunk Wing switch :.
The Trunk Wing extends.
Trunk Wing switch : flashes for as long as
the Trunk Wing extends. It remains
illuminated in red when the Trunk Wing is
fully extended.
XTo retract: Press and hold Trunk Wing
switch : until the Trunk Wing has
retracted completely.
Trunk Wing switch : flashes for as long as
the Trunk Wing retracts. It goes out when
the Trunk Wing is fully retracted.
The message Rear Spoiler retracts
manually appears in the multifunction
display.
iWhen you release Trunk Wing switch :
during the retraction process, the Trunk
Wing extends again automatically.
360Vehicle careOperation
BA 197 USA, CA Edition A 2011; 1; 27, en-UShereepeVersion: 3.0.3.52010-03-24T15:31:10+01:00 - Seite 360
Page 367 of 436
Text messages
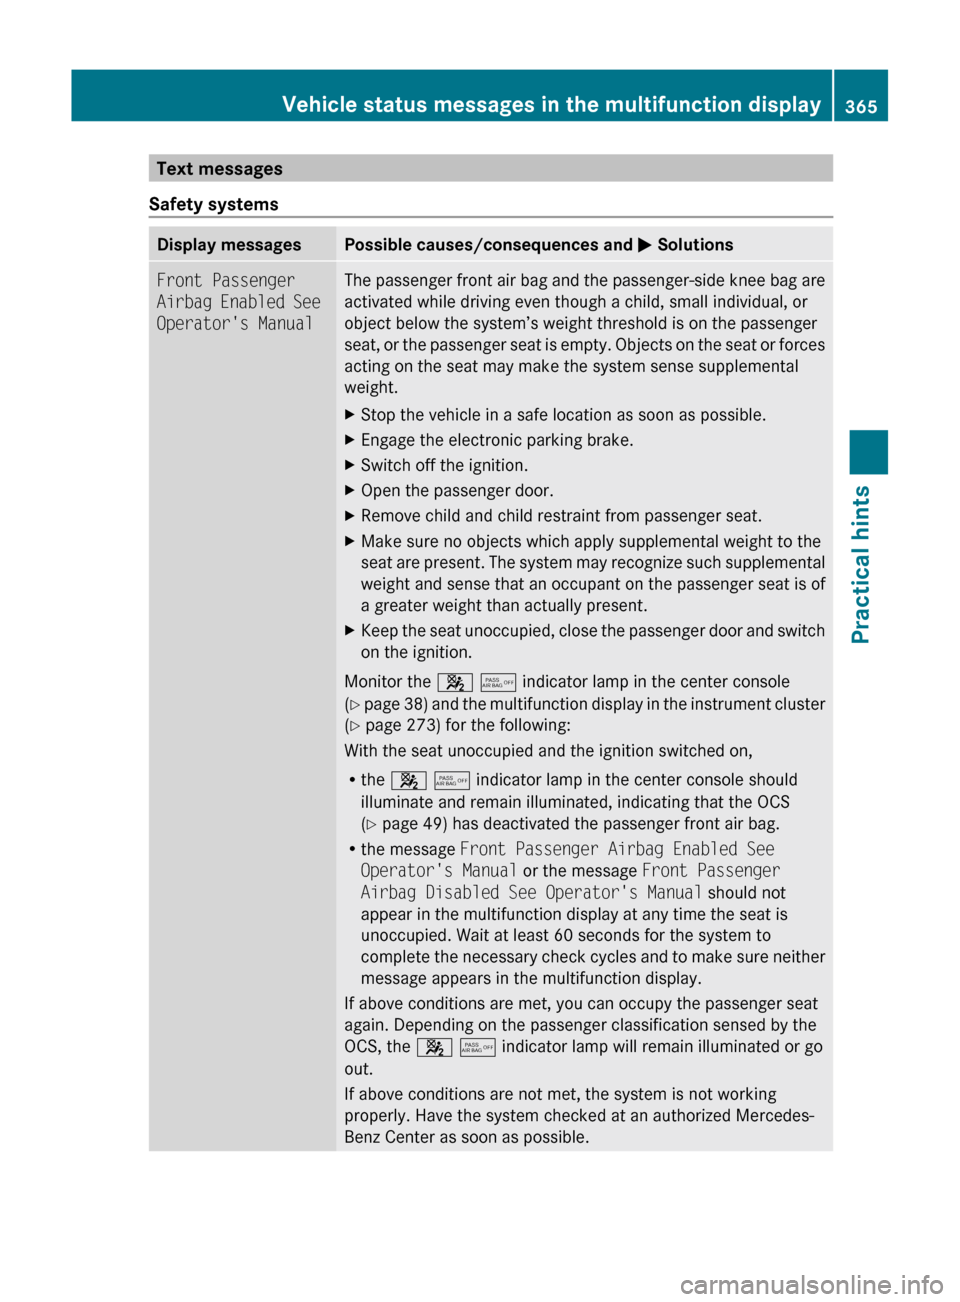
Safety systemsDisplay messagesPossible causes/consequences and M SolutionsFront Passenger
Airbag Enabled See
Operator's ManualThe passenger front air bag and the passenger-side knee bag are
activated while driving even though a child, small individual, or
object below the system’s weight threshold is on the passenger
seat, or the passenger seat is empty. Objects on the seat or forces
acting on the seat may make the system sense supplemental
weight. XStop the vehicle in a safe location as soon as possible.XEngage the electronic parking brake.XSwitch off the ignition.XOpen the passenger door.XRemove child and child restraint from passenger seat.XMake sure no objects which apply supplemental weight to the
seat are present. The system may recognize such supplemental
weight and sense that an occupant on the passenger seat is of
a greater weight than actually present.XKeep the seat unoccupied, close the passenger door and switch
on the ignition.
Monitor the 4 5 indicator lamp in the center console
( Y page 38) and the multifunction display in the instrument cluster
( Y page 273) for the following:
With the seat unoccupied and the ignition switched on,
R the 4 5 indicator lamp in the center console should
illuminate and remain illuminated, indicating that the OCS
( Y page 49) has deactivated the passenger front air bag.
R the message Front Passenger Airbag Enabled See
Operator's Manual or the message Front Passenger
Airbag Disabled See Operator's Manual should not
appear in the multifunction display at any time the seat is
unoccupied. Wait at least 60 seconds for the system to
complete the necessary check cycles and to make sure neither
message appears in the multifunction display.
If above conditions are met, you can occupy the passenger seat
again. Depending on the passenger classification sensed by the
OCS, the 4 5 indicator lamp will remain illuminated or go
out.
If above conditions are not met, the system is not working
properly. Have the system checked at an authorized Mercedes-
Benz Center as soon as possible.
Vehicle status messages in the multifunction display365Practical hintsBA 197 USA, CA Edition A 2011; 1; 27, en-UShereepeVersion: 3.0.3.52010-03-24T15:31:10+01:00 - Seite 365Z
Page 368 of 436
GWarning!
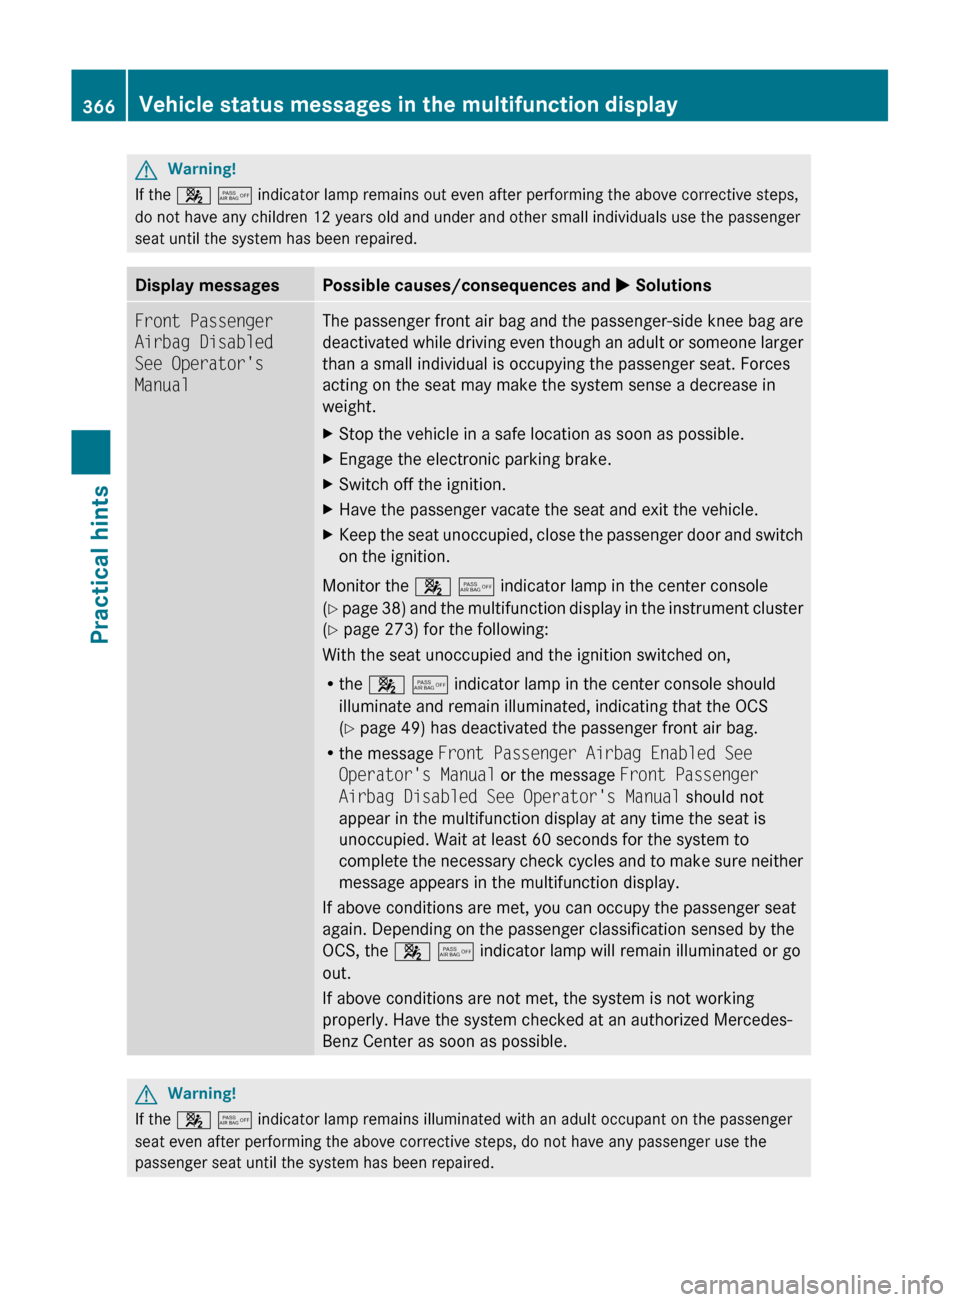
If the 4 5 indicator lamp remains out even after performing the above corrective steps,
do not have any children 12 years old and under and other small individuals use the passenger
seat until the system has been repaired.
Display messagesPossible causes/consequences and M SolutionsFront Passenger
Airbag Disabled
See Operator's
ManualThe passenger front air bag and the passenger-side knee bag are
deactivated while driving even though an adult or someone larger
than a small individual is occupying the passenger seat. Forces
acting on the seat may make the system sense a decrease in
weight.XStop the vehicle in a safe location as soon as possible.XEngage the electronic parking brake.XSwitch off the ignition.XHave the passenger vacate the seat and exit the vehicle.XKeep the seat unoccupied, close the passenger door and switch
on the ignition.
Monitor the 4 5 indicator lamp in the center console
( Y page 38) and the multifunction display in the instrument cluster
( Y page 273) for the following:
With the seat unoccupied and the ignition switched on,
R the 4 5 indicator lamp in the center console should
illuminate and remain illuminated, indicating that the OCS
( Y page 49) has deactivated the passenger front air bag.
R the message Front Passenger Airbag Enabled See
Operator's Manual or the message Front Passenger
Airbag Disabled See Operator's Manual should not
appear in the multifunction display at any time the seat is
unoccupied. Wait at least 60 seconds for the system to
complete the necessary check cycles and to make sure neither
message appears in the multifunction display.
If above conditions are met, you can occupy the passenger seat
again. Depending on the passenger classification sensed by the
OCS, the 4 5 indicator lamp will remain illuminated or go
out.
If above conditions are not met, the system is not working
properly. Have the system checked at an authorized Mercedes-
Benz Center as soon as possible.
GWarning!
If the 4 5 indicator lamp remains illuminated with an adult occupant on the passenger
seat even after performing the above corrective steps, do not have any passenger use the
passenger seat until the system has been repaired.
366Vehicle status messages in the multifunction displayPractical hints
BA 197 USA, CA Edition A 2011; 1; 27, en-UShereepeVersion: 3.0.3.52010-03-24T15:31:10+01:00 - Seite 366
Page 369 of 436
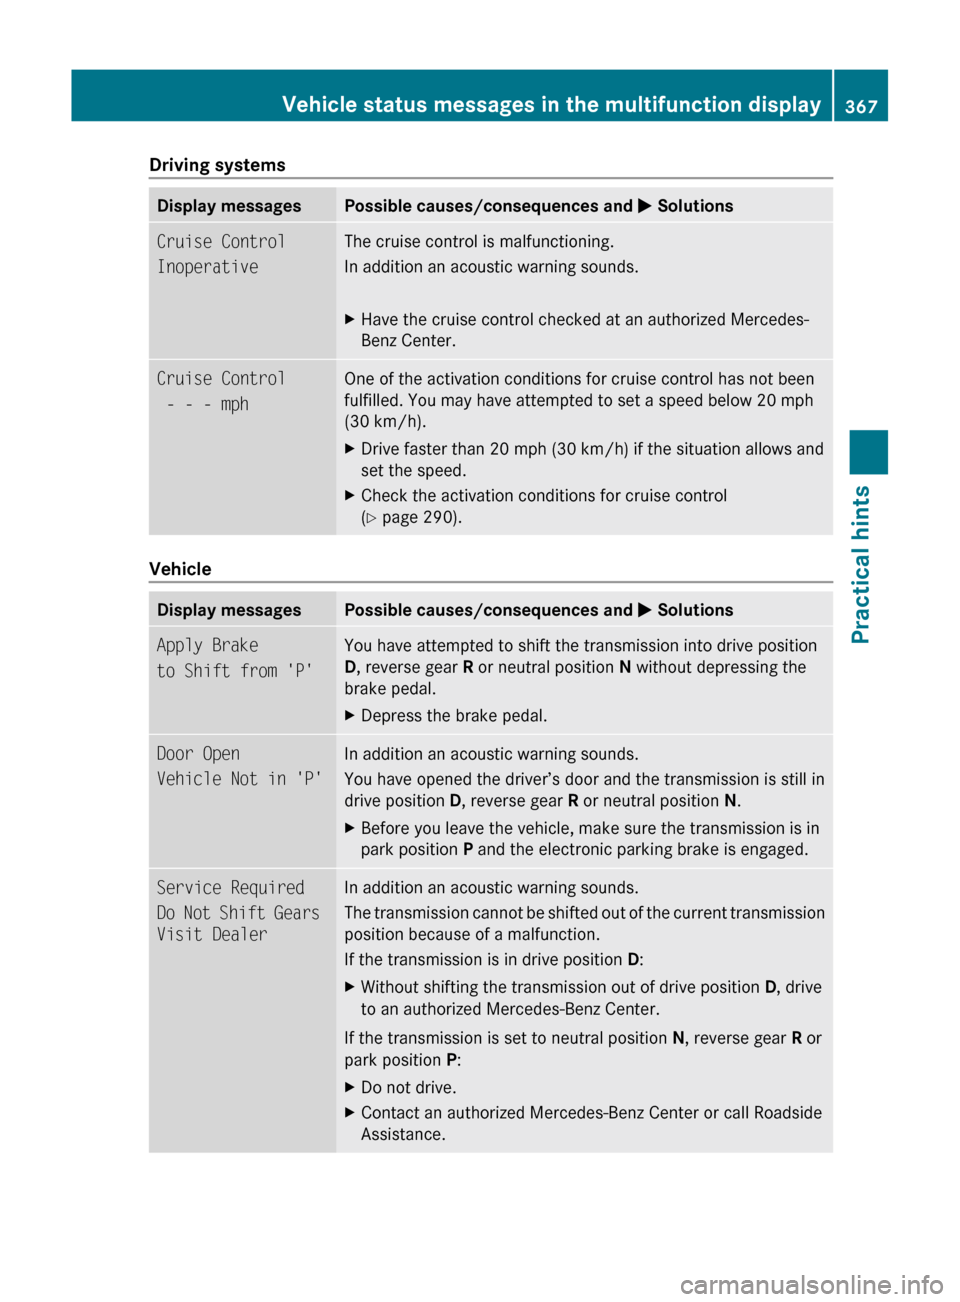
Driving systemsDisplay messagesPossible causes/consequences and M SolutionsCruise Control
InoperativeThe cruise control is malfunctioning.
In addition an acoustic warning sounds.XHave the cruise control checked at an authorized Mercedes-
Benz Center.Cruise Control
- - - mph One of the activation conditions for cruise control has not been
fulfilled. You may have attempted to set a speed below 20 mph
(30 km/h). XDrive faster than 20 mph (30 km/h) if the situation allows and
set the speed.XCheck the activation conditions for cruise control
( Y page 290).
Vehicle
Display messagesPossible causes/consequences and M SolutionsApply Brake
to Shift from 'P'You have attempted to shift the transmission into drive position
D , reverse gear R or neutral position N without depressing the
brake pedal.XDepress the brake pedal.Door Open
Vehicle Not in 'P'In addition an acoustic warning sounds.
You have opened the driver’s door and the transmission is still in
drive position D, reverse gear R or neutral position N.XBefore you leave the vehicle, make sure the transmission is in
park position P and the electronic parking brake is engaged.Service Required
Do Not Shift Gears
Visit DealerIn addition an acoustic warning sounds.
The transmission cannot be shifted out of the current transmission
position because of a malfunction.
If the transmission is in drive position D:XWithout shifting the transmission out of drive position D, drive
to an authorized Mercedes-Benz Center.
If the transmission is set to neutral position N, reverse gear R or
park position P:
XDo not drive.XContact an authorized Mercedes-Benz Center or call Roadside
Assistance.Vehicle status messages in the multifunction display367Practical hintsBA 197 USA, CA Edition A 2011; 1; 27, en-UShereepeVersion: 3.0.3.52010-03-24T15:31:10+01:00 - Seite 367Z
Page 370 of 436

Display messagesPossible causes/consequences and M SolutionsOnly Shift to 'P'
when Vehicle is
StationaryYou have attempted to shift the transmission into park position
P although the vehicle was still in motion.XStop your vehicle as soon as it is safe to do so.XShift the transmission to park position P.Shift to 'P' or 'N'
to Start EngineYou have attempted to start the engine while the transmission was
in reverse gear R or drive position D.XShift the transmission into park position P or neutral position
N . Make sure the brake pedal is depressed.Auxiliary Battery
MalfunctionThe backup battery for the transmission is no longer charging. XContact an authorized Mercedes-Benz Center.
Tires
Display messagesPossible causes/consequences and M SolutionsTire pressures
will be displayed
after driving a
few minutesThe tire inflation pressure is being checked by the Advanced
TPMS.XDrive the vehicle for a few minutes.Tire Pressure
Monitor
InoperativeThe Advanced TPMS is malfunctioning. XHave the Advanced TPMS checked at an authorized Mercedes-
Benz Center.Tire Pressure
Monitor
Inoperative No
Wheel SensorsThere are wheels without appropriate wheel sensors mounted
(e.g. winter tires).XHave the Advanced TPMS checked at an authorized Mercedes-
Benz Center.XHave the appropriate wheel sensors installed at an authorized
Mercedes-Benz Center.TirePress.
Sensor(s)MissingAt least one sensor is defect (e.g. battery is empty).
The respective tire is indicated by – – instead of the tire inflation
pressure in the multifunction display.XHave the Advanced TPMS checked at an authorized Mercedes-
Benz Center.XHave the wheel sensors installed at an authorized Mercedes-
Benz Center.368Vehicle status messages in the multifunction displayPractical hints
BA 197 USA, CA Edition A 2011; 1; 27, en-UShereepeVersion: 3.0.3.52010-03-24T15:31:10+01:00 - Seite 368
Page 371 of 436
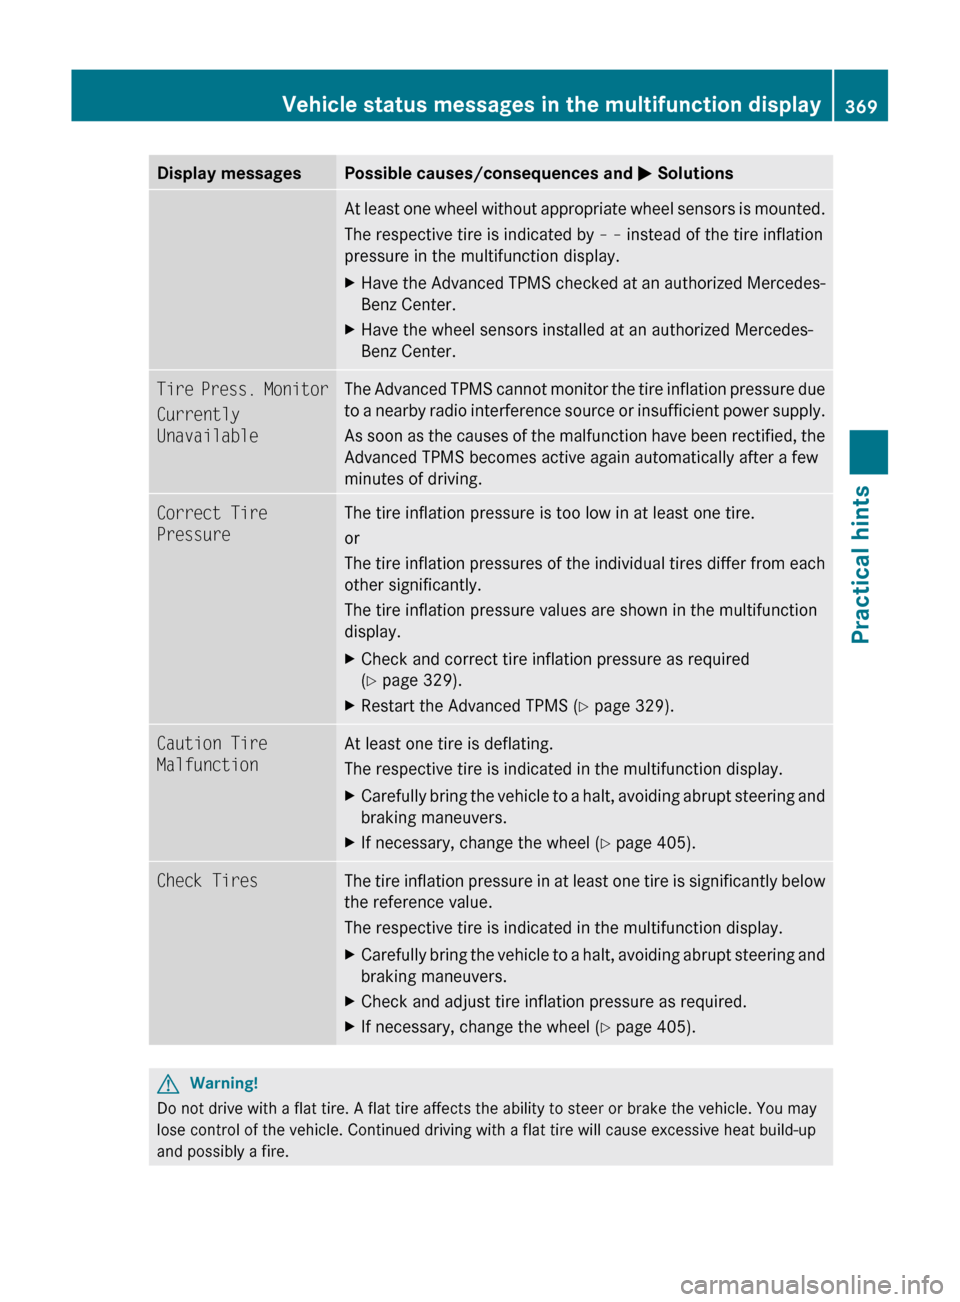
Display messagesPossible causes/consequences and M SolutionsAt least one wheel without appropriate wheel sensors is mounted.
The respective tire is indicated by – – instead of the tire inflation
pressure in the multifunction display.XHave the Advanced TPMS checked at an authorized Mercedes-
Benz Center.XHave the wheel sensors installed at an authorized Mercedes-
Benz Center.Tire Press. Monitor
Currently
UnavailableThe Advanced TPMS cannot monitor the tire inflation pressure due
to a nearby radio interference source or insufficient power supply.
As soon as the causes of the malfunction have been rectified, the
Advanced TPMS becomes active again automatically after a few
minutes of driving.Correct Tire
PressureThe tire inflation pressure is too low in at least one tire.
or
The tire inflation pressures of the individual tires differ from each
other significantly.
The tire inflation pressure values are shown in the multifunction
display.XCheck and correct tire inflation pressure as required
( Y page 329).XRestart the Advanced TPMS ( Y page 329).Caution Tire
MalfunctionAt least one tire is deflating.
The respective tire is indicated in the multifunction display.XCarefully bring the vehicle to a halt, avoiding abrupt steering and
braking maneuvers.XIf necessary, change the wheel ( Y page 405).Check TiresThe tire inflation pressure in at least one tire is significantly below
the reference value.
The respective tire is indicated in the multifunction display.XCarefully bring the vehicle to a halt, avoiding abrupt steering and
braking maneuvers.XCheck and adjust tire inflation pressure as required.XIf necessary, change the wheel ( Y page 405).GWarning!
Do not drive with a flat tire. A flat tire affects the ability to steer or brake the vehicle. You may
lose control of the vehicle. Continued driving with a flat tire will cause excessive heat build-up
and possibly a fire.
Vehicle status messages in the multifunction display369Practical hintsBA 197 USA, CA Edition A 2011; 1; 27, en-UShereepeVersion: 3.0.3.52010-03-24T15:31:10+01:00 - Seite 369Z
Page 372 of 436
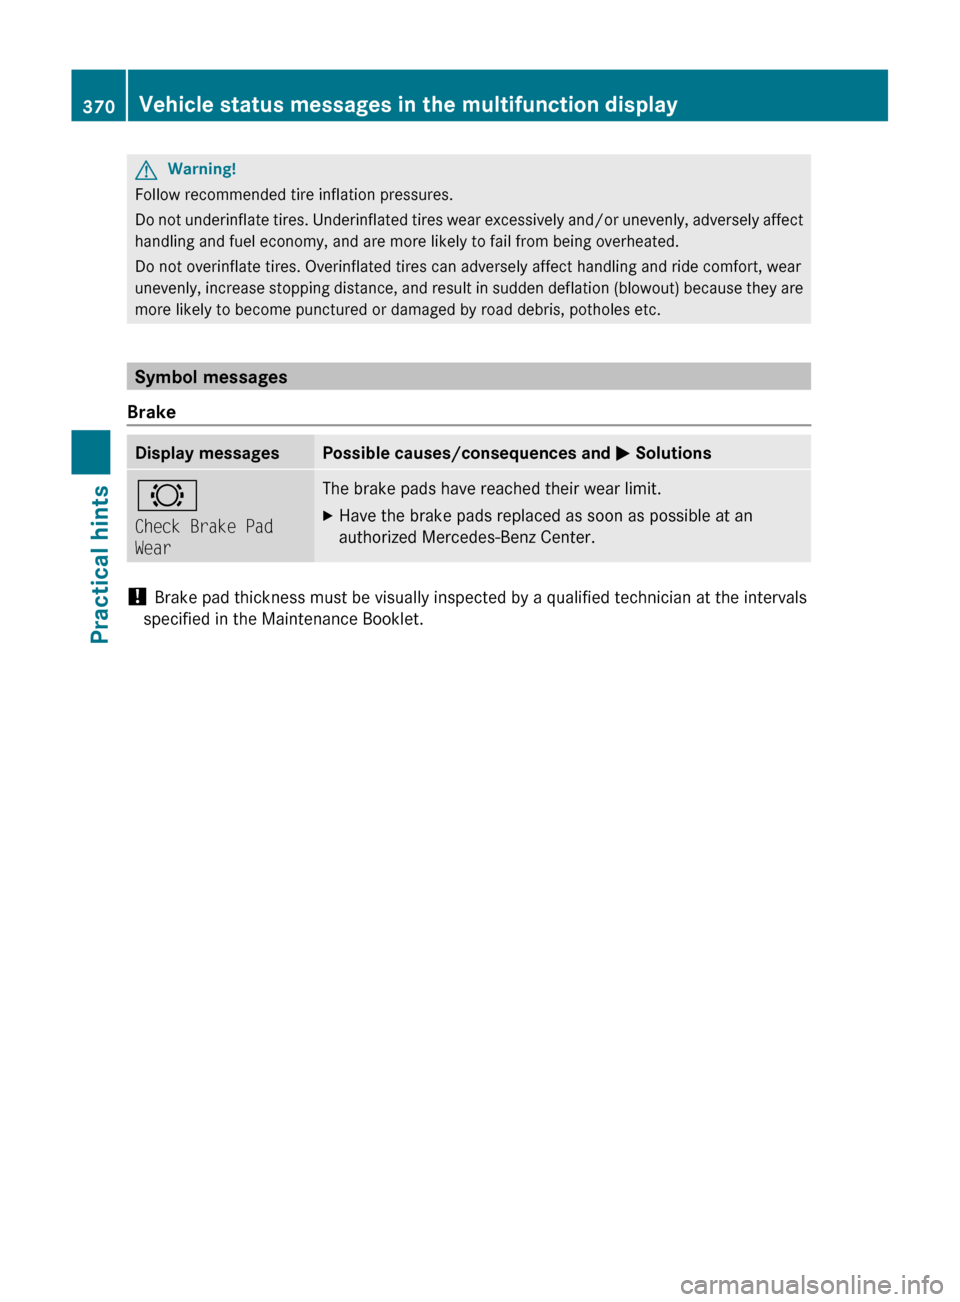
GWarning!
Follow recommended tire inflation pressures.
Do not underinflate tires. Underinflated tires wear excessively and/or unevenly, adversely affect
handling and fuel economy, and are more likely to fail from being overheated.
Do not overinflate tires. Overinflated tires can adversely affect handling and ride comfort, wear
unevenly, increase stopping distance, and result in sudden deflation (blowout) because they are
more likely to become punctured or damaged by road debris, potholes etc.
Symbol messages
Brake
Display messagesPossible causes/consequences and M Solutions#
Check Brake Pad
WearThe brake pads have reached their wear limit. XHave the brake pads replaced as soon as possible at an
authorized Mercedes-Benz Center.
! Brake pad thickness must be visually inspected by a qualified technician at the intervals
specified in the Maintenance Booklet.
370Vehicle status messages in the multifunction displayPractical hints
BA 197 USA, CA Edition A 2011; 1; 27, en-UShereepeVersion: 3.0.3.52010-03-24T15:31:10+01:00 - Seite 370