2011 MERCEDES-BENZ M-CLASS SUV warning light
[x] Cancel search: warning lightPage 304 of 389
or fragile objec
ts.W hen brakin gsharply,
changing direction quickly or in the even tof
an accident ,the bag hooks will not secur ethe
item ssufficiently. This could result in injury to
yourself or others.
! The bag hoo kcan bear amaximum load
of 3k g. Do not use it to secur eaload.
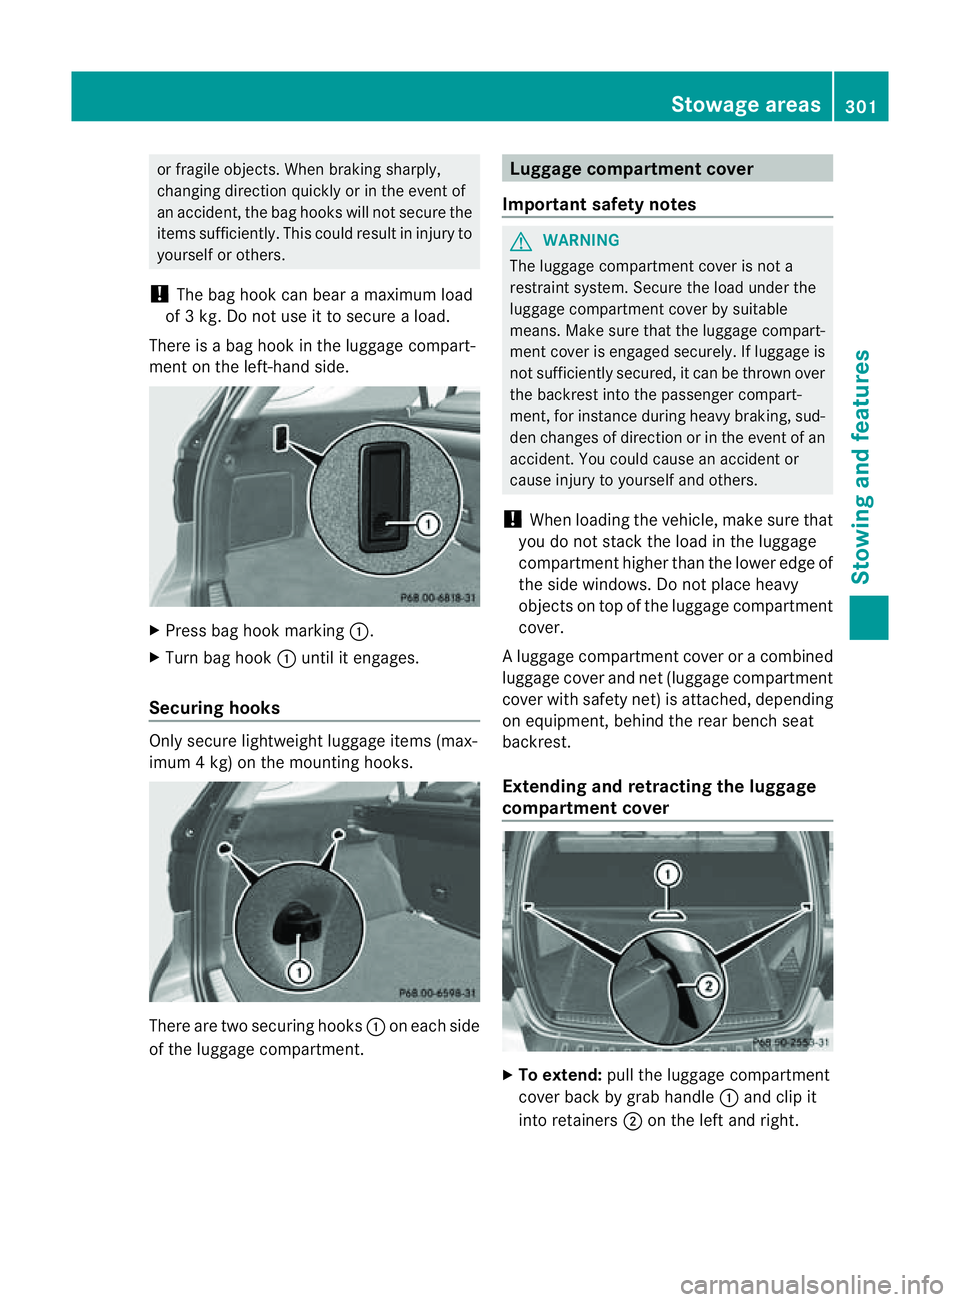
There is abag hook in the luggag ecompart-
men tont he left-hand side. X
Press bag hook marking :.
X Tur nbag hook :until it engages.
Securing hooks Only secure lightweight luggag
eitems (max-
imum 4kg) on the mounti nghooks. There ar
etwo securing hooks :on each side
of the luggage compart ment. Luggag
ecompartment cover
Important safety notes G
WARNING
The luggage compartment cover is not a
restraint system. Secur ethe load unde rthe
luggag ecompart ment cover by suitable
means. Make sure that the luggage compart-
ment cover is engaged securely. If luggage is
not sufficiently secured, it can be thrown over
the backres tinto the passenger compart-
ment, for instance during heavy braking, sud-
den change sofdirection or in the event of an
accident .You coul dcause an accident or
cause injury to yourself and others.
! When loading the vehicle, make sure that
you do not stack the load in the luggage
compartment higher than the lower edge of
the side windows .Donot plac eheavy
object sontop of the luggage compartment
cover.
Al uggage compartment cover or acombined
luggage cover and net (luggage compar tment
cove rwith safety net) is attached, depending
on equipment, behind the rear bench seat
backrest.
Extending and retracting the luggage
compa rtment cover X
To extend: pull the luggage compartment
cover back by grab handle :and clip it
int or etainers ;on the left and right. Stowage areas
301Stowingandfeatur es Z
Page 306 of 389
Safety net in th
ecombined luggage
cover and net
Important safety notes G
WARNING
The safety net cannot secure heavy loads. You
should therefor ealways lash down the load.
You could otherwise be injured by objects
which have not been sufficiently secured
being thrown around in the event of sharp
braking, asudden change of direction or an
accident. G
WARNING
In the event of sharp braking, asudden
change of direction, or an accident, light loads
can be thrown about.
This could result in injury to yourself or others.
Therefore, if you are transporting light loads,
use the safety net.
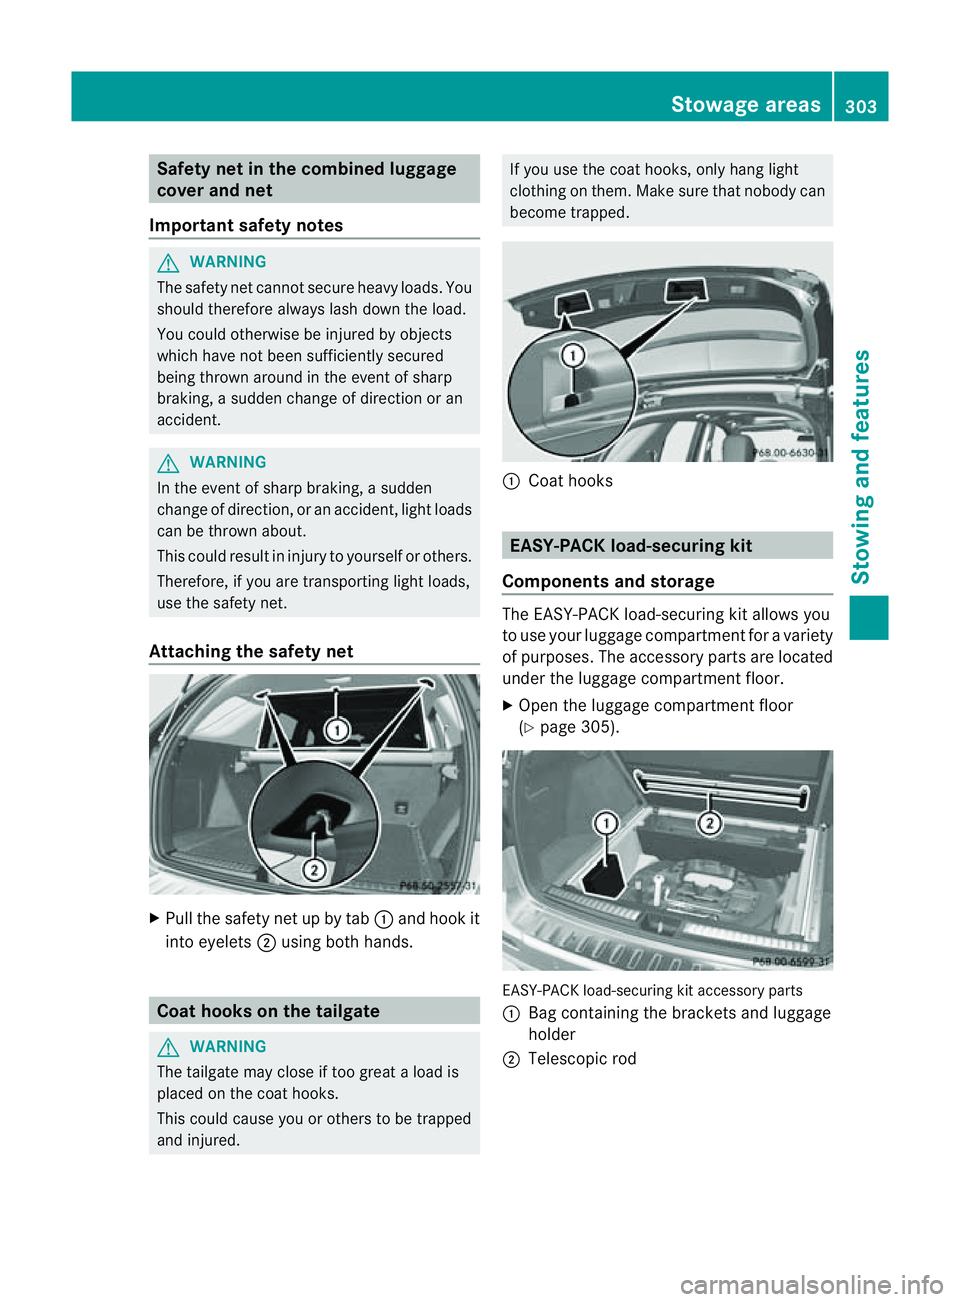
Attaching the safety net X
Pull the safety net up by tab :and hoo kit
into eyelets ;using both hands. Coat hook
sonthe tailgate G
WARNING
Th et ailgate may close if too great aload is
placed on the coat hooks.
This coul dcause you or others to be trapped
and injured. If you use the coat hooks
,only hang light
clothing on them. Make sure that nobody can
become trapped. :
Coat hooks EASY-PACK load-securing kit
Components and storage Th
eE ASY-PACK load-securing kit allo wsyou
to use your luggag ecompartmen tfor av ariety
of purposes .The accessory parts ar elocated
under the luggage compartment floor.
X Open the luggage compartment floor
(Y page 305). EASY-PACK load-securin
gkit accessory parts
: Bag containing the bracket sand luggage
holder
; Telescopic rod Stowage areas
303Stowingand fe atures Z
Page 307 of 389

Inserting th
ebracket sintot he loading
rail X
Insert bracket :into th ecentr eofl oading
rail ?.
X Press release button ;and push
bracket :intothe desired position in load-
ing rail ?.
X Let go of rel ease button ;.
X Press locking button =.
Bracket :is locked in loading rail ?.
X If necessary, fol dlashin geyelet A
upwards. G
WARNING
Distribute the loa donthe lashing eyelets
evenly.
Otherwise, vehicle occupants could be
injured by objects being thrown around if you:
R brake shar ply
R chang edirection suddenly
R are involved in an accident
Please observe the loading guidelines.
Luggage holder The luggage holder can be use
dtosecure
ligh tloads against the side wall of the luggage
compartment to prev entthem from moving
around.
! Only use the luggage holder to secure
loads with amaximum weight of 7kgand
with dimensions that the luggage holder
can safel yand securely contain. X
To install: insert two brackets Ainto the
left or right loading rail (Y page303).
X Press releas ebutton :of the luggage
holder and pull the strap out slightly.
X Insert luggag eholder ;intob rackets A
and ,while doing so, press release button
= and push the luggage holder downwards
until it engages.
X Press release button :of the luggage
holder and pull the strap out in the direction
of the arrow.
X Plac ethe load between the strap and the
luggage compartment side wall.
X Using one hand, press locking button :of
the luggage holder.
X With your other hand, let the strap go slowly
until the load is secured.
X Make sur ethat locking button ?on brack-
ets Ais pressed.
This keeps brackets Ain plac eonthe
loading rail.
X To remove: press release button =on
respective bracket Aand remove luggage
holder ;by pulling upwards and out.
Telescopic rod The telescopic rod can be used to secure the
load against the rea
rseats to prevent it from
moving around. 304
Stowage areasStowing and features
Page 310 of 389
The bottles are neither secured nor prevented
from tippin gover. Therefore ,donot plac eany
ope ndrink con tainers in the stowage com-
partments.
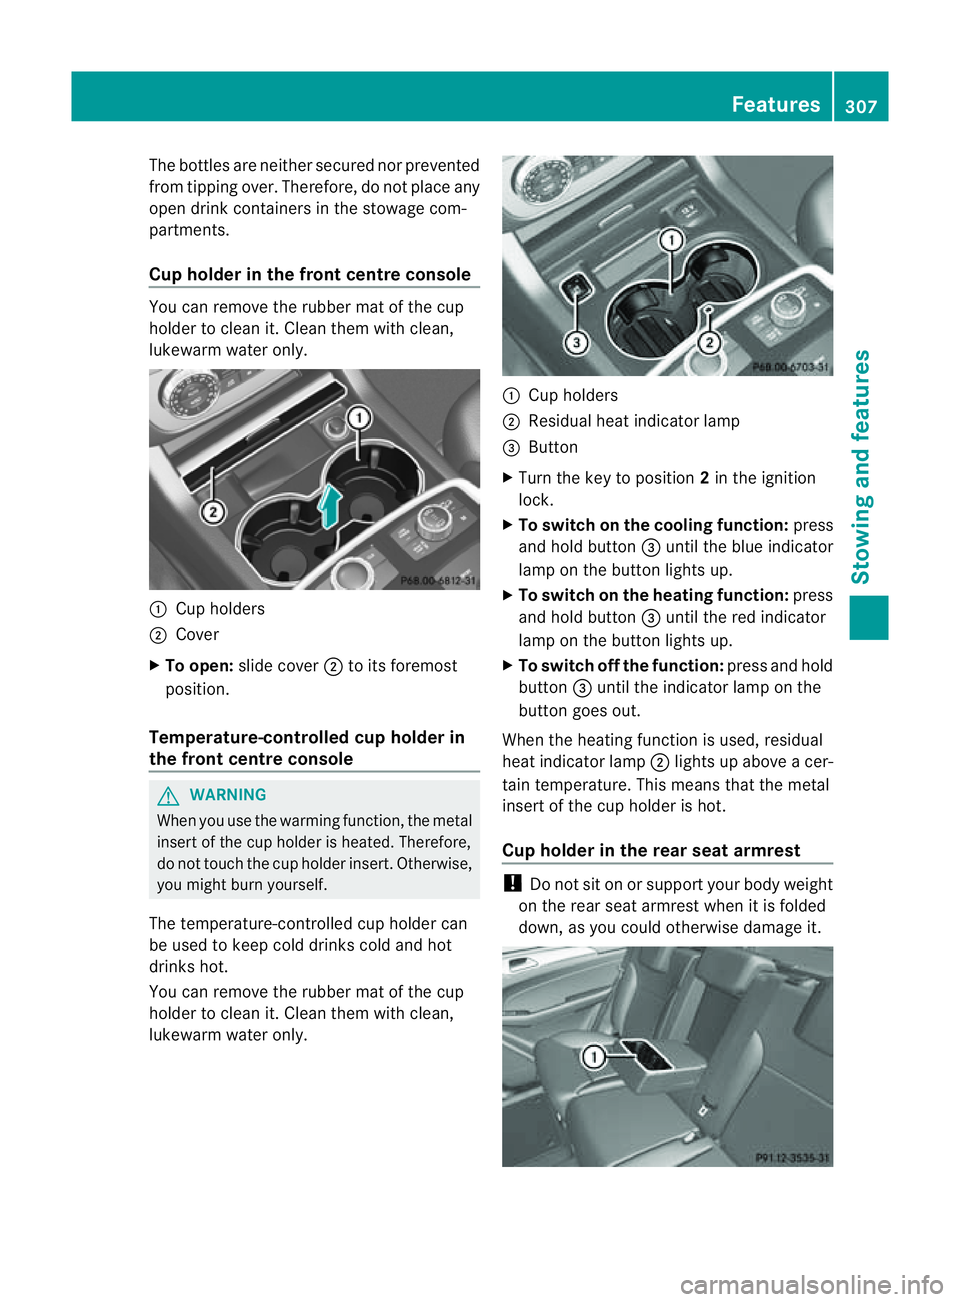
Cup holder in the front centre console You can remov
ethe rubber ma tofthe cup
holder to clea nit. Clean them with clean,
lukewarm water only. :
Cup holders
; Cover
X To open: slidecover ;to its foremost
position.
Tem perature-controlled cup holder in
the front centre console G
WARNING
When you use the warming function, the metal
insert of the cup holder is heated. Therefore,
do not touch the cup holder insert. Otherwise,
you might burn yourself.
The tem perature-c ontrolle dcup holde rcan
be used to keep cold drinks cold and hot
drinks hot.
You can remove the rubber mat of the cup
holder to clean it. Clean them with clean,
lukewar mwater only. :
Cup holders
; Residua lheat indicator lamp
= Button
X Tur nthe key to position 2in the ignition
lock.
X To switch on th ecooling function: press
and hold button =until the blue indicator
lamp on the button lights up.
X To switch on the heating function: press
and hold button =until the red indicator
lamp on the button lights up.
X To switch off the function: press and hold
button =until the indicator lamp on the
button goes out.
When the heating func tion is used, residual
heat indicator lamp ;lights up abov eacer-
tain temperature. This mean sthat the metal
inser tofthe cup holder is hot.
Cu ph older in the rear seat armrest !
Do not sit on or support your body weight
on the rear seat armrest when it is folded
down, as you could otherwise damage it. Features
307Stowingandfeatu res Z
Page 311 of 389
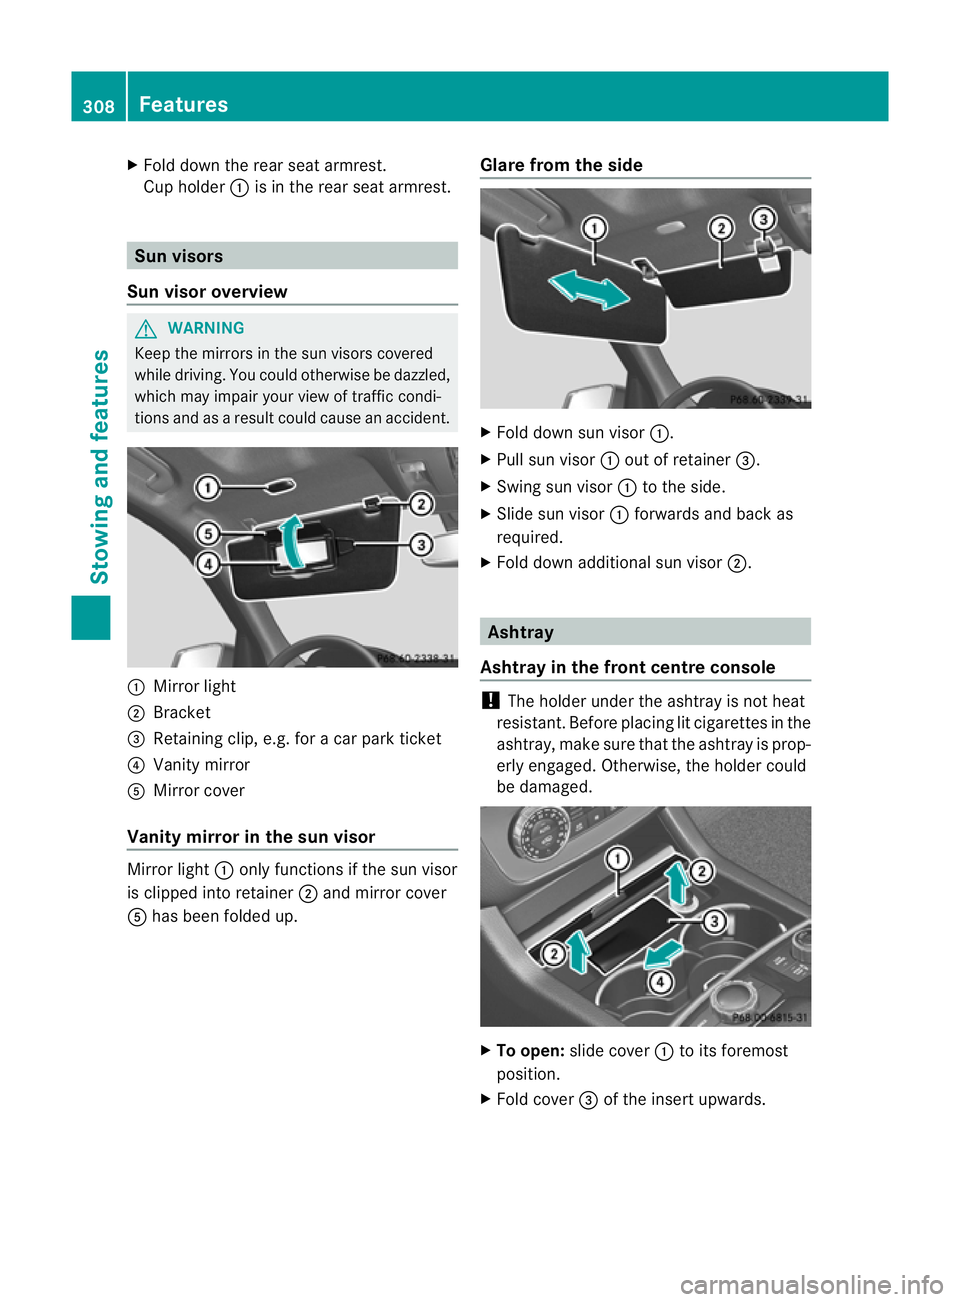
X
Fold do wnthe rear seat armrest.
Cu ph older :is in the rea rseat armrest. Sun visors
Sun visor overview G
WARNING
Keep the mirror sinthe sun visor scovered
while driving. You coul dotherwis ebedazzled,
which may impair your view of traffic condi-
tions and as aresult could cause an accident. :
Mirror light
; Bracket
= Retaining clip, e.g. for acar park ticket
? Vanity mirror
A Mirror cover
Vanity mirror in the sun visor Mirror light
:only functions if the sun visor
is clipped into retainer ;and mirror cover
A has been folded up. Glare from the side X
Fold down sun visor :.
X Pull sun visor :out of retainer =.
X Swing sun visor :to the side.
X Slide sun visor :forwards and back as
required.
X Fold down additional sun visor ;. Ashtray
Ashtray in the front centre console !
The holde runder the ashtray is not heat
resistant. Before placing lit cigarettes in the
ashtray, make sure that the ashtray is prop-
erly engaged .Otherwise, the holder could
be damaged. X
To open: slidecover :to its foremost
position.
X Fold cover =of the inser tupwards. 308
FeaturesStowing and features
Page 312 of 389
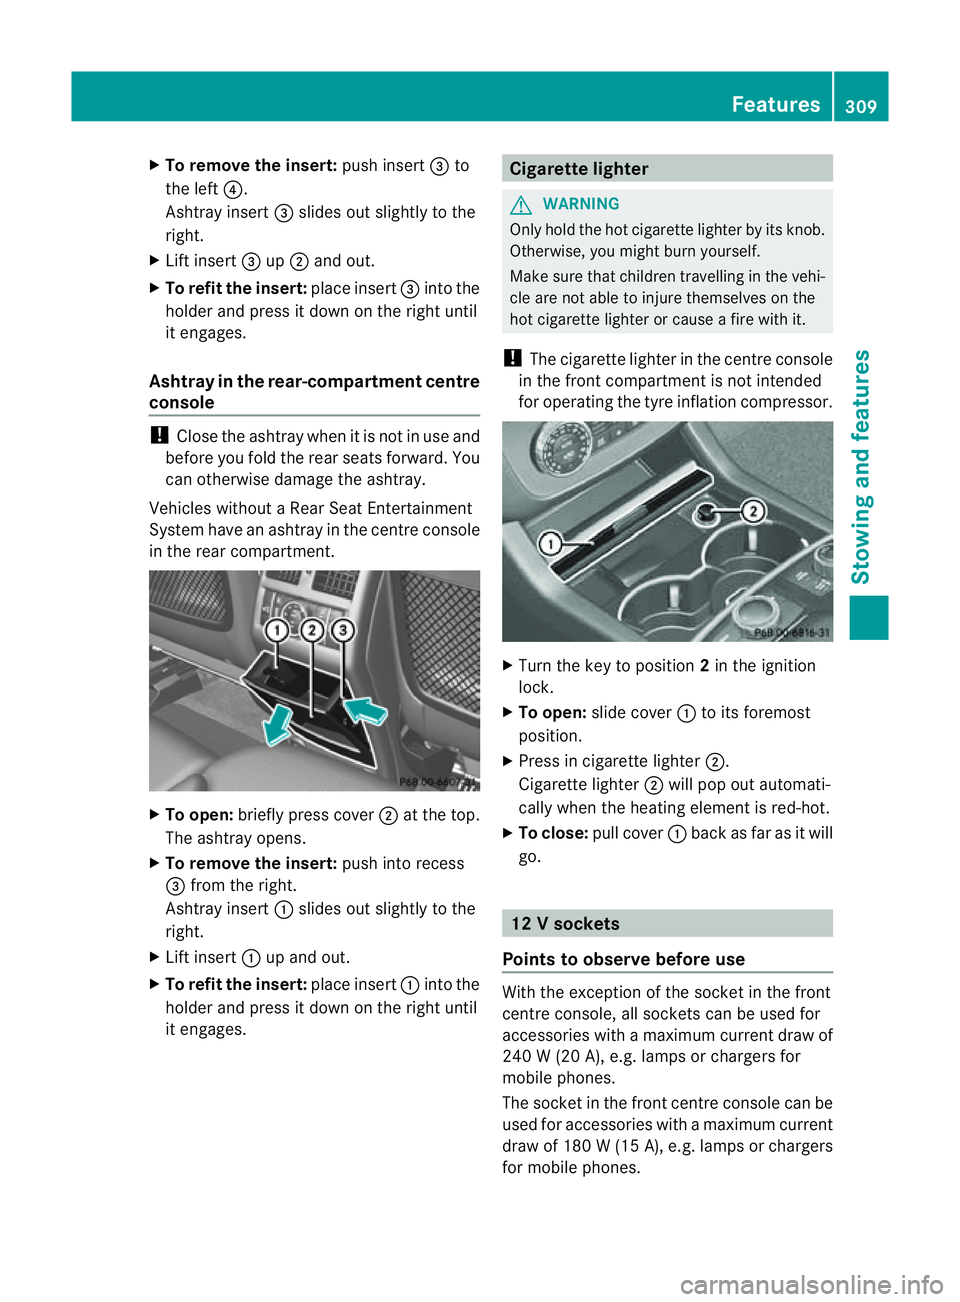
X
To remove the insert: push insert=to
the left ?.
Ashtray insert =slides ou tslightly to the
right.
X Lif tinsert =up; and out.
X To refit th einsert: place insert =intothe
holder and press it down on the right until
it engages.
Ash tray in therear-compartme nt centre
console !
Close th eashtra ywhen it is no tinuse and
before you fol dthe rea rseats forward. You
can otherwise damage the ashtray.
Vehicles without aRear Seat Entertainment
System have an ashtra yinthe cen tre console
in the rear compartment. X
To open: briefly pres scover ;at the top.
The ashtray opens.
X To remove th einsert: push into recess
= from the right.
Ashtray insert :slides out slightly to the
right.
X Lif tinsert :up and out.
X To refit the insert: place insert:into the
holder and pres sitdown on the right until
it engages. Cigarette lighter
G
WARNING
Only hold the hot cigarette lighte rbyits knob.
Otherwise, you might burn yourself.
Make sure that children travelling in the vehi-
cle are not able to injure themselves on the
hot cigarette lighter or cause afire with it.
! The cigarette lighter in the centre console
in the front compartment is not intended
for operating the tyre inflation compressor. X
Turn the key to position 2in the ignition
lock.
X To open: slide cover :to its foremost
position.
X Press in cigarette lighter ;.
Cigarette lighter ;will pop out automati-
cally when the heating element is red-hot.
X To close: pull cover :back as far as it will
go. 12
Vsockets
Point stoo bserve befo reuse With the exception of the so
cket in th efront
centr econsole, all socket scan be used for
accessories with amaximum curren tdraw of
240 W(20 A) ,e.g. lamp sorchargers for
mobi lephones.
The socket in the front centre console can be
used for accessories with amaximum current
draw of 18 0W(15A ), e.g .lam ps or chargers
for mobil ephones. Features
309Stowing and features Z
Page 316 of 389

Garag
edoor opener
Important safety notes The HomeLink
®
garage door opener integra-
ted in the rear-view mirror allows you to oper-
ate up to three differ entd oor and gate sys-
tems.
i The garage door opener is only available
for certain countries. Observ ethe legal
requirement sfor each individua lcountry.
The HomeLink ®
garage door opener is
compatible with most European garage and
gate ope nerd rives. Mo reinformatio non
HomeLink ®
and/o rcompatible products is
available from:
R any Mercedes-Benz Servic eCentre
R the HomeLink ®
hotline
(0) 0800 0466 354 65 (fre eofcharge) or
+4 9(0) 6838 907 277 (charge sapply)
R on the In ternet at:
http://www.homelink.com
Programming the integra tedg arage
doo ropene rinthe rear-view mir ror Progr
ammi ng G
WARNING
Only press the transmit terb utton on the inte-
grated garage door opener if there are no per-
sons or objects present within the sweep of
the garage door. Persons could otherwis ebe
injured as the door moves. Integrated garage door opener in the rear-view mir-
ror Garage door remote control
Ais not part of
this integrated garage door opener.
i To achieve the best results, insert new
batteries in garage door remote control
A before programming.
X Before programming for the first time, clear
the memor yofthe integrated garage door
opener (Y page 315).
X Tur nthe key to position 2in the ignition
lock.
X Press and hold one of transmitter but-
tons ;to? on the integrated garage door
opener.
Af teras hort time, indicator lamp :star ts
fl ashing yellow.
i Indicator lamp :flashes yellow immedi-
ately the first time that the transmitter but-
ton is programmed. If this transmitter but-
ton has already been programmed, indica-
tor lamp :only start sflashing yellow after
10 seconds have elapsed.
X Release the transmitter button.
X Point transmitter button Bof garage door
remote control Atowards the transmitter
button sonthe rear-vie wmirror at adis-
tanc eof5 to 20 cm.
i The required distance between garage
door remote control Aand the integrated
door opener depends on the garage door
driv esystem. You might require several
attempts. You should test every position for
at leas t25seconds befor etryin ganother
position.
X Pres sand hol dtransmitter button Bon
garag edoor remote con trol A until indi-
cator lamp :lights up green.
The programmin ghas been successful if
indicator lamp :lights up or flashes
green.
X Release transmitter button ;,=or? on
the integrated garage door opener and the
transmitter button on garage door remote
control B. Features
313Stowingandfeatures Z
Page 319 of 389
Frequencies for th
egarage doo ropener Th
er adio typ eapproval number and th efrequency range for th egarag edoor opener can be
fou ndonthe Interne tat: http://www.mercedes-benz.de/betriebsanleitung. Floormats
G
WARNING
Make sure that there is sufficient clearance
around the pedals when floormats are used,
and that the floormats are properly secured.
The floormats must be correctly secured at all
times using retainer sand press-studs.
Before you drive off ,chec kthe floormats and
secur eifnecessary. Afloormat which is not
properly secured can slip and, thereby, inter-
fere with the movemen tofthe pedals.
Do not plac efloormats on top of one another. Floormat on the driver's side (example)
X
Driver's seat/front-passenger seat:
slide the respective seat back.
X Rear seats: slide the respective seat for-
wards.
X To fit: place the floorma tinthe footwell.
X Press studs :ontoretainers ;.
X To remove: pull the floormat off retain-
ers ;.
X Remov ethe floormat. Infrared reflective windscreen
The infrared reflecting glass prevents the
vehicle interior from becoming too hot. It also blocks radio waves up int
othe gigahertz
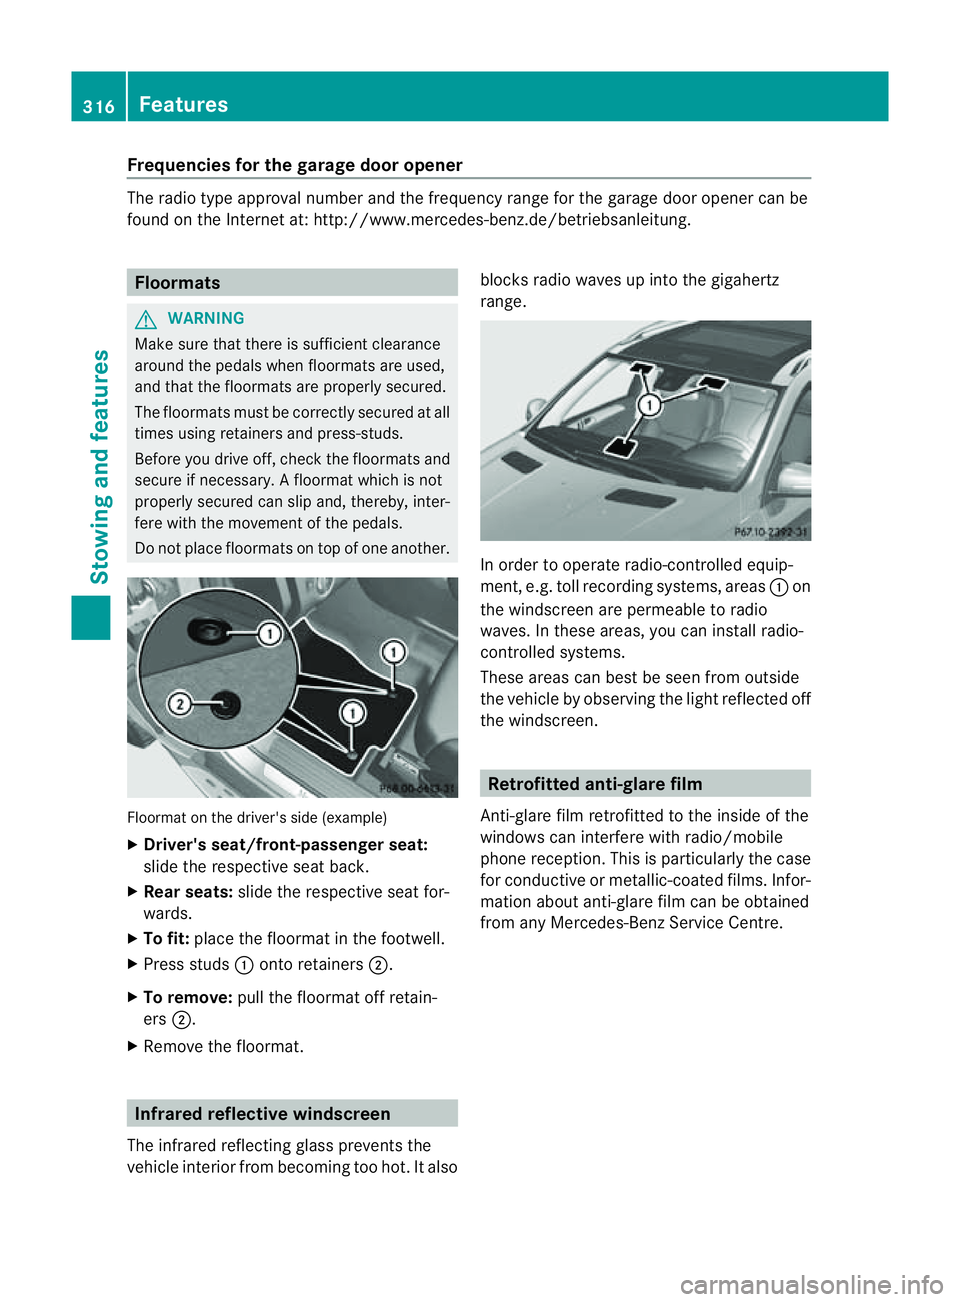
range. In orde
rtooperateradio-controlled equip-
ment, e.g. toll recording systems, areas :on
the windscreen are permeable to radio
waves. In these areas, you can install radio-
controlled systems.
Thes earea scan best be seen from outside
the vehicle by observing the light reflected off
the windscreen. Retrofitted anti-glar
efilm
Anti-glar efilm retrofitted to the inside of the
windows can interfer ewith radio/mobile
phone reception. This is particularly the case
for conductive or metallic-coated films. Infor-
mation about anti-glar efilm can be obtained
from any Mercedes-Ben zService Centre. 316
FeaturesStowing and features