2011 MERCEDES-BENZ M-CLASS SUV light
[x] Cancel search: lightPage 188 of 389
cons
umption may incr easeand handling per-
formance may be affected. X
Start the engine.
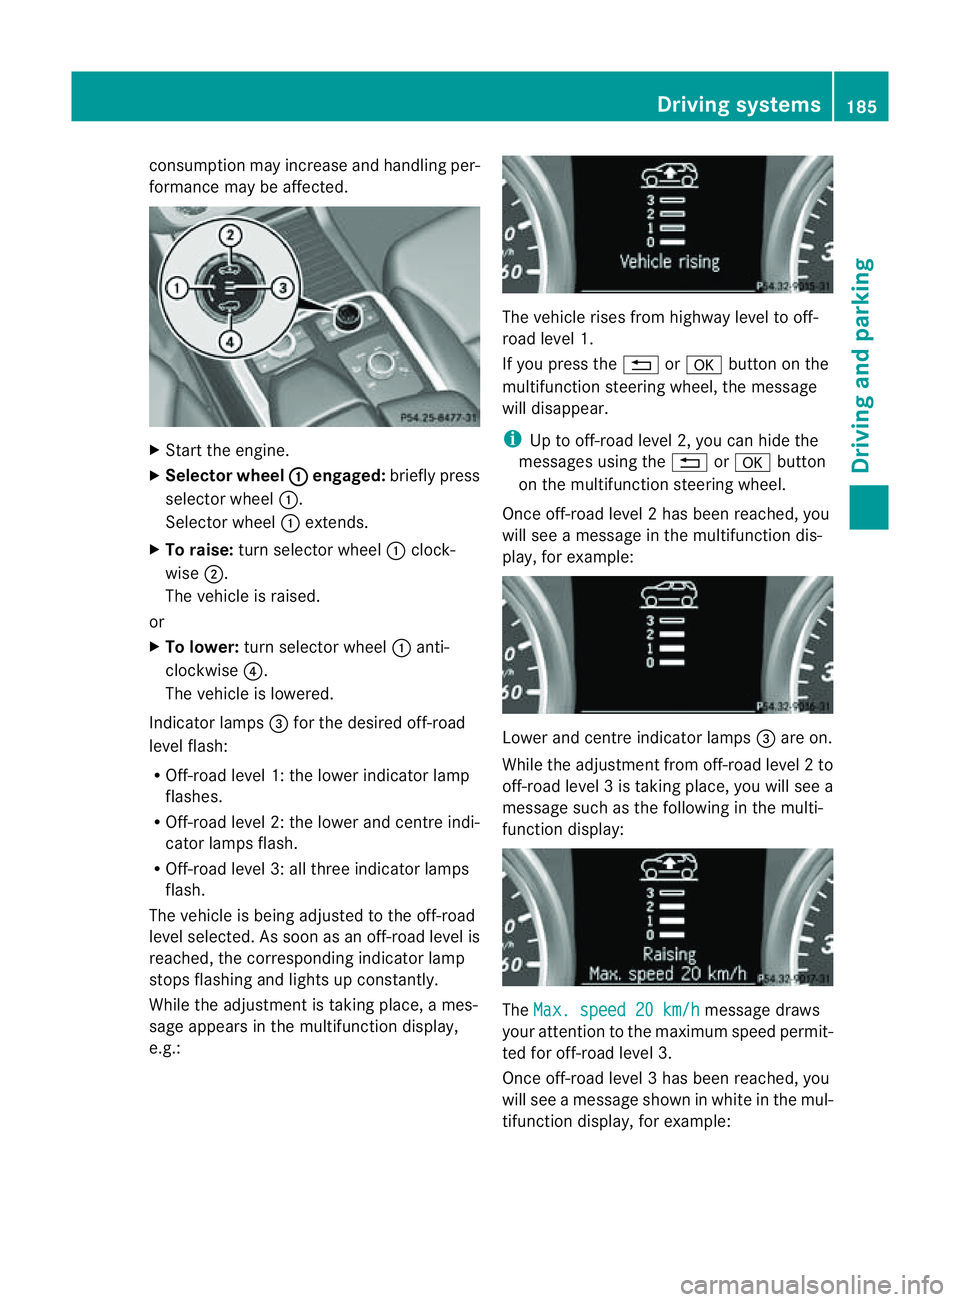
X Selecto rwheel : en
gaged: briefly press
selector wheel :.
Selector wheel :extends.
X To raise: turns elector wheel :clock-
wise ;.
The vehicle is raised.
or
X To lower: turns elector wheel :anti-
clockwise ?.
The vehicle is lowered.
Indicator lamps =for the desired off-road
level flash:
R Off-road level 1: thel ower indicator lamp
flashes.
R Off-road level 2: thel ower and centr eindi-
cator lamps flash.
R Off-road leve l3:allthree indicator lamps
flash.
The vehicle is being adjusted to the off-road
leve lselected. As soon as an off-road level is
reached, the corresponding indicator lamp
stops flashing and lights up constantly.
Whil ethe adjustment is taking place, ames-
sage appears in the multifunction display,
e.g.: The vehicle rises from highway level to off-
road level 1.
If you press the %ora button on the
multifunction stee ring wheel, the message
will disappear.
i Up to off-road level 2, you can hid ethe
messages usin gthe % ora button
on the multifunction steering wheel.
Onc eoff-roa dlevel 2has been reached, you
will see amessage in th emultifunction dis-
play, for example: Lower and
centre indicator lamps =areo n.
While the adjustment from off-ro adlevel 2to
off -ro ad level 3istaking place, you will see a
message such as the following in the multi-
function displ ay: The
Max. speed 20 km/h message draws
your attentio ntothe maximum speed permit-
ted for off-road level 3.
Onc eoff-roa dlevel 3has been reached, you
will see amessage shown in whit einthe mul-
ti fu nction display, for example: Driving systems
185Drivingand pa rking Z
Page 191 of 389
R
the electrica lsystem in thee ngine com-
partment, the battery or the fuses are tam-
pered with.
R the battery is disconnected.
If you leave the vehicl eorpark it, deactivate
the HOLD function and secure the vehicle
against rolling away.
The electric parking brake secures the vehicle
automatically if the HOLD function is activa-
ted and:
R the driver' sdoor is open and the driver's
seat belt is unfastened.
R the engin eisswitched off, unless it is auto-
matically switched off by the ECO start/
stop func tion.
R as ystem fault occurs.
R the powe rsupply is not sufficient.
On steep uphill or downhill inclines or if there
is am alfunction, the transmission may also
automatically be shifted into position P.AIRMATIC package
General notes AIRMATIC enables
asuspension tuning set-
ting to be selected and regulates the damping
behaviou rand level of your vehicle. The sys-
tem comprises aminimum of two compo-
nents. These are ADS (Adaptive Damping Sys-
tem) (Y page 188 )and level control
(Y page 189) .Your vehicle ma yalso be equip-
ped with the Active Curv eSystem
(Y page 188).
Observe the notes on driving with atrailer
(Y page 226).
ADS (Adaptive Damping System) General notes
ADS adapts th
edamping characteristic sto
the curren toperatin gand driving situation. Thi
sd epends on:
R your drivin gstyle
R the road surface conditions
R the AD Ssetting
R the vehicle level setting
Your selection remains stored even if you
remov ethe key from the igni tion lock. X
Star tthe engine.
Sports tuning
The firmer suspension tunin ginSport mode
ensures even better contact with the road.
Select this mode when employing asporty
drivin gstyle, e.g. on winding country roads.
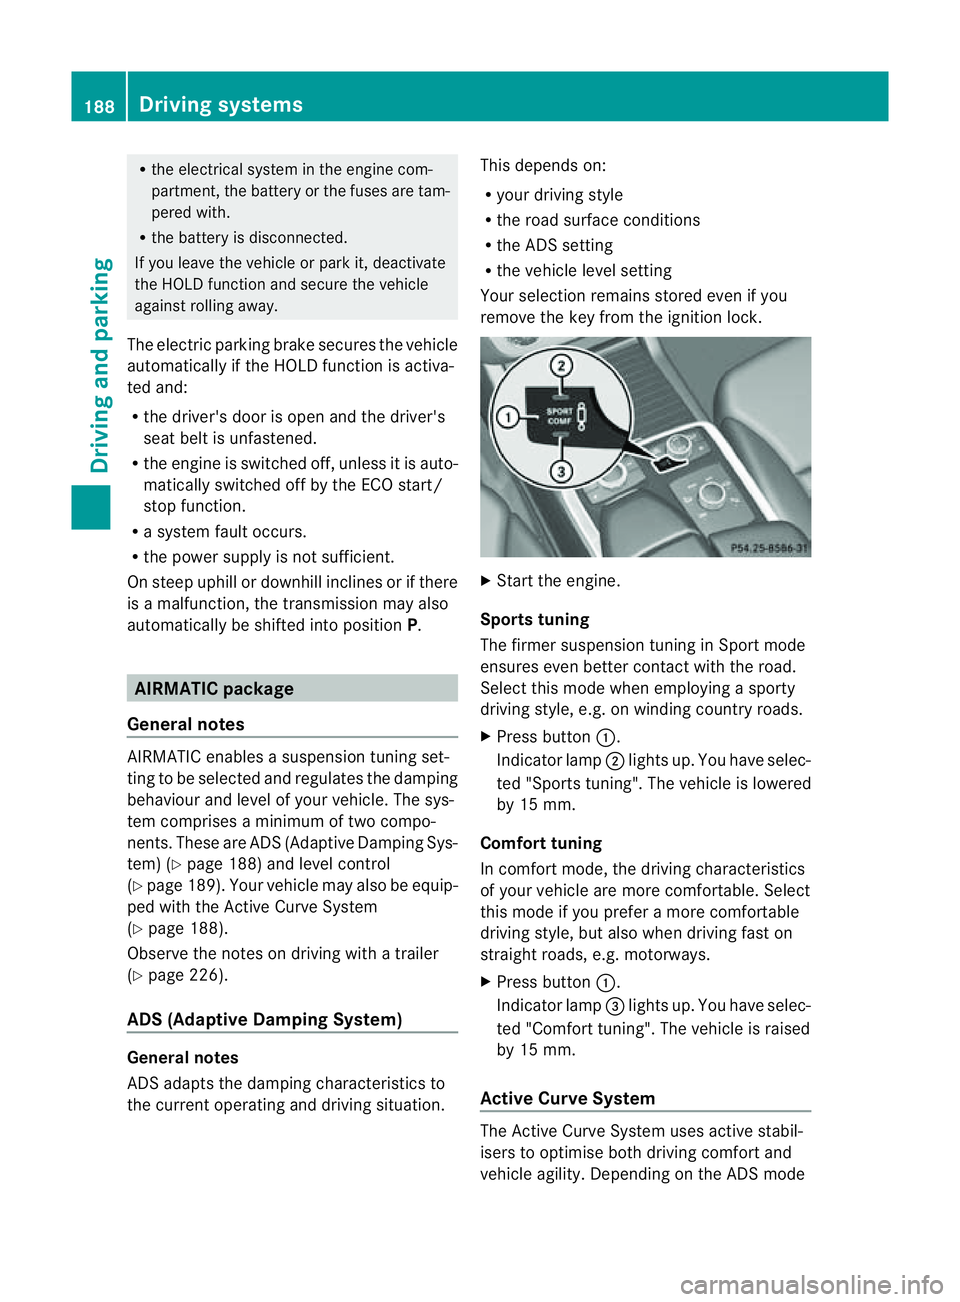
X Press button :.
Indicator lamp ;lights up. You have selec-
ted "Sports tuning". The vehicle is lowered
by 15 mm.
Comfort tuning
In comfort mode, the driving characteristics
of your vehicle are more comfortable. Select
this mode if you prefer amore com fortable
driving style ,but also when drivin gfast on
straight roads, e.g. motorways.
X Press button :.
Indicator lamp =lights up. You have selec-
ted "Comfort tuning". The vehicle is raised
by 15 mm.
Active Curve System The Active Curve System uses activ
estabil-
isers to optimis eboth drivin gcomfort and
vehicle agility. Depending on the AD Smode 188
Driving systemsDriving and parking
Page 195 of 389

vehicle. Yo
ucould dam aget he vehicle or
the objects.
The sensor smay not detect snow and
objects which absorb ultrasonic sources.
Ultrasonic sources, such as an automatic
car wash, alorry's compressed-air brakes
or ap neumatic drill, coul dcause PARK-
TRONI Ctom alfunction.
PARKTRONIC may not fun ctioncorrectly on
uneven terrain.
Minimum distance Centre approxima
tely 20 cm Corners approximately 15 cm
If there is an obstacle within this range, the
relevan twarning displays light up and awarn-
ing ton esounds. If th edistanc efalls below
the minimum, the distanc emay no longer be
shown.
Warning displays The warning displays show the distan
ce
between th esensor sand the obstacle. The
warning display for the fron tarea is located
on th edashboard above the centre air vents.
The warning display for the rear area is in the
roof lamp in the rear compartment. Warning display for the front area
: Segments on the left-hand side of the
vehicle
; Segments on the right-hand side of the
vehicle
= Segments sho wingoperational readiness The warning display for each side of the vehi-
cle is divided into fiv
eyellow and two red seg-
ments. PARKTRONI Cisoperational if yellow
segment sshowing oper ational readiness =
light up.
The selected transmission position and the
direction in which the vehicle is rolling deter-
mine which warning display is activ ewhen the
engin eisrunning. Transmission
position Warning display
D
Front area activated
R,
Nor the vehicle
is rolling back-
wards Rea
rand front areas
activated P
No area
sactivated One or more segment
slight up as the vehicle
approaches an obstacle, depending on the
vehicle's distance from the obstacle.
From the:
R sixth segment onwards, you wil lhear an
intermitten twarnin gtonef or approx-
imately two seconds.
R seven thsegment onwards, you will hear a
warnin gtonef or approximately two sec-
onds. This indicates that you have now
reached the minimu mdistance.
Deactivating/activating PARKTRONIC :
Indicator lamp
; To deactivate/activate PARKTRONIC 192
Drivin
gsystemsDrivin gand parking
Page 196 of 389
If indicato
rlamp :lights up, PARKTRONIC is
deactivated. Active Park Assis tisthen also
deactivated.
i PARKTRONIC is automatically activated
when you tur nthe key to positi on2in the
ignition lock.
Towing atrailer PARKTRONIC is deactivate
dfor the rear area
when you establish an electrical connection
between you rvehicle and atrailer.
! Foldint he ball couplin gifthe trailer tow
hitc hisn ot required .PARKTRONIC meas-
ures the minimum dete ction range to an
obstacle from the bumper, not the ball cou-
pling. Drivin
gsystems
193Drivingand park ing Z
Page 197 of 389

Problems wit
hPARKTRONIC Problem Possible causes/consequences and
M Solutions
Only the red segments
in the PARKTRONIC
warning display sare lit.
Yo ua lso hear awarning
tone for approximately
two seconds.
PARKTRONIC is deacti-
vated after approx-
imately 20 seconds,
and the indicator lamp
in the PARKTRONIC
button lights up. PARKTRONIC has malfunctioned and has switched off.
X If problems persist, have PARKTRONIC checked at aqualified
specialist workshop. Only the red segments
in the PARKTRONIC
warning display sare lit.
PARKTRONIC is deacti-
vate dafter approx-
imatel y20seconds. The PARKTRONI
Csensors are dirt yorthere is interference.
X Clean the PARKTRONI Csensors (Y page 327).
X Switch the ignition back on. The problem may be caused by an exter
nalsource of radio or
ultrasoun dwaves.
X See if PARKTRONIC functions in adifferent location. Active Parking Assist
Important safet ynotes Active Parking Assist is an electronic parking
aid with ultrasound. Ultrasound is used to
measure the road on both sides of the vehicle.
As uitable parking space is indicated by the
parking symbol. Activ esteering intervention
can assis tyou during parking. You ma yalso
use PARKTRONIC (Y page 191). When PARK-
TRONIC is switched off, Active Parking Assist
is also unavailable. G
WARNING
Active Parkin gAssist is merely an aid and may
sometimes recommen dparking spaces that
are not suitable for parking. For example,
these might be spaces where parking is pro-
hibited ,driveways, unsuitabl esurfaces, etc.
Active Parking Assis tmeasures the parking
space as you driv epast it. Any later changes to the parking space are not taken into
account .For insta nce,this ma ybethe case
when the vehicle parked in front of or behind
the space changes its position or when an
obstacle is moved int othe parkin gspace.
Active Parking Assist does not reliev eyou of
the responsibilit yofpaying attention. If you
rely solel yonA ctive Parkin gAssist ,you could
cause an accident and injure yourself and oth-
ers.
You are always responsible for safet yand
must continue to pay attention to your imme-
diate surroundings whe nparking and
manoeuvring. G
WARNING
Objects located above the heigh trange of
Active Parking Assis twill not be detected
when the parking space is measured. These
are not taken into account when the parking 194
Drivin
gsystemsDrivin gand parking
Page 200 of 389
X
Shift the transmissio ntoposition Dwhile
the vehicle is stationary.
Active Parkin gAssist immediately steer sin
the othe rdirection.
The Park Assist active Accelerate and brake Observe surroundings mes-
sage appears in the multifunction display.
i You will achieve the best parkin gresults
by waiting for the steerin gprocedure to
complete before moving forwards.
X Drive forward sand be ready to brake at all
times.
X Stop as soon as PARKTRONIC sounds the
continuou swarning tone, if not before.
The Park Assist active Select R Observe surroundings message appears in
the multifunc tion display.
X Further transmission shift smay be neces-
sary.
As soon as the parking procedure is com-
plete, the Park Assist switched off mes-
sage appears in the multifunc tion display.
PARKTRONIC con tinues to be available.
X Manoeuvre if necessary.
X Always observe the warning message sdis-
played by PARKTRONI C(Ypage 192).
Cancell ingA ctive Parking Assist You can cancel Active Parking Assist at any
time.
X Stop the movemen tofthe multifunc tion
steerin gwheel or steer yourself.
Ac tive Parkin gAssist will be cancelled at
once. The Park Assist cancelled mes-
sage appears in the multifunc tion display.
or
X Press the PARKTRONIC button on the
cen trec onsole (Y page 192).
PARKTRONIC is switched off and Active
Parkin gAssist is immediately cancelled.
The Park Assist cancelled message
appears in the multifunc tion display. Active Parkin
gAssist is cancelled automati-
cally if:
R parkin gusing Ac tive Parkin gAssist is no
longe rpossible.
R you ar edriving faster than 10 km/h.
R aw heel spins and ESP ®
intervenes or fails.
The ä warnin glamp lights up in the
instrument cluster.
Aw arning ton esounds. The par king spa ce
sym boldisappear sand the ParkA ssist cancelled messag
eappear sinthe multi-
functio ndisplay.
When Activ eParking Assist is cancelled, you
must steer again yourself.
Towing atrailer For vehicles with
atrailer to whitch, the min-
imum length for parking spaces is slightly
increased.
If yo uhavea ttache datrailer to your vehicle,
yo us houl dnot us eActiv eParking Assist.
Once the electrica lconnection is established
between your vehicl eand the trailer, Active
Parking Assist is no longer available .PARK-
TRONIC is deactivated for the rear area. Reversin
gcamera
Important safety notes Th
er eversing camera is an optica lparking
and manoeuvring aid. It shows the area
behind your vehicle with guide lines in the
COMAND displ ay. G
WARNING
Make sure tha tnopersons or animals are in
the manoeuvring range. Otherwise, they
could be injured.
The reversing camera is in the handle on the
tailgate. Driving systems
197Drivingand park ing Z
Page 201 of 389
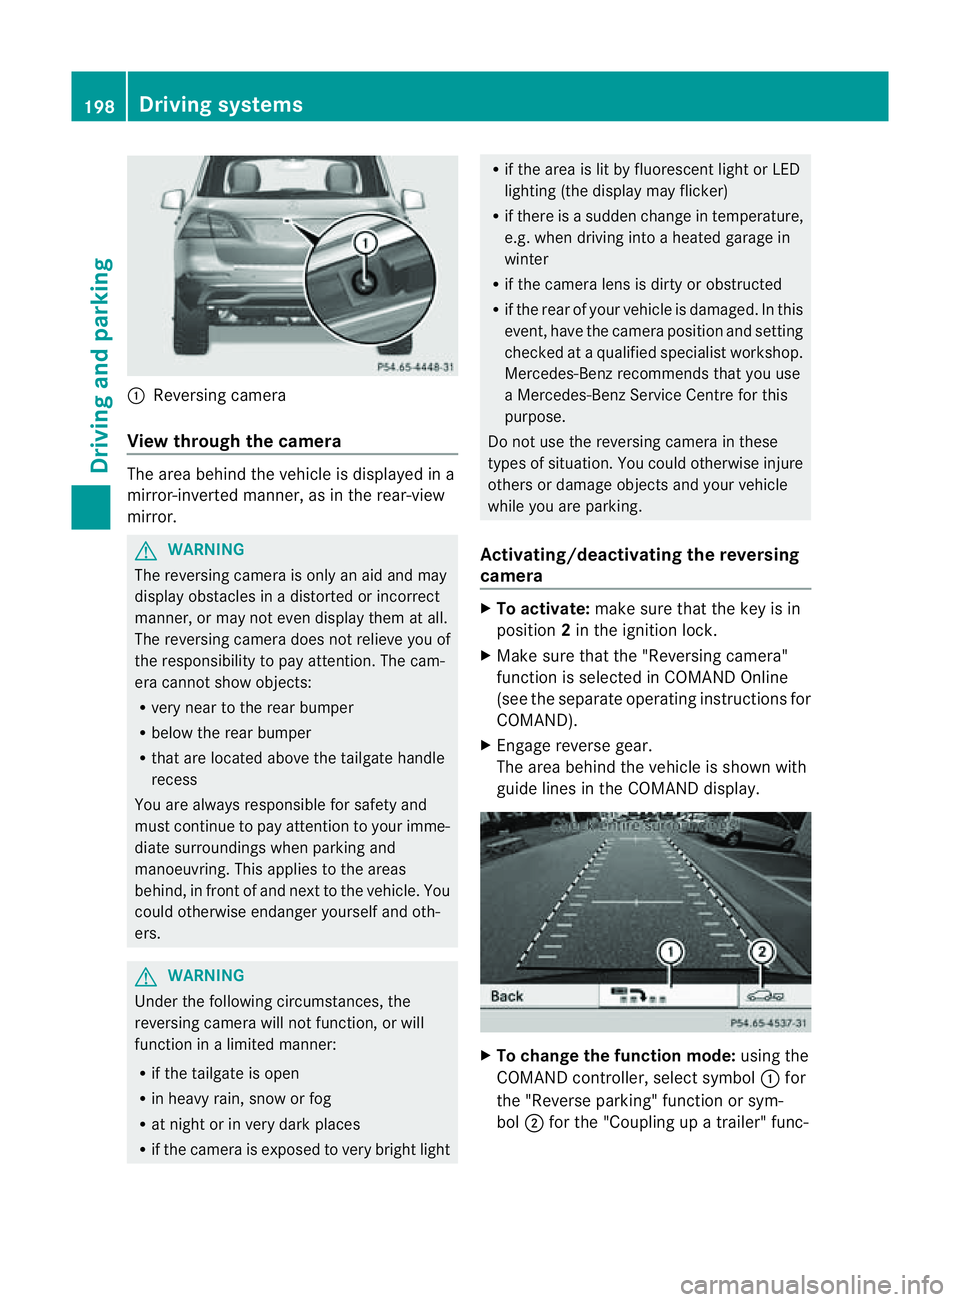
:
Reversin gcamera
View through th ecamera Th
ea rea behind the vehicle is displaye dina
mirror-inverted manner, as in the rea r-view
mirror. G
WARNING
The reversin gcamera is only an aid and may
display obstacles in adistorted or incorrect
manner, or may no teven display them at all.
Th er eversing camera does not relieve you of
the responsibility to pay attention. The cam-
era cannot show objects:
R ver ynear to the rear bumper
R belo wthe rea rbumper
R that are located above the tailgate handle
recess
You are alway sresponsible for safet yand
must continue to pay attentio ntoyourimme-
di at es urroundings when parking and
manoeuvring. This applie stothe areas
behind, in front of and nex ttothe vehicle. You
coul dotherwise endang er yourself and oth-
ers. G
WARNING
Under the following circumstances, the
reversing camera will not function, or will
function in alimited manner:
R if the tailgate is open
R in heavy rain, snow or fog
R at night or in very dark places
R if the camer aisexposed to very brigh tlight R
if the area is lit by fluorescen tlight or LED
lighting (the display may flicker)
R if there is asudden change in temperature,
e.g. when driving into aheated garage in
winter
R if the camera lens is dirt yorobstruc ted
R if the rear of your vehicle is damaged. In this
event ,have the camera positio nand setting
checked at aqualified specialist workshop.
Mercedes-Benz recommends that you use
aM ercedes-Benz Servic eCentr efor this
purpose.
Do not use the reversin gcamera in these
types of situation. You could otherwise injure
others or damage objects and your vehicle
while you are parking.
Activating/deactivating the reversing
camera X
To activate: make sure that the key is in
position 2in the ignition lock.
X Make sure that the "Reversing camera"
function is selected in COMAND Online
(see the separate operating instructions for
COMAND).
X Engage reverse gear.
The area behind the vehicle is shown with
guide lines in the COMAND display. X
To change the function mode: using the
COMAND controller, select symbol :for
the "Reverse parking" function or sym-
bol ;for the "Coupling up atrailer" func- 198
Dri
ving systemsDriving and parking
Page 202 of 389

tion. See the separate COMAND operating
instructi
ons.
The symbo lofthe selected function is high-
lighted.
To deactivate: the reversing camera is deac-
tivated if you:
R shift the transmission to position P
R drive forward ten metres
R shift the transmission from position Rto
anothe rposition (after 15 seconds)
R drive forwards at aspeed of over
10 km/h
Displays in the COMAN Ddisplay G
WARNING
Usin gthe reversing camera can be dangerous
if you ar ecolour-blin dorify our ability to dis-
tinguish colours is impaired.
Only use the reversin gcamera if you can see
and distinguis hbetween all the coloured
guide lines that are displayed by the reversing
camera in the COMAN Ddisplay. G
WARNING
Please note that objects not at ground level
may appea rtobefurther away than they
actually are. Thes einclude:
R the bumper of avehicle that is parked
behind your vehicle
R at railer drawbar
R theb all coupling of atrailer tow hitch
R thet ail-end of alorry
R slanted posts
The lines are only guides, not accurate meas-
urements of the distance to an obstacle.
Therefore, you should never pass the red line
when approachin ganobstacle. You could oth-
erwise cause an accident and injur eyourself
and others. :
Vehicle width includin gexterior mirrors
; Vehicl ewidth including wheel extremities
= Yellow guide line at adistance of approx-
imately 4.0 mfrom th erear area
? Red lane of vehicle width at curren tsteer-
ing whee langle (dynamic)
A Yellow lane of tyres at current steering
wheel angle (dynamic)
B Bumper
C Red guid eline at adistance of approx-
imately 0.2 5mfrom th erear area
D Yellow guide line at adistance of approx-
imately 1.0 mfrom th erear area
E White lane of vehicle width with steering
wheel straight (static)
F Vehicle centre axle (marker assistance)
The guide lines are only shown when the
transmission is in position R.
The distance specification sonly appl yto
objec tsthat are at ground level. Driving systems
199Drivingand park ing Z