2011 MERCEDES-BENZ G-CLASS ECU
[x] Cancel search: ECUPage 242 of 288

Towing and tow-starting
Important safety notes
GWarning
If circumstances require towing the vehicle
with all wheels on the ground, always tow with
a tow bar if:
R the engine will not run
R there is a malfunction in the brake system
R there is a malfunction in the power supply
or the vehicle's electrical system
This is necessary to adequately control the
towed vehicle.
Prior to towing the vehicle with all wheels on
the ground, make sure the SmartKey is in
starter switch position 2.
If the SmartKey is left in starter switch
position 0 for an extended period of time, it
can no longer be turned in the switch. In this
case, the steering is locked. To unlock,
remove SmartKey from starter switch and
reinsert.
It is better to have the vehicle transported
than to have it towed.
! You may only tow the vehicle a maximum
distance of 30 miles (50 km). A towing
speed of 30 mph (50 km/h) must not be
exceeded.
For towing distances over 30 miles
(50 km), the vehicle must loaded onto a
transporter.
! Only secure the tow cable or tow bar to
the towing eyes. You could otherwise
damage the vehicle.
! Do not tow with sling-type equipment.
This could damage the vehicle.
! Do not use the towing eyes for recovery
purposes as this could damage the vehicle.
If in doubt, recover the vehicle with a crane.
! When towing, pull away slowly and
smoothly. If the tractive power is too high,
the vehicles could be damaged.
! Your vehicles is equipped with an
automatic transmission. Therefore, you
must not have the vehicle tow-started. The
transmission may otherwise be damaged.
If the transfer case can be shifted into neutral
N , you can tow the vehicle.
If the transfer case cannot be shifted into
neutral N, you can tow the vehicle with one
axle raised. Please bear the following in mind:
R remove the propeller shaft between the
transfer case and the rolling axle.
R turn the key to position 1 in the ignition
lock.
The battery must be connected and charged.
Otherwise, you:
R cannot turn the key in the ignition lock to
position 2
R cannot shift the automatic transmission to
position N
i Deactivate the automatic locking feature
( Y page 165) You could otherwise be
locked out when pushing or towing the
vehicle.
Towing eye
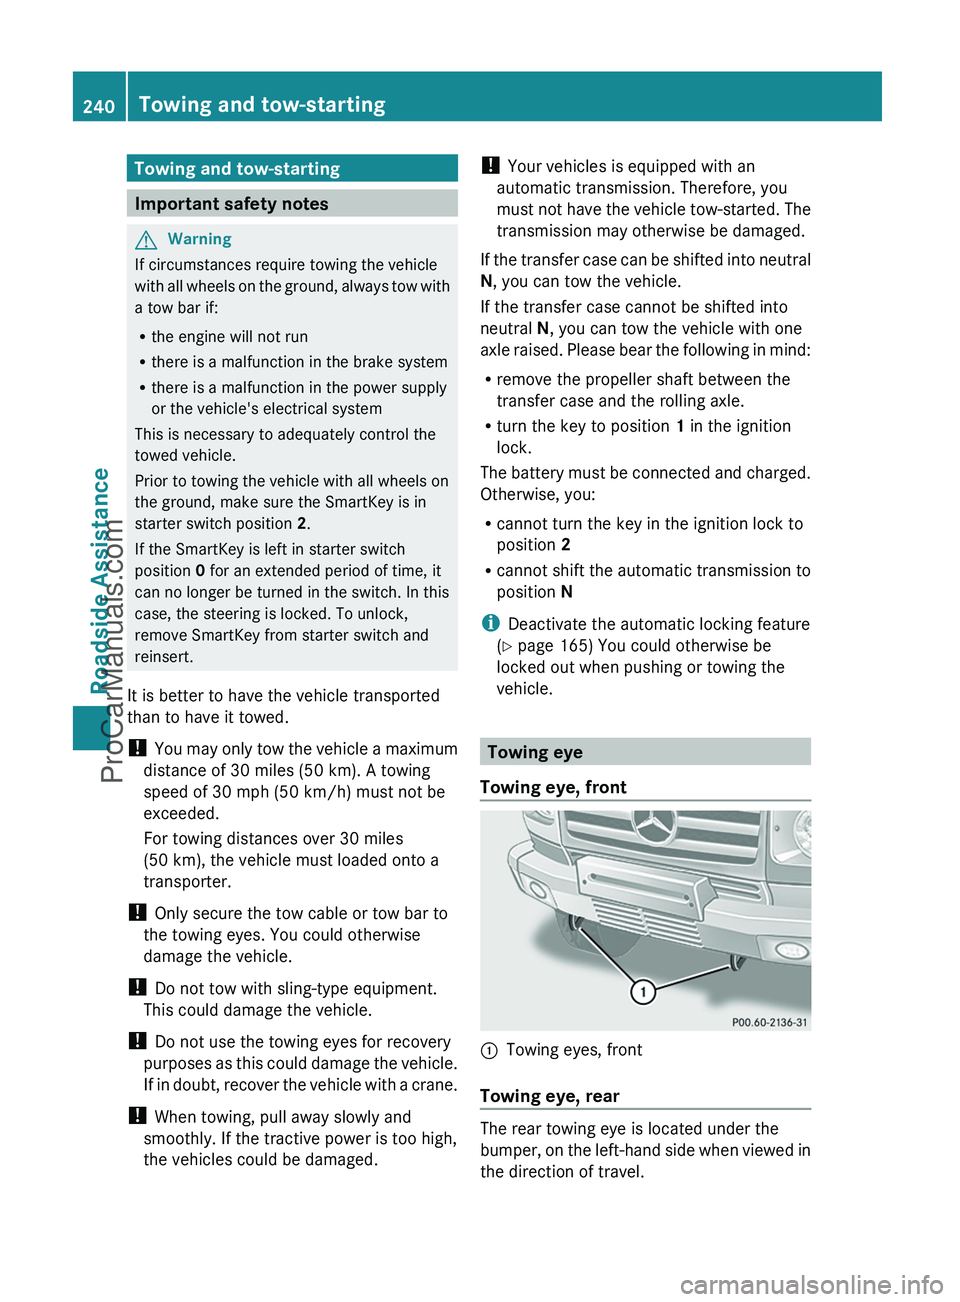
Towing eye, front
:Towing eyes, front
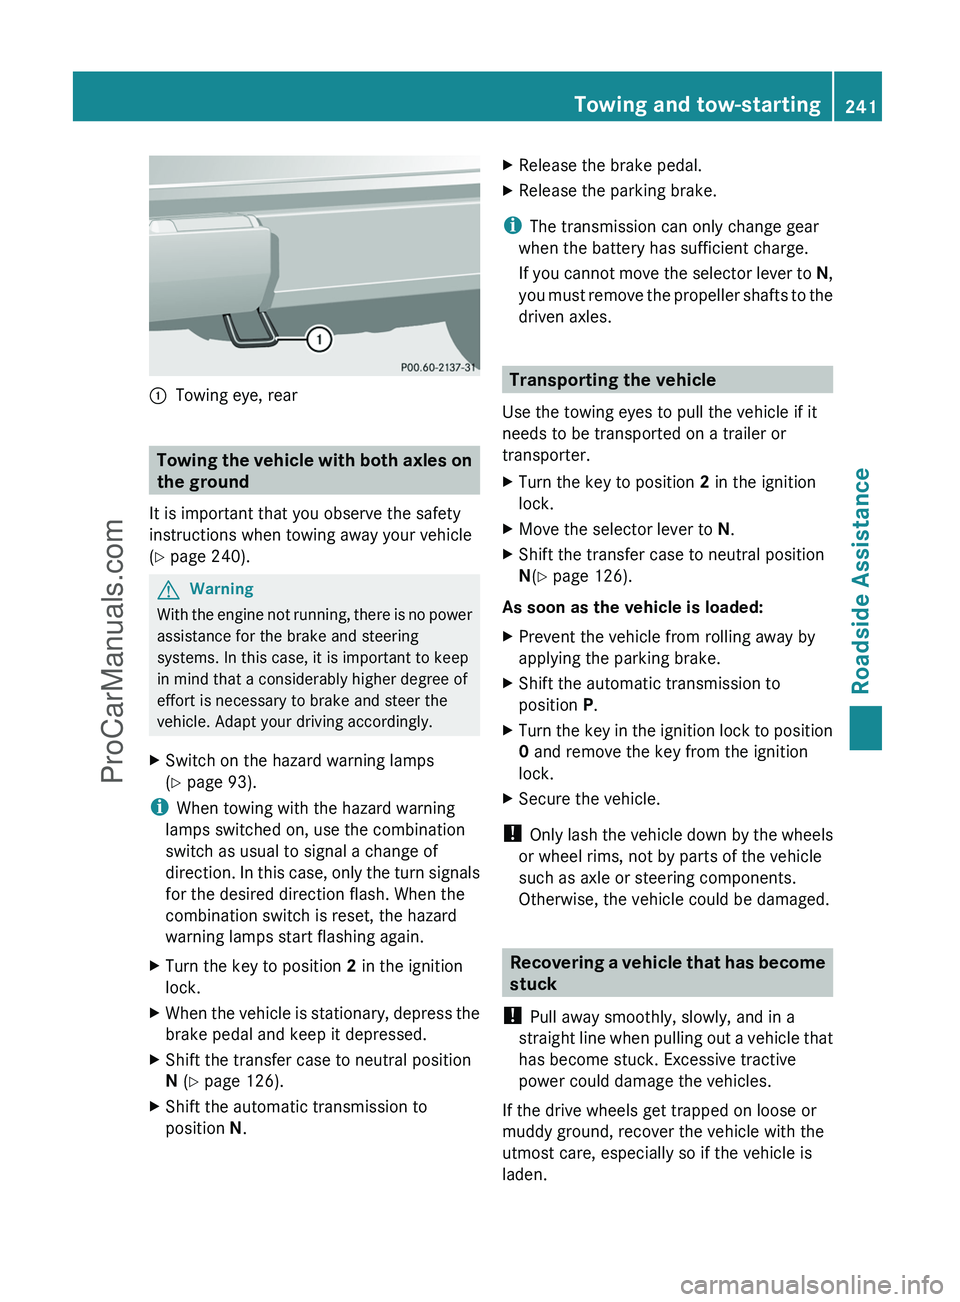
Towing eye, rear
The rear towing eye is located under the
bumper, on the left-hand side when viewed in
the direction of travel.
240Towing and tow-startingRoadside Assistance
ProCarManuals.com
Page 243 of 288

:Towing eye, rear
Towing the vehicle with both axles on
the ground
It is important that you observe the safety
instructions when towing away your vehicle
( Y page 240).
GWarning
With the engine not running, there is no power
assistance for the brake and steering
systems. In this case, it is important to keep
in mind that a considerably higher degree of
effort is necessary to brake and steer the
vehicle. Adapt your driving accordingly.
XSwitch on the hazard warning lamps
( Y page 93).
i
When towing with the hazard warning
lamps switched on, use the combination
switch as usual to signal a change of
direction. In this case, only the turn signals
for the desired direction flash. When the
combination switch is reset, the hazard
warning lamps start flashing again.
XTurn the key to position 2 in the ignition
lock.XWhen the vehicle is stationary, depress the
brake pedal and keep it depressed.XShift the transfer case to neutral position
N (Y page 126).XShift the automatic transmission to
position N.XRelease the brake pedal.XRelease the parking brake.
i
The transmission can only change gear
when the battery has sufficient charge.
If you cannot move the selector lever to N,
you must remove the propeller shafts to the
driven axles.
Transporting the vehicle
Use the towing eyes to pull the vehicle if it
needs to be transported on a trailer or
transporter.
XTurn the key to position 2 in the ignition
lock.XMove the selector lever to N.XShift the transfer case to neutral position
N (Y page 126).
As soon as the vehicle is loaded:
XPrevent the vehicle from rolling away by
applying the parking brake.XShift the automatic transmission to
position P.XTurn the key in the ignition lock to position
0 and remove the key from the ignition
lock.XSecure the vehicle.
! Only lash the vehicle down by the wheels
or wheel rims, not by parts of the vehicle
such as axle or steering components.
Otherwise, the vehicle could be damaged.
Recovering a vehicle that has become
stuck
! Pull away smoothly, slowly, and in a
straight line when pulling out a vehicle that
has become stuck. Excessive tractive
power could damage the vehicles.
If the drive wheels get trapped on loose or
muddy ground, recover the vehicle with the
utmost care, especially so if the vehicle is
laden.
Towing and tow-starting241Roadside AssistanceZProCarManuals.com
Page 244 of 288

Never attempt to recover a vehicle with a
trailer attached.
Pull out the vehicle backwards, if possible,
using the tracks it made when it became
stuck.
Towing in the event of malfunctions
General notes
! If you are removing the propeller shaft,
use M10 nuts as spacers on the M8 bolts
and secure them with M8 nuts.
New self-locking nuts must be used when
the propeller shafts are refitted.
XObserve the safety notes as you do so
( Y page 240).
i
Consult an authorized Mercedes-Benz
Center.
Engine damage, gear damage or
electrical malfunctions
XMove the selector lever to N(Y page 122).XShift the transfer case to neutral position
N (Y page 126).
In the event of damage to the transfer
case
Have the propeller shafts between the axles
and the transfer case removed.
Have the vehicle towed with the front axle
raised.
In the event of damage to the front axle
Have the propeller shaft between the rear
axle and the transfer case removed.
Have the vehicle towed with the front axle
raised.
In the event of damage to the rear axle
Have the propeller shaft between the front
axle and the transfer case removed.
Then, have the vehicle towed with the rear
axle raised and with wheel rollers under the
front axle.
Electrical fuses
Important safety notes
The fuses in your vehicle serve to close down
faulty circuits. If a fuse blows, all the
components on the circuit and their functions
stop operating.
GWarning
Only use fuses approved by Mercedes-Benz
with the specified amperage for the system in
question and do not attempt to repair or
bridge a blown fuse. Using other than
approved fuses or using repaired or bridged
fuses may cause an overload leading to a fire,
and/or cause damage to electrical
components and/or systems. Have the cause
determined and remedied by an authorized
Mercedes-Benz Center.
Blown fuses must be replaced with fuses of
the same rating, which you can recognize by
the color and value. The fuse ratings are listed
in the fuse allocation chart. An authorized
Mercedes-Benz Center will be happy to
advise you.
i If a fuse has blown, visit a breakdown
service or an authorized Mercedes-Benz
Center.
If the newly inserted fuse also blows, have the
cause traced and rectified at a qualified
specialist workshop, e.g. an authorized
Mercedes-Benz Center.
! Only use fuses that have been approved
for Mercedes-Benz vehicles and which
have the correct fuse rating for the system
concerned. Otherwise, components or
systems could be damaged.
242Electrical fusesRoadside Assistance
ProCarManuals.com
Page 255 of 288

Check the tire pressures at least once a
month.
Only check and correct tire pressures when
the tires are cold ( Y page 249).
Checking the tire pressure manually
To determine and set the correct tire
pressure, proceed as follows:
XRemove the valve cap of the tire that is to
be checked.XPress the tire pressure gauge securely onto
the valve.XRead the tire pressure and compare it with
the recommended value on the tire and
loading information table on the B-pillar on
the driver's side of your vehicle.XIf necessary, increase the tire pressure to
the recommended value ( Y page 249).XIf the tire pressure is too high, release air
by pressing down the metal pin in the valve
using the tip of a pen, for example. Then,
check the tire pressure again using the tire
pressure gauge.XScrew the valve cap onto the valve.XRepeat these steps for the other tires.
Tire pressure monitor
Important safety notes
If a tire pressure monitor system is installed,
the vehicle's wheels have sensors that
monitor the tire pressures in all four tires. The
tire pressure monitor warns you when the
pressure drops in one or more of the tires. The
tire pressure monitor only functions if the
correct wheel electronics units are installed
on all wheels.
The tire pressure monitor has a yellow
warning lamp in the instrument cluster for
indicating pressure loss/malfunctions (USA)
or pressure loss (Canada). Whether the
warning lamp flashes or lights up indicates
whether a tire pressure is too low or the tire
pressure monitoring system is
malfunctioning:
R If the warning lamp is lit continuously, the
tire pressure on one or more tires is
significantly too low. The tire pressure
monitor is not malfunctioning.
R USA only: if the warning lamp flashes for
60 seconds and then remains lit constantly,
the tire pressure monitor is malfunctioning.GWarning!
The TPMS does not indicate a warning for
wrongly selected inflation pressures. Always
adjust tire inflation pressure according to the
Tire and Loading Information placard or the
supplemental tire inflation pressure
information on the inside of the fuel filler flap.
The TPMS is not able to issue a warning due
to a sudden dramatic loss of pressure (e.g. tire
blowout caused by a foreign object). In this
case bring the vehicle to a halt by carefully
applying the brakes and avoiding abrupt
steering maneuvers.
GWarning
Each tire, including the spare (if provided),
should be checked at least once a month
when cold and inflated to the inflation
pressure recommended by the vehicle
manufacturer on the Tire and Loading
Information placard on the driver’s door B-
pillar or the tire inflation pressure label on the
inside of the fuel filler flap. If your vehicle has
tires of a different size than the size indicated
on the Tire and Loading Information placard
or the tire inflation pressure label, you should
determine the proper tire inflation pressure
for those tires.
As an added safety feature, your vehicle has
been equipped with a tire pressure monitoring
system (TPMS) that illuminates a low tire
Tire pressure253Wheels and tiresZProCarManuals.com
Page 270 of 288

accessories, the maximum load and the
weight of the optional equipment installed at
the factory.
Kilopascal (kPa)
Metric unit for tire pressure. 6.9 kPa is the
equivalent of 1 psi. Another unit for tire
pressure is bar. 100 kilopascal (kPa) is the
equivalent of 1 bar.
Load index
In addition to the load bearing index, the load
index may also be imprinted on the sidewall
of the tire. This specifies the load bearing
capacity more precisely.
Curb weight
The weight of a vehicle with standard
equipment, including the maximum capacity
of fuel, oil and coolant and also includes the
air-conditioning system and optional
equipment if these are installed on the
vehicle, but does not include passengers or
luggage.
Maximum tire load
The maximum tire load is the maximum
permissible weight in kilograms or lbs for
which a tire is approved.
Maximum permissible tire pressure
Maximum permissible tire pressure for one
tire.
Maximum load on one tire
Maximum load on one tire. This is calculated
by dividing the maximum axle load of one axle
by two.
PSI (pounds per square inch)
Standard unit of measurement for tire
pressure.
Aspect ratio
Relationship between tire height and tire
width in percent.
Tire pressure
This is pressure inside the tire applying an
outward force to every square inch of the
tire's surface. The tire pressure is specified in
pounds per square inch (psi), in kilopascal
(kPa) or in bar. The tire pressure should only
be corrected when the tires are cold. For this,
the vehicle must have been stationary for at
least 3 hours or not have traveled more than
1.6 km (1 mile) in this time.
Tire tread
The part of the tire that comes into contact
with the road.
Tire bead
The tire bead ensures that the tire sits
securely on the wheel. There are several steel
wires in the bead to prevent the tire from
coming loose from the wheel rim.
Sidewall
The part of the tire between the tread and the
tire bead.
Weight of optional extras
The combined weight of those optional extras
that weigh more than the replaced standard
part and more than 2.3 kg (5 lbs). These
optional extras, such as high-performance
268Definitions for tires and loadingWheels and tires
ProCarManuals.com