2011 MERCEDES-BENZ E-CLASS CABRIOLET warning light
[x] Cancel search: warning lightPage 205 of 353

R
ad riving safety system intervenes, suc has
ESP ®
or PRE-SAFE ®
Brake.
R ESP ®
is deactivated.
R al oss of tyr epressure or adefective tyr eis
detected.
Activating Activ eBlind Spot Assist
X Mak esure that th eradar sensor system
(Y page 229) and Activ eBlindS potA ssist
(Y page 224) are activated in th eon-bo ard
computer.
X Turn th ekeyto position 2in th eignition
lock.
Warning lamps :light up red in th eexte-
rior mirror sfor approximately 1. 5seconds
and then tur nyellow.
Trailer towing
If you attac hatrailer, make sure you have
correctly established the electrical connec-
tion .This can be accomplished by checking
the trailer lighting. Active Blind Spot Assist is
then deactivated. The indicator lamp in the
exterior mirrors lights up yellow, and the
Active Blind Spot Assist currently unavailable See Owner's Manual mes-
sage appears in the multifunction display.
Active Lane Keeping Assist Important safety notes
Active Lane Keeping Assist monitors the area
in front of your vehicle by means of
acamera
at the top of the windscreen. Active Lane
Keeping Assist detectsl ane markings on the
road and warns you before you leave your
lane unintentionally. If you do not react to the
warning, alane-correcting application of the
brakes can bring the vehicle back into the
original lane. :
Active Lane Keeping Assist camera
If you have selected the Display unit Speed-/odometer: (Y
page 225) function in
the on-board computer and select kmkm as
the unit of measurement, Active Lane Keep-
ing Assist is active from speeds of 60 km/h.
If the miles displayu
nit is selected, the assis-
tance range begins at 40 mph. G
WARNING
Active Lane Keeping Assist does not keep
your vehicle in its lane. It is only an aid and
may detect the lane markings on the road
incorrectly or not at all.
The system may be impaired or may not func-
tion if:
R several or no lane markings for asingle lane
are present.
R there is poor visibility, e.g. due to insuffi-
cient illumination of the road, or due to
snow, rain, fog or spray.
R there is glare, e.g. from oncomingt raffic,
the sun, or reflection from other vehicles.
R the windscreen is dirty, misted up or cov-
ered, for instancebyas ticker, in the vicinity
of the camera.
R the lane markings are worn away,d ark or
covered up, e.g. by dirt or snow.
R the distance to the vehicle in front is too
small and the lane markings thus cannot be
detected.
R the lane markings on the road are unclear,
e.g. near roadworks. 202
Driving systemsDriving and parking
Page 206 of 353

R
the lane markings change quickly, e.g.
lanes branch off ,cros sone anothe ror
merge.
R the road is narrow and winding.
Active Lane Keeping Assist cannot detect
road and traffic conditions. It is not asubsti-
tute for attentive driving. You are responsible
for the vehicle's speed ,braking in good time,
and steering correctly. Always adapt your
driving style to suitt he prevailing road and
weather conditions.A lways pay attention to
traffic condition sand your surroundings. Oth-
erwise, you may fail to recognise danger sin
time, cause an accident and injure yourself
and others.
Warning vibration in th esteering wheel
Aw arnin gmay be given if afront wheel
passes over alane marking. You will be
warned by way of intermitten tvibrations in
the steerin gwheel for up to 1. 5seconds.
In order that you are warned only when nec-
essary and in good time if you cross the lane
marking, the system recognises certain con-
ditions and warns you accordingly.
The warning vibration occur searlier if:
R you approach the outer lane markin gona
bend.
R the road has very wide lanes, e.g. amotor-
way.
R the system recognises solid lane markings.
The warning vibration occur slater if:
R the road has narrow lanes.
R you cut the corner on abend.
No warning vibration occur sif:
R you clearly and actively steer ,brake, or
accelerate.
R you cut the corner on asharp bend.
R ad riving safety system intervenes, such as
ABS, BASorE SP®
.
R you have switched on the turn signals. In
this event ,the warnings are suppressed for
ac ertain period of time. Lane-correcting brak
eapplication
If you leave your lane under certain circum-
stances, the vehicle will brake briefly on one
side. This is designed to help you bring the
vehicle back intot he original lane.
This function is available in the range between
60 km/ha nd 200 km/h.
Al ane-correctingb rake application can only
be made after driving over asolid, recognis-
able lane marking. Befor ethis, awarning
must be emitted by means of intermittent
vibration in the steering wheel. In addition, a
lane with lane markings on both sides must
be recognised. The brake application also
slightly reduces driving speed.
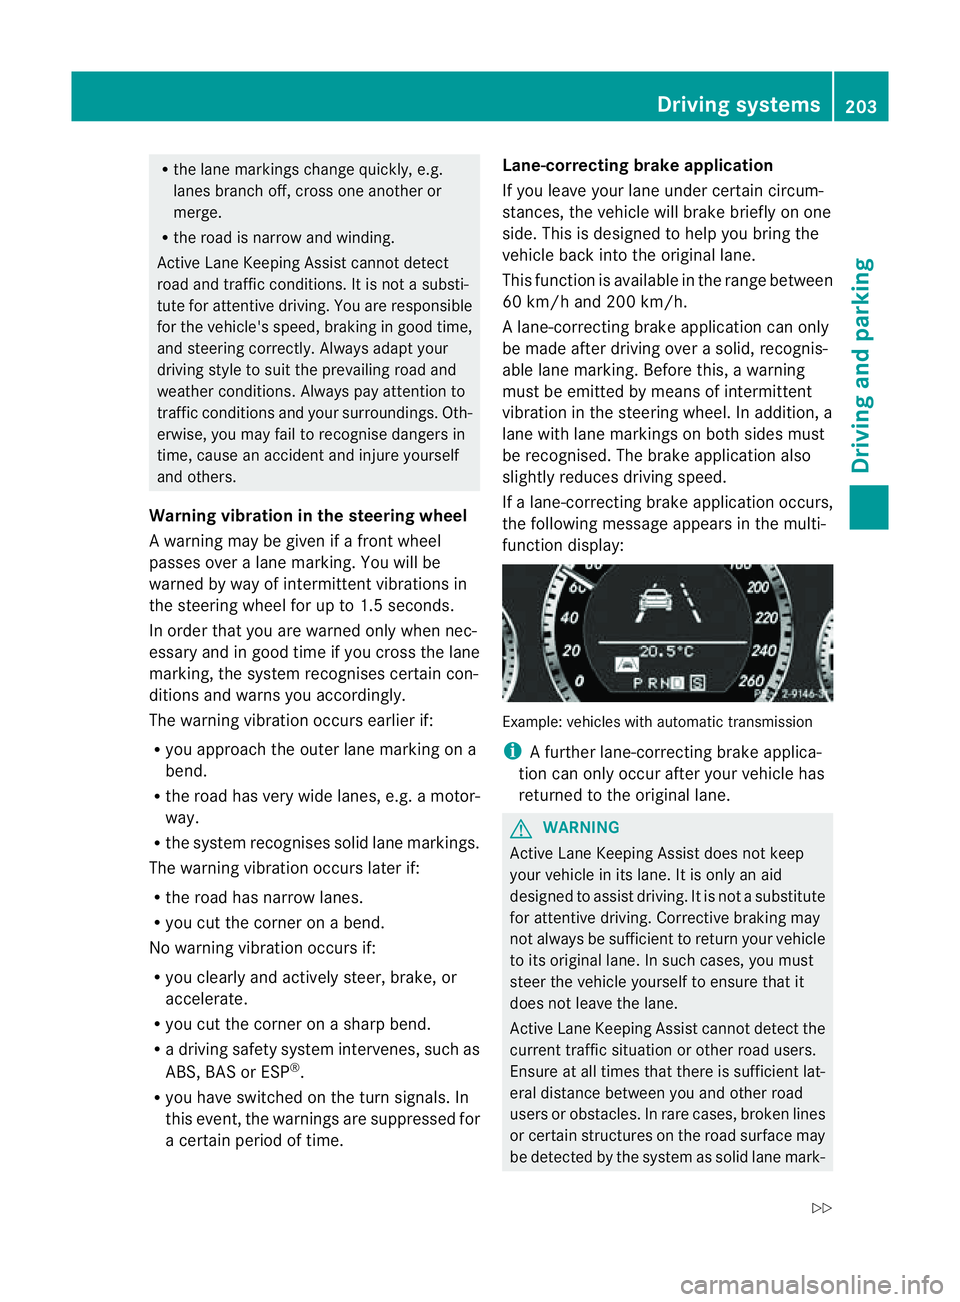
If al ane-correcting brake application occurs,
the following message appears in the multi-
function display: Example: vehicles with automatic transmission
i
Afurther lane-correcting brake applica-
tion can only occur after your vehicle has
returned to the original lane. G
WARNING
Active Lane Keeping Assist does not keep
your vehicle in its lane. It is only an aid
designed to assist driving. It is not asubstitute
for attentive driving. Corrective braking may
not always be sufficient to return your vehicle
to its original lane. In such cases, you must
steer the vehicle yourself to ensure that it
does not leave the lane.
Active Lane Keeping Assist cannot detect the
current traffic situation or other road users.
Ensure at all times that there is sufficient lat-
eral distance between you and other road
users or obstacles. In rare cases, broken lines
or certain structures on the road surface may
be detected by the system as solid lane mark- Driving systems
203Driving and parking
Z
Page 207 of 353

ings
.You can, for example, countersteer gen-
tly at any time to cancel inappropriate braking
action, e.g. if you intentionally drive across a
solid lane marking.
Active Lane Keeping Assist cannot take
weather conditions into account.
You are responsible for the vehicle's speed,
correc tsteerin gand for braking in good time.
Alway sadapt your drivin gstyle to suit the
prevailing road and weather conditions.
Always pay attention to traffic conditions and
your surroundings. Otherwise, you may fail to
recognise dangers in time, cause an accident
and injure yourself and others.
No lane-correcting brake application occurs
if:
R you clearly and actively steer, brake, or
accelerate.
R you cut the corner on asharp bend.
R you have switched on the turn signals.
R ad riving safety system intervenes, such as
ESP ®
,P RE-SAFE ®
Brake or Active Blind
Spot Assist.
R you have adopted asporty driving style with
high cornering speeds or high rates of
acceleration.
R on vehicles with atrailer tow hitch, the
electrical connection to the trailer has been
correctly established.
R ESP ®
is deactivated.
R the transmission is not in position D.
R al oss of tyre pressure or adefective tyre
has been detected and displayed.
Active Lane Keeping Assist does not detect
road and traffic conditions. An inappropriate
brake application may be interrupted at any
time if:
R you steer slightly in the opposite direction.
R you use aturn signal.
R you clearly brake or accelerate. Al
ane-correcting brak eapplicatio nisinter-
rupted automaticallyi f:
R ad riving safety system intervenes, such as
ESP ®
,P RE-SAFE ®
Brake or Active Blind
Spot Assist.
R lane markings can no longer be recognised.
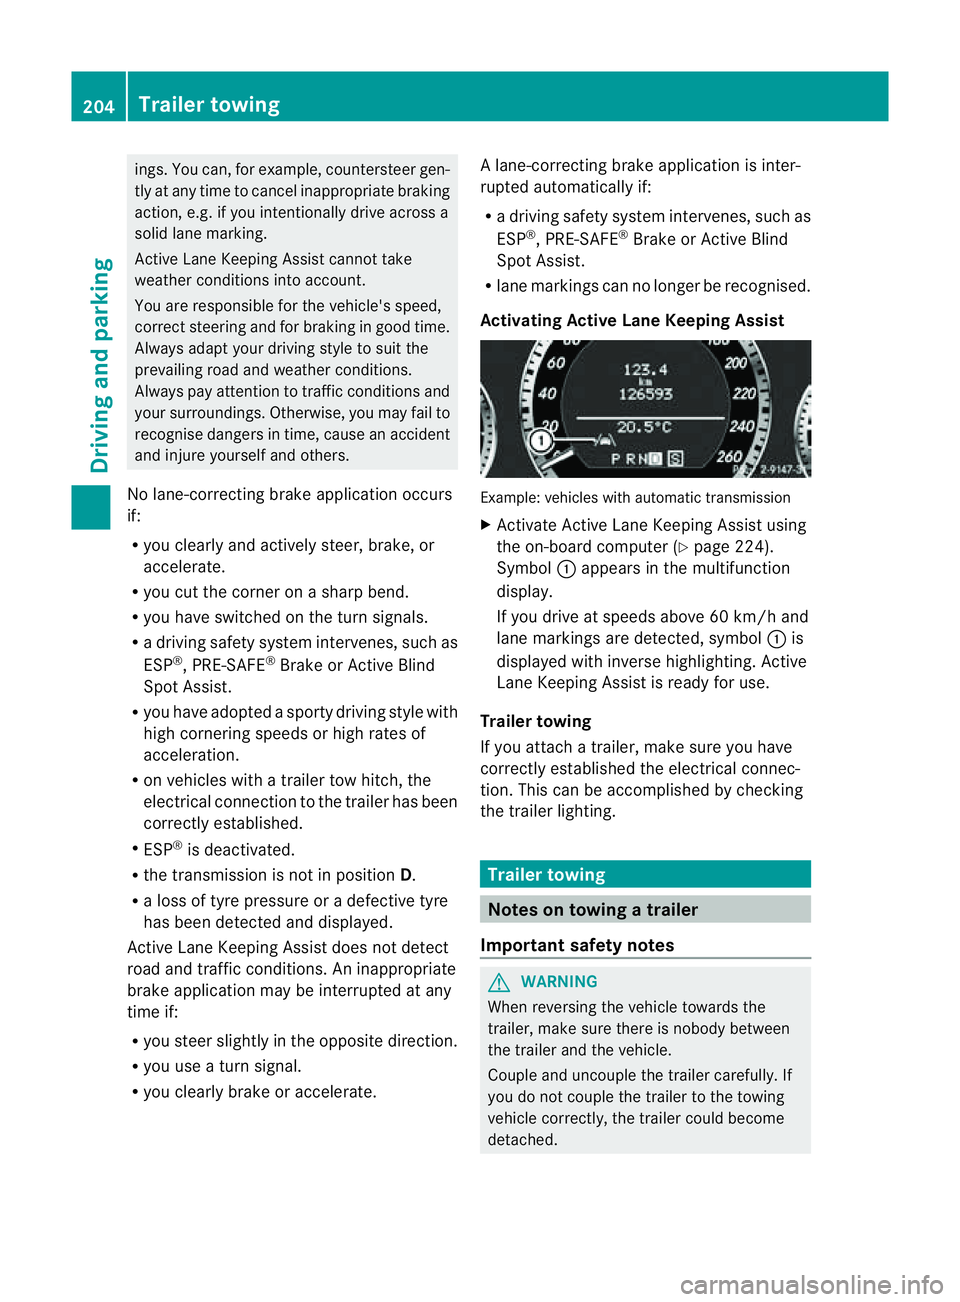
Activating Active Lane Keeping Assist Example: vehicles with automatic transmission
X
Activate Active Lane Keeping Assist using
the on-board computer (Y page 224).
Symbol :appears in the multifunction
display.
If you drive at speeds above 60 km/h and
lane markings are detected, symbol :is
displayed with inverse highlighting. Active
Lane Keeping Assist is ready for use.
Trailer towing
If you attach atrailer, make sure you have
correctly established the electrical connec-
tion. This can be accomplished by checking
the trailer lighting. Trailer towing
Notes on towing
atrailer
Important safety notes G
WARNING
When reversing the vehicl etowards the
trailer, make sure there is nobod ybetween
the trailer and the vehicle.
Couple and uncoupl ethe trailer carefully .If
you do no tcouple the trailer to the towing
vehicle correctly, the trailer could become
detached. 204
Trailer towingDriving and parking
Page 208 of 353

Make sure that the following values are not
exceeded:
R the permissible trailer drawbar noseweight
R the permissible trailer load
R the permissible rear axle load of the towing
vehicle
R the maximum permissible gross vehicle
weight of both the towing vehicle and the
trailer
You will find the applicable permissible val-
ues, which must not be exceeded, in the vehi-
cle documents.
You will find the values approved by the man-
ufacturer on the vehicle identification plates
and those for the towing vehicle in the "Tech-
nical data" section. G
WARNING
If the Check trailer hitch locking mechanism message appears in the multi-
function display while the vehicle is in motion,
pull over immediately and check whether the
ball coupling is correctly engaged. G
WARNING
Always observe the maximum speed permit-
ted in Germany for vehicle/trailer combina-
tions, even in countries where higher speeds
are permitted. This lowers the risk of an acci-
dent. G
WARNING
Never depress the brake pedal continuously
while the vehicle is in motion, e.g. never cause
the brakes to rub by applying constant slight
pedal pressure. This causes the brake system
to overheat, increases the braking distance
and can lead to the brakes failing completely. G
WARNING
On no account should you attempt to draw the
vehicle/trailer combination out by increasing
speed. General information i
When towing atrailer, set the tyre pres-
sure on the rear axle of the towing vehicle
for am aximum load; see the tyre pressure
table in the fuel filler flap (Y page 321).
You will find installation dimensions and loads
in the "Technical data" section
(Y page 343).
The maximum permissible trailer drawbar
noseweight on the ball coupling is 75 kg.
However, the actual noseweight must not
exceed the value given on the trailer tow hitch
and trailer identification plates. The lowest
weight applies.
! Use anoseweight as close as possible to
the maximum permissible noseweight. Do
not use anoseweight of less than 50 kg,
otherwise the trailer may come loose.
Bear in mind that the payload and the rear
axle load are reduced by the actual nose-
weight.
Please note that when towing atrailer, PARK-
TRONIC (Y page 185) and parking guidance
(Y page 189) are only available with limita-
tions, or not at all.
i The height of the ball coupling changes
with the load of the vehicle. If necessary,
use atrailer with aheight-adjustable draw-
bar.
Driving tips i
Observe the notes on ESP ®
trailer stabi-
lisation (Y page 65).
In Germany, the maximum permissible speed
for vehicle/trailer combinations depends on
the type of trailer, and is either 80 km/h or
100 km/h. In some countries, higher maxi-
mum speeds are permissible for vehicle/
trailer combinations. Before beginning the
journey, check the trailer's documents to see
what the maximum permitted speed is.
For certain Mercedes-Ben zvehicles, the max-
imum permissible rear axle load is increased
when towing atrailer. Refer to the "Technical Trailer towing
205Driving and parking Z
Page 210 of 353

X
Pull out release wheel ;.
X Turn release wheel ;anti-clockwise until
the ball coupling releases and folds out
from under the rear bumper. Indicator
lamp :flashes. X
Pull the ball coupling in the direction of the
arrow until it engages in avertical position.
Indicator lamp :goes out. The power
socket folds down automatically.
The multifunction display shows the
Trailer hitch Check lock mech. mes-
sage until the ball coupling is engaged.
X Remove the protective cap from the ball
coupling and store it in asafe place.
X Make sure that the ball of the ball coupling
is clean and that, depending on the trailer
specification, it is greased or dry (without
grease) when used. Coupling up
atrailer G
WARNING
Do not disconnect atrailer with an engaged
overrun brake. Otherwise, your hand could
become trapped between the bumper and
trailer drawbar.
X Make sure that the transmission is in posi-
tion P.
X Apply the parking brake.
X Position the trailer level behind the vehicle.
X Couple up the trailer.
X Establish the electrical connection
between the vehicle and the trailer.
X Check that the trailer lighting system is
working. Decoupling
atrailer G
WARNING
As soon as yo uraise the trailer drawbar ,the
unladen vehicl erises slightly. Th evehicl ethen
lowers to driving level.
Make sure tha tnobody is in the vicinit yofthe
wheel arch or the underbody. You could oth-
erwise trap yourself or others. G
WARNING
The vehicle is lowered as soon as you discon-
nect the trailer cable. Make sure that nobody
is in the vicinit yofthe wheel arch or the
underbody. You could otherwise trap yourself
or others.
As soon as you decouple the trailer, the unla-
den vehicle rises slightly. Make sure that you
or others are not injured in the process.
! Do not disconnect atrailer with an
engaged overrun brake. Otherwise, your
vehicle could be damaged by the rebound-
ing of the overrun brake.
X Make sure that the transmission is in posi-
tion P.
X Apply the parking brake. Trailer towing
207Driving and parking Z
Page 216 of 353

!
Do not drive in the overrevving range.
Doing so will damage the engine.
The fuel supplyisi nterrupted to protect the
engine when the red band is reached. Outside temperatured
isplay
The outside temperature displayisint he mul-
tifunction display( Ypage 214). G
WARNING
At temperatures just above freezing point, the
street may be icy, especiallyinw ooded areas
or on bridges. If you do not adapty our driving
style to the conditions, the vehicle could skid.
For this reason, adapt your driving style and
speed to the weather conditions.
Changes in the outside temperature are dis-
playeda fterashort delay. Speedometer with segments
The segment sinthe speedometer indicate
which speed range is available.
Cruise control (Y page 169) activated:
The segment slight up from the stored speed
to the maximum speed.
Variable SPEEDTRONIC (Y page 180) activa-
ted:
The segment slight up from the start of the
scale to the selected limit speed.
DISTRONIC PLUS (Y page 171) activated:
One or two segment sinthe set speed range
light up.
DISTRONIC PLUS detect savehicle in front:
The segment sbetween the speed of the vehi-
cle in front and the stored speed light up. Operating the on-board computer
Overview The on-board computer is activated as soon
as you turn the key to position
1in the ignition
lock.
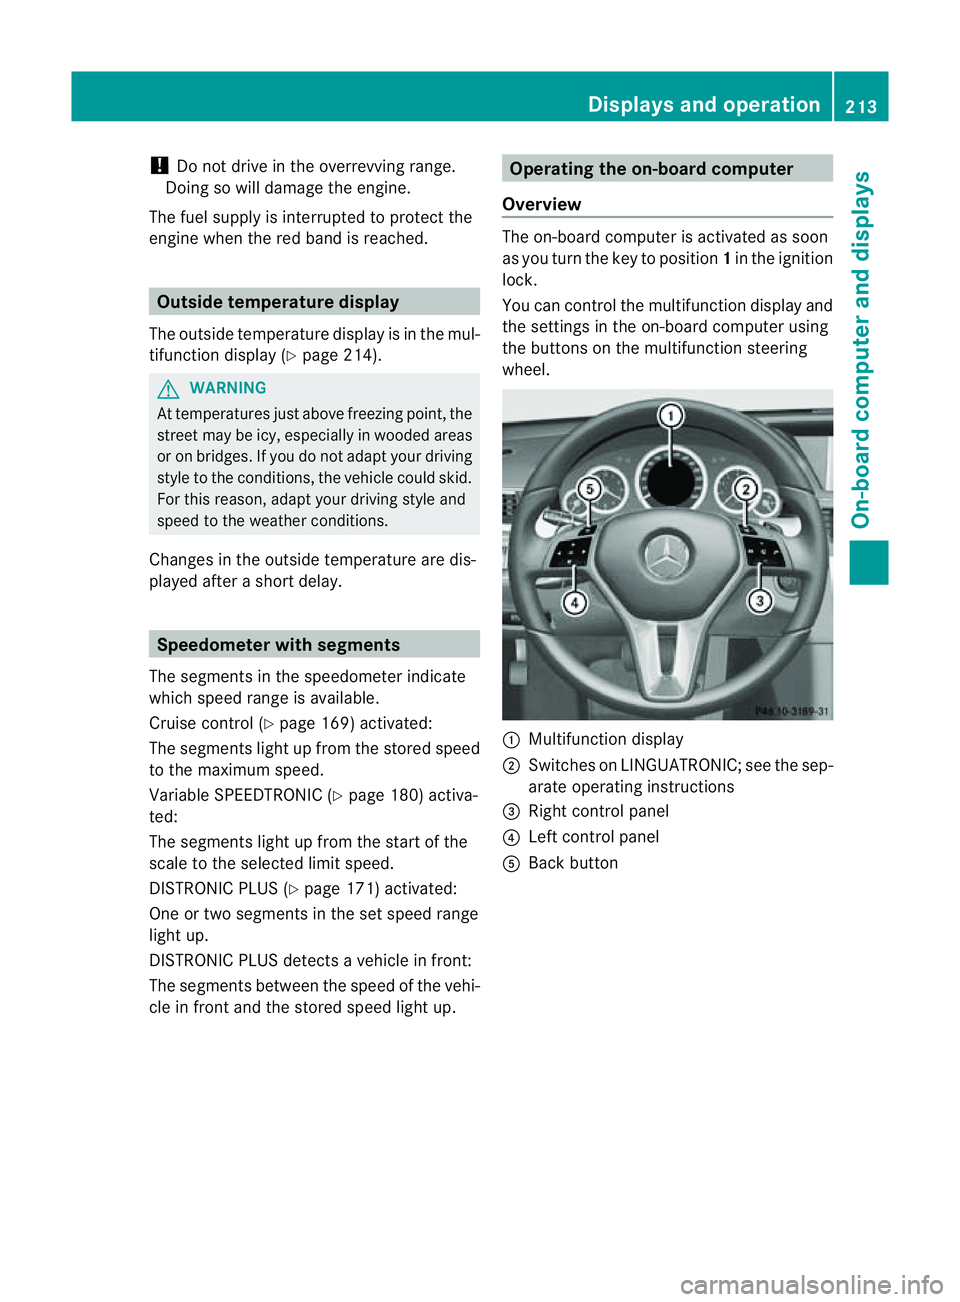
You can control the multifunction display and
the settings in the on-board computer using
the button sonthe multifunction steering
wheel. :
Multifunction display
; Switches on LINGUATRONIC; see the sep-
arate operating instructions
= Right control panel
? Left control panel
A Back button Displays and operation
213On-board computer and displays Z
Page 219 of 353

Menus and submenus
Menu overview
The number of menus show ndepends on the optional equipment in the vehicle. Function
:
Trip menu (Y
page 217) ;
Navi menu (navigation instructions) (Y
page 218)=
Audio menu (Y
page 219) ?
Tel menu (telephone) (Y
page 221)A
Assist. menu (assistance) (Y
page 222)B
Service menu (Y
page 224)
R calls up display messages ( Ypage 232)
R tyre pressure loss warning (Y page 322)
R ASSYST PLUS servic einterval display (Y page 284) C
Settings menu (Y
page 224) The
Audio ,
Navi and
Tel menus differ slightly in vehicles with an audio system and vehicles
with COMAND APS.T he examples given in this Owner's Manual apply to vehicles equipped
with COMAND APS. 216
Menus and submenusOn-board computer and displays
Page 226 of 353

X
Press =or; on the steerin gwheel
to select the Assist. menu.
X Press 9or: to select Speed Lim.
Asst. .
X Press a.
The multifunction display shows Speed
Limit Assist.
X Press :.
The curren tselection is displayed.
X To activate or deactivate: pressa.
If Speed Limit Assist is operational and the
message function is activated, the multifunc-
tion display shows the Äsymbol when the
ignition is switched on.
Showing the distance display This function is only available with DIS-
TRONIC PLUS.
X Press =or; on the steering wheel
to select the Assist. menu.
X Press the 9or: button to select
Distanc edisplay .
X Press a.
The DISTRONIC PLUS distanc edisplay
(Y page 178)a ppears in the multifunction
display.
Deactivating/activating ESP ®G
WARNING
If the ä warning lamp in the instrument
cluster flashes, proceed as follows:
R do not deactivat eESP®
under any circum-
stances.
R only depress the accelerator pedal as far as
necessary when pulling away.
R adapt your driving style to suit the prevail-
ing road and weather conditions.
Otherwise, the vehicle could skid.
ESP ®
cannot reduce the risk of an acciden tif
you drive to ofast. ESP ®
canno toverride the
laws of physics. Fo
rfurther information about ESP ®
,s ee
(Y page 64).
X Start th eengine.
X Press =or; on thesteerin gwheel
to select the Assist. menu.
X Press the 9or: buttontos elect
ESP .
X Press the abutton.
X To deactivate: pressaagain.
The å warning lamp in the instrument
cluster comes on. G
WARNING
If the å warning lamp in the instrument
cluster lights up when the engine is running,
ESP ®
is deactivated or is unavailabl edue to a
malfunction. The risk that your vehicle may
start to skid then increases in certain situa-
tions.
Always adapt your driving style to the prevail-
ing road and weather conditions.
X To activate: pressaagain.
The å warning lamp in the instrument
cluster goes out.
Activating/deactivating the PRE-SAFE ®
Brake PRE-SAFE
®
Brake is only available in vehicles
with DISTRONIC PLUS.
X Press =or; on the steerin gwheel
to select the Assist. menu.
X Press 9or: to select PreSafe Brake .
X Press the abutton.
The current selection is displayed.
X To activate/deactivate: pressa
again.
When PRE-SAFE ®
Brake (Y page 66) is acti-
vated, the multifunction display shows the
Ä symbol as long as the HOLD function is
not activated (Y page 184). Menus and submenus
223On-board computer and displays Z