2011 INFINITI QX56 headrest
[x] Cancel search: headrestPage 3400 of 5598

IP-10
< SYMPTOM DIAGNOSIS >
SQUEAK AND RATTLE TROUBLE DIAGNOSES
1. Trunk lid dumpers out of adjustment
2. Trunk lid striker out of adjustment
3. Trunk lid torsion bars knocking together
4. A loose license plate or bracket
Most of these incidents can be repaired by adjusting, securing, or insulating the item(s) or component(s) caus-
ing the noise.
SUNROOF/HEADLINING
Noises in the sunroof / headlining area can often be traced to one of the following items:
1. Sunroof lid, rail, linkage, or seals making a rattle or light knocking noise
2. Sunvisor shaft shaking in the holder
3. Front or rear windshield touching headlining and squeaking
Again, pressing on the components to stop the noise while duplicating the conditions can isolate most of these
incidents. Repairs usually consist of insulating with felt cloth tape.
SEATS
When isolating seat noise it is important to note t he position the seat is in and the load placed on the seat
when the noise occurs. These conditions should be duplic ated when verifying and isolating the cause of the
noise.
Causes of seat noise include:
1. Headrest rods and holder
2. A squeak between the seat pad cushion and frame
3. The rear seatback lock and bracket
These noises can be isolated by moving or pressing on the suspected components while duplicating the con-
ditions under which the noise occurs. Most of thes e incidents can be repaired by repositioning the component
or applying urethane tape to the contact area.
UNDERHOOD
Some interior noise may be caused by components under the hood or on the engine wall. The noise is then
transmitted into the passenger compartment.
Causes of transmitted underhood noise include:
1. Any component mounted to the engine wall
2. Components that pass through the engine wall
3. Engine wall mounts and connectors
4. Loose radiator mounting pins
5. Hood bumpers out of adjustment
6. Hood striker out of adjustment
These noises can be difficult to isolate since they cannot be reached from the interior of the vehicle. The best
method is to secure, move, or insulate one component at a time and test drive the vehicle. Also, engine RPM
or load can be changed to isolate the noise. Repairs can usually be made by moving, adjusting, securing, or
insulating the component causing the noise.
Revision: 2010 May2011 QX56
Page 3732 of 5598

SQUEAK AND RATTLE TROUBLE DIAGNOSESMIR-27
< SYMPTOM DIAGNOSIS >
C
DE
F
G H
I
J
K
M A
B
MIR
N
O P
Most of these incidents can be repaired by adjusting, securing or insulatingthe item(s) or component(s) caus-
ing the noise.
SUNROOF/HEADLINING
Noises in the sunroof/headlining area can often be traced to one of the following:
1. Sunroof lid, rail, linkage or seals making a rattle or light knockingnoise
2. Sunvisor shaft shaking in the holder
3. Front or rear windshield touching headlining and squeaking
Again, pressing on the components to stop the noise whil e duplicatingthe conditions can isolate most of these
incidents. Repairs usually consistof insulating with felt cloth tape.
SEATS
When isolating seat noise it's important to note the pos ition the seatis in and the load placed on the seat when
the noise is present. These conditionsshould be duplic ated when verifying and isolating the cause of the
noise.
Cause of seat noise include:
1. Headrest rods and holder
2. A squeak between the seat pad cushion and frame
3. The rear seatback lock and bracket
These noises can be isolated by moving or pressing on the suspectedcomponents while duplicating the condi-
tions under which the noise occurs. Most of these incidents can be repaired by repositioning the component
orapplying urethane tape to the contact area.
UNDERHOOD
Some interior noise may be caused by components under the hood or onthe engine wall. The noise is then
transmitted into the passenger compartment.
Causes of transmitted underhood noise include:
1. Any component mounted to the engine wall
2. Components that pass through the engine wall
3. Engine wall mounts and connectors
4. Loose radiator mounting pins
5. Hood bumpers out of adjustment
6. Hood striker out of adjustment
These noises can be difficult to isolate since they cannot be reached from the interior of the vehicle. The best
method is to secure, move or insulate one component at a time and test drive the vehicle. Also, engine RPM
or load can be changed to isolate the noise. Repairs c an usually be made by moving, adjusting, securing, or
insulating the component causing the noise.
Revision: 2010 May2011 QX56
Page 4243 of 5598

SQUEAK AND RATTLE TROUBLE DIAGNOSESRF-29
< SYMPTOM DIAGNOSIS >
C
DE
F
G H
I
J
L
M A
B
RF
N
O P
3. Trunk lid torsion bars knocking together
4. A loose license plate or bracket
Most of these incidents can be repaired by adjusting, se curing, or insulating the item(s) or component(s) caus-
ing the noise.
SUNROOF/HEADLINING
Noises in the sunroof / headlining area can of ten be traced to one of the following items:
1. Sunroof lid, rail, linkage, or seals making a rattle or light knocking noise
2. Sunvisor shaft shaking in the holder
3. Front or rear windshield touching headlining and squeaking
Again, pressing on the components to stop the noise while duplicating the conditions can isolate most of these
incidents. Repairs usually consist of insulating with felt cloth tape.
SEATS
When isolating seat noise it is important to note the position the seat is in and the load placed on the seat
when the noise occurs. These conditions should be duplic ated when verifying and isolating the cause of the
noise.
Causes of seat noise include:
1. Headrest rods and holder
2. A squeak between the seat pad cushion and frame
3. The rear seatback lock and bracket
These noises can be isolated by moving or pressing on the suspected components while duplicating the con-
ditions under which the noise occurs. Most of thes e incidents can be repaired by repositioning the component
or applying urethane tape to the contact area.
UNDERHOOD
Some interior noise may be caused by components under the hood or on the engine wall. The noise is then
transmitted into the passenger compartment.
Causes of transmitted underhood noise include:
1. Any component mounted to the engine wall
2. Components that pass through the engine wall
3. Engine wall mounts and connectors
4. Loose radiator mounting pins
5. Hood bumpers out of adjustment
6. Hood striker out of adjustment
These noises can be difficult to isolate since they cannot be reached from the interior of the vehicle. The best
method is to secure, move, or insulate one component at a time and test drive the vehicle. Also, engine RPM
or load can be changed to isolate the noise. Repairs c an usually be made by moving, adjusting, securing, or
insulating the component causing the noise.
Revision: 2010 May2011 QX56
Page 4462 of 5598

SE-3
C
DE
F
G H
I
K L
M A
B
SE
N
O P
CLIMATE CONTROLLED SEAT ACTIVATES
ONCE BUT STOPS IMMEDIATELY .............. ....
96
SEATBACK BLOWER MOTOR ............................ ....96
SEATBACK BLOWER MOTOR : Description .........96
SEATBACK BLOWER MOTOR : Diagnosis Pro-
cedure .....................................................................
96
SEAT CUSHION BLOWER MOTOR ..................... ....96
SEAT CUSHION BLOWER MOTOR : Description ....96
SEAT CUSHION BLOWER MOTOR : Diagnosis
Procedure ................................................................
96
SEAT SWITCH INDICATOR IS NOT ILLUMI-
NATED IN HEAT OR COOL POSITION ............
98
Diagnosis Procedure ........................................... ....98
SQUEAK AND RATTLE TROUBLE DIAG-
NOSES ...............................................................
99
Work Flow ........................................................... ....99
Inspection Procedure ............................................101
Diagnostic Worksheet ...........................................103
REMOVAL AND INSTALLATION .............105
FRONT SEAT ................................................. ..105
Exploded View .................................................... ..105
Removal and Installation .......................................112
SEATBACK ........................................................... ..114
SEATBACK : Disassembly and Assembly ............114
SEAT CUSHION .................................................... ..115
SEAT CUSHION : Disassembly and Assembly ....116
CLIMATE CONTROLLED SEAT UNIT ................. ..117
CLIMATE CONTROLLED SEAT UNIT : Disas-
sembly and Assembly ...........................................
117
HEADREST (WITH HEADREST DISPLAY ONLY) ..117
HEADREST (WITH HEADREST DISPLAY
ONLY) : Disassembly and Assembly ....................
117
SECOND SEAT ................................................120
Exploded View .................................................... ..120
Removal and Installation ..................................... ..125
SEATBACK ............................................................ ..126
SEATBACK : Disassembly and Assembly ............126
SEAT CUSHION .................................................... ..130
SEAT CUSHION : Disassembly and Assembly .....130
ARMREST .............................................................. ..133
ARMREST : Disassembly and Assembly ..............133
Adjustment .............................................................134
THIRD SEAT ...................................................137
Exploded View .......................................................137
Removal and Installation .......................................138
Disassembly and Assembly ...................................139
POWER SEAT SWITCH .................................141
Removal and Installation .......................................141
SECOND SEAT POWER UNLOCK SWITCH .142
Removal and Installation .......................................142
THIRD SEAT RECLINING SWITCH ...............143
Removal and Installation .......................................143
THIRD SEAT FOLD DOWN SWITCH .............144
Removal and Installation .......................................144
FRONT HEATED SEAT SWITCH ...................145
Removal and Installation .......................................145
SECOND HEATED SEAT SWITCH ................146
Removal and Installation .......................................146
CLIMATE CONTROLLED SEAT SWITCH .....147
Removal and Installation .......................................147
CLIMATE CONTROLLED SEAT BLOWER
FILTER ............................................................
148
SEAT CUSHION .................................................... ..148
SEAT CUSHION : Removal and Installation .........148
SEATBACK ............................................................ ..148
SEATBACK : Removal and Installation .................148
Revision: 2010 May2011 QX56
Page 4561 of 5598

SE-102
< SYMPTOM DIAGNOSIS >
SQUEAK AND RATTLE TROUBLE DIAGNOSES
Most of these incidents can be repaired by adjusting, securing or insulating the item(s) or component(s) caus-
ing the noise.
SUNROOF/HEADLINING
Noises in the sunroof/headlining area c an often be traced to one of the following:
1. Sunroof lid, rail, linkage or seals making a rattle or light knocking noise
2. Sunvisor shaft shaking in the holder
3. Front or rear windshield touching headlining and squeaking
Again, pressing on the components to stop the noise while duplicating the conditions can isolate most of these
incidents. Repairs usually consist of insulating with felt cloth tape.
SEATS
When isolating seat noise it's important to note the position the seats in and the load placed on the seat when
the noise occurs. These conditions should be duplicated when verifying and isolating the cause of the noise.
Cause of seat noise include:
1. Headrest rods and holder
2. A squeak between the seat pad cushion and frame
3. The rear seatback lock and bracket
These noises can be isolated by moving or pressing on the suspected components while duplicating the con-
ditions under which the noise occurs.Most of these incidents can be repaired by repositioning the component
or applying urethane tape to the contact area.
UNDERHOOD
Some interior noise may be caused by components under the hood or on the engine wall. The noise is then
transmitted into the passenger compartment.
Causes of transmitted underhood noise include:
1. Any component mounted to the engine wall
2. Components that pass through the engine wall
3. Engine wall mounts and connectors
4. Loose radiator mounting pins
5. Hood bumpers out of adjustment
6. Hood striker out of adjustment
These noises can be difficult to isolate since they cannot be reached from the interior of the vehicle. The best
method is to secure, move or insulate one component at a time and test drive the \
vehicle. Also, engine RPM
or load can be changed to isolate the noise. Repairs can usually be made by moving, adjusting, securing, or
insulating the component causing the noise.
Revision: 2010 May2011 QX56
Page 4565 of 5598

SE-106
< REMOVAL AND INSTALLATION >
FRONT SEAT
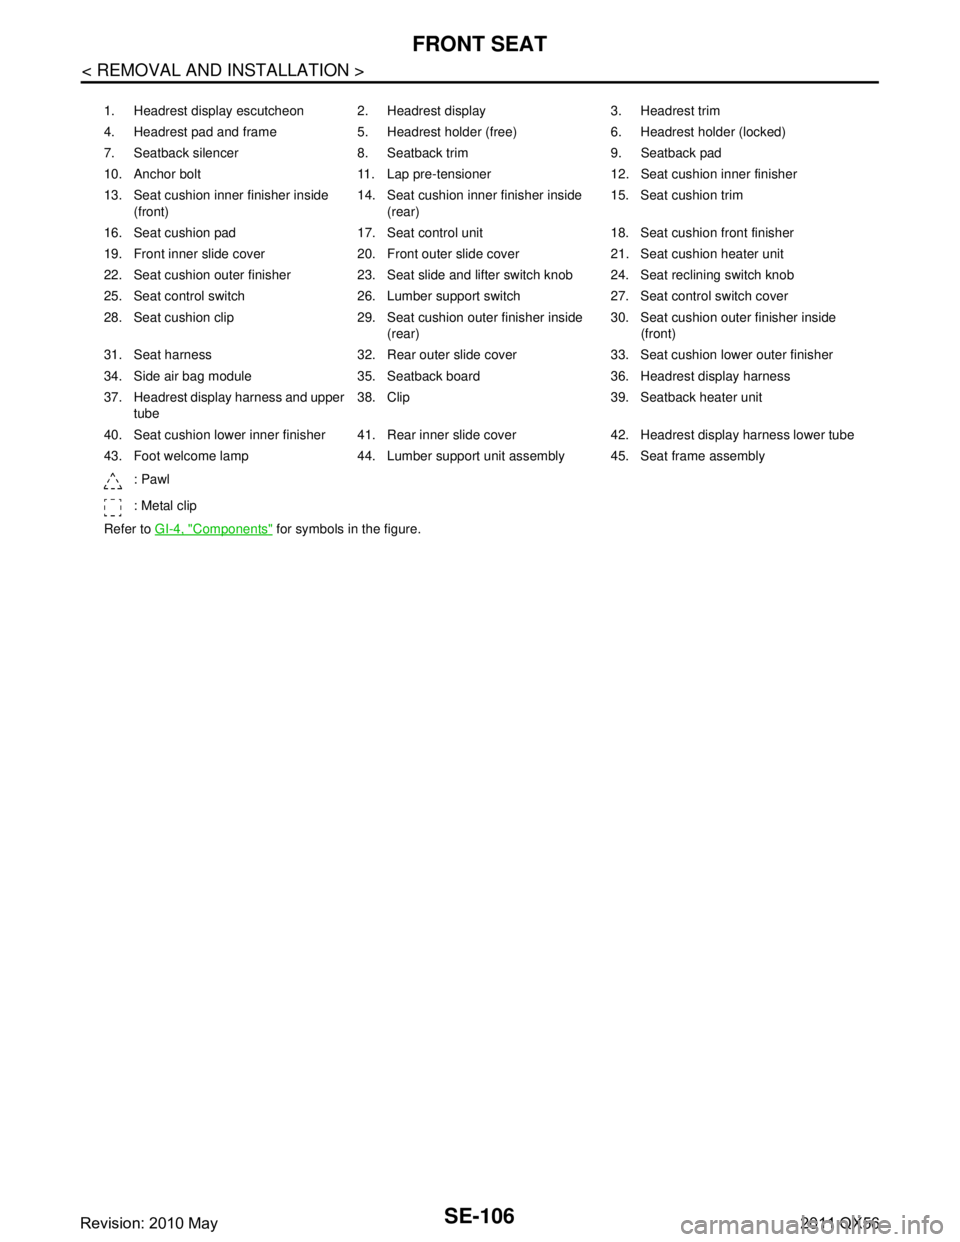
1. Headrest display escutcheon 2. Headrest display 3. Headrest trim
4. Headrest pad and frame 5. Headrest holder (free) 6. Headrest holder (locked)
7. Seatback silencer 8. Seatback trim 9. Seatback pad
10. Anchor bolt 11. Lap pre-tensioner 12. Seat cushion inner finisher
13. Seat cushion inner finisher inside (front) 14. Seat cushion inner finisher inside
(rear) 15. Seat cushion trim
16. Seat cushion pad 17. Seat control unit 18. Seat cushion front finisher
19. Front inner slide cover 20. Front outer slide cover 21. Seat cushion heater unit
22. Seat cushion outer finisher 23. Seat slide and lifter switch knob 24. Seat reclining switch knob
25. Seat control switch 26. Lumber support switch 27. Seat control switch cover
28. Seat cushion clip 29. Seat cushion outer finisher inside (rear)30. Seat cushion outer finisher inside
(front)
31. Seat harness 32. Rear outer slide cover 33. Seat cushion lower outer finisher
34. Side air bag module 35. Seatback board 36. Headrest display harness
37. Headrest display harness and upper tube 38. Clip 39. Seatback heater unit
40. Seat cushion lower inner finisher 41. Rear inner slide cover 42. Headrest display harness lower tube
43. Foot welcome lamp 44. Lumber support unit assembly 45. Seat frame assembly : Pawl
: Metal clip
Refer to GI-4, "
Components" for symbols in the figure.
Revision: 2010 May2011 QX56
Page 4566 of 5598

FRONT SEATSE-107
< REMOVAL AND INSTALLATION >
C
DE
F
G H
I
K L
M A
B
SE
N
O P
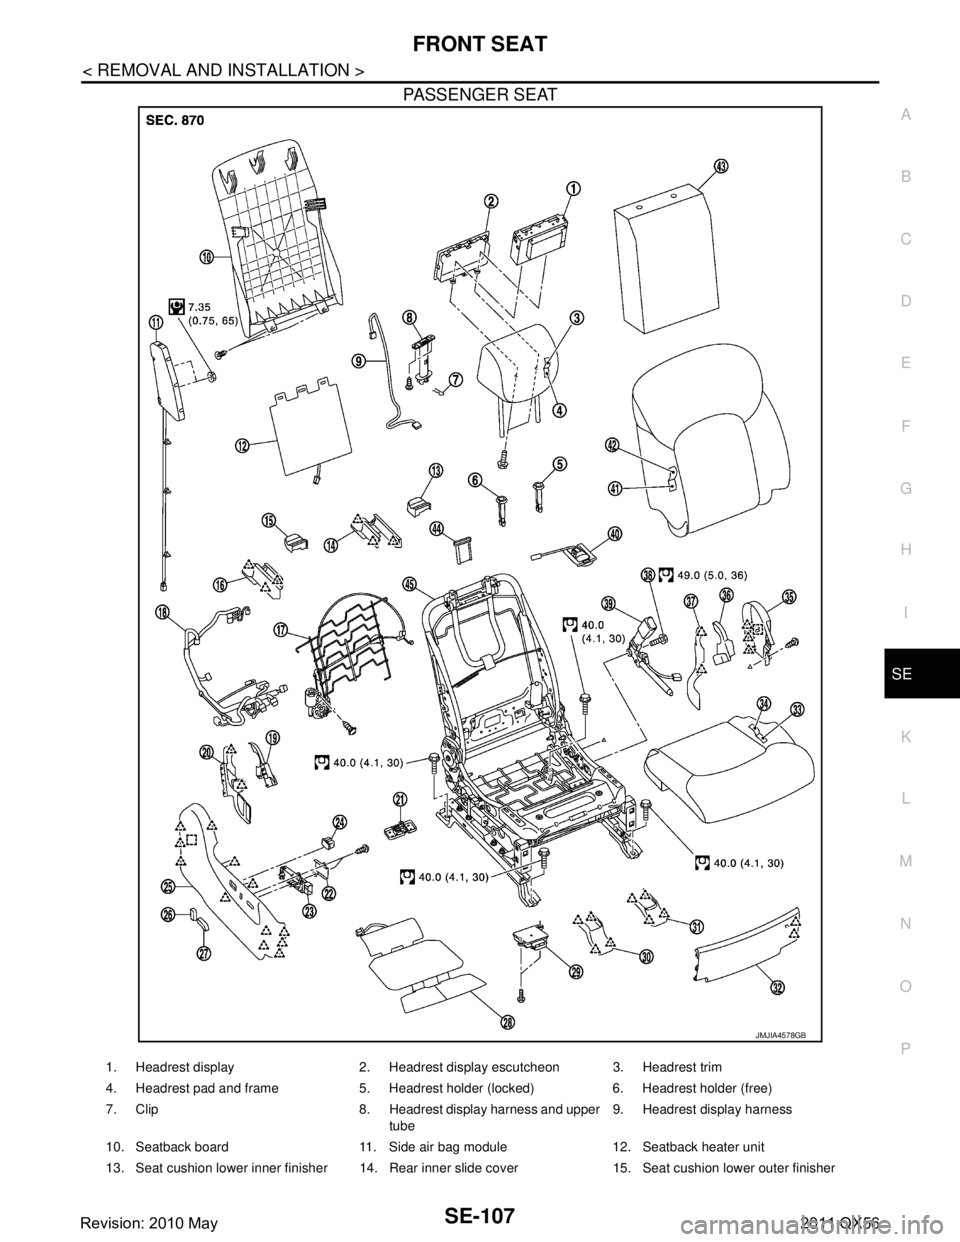
PASSENGER SEAT
JMJIA4578GB
1. Headrest display 2. Headrest display escutcheon 3. Headrest trim
4. Headrest pad and frame 5. Headrest holder (locked) 6. Headrest holder (free)
7. Clip 8. Headrest display harness and upper tube9. Headrest display harness
10. Seatback board 11. Side air bag module 12. Seatback heater unit
13. Seat cushion lower inner finisher 14. Rear inner slide cover 15. Seat cushion lower outer finisher
Revision: 2010 May2011 QX56
Page 4567 of 5598

SE-108
< REMOVAL AND INSTALLATION >
FRONT SEAT
CLIMATE CONTROLLED SEAT
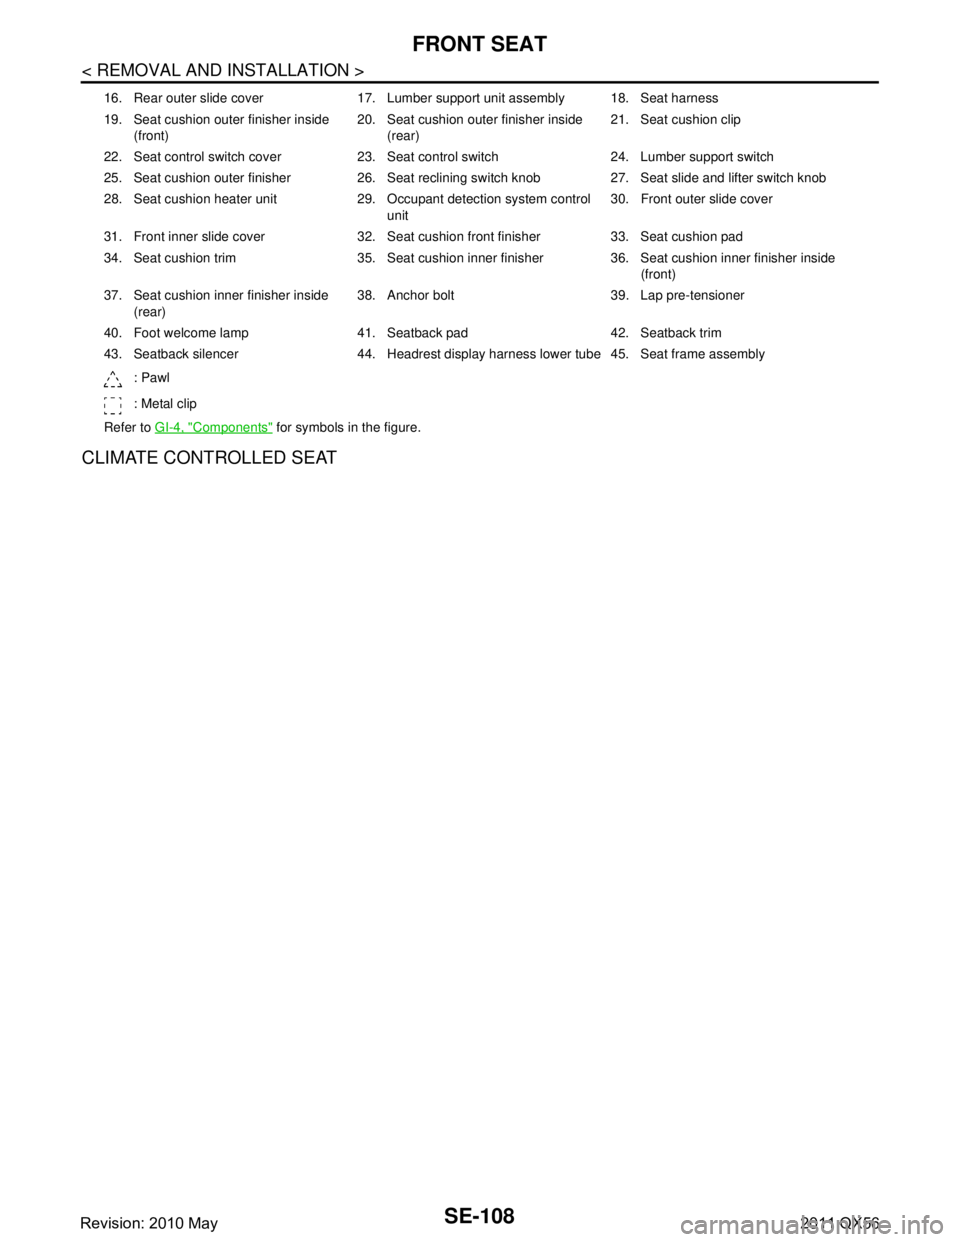
16. Rear outer slide cover 17. Lumber support unit assembly 18. Seat harness
19. Seat cushion outer finisher inside (front) 20. Seat cushion outer finisher inside
(rear) 21. Seat cushion clip
22. Seat control switch cover 23. Seat control switch 24. Lumber support switch
25. Seat cushion outer finisher 26. Seat reclining switch knob 27. Seat slide and lifter switch knob
28. Seat cushion heater unit 29. Occupant detection system control unit30. Front outer slide cover
31. Front inner slide cover 32. Seat cushion front finisher 33. Seat cushion pad
34. Seat cushion trim 35. Seat cushion inner finisher 36. Seat cushion inner finisher inside (front)
37. Seat cushion inner finisher inside (rear) 38. Anchor bolt 39. Lap pre-tensioner
40. Foot welcome lamp 41. Seatback pad 42. Seatback trim
43. Seatback silencer 44. Headrest display harness lower tube 45. Seat frame assembly : Pawl
: Metal clip
Refer to GI-4, "
Components" for symbols in the figure.
Revision: 2010 May2011 QX56