Page 2873 of 5598
EXT-18
< REMOVAL AND INSTALLATION >
REAR BUMPER
Bumper protector (LH and RH)
Bumper side reinforcement (LH and RH)
10. Remove energy absorber.
INSTALLATION
Note the following item, and then install in the reverse order of removal.
NOTE:
The following table shows the specified values for checking normal installation status.
Fitting adjustment cannot be performed.
JMKIA5455ZZ
Portion Clearance Surface height difference
Bumper fascia assembly –
Rear fender A – A0.0 – 1.0 mm
(0.000 – 0.039 in) (-0.7) – (+1.3) mm
[(-0.028) – (+0.051) in]
Bumper fascia assembly –
Rear combination lamp B – B0.3 – 3.0 mm
(0.012 – 0.118 in) —
Bumper fascia assembly –
Back door C – C2.8 – 6.1 mm
(0.110 – 0.240 in) —
Bumper fascia assembly –
Back door D – D3.8 – 7.8 mm
(0.150 – 0.307 in) —
Revision: 2010 May2011 QX56
Page 2928 of 5598
![INFINITI QX56 2011 Factory Service Manual
FAX-28
< REMOVAL AND INSTALLATION >[4WD]
FRONT DRIVE SHAFT
Inspection
INFOID:0000000006225406
INSPECTION AFTER REMOVAL
Move joint up/down, left/right, and in the axial directi ons. Check for motion INFINITI QX56 2011 Factory Service Manual
FAX-28
< REMOVAL AND INSTALLATION >[4WD]
FRONT DRIVE SHAFT
Inspection
INFOID:0000000006225406
INSPECTION AFTER REMOVAL
Move joint up/down, left/right, and in the axial directi ons. Check for motion](/manual-img/42/57033/w960_57033-2927.png)
FAX-28
< REMOVAL AND INSTALLATION >[4WD]
FRONT DRIVE SHAFT
Inspection
INFOID:0000000006225406
INSPECTION AFTER REMOVAL
Move joint up/down, left/right, and in the axial directi ons. Check for motion that is not smooth and for signifi-
cant looseness.
Check boot for cracks, damage, and leakage of grease.
Disassemble drive shaft and exchange malfunctioning part if there is a non-standard condition.
INSPECTION AFTER DISASSEMBLY
Shaft
Check shaft for runout, cracks, or ot her damage. Replace it if necessary.
Joint Sub-Assembly (Wheel Side)
Check the following items, replace the parts if necessary.
Joint sub-assembly for rough rotation and excessive axial looseness.
The inside of the joint sub-assembly for entry of foreign material.
Joint sub-assembly for compression scars, cra cks, and fractures inside of joint sub-assembly.
Replace joint sub-assembly if there are any non-standard conditions of components.
Housing (Final Drive side)
Replace housing if there is scratching or wear of housing roller contact surface.
INSPECTION AFTER INSTALLATION
1. Check wheel sensor harness for proper connection. Refer to BRC-134, "FRONT WHEEL SENSOR :
Exploded View".
2. Check the wheel alignment. Refer to FSU-7, "
Inspection".
3. Adjust neutral position of steering angle sensor. Refer to BRC-64, "
Work Procedure".
4. Adjust levelizer adjustment of height sensor. Refer to EXL-61, "
LEVELIZER ADJUSTMENT : Special
Repair Requirement".
SDIA1163J
Revision: 2010 May2011 QX56
Page 2943 of 5598

FSU-1
SUSPENSION
C
DF
G H
I
J
K L
M
SECTION FSU
A
B
FSU
N
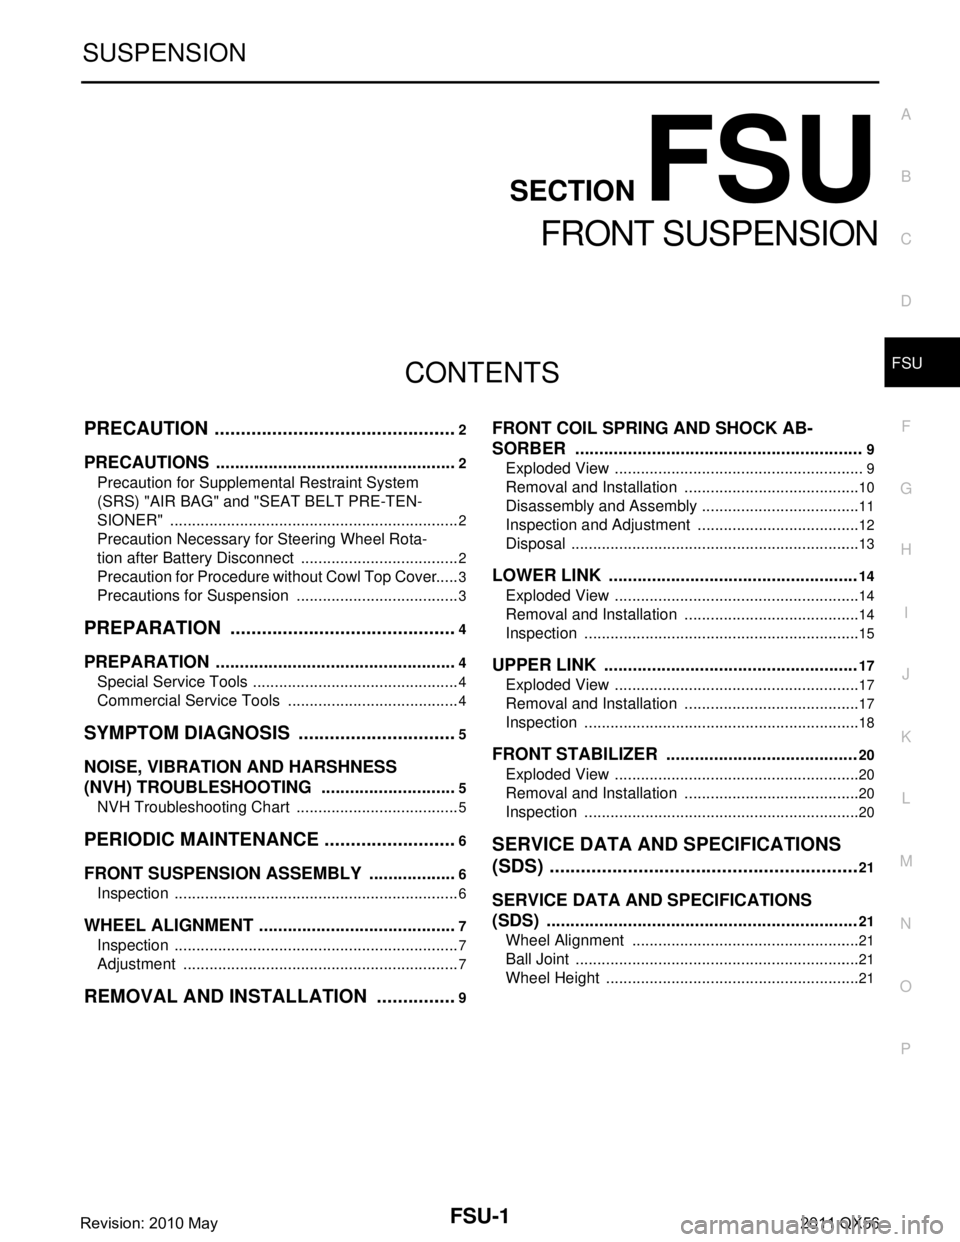
O PCONTENTS
FRONT SUSPENSION
PRECAUTION ................ ...............................2
PRECAUTIONS .............................................. .....2
Precaution for Supplemental Restraint System
(SRS) "AIR BAG" and "SEAT BELT PRE-TEN-
SIONER" ............................................................. ......
2
Precaution Necessary for Steering Wheel Rota-
tion after Battery Disconnect .....................................
2
Precaution for Procedure without Cowl Top Cover ......3
Precautions for Suspension ......................................3
PREPARATION ............................................4
PREPARATION .............................................. .....4
Special Service Tools .......................................... ......4
Commercial Service Tools ........................................4
SYMPTOM DIAGNOSIS ...............................5
NOISE, VIBRATION AND HARSHNESS
(NVH) TROUBLESHOOTING ........................ .....
5
NVH Troubleshooting Chart ................................ ......5
PERIODIC MAINTENANCE ..........................6
FRONT SUSPENSION ASSEMBLY .............. .....6
Inspection ............................................................ ......6
WHEEL ALIGNMENT ..........................................7
Inspection ............................................................ ......7
Adjustment ................................................................7
REMOVAL AND INSTALLATION ................9
FRONT COIL SPRING AND SHOCK AB-
SORBER ............................................................
9
Exploded View ..................................................... .....9
Removal and Installation .........................................10
Disassembly and Assembly .....................................11
Inspection and Adjustment ......................................12
Disposal ...................................................................13
LOWER LINK ....................................................14
Exploded View .........................................................14
Removal and Installation .........................................14
Inspection ................................................................15
UPPER LINK ......................... ............................17
Exploded View ..................................................... ....17
Removal and Installation .........................................17
Inspection ................................................................18
FRONT STABILIZER ........................................20
Exploded View .........................................................20
Removal and Installation .........................................20
Inspection ................................................................20
SERVICE DATA AND SPECIFICATIONS
(SDS) ............... .............................................
21
SERVICE DATA AND SPECIFICATIONS
(SDS) .................................................................
21
Wheel Alignment ................................................. ....21
Ball Joint ..................................................................21
Wheel Height ...........................................................21
Revision: 2010 May2011 QX56
Page 2949 of 5598

WHEEL ALIGNMENTFSU-7
< PERIODIC MAINTENANCE >
C
DF
G H
I
J
K L
M A
B
FSU
N
O P
WHEEL ALIGNMENT
InspectionINFOID:0000000006225640
DESCRIPTION
Measure wheel alignment under unladen conditions.
NOTE:
“Unladen conditions” means that fuel, engine coolant, and lubricant are full. Spare tire, jack, hand tools and
mats are in designated positions.
PRELIMINARY CHECK
Check the following:
Tires for improper air pressure and wear
Road wheels for runout: Refer to WT-64, "
Inspection".
Wheel bearing axial end play: Refer to FA X - 7 , "
Inspection" (2WD), FAX-16, "Inspection" (4WD).
Lower link and upper link ball joint axial end play: Refer to FSU-15, "
Inspection" and FSU-18, "Inspection".
Shock absorber operation.
Each mounting part of axle and suspension for looseness and deformation
Lower link for cracks, deformation and other damage
Vehicle height (posture)
GENERAL INFORMATION AND RECOMMENDATIONS
A four-wheel thrust alignment should be performed.
- This type of alignment is recomm ended for any NISSAN/INFINITI vehicle.
- The four-wheel “thrust” process helps ensure that t he vehicle is properly aligned and the steering wheel is
centered.
- The alignment rack itself should be capable of accepting any NISSAN/INFINITI vehicle.
- The rack should be checked to ensure that it is level.
Make sure the machine is properly calibrated.
- Your alignment equipment should be regularly ca librated in order to give correct information.
- Check with the manufacturer of your specific equi pment for their recommended Service/Calibration Sched-
ule.
ALIGNMENT PROCESS
IMPORTANT:
Use only the alignment specificati ons listed in this Service Manual.
When displaying the alignment settings, many alignment machines use “indicators”: (Green/red, plus or
minus, Go/No Go). Never use these indicators.
- The alignment specifications programmed into your machine that operate these indicators may not be cor-
rect.
- This may result in an ERROR.
Some newer alignment machines are equipped with an optional “Rolling Compensation” method to “com-
pensate” the sensors (alignment targets or head units). Never use this “Rolling Compensation” method.
- Use the “Jacking Compensation Method”. After installi ng the alignment targets or head units, raise the vehi-
cle and rotate the wheels 1/2 turn both ways.
- See Instructions in the alignment machine you're using for more information on this.
AdjustmentINFOID:0000000006225641
CAMBER, CASTER
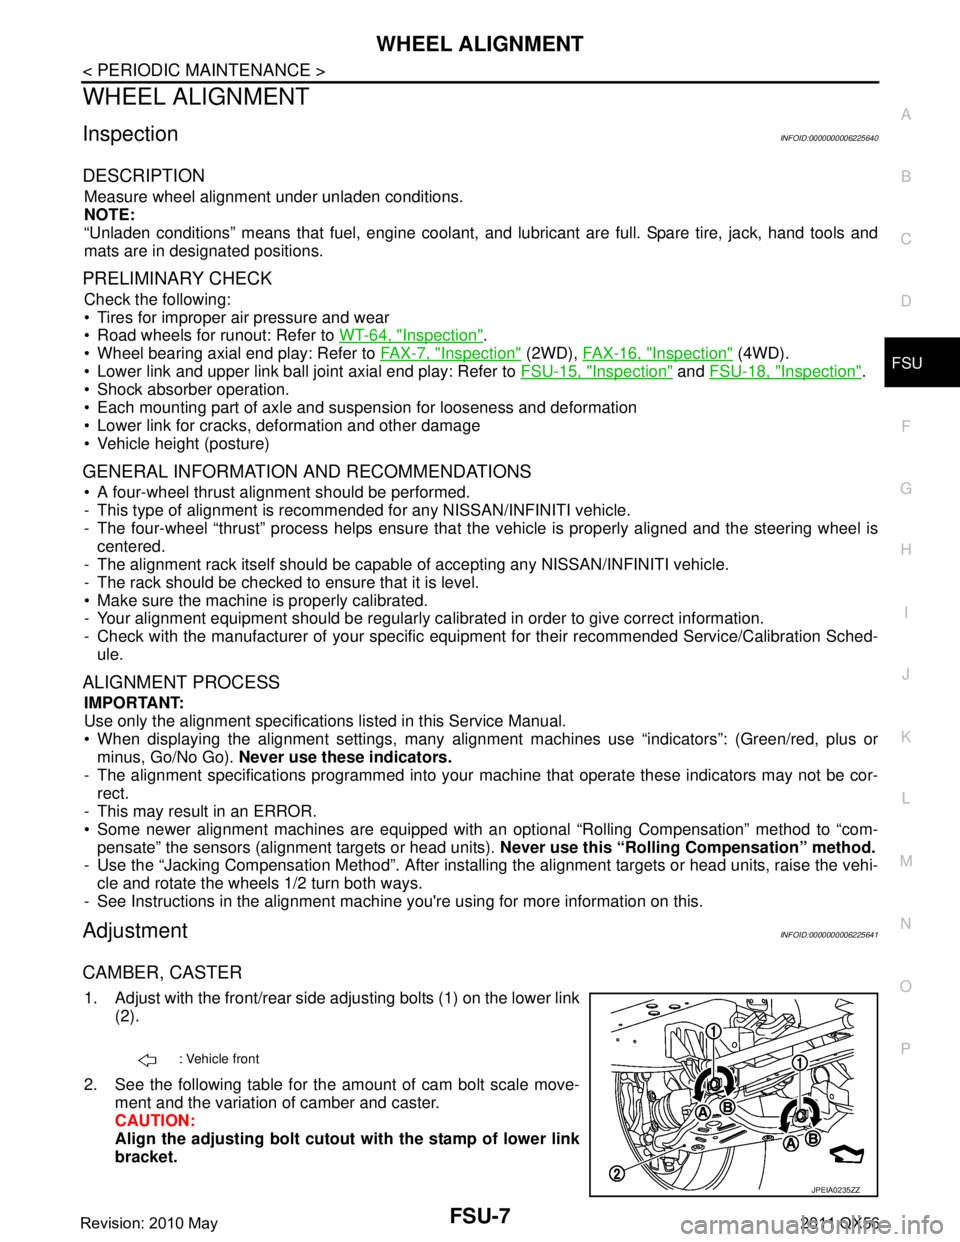
1. Adjust with the front/rear side adjusting bolts (1) on the lower link
(2).
2. See the following table for the amount of cam bolt scale move- ment and the variation of camber and caster.
CAUTION:
Align the adjusting bolt cutout with the stamp of lower link
bracket.
: Vehicle front
JPEIA0235ZZ
Revision: 2010 May2011 QX56
Page 2955 of 5598

FRONT COIL SPRING AND SHOCK ABSORBERFSU-13
< REMOVAL AND INSTALLATION >
C
DF
G H
I
J
K L
M A
B
FSU
N
O P
3. Adjust neutral position of steering angle sensor. Refer to BRC-64, "Work Procedure".
4. Adjust levelizer adjustment of height sensor. Refer to EXL-61, "
LEVELIZER ADJUSTMENT : Special
Repair Requirement".
ADJUSTMENT AFTER INSTALLATION (WITH HBMC)
Bleed air from the HBMC. Refer to SCS-18, "Work Procedure".
DisposalINFOID:0000000006225645
WITHOUT HBMC
1. Set shock absorber horizontally with the piston rod fully extended.
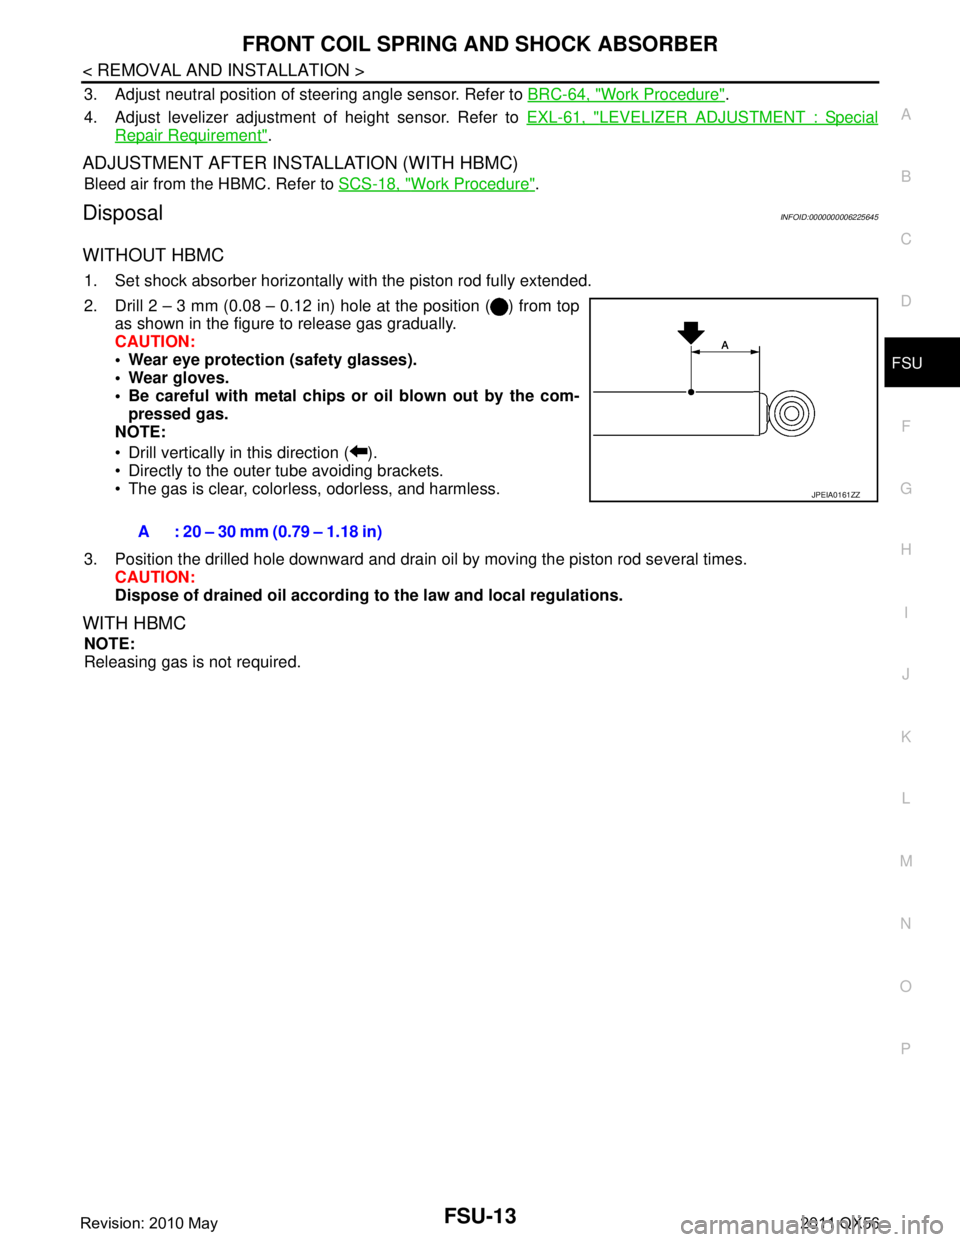
2. Drill 2 – 3 mm (0.08 – 0.12 in) hole at the position ( ) from top
as shown in the figure to release gas gradually.
CAUTION:
Wear eye protection (safety glasses).
Wear gloves.
Be careful with metal chips or oil blown out by the com-
pressed gas.
NOTE:
Drill vertically in this direction ( ).
Directly to the outer tube avoiding brackets.
The gas is clear, colorless, odorless, and harmless.
3. Position the drilled hole downward and drain oil by moving the piston rod several times. CAUTION:
Dispose of drained oil according to the law and local regulations.
WITH HBMC
NOTE:
Releasing gas is not required.A : 20 – 30 mm (0.79 – 1.18 in)
JPEIA0161ZZ
Revision: 2010 May2011 QX56
Page 2958 of 5598
FSU-16
< REMOVAL AND INSTALLATION >
LOWER LINK
2. Move tip of ball stud in axial direction to check for looseness.
If axial end play exceeds standard range, replace lower link assembly.
INSPECTION AFTER INSTALLATION
1. Check wheel sensor harness for proper connection. Refer to BRC-134, "FRONT WHEEL SENSOR :
Exploded View".
2. Check wheel alignment. Refer to FSU-7, "
Inspection".
3. Adjust neutral position of steering angle sensor. Refer to BRC-64, "
Work Procedure".
4. Adjust levelizer adjustment of height sensor. Refer to EXL-61, "
LEVELIZER ADJUSTMENT : Special
Repair Requirement".
Axial end play : Refer to
FSU-21, "
Ball Joint".
Revision: 2010 May2011 QX56
Page 2961 of 5598
UPPER LINKFSU-19
< REMOVAL AND INSTALLATION >
C
DF
G H
I
J
K L
M A
B
FSU
N
O P
4. Adjust levelizer adjustment of height sensor. Refer to EXL-61, "LEVELIZER ADJUSTMENT : Special
Repair Requirement".
Revision: 2010 May2011 QX56
Page 4206 of 5598
RAX-10
< REMOVAL AND INSTALLATION >
REAR WHEEL HUB AND HOUSING
4. Adjust levelizer adjustment of height sensor. Refer to EXL-61, "LEVELIZER ADJUSTMENT : Special
Repair Requirement".
5. Check standard vehicle height setting of vehicle height sensor. Refer to SCS-67, "
Work Procedure".
Revision: 2010 May2011 QX56