2011 Hyundai H-100 Truck steering wheel
[x] Cancel search: steering wheelPage 131 of 211
3 WHAT TO DO IN AN EMERGENCY
16
Tire Pressure Gauge (If Installed) You can easily check the tire pressure with a tire pressure gauge that is foundin OVM tool bag. Tires normally lose some air in day-to-day use, and you may have to add a few pounds of airperiodically and it is not usually a sign of a leaking tire, but of normal wear. Always check tire pressure when thetires are cold because tire pressure increases with temperature. To check the tire pressure, take the following steps;
1. Unscrew the inflation valve cap thatis located on the rim of the tire.
2. Press and hold the gauge against the tire valve. Some air will escape as you begin and more will escape if you don't press the gauge in firmly.
3. A firm non-leaking push will activate the gauge.
4. Read the tire pressure on the gauge
to know whether the tire pressure is low or high.
5. Adjust the tire pressures to the speci-
fied pressure. See page 8-3.
6. Reinstall the inflation valve cap.IF YOUR VEHICLE MUST BE TOWED
D080A02HR-GAT If your vehicle has to be towed, it should be done by your Hyundai dealeror a commercial tow truck service. This will help assure that your vehicle is not damaged in towing. Also, profes-sionals are generally aware of local laws governing towing. In any case, rather than risk damage to your car, itis suggested that you show this infor- mation to the tow truck operator. Be sure that a safety chain system is usedand that all local laws are observed. It is recommended that your vehicle be towed with a wheel lift and dollies orflatbed equipment with all the wheels off the ground.
! CAUTION:
o Your vehicle can be damaged if towed incorrectly!
o Be sure the transmission is in neutral.
o When the engine will not start, be
sure the steering is unlocked by placing the key in the "ACC" po- sition.
3. Stand approximately 2.5 m (8 ft)
away from the fire and squeeze the handle to discharge the extinguisher. If you release the handle, the dis- charge will stop.
4. Sweep the nozzle back and forth at the base of the fire. After the fireappears to be out, watch it carefullysince it may re-ignite.
Triangle Reflector Placed the triangle reflector on the road to warn oncoming vehicles during emergencies, such as when the ve- hicle is parked by the roadside due toany problems. First Aid Kit There are some items such as scis- sors, bandage and adhesive tape and etc. in the kit to give first aid to aninjured person.
Page 133 of 211
3 WHAT TO DO IN AN EMERGENCY
18IF YOU LOSE YOUR KEYS
D120A01A-AAT If you lose your keys, many Hyundai dealers can make you a new key if you have your key number. If you lock the keys inside your car andyou cannot obtain a new key, many Hyundai dealers can use special tools to open the door for you.
Nor should it be attempted if the wheels,drive train, axles, steering or brakesare damaged. Before towing, be sure the transmission is in neutral and the key in "ACC" (with the engine off) or inthe "ON" position (with the engine run- ning). A driver must be in the towed car to steer it and operate the brakes.
CAUTION:
If the car is being towed with all four wheels on the ground, it can be towed only from the front. Be sure that the transmission is in neutral. Do not tow at speeds greater than50 km/h (25 mph) and for more than 25 km (15 miles). Be sure the steering is unlocked byplacing the key in the "ACC" posi- tion. A driver must be in the towed vehicle to operate the steering andbrakes.
!
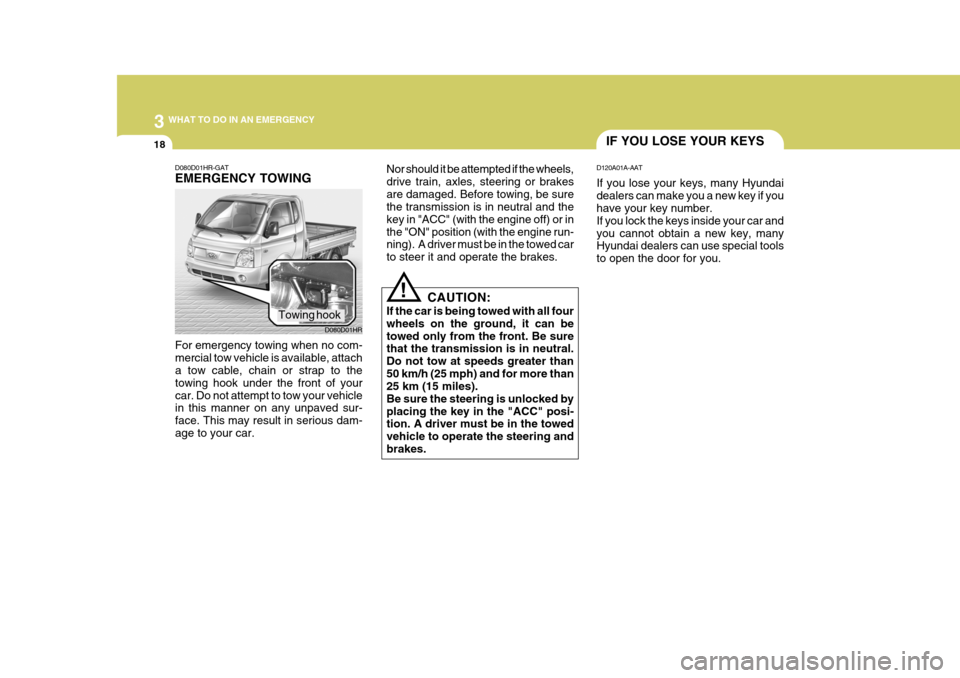
D080D01HR-GAT EMERGENCY TOWING
For emergency towing when no com- mercial tow vehicle is available, attach a tow cable, chain or strap to the towing hook under the front of yourcar. Do not attempt to tow your vehicle in this manner on any unpaved sur- face. This may result in serious dam-age to your car. D080D01HR
Towing hook
Page 138 of 211
4
CORROSION PREVENTION AND APPEARANCE CARE
5
4
CORROSION PREVENTION AND APPEARANCE CARE
5
E030D01A-AAT When to Wax Again You should polish and wax the car again when water no longer beads ona clean surface but spreads out over a larger area. E030E01A-AAT Maintaining Bumpers Special precautions must be observed to preserve the appearance of the bumpers on your Hyundai. They are:
o Be careful not to spill battery elec- trolyte or hydraulic brake fluid on the bumpers. If you do, wash it off im- mediately with clear water.
o Be gentle when cleaning the bumper surfaces. They are made of softplastic and the surface can be dam- aged if mistreated. Do not use abra-sive cleaners. Use warm water and mild soap or car-washing solution.
o Do not expose the bumpers to high temperatures. For example, if youhave your car repainted, do not leave the bumpers on the car if thecar is going to be placed in a high- temperature paint booth.
E030B01A-AAT Spot Cleaning Don't use gasoline, strong solvents or corrosive cleaning agents. These candamage the finish of the car. To re- move road tar, use turpentine on a clean, soft cloth or commercially avail-able bug and tar remover. Be gentle. To remove dead insects or tree sap, use warm water and mild soap or car-washing solution. Soak the spot and rub gently. If the paint has lost its luster, use a commercial car-cleaningpolish.
E030C01A-AAT Polishing and Waxing Always wash and dry the car before polishing or waxing or using a combi- nation cleaner and wax. Use a good quality commercial product and followthe manufacturer's directions on the container. Polish and wax the bright trim pieces as well as the paint.CLEANING THE INTERIOR
E040A01A-AAT To Clean the Vinyl Upholstery To clean the vinyl upholstery, first re- move loose dirt and dust with a vacuumcleaner. Then apply a solution of mild soap or detergent and water using a clean sponge or soft cloth. Allow this tostay on the surface to loosen the dirt, then wipe with a clean damp sponge or cloth. If all the dirt stains are not re-moved, repeat this procedure until the upholstery is clean. Do not use gaso- line, solvent, paint thinner or otherstrong cleaners. E040B01HR-AAT To Clean the Leather Upholstery
CAUTION:
When cleaning leather products (steering wheel, seats etc.), use neu- tral detergents or low alcohol con- tent solutions. If you use high alco-hol content solutions or acid/alka- line detergents, the color of the leather may fade or the surface may getstripped off.
!
o To prevent damage to the plastic
parts, do not clean with chemical solvents or strong detergents.
Page 144 of 211
5
VEHICLE MAINTENANCE REQUIREMENTS
5
50 40
I I I I I I I I I I
See Note (5)
KILOMETERS X 1000 MONTHS
NO.
1 2 3 4 5 6 7 8 9
1011 12 13 14 15 16 17 18 19 20 DESCRIPTION
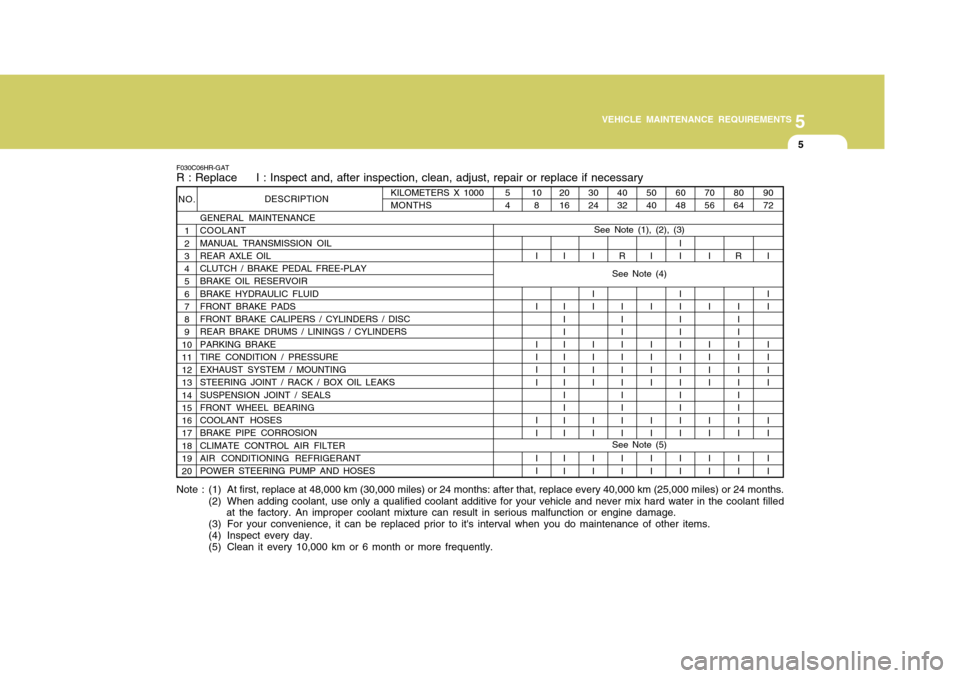
GENERAL MAINTENANCE COOLANT MANUAL TRANSMISSION OIL REAR AXLE OIL CLUTCH / BRAKE PEDAL FREE-PLAY BRAKE OIL RESERVOIR BRAKE HYDRAULIC FLUID FRONT BRAKE PADS FRONT BRAKE CALIPERS / CYLINDERS / DISC REAR BRAKE DRUMS / LININGS / CYLINDERS PARKING BRAKE TIRE CONDITION / PRESSURE EXHAUST SYSTEM / MOUNTING STEERING JOINT / RACK / BOX OIL LEAKS SUSPENSION JOINT / SEALS FRONT WHEEL BEARING COOLANT HOSES BRAKE PIPE CORROSION CLIMATE CONTROL AIR FILTER AIR CONDITIONING REFRIGERANT POWER STEERING PUMP AND HOSES
F030C06HR-GAT R : Replace I : Inspect and, after inspection, clean, adjust, repair or replace if necessary
80 64
R I I I I I I I I I I I I I 90 72
I I I I I I I I I I I
70 56
I I I I I I I I I I
60 48
II I I I I I I I I I I I I I I
40 32
R I I I I I I I I I I I I I
30 24
I I I I I I I I I I I
20 16
I I I I I I I I I I I I I I108
I I I I I I I I I I
54
See Note (1), (2), (3)
Note : (1) At first, replace at 48,000 km (30,000 miles) or 24 months: after that, replace every 40,000 km (25,000 miles) or 24 m onths.
(2) When adding coolant, use only a qualified coolant additive for your vehicle and never mix hard water in the coolant filled at the factory. An improper coolant mixture can result in serious malfunction or engine damage.
(3) For your convenience, it can be replaced prior to it's interval when you do maintenance of other items.
(4) Inspect every day.
(5) Clean it every 10,000 km or 6 month or more frequently.
See Note (4)
Page 146 of 211
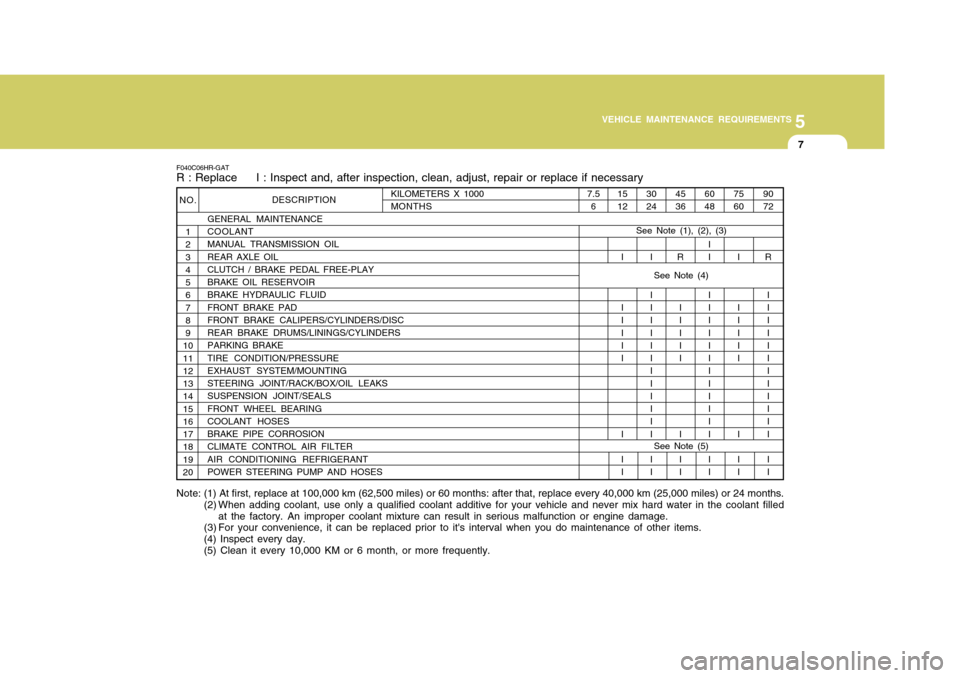
5
VEHICLE MAINTENANCE REQUIREMENTS
7
45 36
R I I I I I I I I
15 12
I I I I I I I I I
F040C06HR-GAT R : Replace I : Inspect and, after inspection, clean, adjust, repair or replace if necessary
KILOMETERS X 1000 MONTHS
NO.
1 2 3 4 5 6 7 8 9
1011 12 13 14 15 16 17 18 19 20 DESCRIPTION
GENERAL MAINTENANCE COOLANT MANUAL TRANSMISSION OIL REAR AXLE OIL CLUTCH / BRAKE PEDAL FREE-PLAY BRAKE OIL RESERVOIR BRAKE HYDRAULIC FLUID FRONT BRAKE PAD FRONT BRAKE CALIPERS/CYLINDERS/DISC REAR BRAKE DRUMS/LININGS/CYLINDERS PARKING BRAKE TIRE CONDITION/PRESSURE EXHAUST SYSTEM/MOUNTING STEERING JOINT/RACK/BOX/OIL LEAKS SUSPENSION JOINT/SEALS FRONT WHEEL BEARING COOLANT HOSES BRAKE PIPE CORROSION CLIMATE CONTROL AIR FILTER AIR CONDITIONING REFRIGERANT POWER STEERING PUMP AND HOSES
75 60
I I I I I I I I I 90 72
R II I I I I I I I I I I I I
60 48
II I I I I I I I I I I I I I I
30 24
I I I I I I I I I I I I I I I
7.5
6
See Note (1), (2), (3)
Note: (1) At first, replace at 100,000 km (62,500 miles) or 60 months: after that, replace every 40,000 km (25,000 miles) or 24 months.
(2) When adding coolant, use only a qualified coolant additive for your vehicle and never mix hard water in the coolant filled at the factory. An improper coolant mixture can result in serious malfunction or engine damage.
(3) For your convenience, it can be replaced prior to it's interval when you do maintenance of other items. (4) Inspect every day. (5) Clean it every 10,000 KM or 6 month, or more frequently.
See Note (4) See Note (5)
Page 150 of 211
5
VEHICLE MAINTENANCE REQUIREMENTS
11
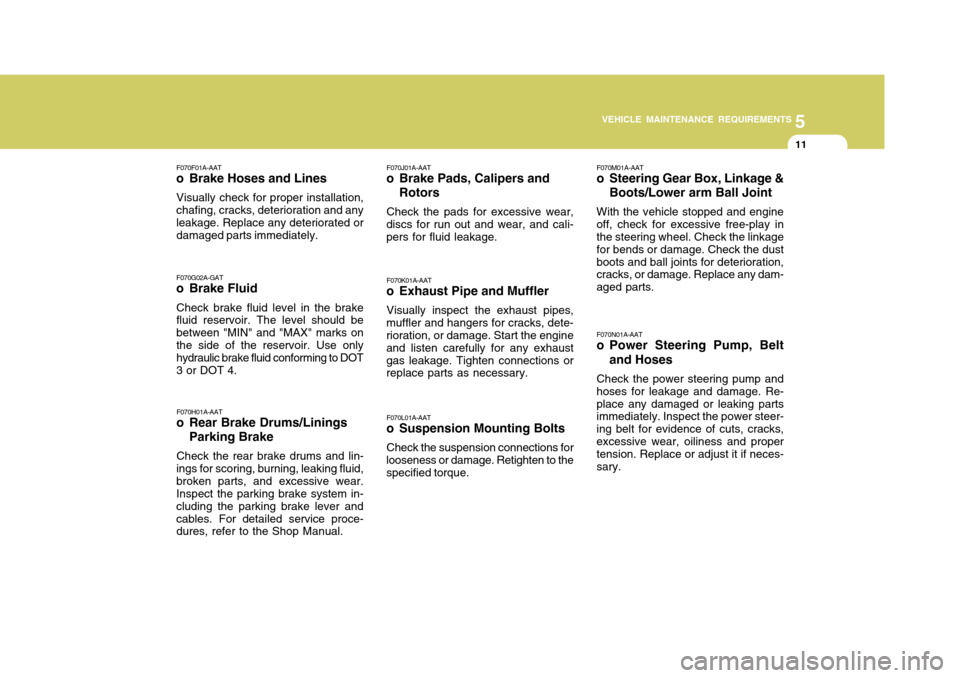
F070F01A-AAT
o Brake Hoses and Lines
Visually check for proper installation, chafing, cracks, deterioration and any leakage. Replace any deteriorated or damaged parts immediately. F070G02A-GAT
o Brake Fluid
Check brake fluid level in the brake fluid reservoir. The level should be between "MIN" and "MAX" marks on the side of the reservoir. Use only hydraulic brake fluid conforming to DOT3 or DOT 4.
F070L01A-AAT
o Suspension Mounting Bolts
Check the suspension connections for
looseness or damage. Retighten to thespecified torque. F070M01A-AAT
o Steering Gear Box, Linkage &
Boots/Lower arm Ball Joint
With the vehicle stopped and engine off, check for excessive free-play in the steering wheel. Check the linkage for bends or damage. Check the dustboots and ball joints for deterioration, cracks, or damage. Replace any dam- aged parts. F070N01A-AAT
o Power Steering Pump, Belt and Hoses
Check the power steering pump and hoses for leakage and damage. Re-place any damaged or leaking parts immediately. Inspect the power steer- ing belt for evidence of cuts, cracks,excessive wear, oiliness and proper tension. Replace or adjust it if neces- sary.
F070J01A-AAT
o Brake Pads, Calipers and
Rotors
Check the pads for excessive wear,
discs for run out and wear, and cali- pers for fluid leakage.
F070K01A-AAT
o Exhaust Pipe and Muffler
Visually inspect the exhaust pipes,
muffler and hangers for cracks, dete-rioration, or damage. Start the engine and listen carefully for any exhaustgas leakage. Tighten connections or replace parts as necessary.
F070H01A-AAT
o Rear Brake Drums/Linings
Parking Brake
Check the rear brake drums and lin-
ings for scoring, burning, leaking fluid, broken parts, and excessive wear. Inspect the parking brake system in- cluding the parking brake lever andcables. For detailed service proce- dures, refer to the Shop Manual.
Page 156 of 211
6
DO-IT-YOURSELF MAINTENANCE
5
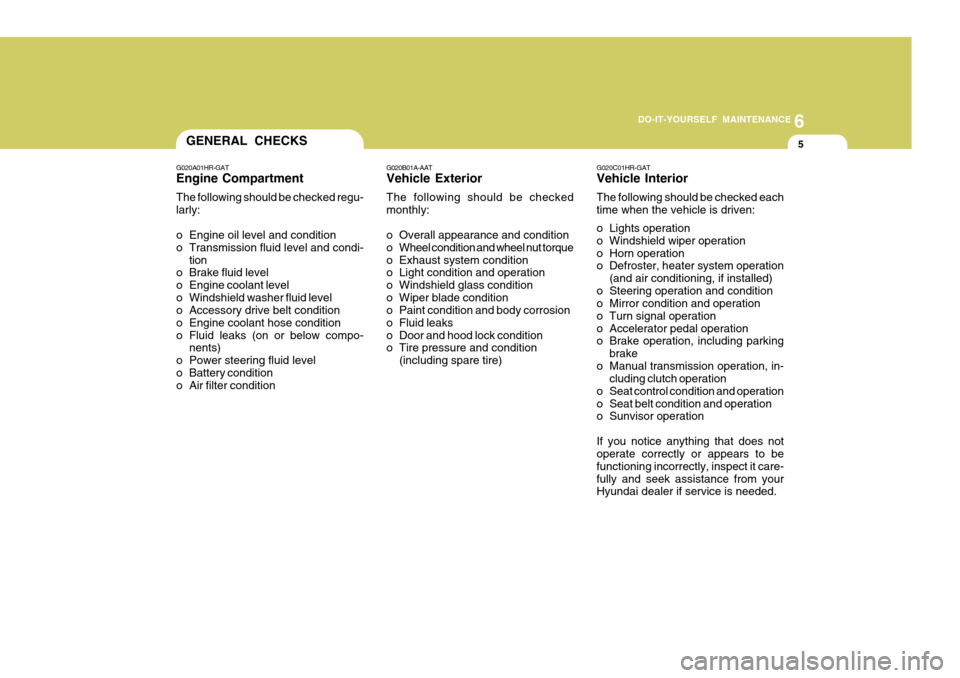
G020A01HR-GAT Engine Compartment The following should be checked regu- larly:
o Engine oil level and condition
o Transmission fluid level and condi-
tion
o Brake fluid level
o Engine coolant level
o Windshield washer fluid level
o Accessory drive belt condition
o Engine coolant hose condition
o Fluid leaks (on or below compo- nents)
o Power steering fluid level
o Battery condition
o Air filter condition G020C01HR-GAT Vehicle Interior The following should be checked each time when the vehicle is driven:
o Lights operation
o Windshield wiper operation
o Horn operation
o Defroster, heater system operation
(and air conditioning, if installed)
o Steering operation and condition
o Mirror condition and operation
o Turn signal operation
o Accelerator pedal operation
o Brake operation, including parking
brake
o Manual transmission operation, in- cluding clutch operation
o Seat control condition and operation
o Seat belt condition and operation
o Sunvisor operation If you notice anything that does not operate correctly or appears to be functioning incorrectly, inspect it care-fully and seek assistance from your Hyundai dealer if service is needed.
G020B01A-AAT Vehicle Exterior The following should be checked monthly:
o Overall appearance and condition
o Wheel condition and wheel nut torque
o Exhaust system condition
o Light condition and operation
o Windshield glass condition
o Wiper blade condition
o Paint condition and body corrosion
o Fluid leaks
o Door and hood lock condition
o Tire pressure and condition
(including spare tire)
GENERAL CHECKS
Page 171 of 211
6 DO-IT-YOURSELF MAINTENANCE
20
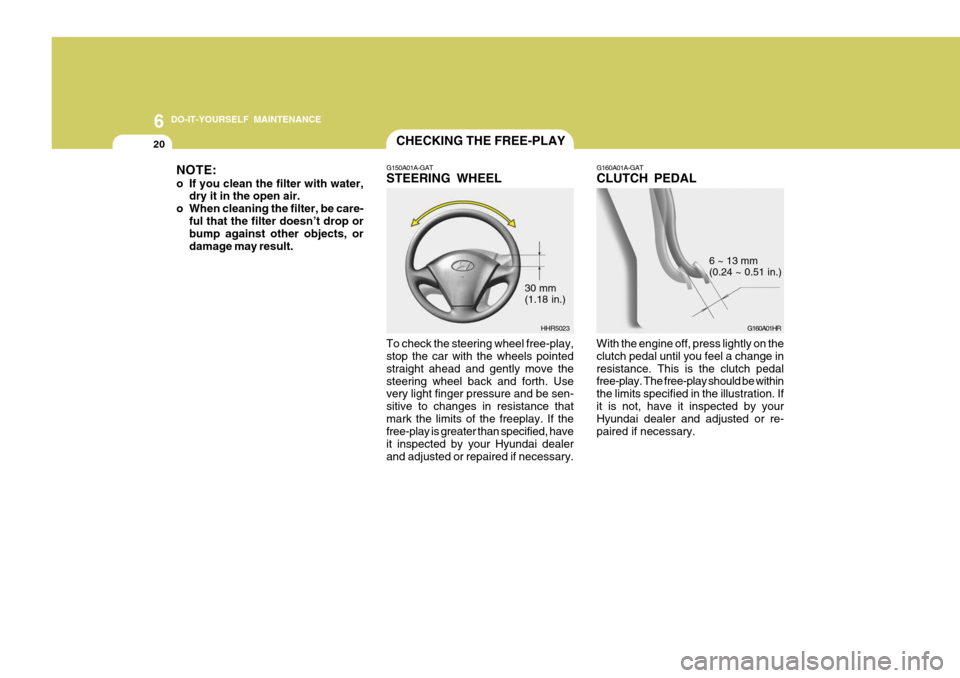
G160A01A-GAT CLUTCH PEDAL
G160A01HR
6 ~ 13 mm (0.24 ~ 0.51 in.)
With the engine off, press lightly on the clutch pedal until you feel a change inresistance. This is the clutch pedal free-play. The free-play should be within the limits specified in the illustration. Ifit is not, have it inspected by your Hyundai dealer and adjusted or re- paired if necessary.
CHECKING THE FREE-PLAY
G150A01A-GAT STEERING WHEEL To check the steering wheel free-play, stop the car with the wheels pointed straight ahead and gently move thesteering wheel back and forth. Use very light finger pressure and be sen- sitive to changes in resistance thatmark the limits of the freeplay. If the free-play is greater than specified, have it inspected by your Hyundai dealerand adjusted or repaired if necessary. HHR5023
30 mm (1.18 in.)
NOTE:
o If you clean the filter with water,
dry it in the open air.
o When cleaning the filter, be care- ful that the filter doesn’t drop or bump against other objects, or damage may result.