Page 201 of 286

3. Remove the oil filter and let theremaining oil drain. A special
wrench (available from your
dealer) is required.
Make sure the oil filter gasket is
not stuck to the engine block. If it
is, remove it before installing a
new oil filter. 4. Install a new oil filter according to
the instructions that come with it.
Make sure to clean off any dirt and
dust on the connecting surface of a
new oil filter.
5. Put a new washer on the drain bolt, then reinstall the drain bolt.
Tighten the drain bolt to:
33 lbf·ft (45 N·m, 4.5 kgf·m)
6. Refill the engine with the recommended oil.
Engine oil change capacity
(including filter):
4.4 US qt (4.2 L)
7. Replace the engine oil fill cap. Start the engine. The oil pressure
indicator should go out within 5
seconds. If it does not, turn off the
engine, and check your work.
8. Let the engine run for several minutes, then check the drain bolt
and oil filter for leaks. 9. Turn off the engine and let it sit for
several minutes, then check the oil
level on the dipstick. If necessary,
add more oil.
Improper disposal of engine oil can be
harmful to the environment. If you
change your own oil, please dispose of
the used oil properly. Put it in a sealed
container, and take it to a recycling
center. Do not discard it in a trash bin
or dump it on the ground.
OIL FILTER
Changing the Engine Oil and Filter
195
Maintenance
10/08/06 08:34:41 11 ELEMENT MMC North America Owner's Man 50 31SCV680 enu
Page 202 of 286

Adding Engine CoolantIf the coolant level in the reserve
tank is at or below the MIN line, add
coolant to bring it up to the MAX
line. Inspect the cooling system for
leaks.Always use Honda Long-life Anti-
freeze/Coolant Type 2. This coolant
is pre-mixed with 50 percent
antifreeze and 50 percent distilled
water. Never add straight antifreeze
or plain water.
If Honda antifreeze/coolant is not
available, you may use another
major-brand non-silicate coolant as a
temporary replacement. Make sure it
is a high-quality coolant
recommended for aluminum
engines. Continued use of any non-
Honda coolant can result in
corrosion, causing the cooling
system to malfunction or fail. Have
the cooling system flushed and
refilled with Honda antifreeze/
coolant as soon as possible.If the reserve tank is completely
empty, you should also check the
coolant level in the radiator.
Removing the radiator cap
while the engine is hot can
cause the coolant to spray out,
seriously scalding you.
Always let the engine and
radiator cool down before
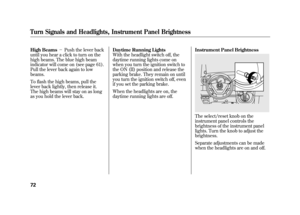
removing the radiator cap.
RESERVE TANK
Engine Coolant19610/08/06 08:34:41 11 ELEMENT MMC North America Owner's Man 50 31SCV680 enu
Page 203 of 286

1. Make sure the engine and radiatorare cool.
2. Relieve any pressure in the cooling system by turning the radiator cap
counterclockwise, without
pressing down.
3. Remove the radiator cap by pushing down and turning
counterclockwise. 4. The coolant level should be up to
the base of the filler neck. Add
coolant if it is low.
Pour the coolant slowly and
carefully so you do not spill any.
Clean up any spill immediately; it
could damage components in the
engine compartment.
5. Put the radiator cap back on and tighten it fully.
6. Pour coolant into the reserve tank. Fill it to halfway between the MAX
and MIN marks. Put the cap back
on the reserve tank.
Do not add any rust inhibitors or
other additives to your vehicle's
cooling system. They may not be
compatible with the coolant or
engine components. Windshield Washers
Check the fluid level in the
windshield washer reservoir at least
monthly during normal use.
Check the reservoir's fluid level by
removing the cap and looking at the
level gauge attached to the cap.
RADIATOR CAP
LEVEL GAUGE
CONTINUED
Engine Coolant, Windshield Washers
197
Maintenance
10/08/06 08:34:41 11 ELEMENT MMC North America Owner's Man 50 31SCV680 enu
Page 204 of 286

Fill the reservoir with a good-quality
windshield washer fluid. This
increases the cleaning capability and
prevents freezing in cold weather.
When you refill the reservoir, clean
the edges of the windshield wiper
blades with windshield washer fluid
on a clean cloth. This will help to
condition them.Do not use engine antifreeze or a
vinegar/water solution in the
windshield washer reservoir. Antifreeze
can damage your vehicle's paint, while
a vinegar/water solution can damage
the windshield washer pump. Use only
commercially-available windshield
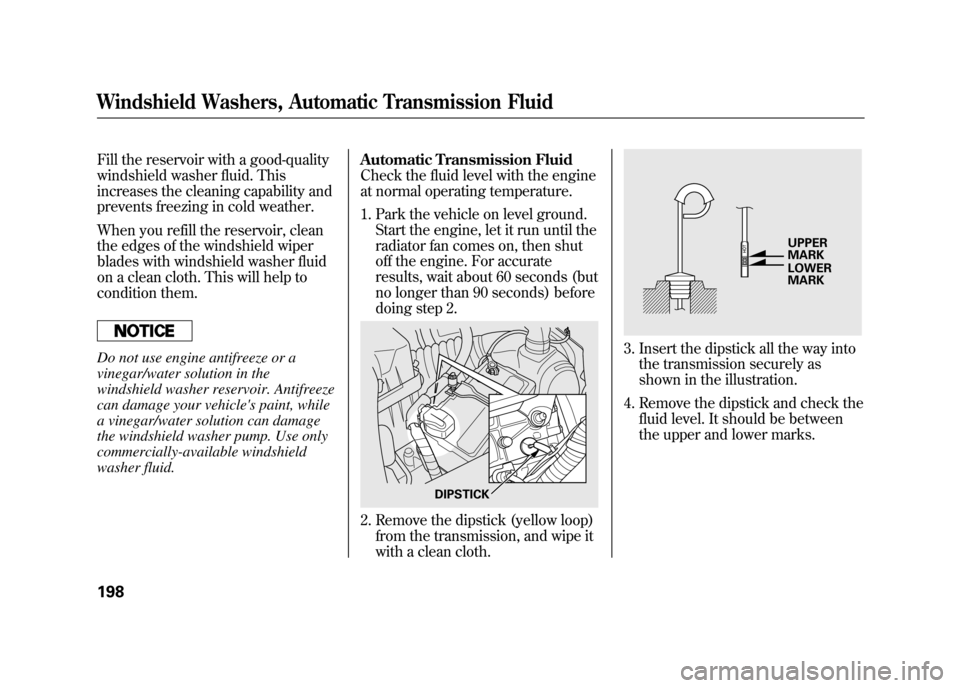
washer fluid.Automatic Transmission Fluid
Check the fluid level with the engine
at normal operating temperature.
1. Park the vehicle on level ground.
Start the engine, let it run until the
radiator fan comes on, then shut
off the engine. For accurate
results, wait about 60 seconds (but
no longer than 90 seconds) before
doing step 2.
2. Remove the dipstick (yellow loop)
from the transmission, and wipe it
with a clean cloth.
3. Insert the dipstick all the way intothe transmission securely as
shown in the illustration.
4. Remove the dipstick and check the fluid level. It should be between
the upper and lower marks.
DIPSTICK
UPPER
MARK
LOWER
MARK
Windshield Washers, Automatic Transmission Fluid19810/08/06 08:34:41 11 ELEMENT MMC North America Owner's Man 50 31SCV680 enu
Page 205 of 286

5. If the level is below the lowermark, add fluid into the dipstick
hole to bring it to the level
between the upper and lower
marks.
Pour the fluid slowly and carefully
so you do not spill any. Clean up
any spill immediately; it could
damage components in the engine
compartment.
Always use Honda ATF DW-1
(automatic transmission fluid).
Use only Honda ATF DW-1 (automatic
transmission fluid). Do not mix with
other transmission fluids.
Using transmission fluid other than
Honda ATF DW-1 may cause
deterioration in transmission operation
and durability, and could result in
damage to the transmission.
Damage resulting from the use of
transmission fluid other than Honda
ATF DW-1 is not covered by the Honda
new vehicle warranty.
6. Insert the dipstick all the way backinto the transmission securely as
shown in the illustration.
The transmission should be drained
and refilled with new fluid according
to the Maintenance Minder ™(see
page 185).
If you are not sure how to add fluid,
contact your dealer. Brake Fluid
Check the fluid level in the brake
fluid reservoir monthly.
Independent of the Maintenance
Minder display, replace the brake
fluid every 3 years.
Always use Honda Heavy Duty
Brake Fluid DOT 3. If it is not
available, you should use only DOT 3
or DOT 4 fluid, from a sealed
container, as a temporary
replacement.
Using any non-Honda brake fluid can
cause corrosion and decrease the life
of the system. Have the brake
system flushed and refilled with
Honda Heavy Duty Brake Fluid DOT
3 as soon as possible.
Brake fluid marked DOT 5 is not
compatible with your vehicle's
braking system and can cause
extensive damage.
CONTINUED
Automatic Transmission Fluid, Brake Fluid
199
Maintenance
10/08/06 08:34:41 11 ELEMENT MMC North America Owner's Man 50 31SCV680 enu
Page 206 of 286
The fluid level should be between
the MIN and MAX marks on the side
of the reservoir. If the level is at or
below the MIN mark, your brake
system needs attention. Have the
brake system inspected for leaks or
worn brake pads.Power Steering Fluid
Check the level on the side of the
reservoir when the engine is cold.
The fluid should be between the
UPPER LEVEL and LOWER LEVEL.
If not, add power steering fluid to the
UPPER LEVEL.Pour the fluid slowly and carefully so
you do not spill any. Clean up any
spills immediately; it could damage
components in the engine
compartment.
Always use Honda Power Steering
Fluid. You may use another power
steering fluid as an emergency
replacement, but have the power
steering system flushed and refilled
with Honda PSF as soon as possible.
MAX
MIN
UPPER LEVEL
LOWER LEVEL
Brake Fluid, Power Steering Fluid20010/08/06 08:34:41 11 ELEMENT MMC North America Owner's Man 50 31SCV680 enu
Page 207 of 286
A low power steering fluid level can
indicate a leak in the system. Check
the fluid level frequently, and have
the system inspected as soon as
possible.
If you are not sure how to add fluid,
contact your dealer.
Turning the steering wheel to full left or
right lock and holding it there can
damage the power steering pump.
Cleaning the Body PanelsIf equipped with body panelsTo clean the gray composite body
panels, wash them with soap and
water only. Do not apply wax to the
panels; it will cause discoloration.Headlight Aiming
The headlights were properly aimed
when your vehicle was new. If you
regularly carry heavy items in the
cargo area or pull a trailer,
readjustment may be required.
Adjustments should be done by your
dealer or another qualified
technician.
CONTINUED
Power Steering Fluid, Cleaning the Body Panels, Lights
201
Maintenance
10/08/06 08:34:41 11 ELEMENT MMC North America Owner's Man 50 31SCV680 enu
Page 208 of 286
Replacing a Headlight Bulb
Your vehicle has halogen headlight
bulbs. Handle it by its steel base and
protect the glass from contact with
your skin or hard objects. If you
touch the glass, clean it with
denatured alcohol and a clean cloth.Halogen headlight bulbs get very hot
when lit. Oil, perspiration, or a scratch
on the glass can cause the bulb to
overheat and shatter.
1. Open the hood.If you need to change the
headlight bulb on the driver's side,
remove the front end of the air
intake duct by pulling it out.
2. Remove the electrical connectorfrom the bulb by pulling the
connector straight back.
3. Remove the rubber weather seal by pulling on the tab.
4. Unclip the end of the hold-down wire from its slot. Pivot the wire
out of the way, then remove the
bulb.
AIR INTAKE DUCT
Lights20210/08/06 08:34:41 11 ELEMENT MMC North America Owner's Man 50 31SCV680 enu