Page 73 of 286

If the system still detects a leak in
your vehicle's evaporative emissions
system, the malfunction indicator
lamp (MIL) comes on. If the fuel fill
cap was not already tightened, turn
the engine off, and check or
retighten the fuel fill cap until it
clicks at least once. The MIL should
go off after several days of normal
driving once the cap is tightened or
replaced. If the MIL does not go off,
have your vehicle inspected by a
dealer. For more information, see
page 236.Temperature Gauge
This shows the temperature of the
engine's coolant. During normal
operation, the pointer should rise to
about the middle of the gauge. In
severe driving conditions, the pointer
may rise to the upper zone. If it
reaches the red (hot) mark, pull
safely to the side of the road. Turn to
page 233 for instructions and
precautions on checking the engine's
cooling system.
Maintenance Minder
™
The information display in the
instrument panel shows you the
engine oil life and maintenance
service items when the ignition
switch is in the ON (II) position. This
information helps to keep you aware
of the periodic maintenance your
vehicle needs for continued trouble-
free driving. Refer to page 185 for
more information.
Gauges
67
Instruments and Controls
10/08/06 08:34:41 11 ELEMENT MMC North America Owner's Man 50 31SCV680 enu
Page 74 of 286

Outside Temperature IndicatorOn EX modelThis indicator displays the outside
temperature in Fahrenheit.
The temperature sensor is in the
front bumper. The temperature
reading can be affected by heat
reflection from the road surface,
engine heat, and the exhaust from
surrounding traffic. This can cause
an incorrect temperature reading
when your vehicle speed is under 19
mph (30 km/h). When you start your
trip, the sensor is not fully
acclimatized, therefore it may take
several minutes until the proper
temperature is displayed.In certain weather conditions,
temperature readings near freezing
(32°F, 0°C) could mean that ice is
forming on the road surface.
If the outside temperature is
incorrectly displayed, you can adjust
it up to
ꭗ5°F warmer or cooler.
NOTE: The temperature must be
stabilized before doing this
procedure. To adjust the outside temperature
indicator, make sure the odometer is
shown in the display, then press and
hold the select/reset knob for 10
seconds. The following sequence will
appear for 1 second each: 0, 1, 2, 3, 4,
5,
-5, -4,-3,-2,-1, 0.
When the temperature reaches the
desired value, release the select/
reset knob. You should see the new
outside temperature displayed.Gauges6810/08/06 08:34:41 11 ELEMENT MMC North America Owner's Man 50 31SCV680 enu
Page 75 of 286
ꭧ1: To use the horn, press the center pad of the steering wheel.
ꭧ 2: If equipped
HAZARD WARNING BUTTON
(P. 73)
CRUISE CONTROL BUTTONS (P. 137)
STEERING WHEEL ADJUSTMENT (P. 74) HORN
ꭧ
1
Ex model is shown. VSA OFF SWITCH
(P. 173) REMOTE AUDIO
CONTROLS
ꭧ
2
(P. 135) HEADLIGHTS/TURN SIGNALS
(P. 71) WINDSHIELD WIPERS/WASHERS
(P. 70)
REAR WINDOW
DEFOGGER BUTTON
(P. 74) AUTOMATIC
TRANSMISSION
(P. 161)
ACCESSORY
POWER SOCKET
(P. 100)
Controls Near the Steering Wheel
69
Instruments and Controls
10/08/06 08:34:41 11 ELEMENT MMC North America Owner's Man 50 31SCV680 enu
Page 76 of 286

Windshield Wiper1. MIST
2. OFF
3. INT-Intermittent
3. LO -Low speed
5. HI -High speed
6. Windshield washers Push the right lever up or down to
select a position.
MIST
-The wipers run at high
speed until you release the lever.
OFF -The wipers are not activated.
INT -The length of the wipe
interval is varied automatically
according to vehicle's speed.
Vary the delay by turning the
adjustment ring. If you turn it to the
shortest delay (
position), the
wipers change to low speed
operation when the vehicle speed
exceeds 12 mph (20 km/h).
LO -The wipers run at low speed.
HI -The wipers run at high speed.
Windshield Washer -Pull the
wiper control lever toward you, and
hold it. The washers spray until you
release the lever. The wipers run at
low speed, then complete one more
sweep after you release the lever. Rear Window Wiper and Washer
1. Rotate the switch clockwise to turn
the rear window wiper ON.
2. Hold past ON to turn the window wiper on and the window washer
on.
3. OFF
4. Rotate the switch counterclockwise and hold to
spray the window washer and
operate the wiper.
ADJUSTMENT RING
Windshield Wipers and Washers7010/08/06 08:34:41 11 ELEMENT MMC North America Owner's Man 50 31SCV680 enu
Page 77 of 286

1. Turn signal
2. Off
3. Parking and instrument panel
lights
4. Headlights on
5. High beams
6. Flash high beamsTurn Signal
-Push down on the
lever to signal a left turn and up to
signal a right turn. To signal a lane
change, push lightly on the lever,
and hold it. The lever will return to
center when you release it or
complete a turn. Headlights
-Turning the switch to
the ‘‘
’’position turns on the
parking lights, taillights, instrument
panel lights, side-marker lights, and
rear license plate lights.
Turning the switch to the ‘‘
’’
position turns on the headlights.
When the light switch is in the
‘‘
’’ or ‘‘
’’position, the lights
on indicator comes on as a reminder.
This indicator stays on if you leave
the light switch on and turn the
ignition switch to the ACCESSORY
(I) or the LOCK (0) position.
If you leave the lights on with the key
removed from the ignition switch,
you will hear a reminder chime when
you open the driver's door.
CONTINUED
Turn Signals and Headlights
71
Instruments and Controls
10/08/06 08:34:41 11 ELEMENT MMC North America Owner's Man 50 31SCV680 enu
Page 78 of 286

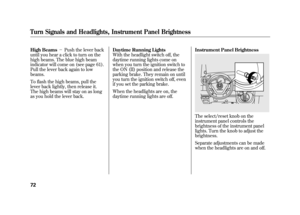
High Beams-Push the lever back
until you hear a click to turn on the
high beams. The blue high beam
indicator will come on (see page 61).
Pull the lever back again to low
beams.
To flash the high beams, pull the
lever back lightly, then release it.
The high beams will stay on as long
as you hold the lever back. Daytime Running Lights
With the headlight switch off, the
daytime running lights come on
when you turn the ignition switch to
the ON (II) position and release the
parking brake. They remain on until
you turn the ignition switch off, even
if you set the parking brake.
When the headlights are on, the
daytime running lights are off.Instrument Panel Brightness
The select/reset knob on the
instrument panel controls the
brightness of the instrument panel
lights. Turn the knob to adjust the
brightness.
Separate adjustments can be made
when the headlights are on and off.
Turn Signals and Headlights, Instrument Panel Brightness7210/08/06 08:34:41 11 ELEMENT MMC North America Owner's Man 50 31SCV680 enu
Page 79 of 286

The level of brightness is shown on
the information display while you
adjust it. It goes out about 5 seconds
after you finish adjusting.
To reduce glare at night, the
instrument panel illumination dims
when you turn the light switch to
or
. Turning the select/reset
knob to the right until you hear a
beep will cancel the reduced
brightness. The instrument panel will illuminate
with reduced brightness when you
unlock and open the driver's door.
The brightness will increase slightly
when you insert the key in the
ignition switch, then go to normal
brightness when you turn the
ignition switch to the ON (II)
position.
If you do not insert the key in the
ignition switch after opening the
driver's door, the illumination turns
off about 30 seconds after you close
the door.
If you insert the key but do not turn
the ignition switch to the ON (II)
position, the illumination turns off in
about 10 seconds.
Hazard Warning Button
Push the button next to the shift
lever to turn on the hazard warning
lights (four-way flashers). This
causes all four outside turn signals
and both turn indicators in the
instrument panel to flash. Use the
hazard warning lights if you need to
park in a dangerous area near heavy
traffic, or if your vehicle is disabled.
BRIGHTNESS LEVEL
Instrument Panel Brightness, Hazard Warning Button
73
Instruments and Controls
10/08/06 08:34:41 11 ELEMENT MMC North America Owner's Man 50 31SCV680 enu
Page 80 of 286

Rear Window DefoggerThe rear window defogger will clear
fog, frost, and thin ice from the
window. Push the defogger button to
turn it on and off. The indicator in the
button comes on to show the
defogger is on. If you do not turn it
off, the defogger will shut itself off
after about 15 minutes. It also shuts
off when you turn off the ignition
switch. You have to turn the
defogger on again when you restart
the vehicle.Make sure the rear window is clear
and you have good visibility before
starting to drive.
The defogger wires on the inside of
the rear window can be accidentally
damaged. When cleaning the glass,
always wipe side-to-side.
Steering Wheel Adjustment
Make any steering wheel adjustment
before you start driving.
Adjusting the steering wheel
position while driving may
cause you to lose control of the
vehicle and be seriously injured
in a crash.
Adjust the steering wheel only
when the vehicle is stopped.
Rear Window Defogger, Steering Wheel Adjustment7410/08/06 08:34:41 11 ELEMENT MMC North America Owner's Man 50 31SCV680 enu