Page 286 of 369

�µ�µ�µ
�µ
�µ �µ
�Ì Youshouldcheckthefollowing
items at the specif ied intervals. If
you are unsure of how to perf orm
any check, turn to the appropriate
page listed.
Engine oil level Check every
time you fill the fuel tank. See
page .
Engine coolant level Check the
radiator reserve tank every time
youfillthefueltank.Seepage .
Automatic transmission Check
the f luid level monthly. See page .
Brakes Check the f luid level
monthly. See page .
Tires Check the tire pressure
monthly. Examine the tread f or
wear and foreign objects. See page . Lights Check the operation of
the headlights, parking lights,
taillights, high-mount brake light,
turn signals, brake lights, and
license plate light monthly. See
page .
According to state and federal
regulations, f ailure to perf orm
maintenance on the items marked
with will not void your emissions
warranties. However, all
maintenance services should be
perf ormed in accordance with the
intervals indicated by the
inf ormation display.
U.S. Vehicles:
245246
291
303 293
292
Maintenance Minder
Owner’s Maintenance Checks
282
TM
Main Menu
Page 287 of 369

�Î �Î
�Ì �Ì
�Ì
�Î
Maintenance Minder
283
:
TM
See information on maintenance and emissions warranty on page .
If the message ‘‘SERVICE’’ does not appear more than 12 months after the
display is reset, change the engine oil every year.
Independent of the maintenance messages on the information display,
replace the brake fluid every 3 years.
Adjust the valves during services A, B, 1, 2, or 3 only if they are noisy.
Inspect idle speed every 160,000 miles (256,000 km).
NOTE:
282
: Maintenance Main Items
Replace engine oil
Replace engine oil and oil filter
Inspect front and rear brakes
Check parking brake adjustment
Inspect these items: Tie rod ends, steering gear box, and boots
Suspension components
Driveshaft boots
Brake hoses and lines (including ABS/VSA)
All fluid levels and condition of fluids
Exhaust system
Fuel lines and connections Maintenance Sub Items
Rotate tires
Replace air cleaner element
If you drive in dusty conditions, replace every 15,000
miles (24,000 km).
Replace dust and pollen filter If you drive primarily in urban areas that have high
concentrations of soot in the air from industry and
from diesel-powered vehicles, replace every 15,000
miles (24,000 km).
Inspect drive belt
Replace transmission fluid
Replace spark plugs
Inspect valve clearance
Replace engine coolant
AB
Symbol
Symbol
12 3 4 5
Maintenance Minder
Main Menu
Page 288 of 369
Fluid Locations
284RADIATOR CAP
ENGINE OIL DIPSTICK
(Orange loop)
WASHER FLUID
(Blue cap) AUTOMATIC
TRANSMISSION (CVT)
FLUID DIPSTICK
(Yellow loop)
ENGINE COOLANT
RESERVOIR
BRAKE FLUID
(Black cap)
ENGINE OIL FILL CAP
Main Menu
Page 289 of 369
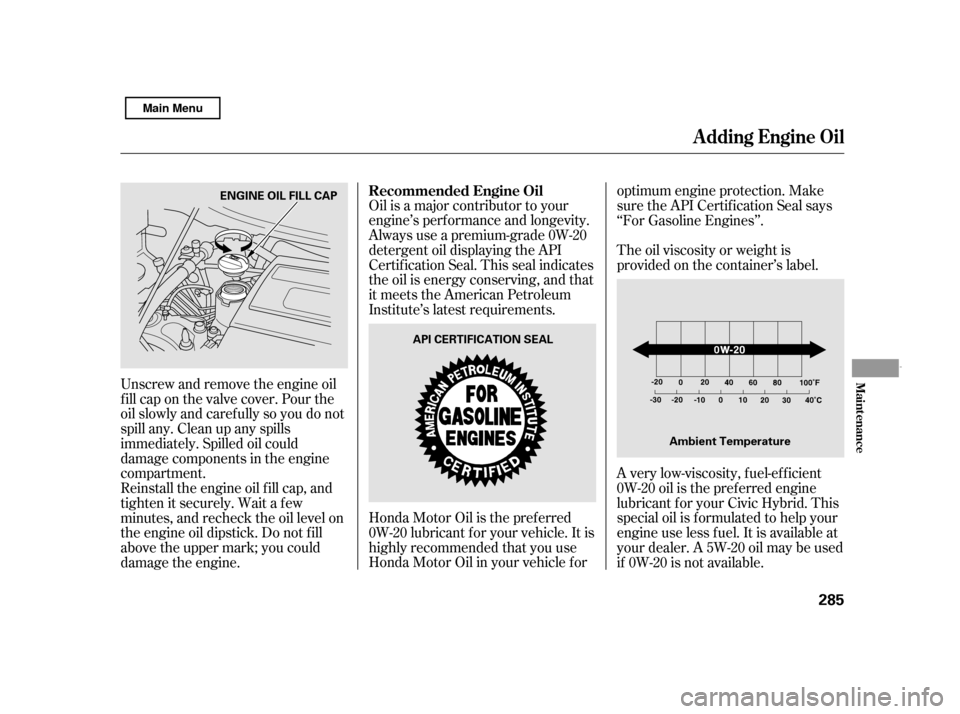
The oil viscosity or weight is
provided on the container’s label.
Oil is a major contributor to your
engine’s perf ormance and longevity.
Always use a premium-grade 0W-20
detergent oil displaying the API
Certif ication Seal. This seal indicates
the oil is energy conserving, and that
it meets the American Petroleum
Institute’s latest requirements.
Honda Motor Oil is the pref erred
0W-20 lubricant f or your vehicle. It is
highly recommended that you use
Honda Motor Oil in your vehicle f or optimum engine protection. Make
sure the API Certif ication Seal says
‘‘For Gasoline Engines’’.
A very low-viscosity, f uel-ef f icient
0W-20 oil is the pref erred engine
lubricant f or your Civic Hybrid. This
special oil is f ormulated to help your
engine use less fuel. It is available at
your dealer. A 5W-20 oil may be used
if 0W-20 is not available.
Unscrew and remove the engine oil
fill cap on the valve cover. Pour the
oil slowly and caref ully so you do not
spill any. Clean up any spills
immediately. Spilled oil could
damage components in the engine
compartment.
Reinstall the engine oil f ill cap, and
tighten it securely. Wait a f ew
minutes, and recheck the oil level on
the engine oil dipstick. Do not f ill
above the upper mark; you could
damage the engine. Recommended Engine Oil
A dding Engine Oil
Maint enance
285
API CERTIFICATION SEAL
Ambient Temperature
ENGINE OIL FILL CAP
Main Menu
Page 290 of 369
Always change the oil and f ilter
according to the maintenance
messages shown on the inf ormation
display. The oil and f ilter collect
contaminants that can damage your
engine if they are not removed
regularly.Run the engine until it reaches
normal operating temperature,
then shut it off.
Open the hood, and remove the
engine oil f ill cap.
Your vehicle does not require any oil
additives. Additives may adversely
af f ect the engine or transmission
perf ormance and durability.
Changing the oil and f ilter requires
special tools and access f rom
underneath the vehicle. The vehicle
should be raised on a service station-
type hydraulic lif t f or this service.
Unless you have the knowledge and
proper equipment, you should have
this maintenance done by a skilled
mechanic.
You may use a synthetic motor oil if
it meets the same requirements
given f or a conventional motor oil: it
displays the API Certif ication Seal,
and it is the proper weight. You must
f ollow the oil and f ilter change
intervals shown on the information
display.
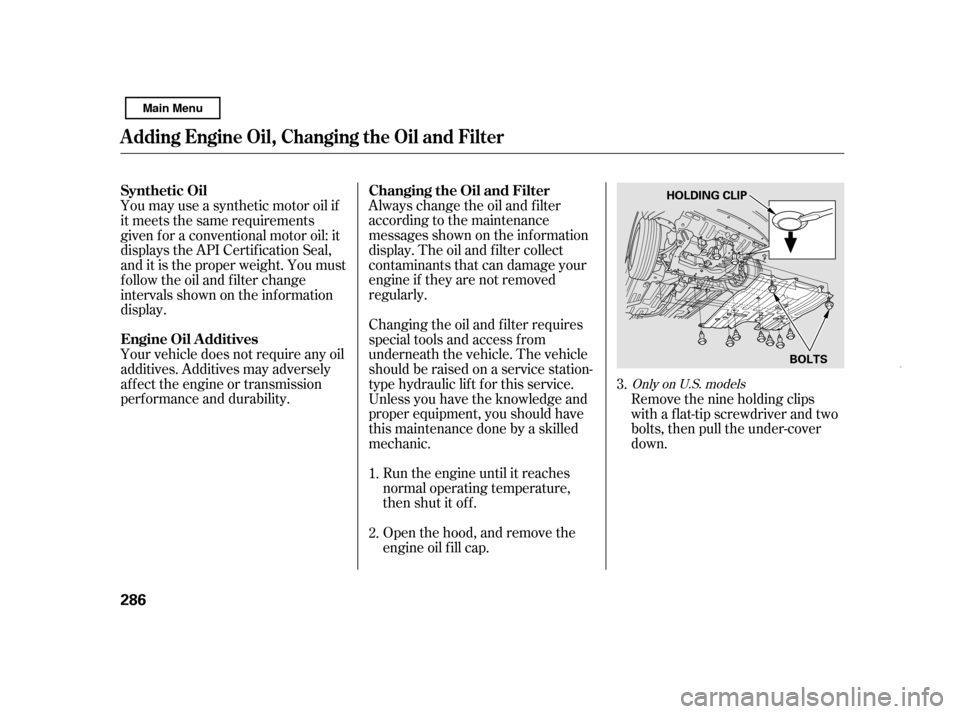
Removethenineholdingclips
with a flat-tip screwdriver and two
bolts, then pull the under-cover
down.
1. 2. 3.
Only on U.S. models
Changing the Oil and Filter
Synthetic Oil
Engine Oil A dditives
A dding Engine Oil, Changing the Oil and Filter
286 HOLDING CLIP
BOLTS
Main Menu
Page 291 of 369
Refill the engine with the
recommended oil.
Engine oil change capacity
(including f ilter):
Let the engine run f or several
minutes, then check the drain bolt
and oil f ilter f or leaks.
Put a new washer on the drain bolt,
then reinstall the drain bolt.
Tighten the drain bolt to:
Install a new oil f ilter according to
the instructions that come with it. Reinstall the engine oil f ill cap.
Start the engine. The oil pressure
indicator should go out within 5
seconds. If it does not, turn of f the
engine, and check your work.
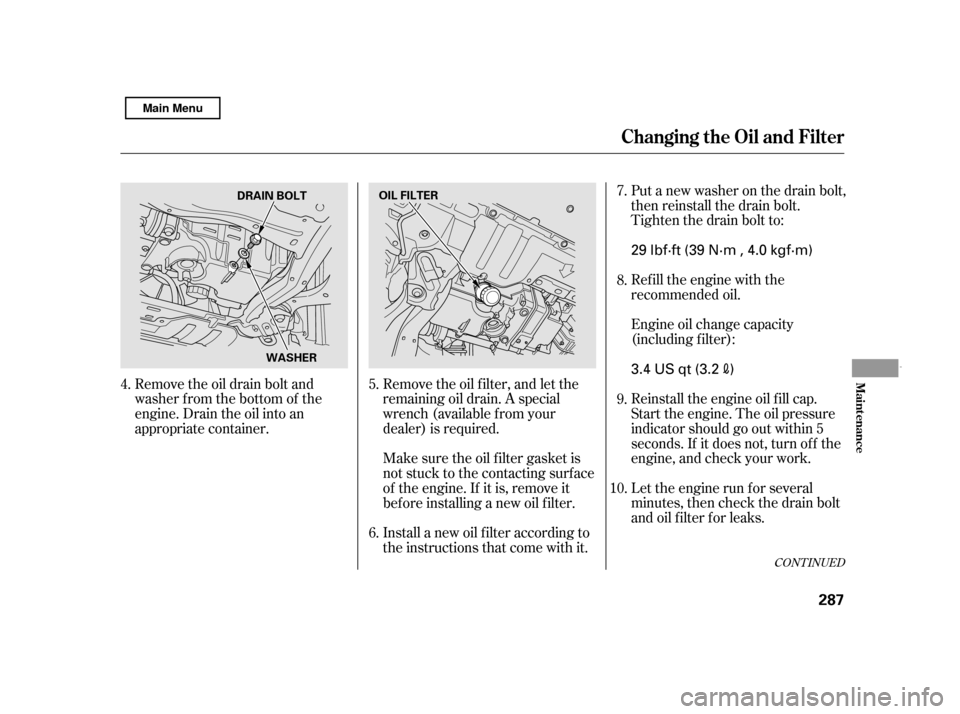
Remove the oil drain bolt and
washer from the bottom of the
engine. Drain the oil into an
appropriate container.
Remove the oil f ilter, and let the
remaining oil drain. A special
wrench (available f rom your
dealer) is required.
Make sure the oil f ilter gasket is
not stuck to the contacting surface
of the engine. If it is, remove it
bef ore installing a new oil f ilter.7. 8. 9.
4.
5. 6.10.
CONT INUED
Changing the Oil and Filter
Maint enance
287
DRAIN BOLT
WASHER OIL FILTER
3.4 US qt (3.2
)
29 lbf·ft (39 N·m , 4.0 kgf·m)
Main Menu
Page 292 of 369
Turn of f the engine, let it sit f or
several minutes, then check the oil
level on the dipstick. If necessary,
add more oil.
Put the under-cover back in place
and reinstall the nine holding clips.
Locktheclipssecurelybypushing
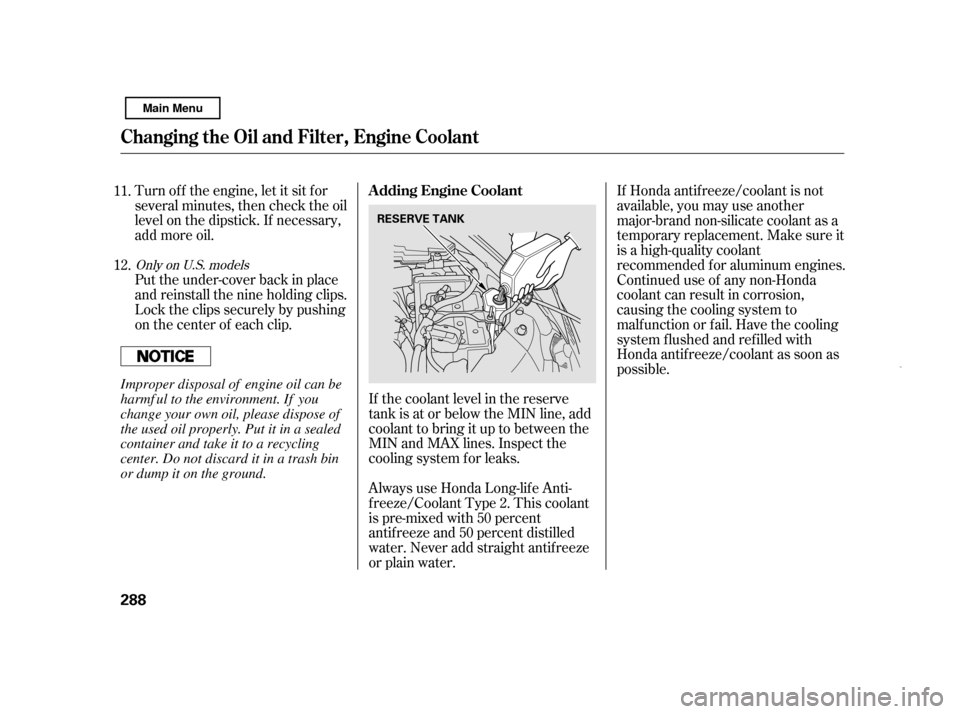
on the center of each clip.If the coolant level in the reserve
tank is at or below the MIN line, add
coolant to bring it up to between the
MIN and MAX lines. Inspect the
cooling system f or leaks. If Honda antif reeze/coolant is not
available, you may use another
major-brand non-silicate coolant as a
temporaryreplacement.Makesureit
is a high-quality coolant
recommended f or aluminum engines.
Continued use of any non-Honda
coolant can result in corrosion,
causingthecoolingsystemto
malf unction or f ail. Have the cooling
system f lushed and ref illed with
Honda antif reeze/coolant as soon as
possible.
Always use Honda Long-lif e Anti-
f reeze/Coolant Type 2. This coolant
is pre-mixed with 50 percent
antif reeze and 50 percent distilled
water. Never add straight antif reeze
or plain water.
11. 12.
Only on U.S. models
A dding Engine Coolant
Changing the Oil and Filter, Engine Coolant
288 RESERVE TANK
Improper disposal of engine oil can be
harmf ul to the environment. If you
change your own oil, please dispose of
the used oil properly. Put it in a sealed
container and take it to a recycling
center. Do not discard it in a trash bin
or dump it on the ground.
Main Menu
Page 293 of 369
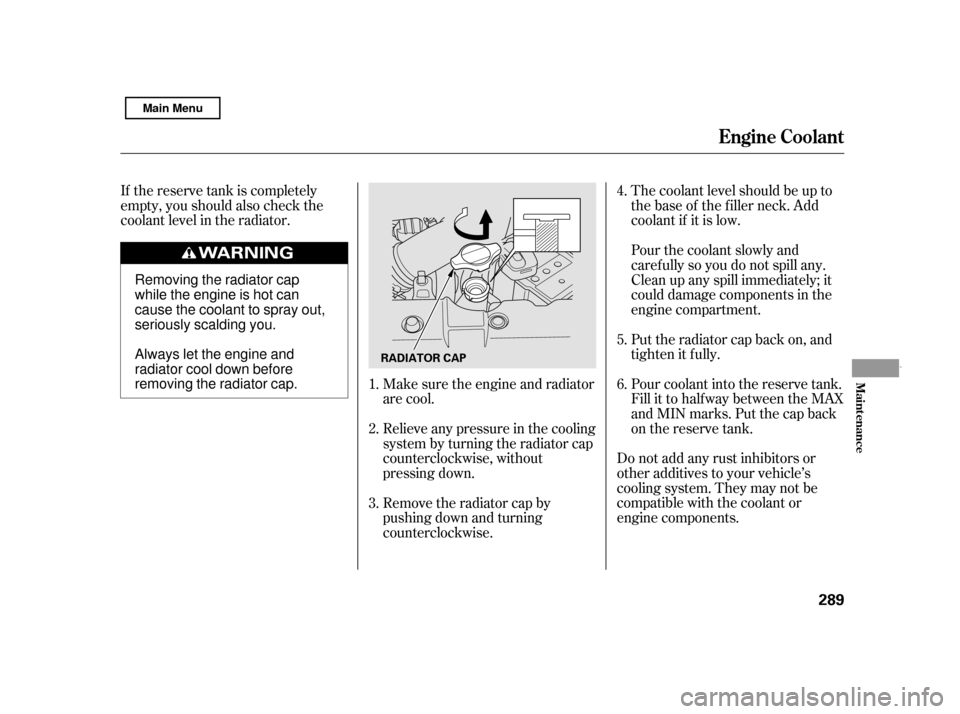
If the reserve tank is completely
empty, you should also check the
coolant level in the radiator.The coolant level should be up to
the base of the f iller neck. Add
coolant if it is low.
Do not add any rust inhibitors or
other additives to your vehicle’s
cooling system. They may not be
compatible with the coolant or
engine components. Pour coolant into the reserve tank.
Fill it to half way between the MAX
and MIN marks. Put the cap back
on the reserve tank.
Pourthecoolantslowlyand
caref ully so you do not spill any.
Clean up any spill immediately; it
could damage components in the
engine compartment.
Make sure the engine and radiator
are cool.
Relieve any pressure in the cooling
system by turning the radiator cap
counterclockwise, without
pressing down.
Remove the radiator cap by
pushing down and turning
counterclockwise. Put the radiator cap back on, and
tighten it fully.
1. 2. 3. 4. 5. 6.
Engine Coolant
Maint enance
289
RADIATOR CAP
Removing the radiator cap
while the engine is hot can
cause the coolant to spray out,
seriously scalding you.
Always let the engine and
radiator cool down before
removing the radiator cap.
Main Menu