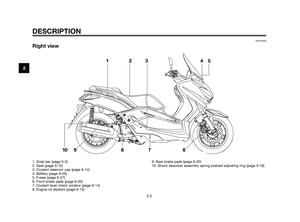
Page 25 of 88

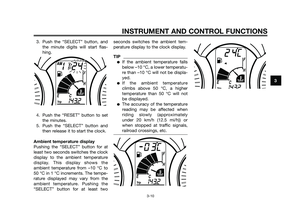
3. Push the “SELECT” button, and
the minute digits will start flas-
hing.
4. Push the “RESET” button to set
the minutes.
5. Push the “SELECT” button and
then release it to start the clock.
Ambient temperature display
Pushing the “SELECT” button for at
least two seconds switches the clock
display to the ambient temperature
display. This display shows the
ambient temperature from –10 °C to
50 °C in 1 °C increments. The tempe-
rature displayed may vary from the
ambient temperature. Pushing the
“SELECT” button for at least twoseconds switches the ambient tem-
perature display to the clock display.
TIP
�If the ambient temperature falls
below –10 °C, a lower temperatu-
re than –10 °C will not be displa-
yed.
�If the ambient temperature
climbs above 50 °C, a higher
temperature than 50 °C will not
be displayed.
�The accuracy of the temperature
reading may be affected when
riding slowly (approximately
under 20 km/h (12.5 mi/h)) or
when stopped at traffic signals,
railroad crossings, etc.
INSTRUMENT AND CONTROL FUNCTIONS
3-10
3
39D-F8199-E0 4/11/09 20:21 P√°gina 25
Page 26 of 88

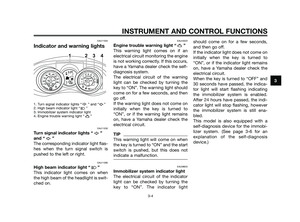
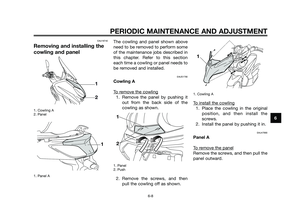
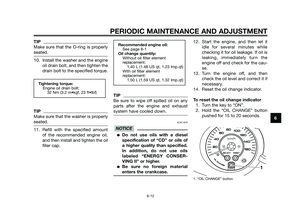
EAU12348
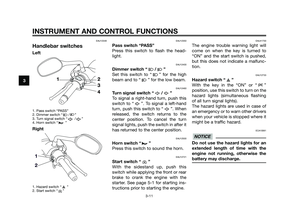
Handlebar switches
Left
1. Pass switch “PASS”
2. Dimmer switch “ / ”
3. Turn signal switch “ / ”
4. Horn switch “ ”
Right
1. Hazard switch “ ”
2. Start switch “ ”
EAU12350
Pass switch “PASS”
Press this switch to flash the head-
light.
EAU12400
Dimmer switch “ / ”
Set this switch to “ ” for the high
beam and to “ ” for the low beam.
EAU12460
Turn signal switch “ / ”
To signal a right-hand turn, push this
switch to “ ”. To signal a left-hand
turn, push this switch to “ ”. When
released, the switch returns to the
center position. To cancel the turn
signal lights, push the switch in after it
has returned to the center position.
EAU12500
Horn switch “ ”
Press this switch to sound the horn.
EAU12721
Start switch “ ”
With the sidestand up, push this
switch while applying the front or rear
brake to crank the engine with the
starter. See page 5-1 for starting ins-
tructions prior to starting the engine.
EAU41700
The engine trouble warning light will
come on when the key is turned to
“ON” and the start switch is pushed,
but this does not indicate a malfunc-
tion.
EAU12733
Hazard switch “ ”
With the key in the “ON” or “ ”
position, use this switch to turn on the
hazard lights (simultaneous flashing
of all turn signal lights).
The hazard lights are used in case of
an emergency or to warn other drivers
when your vehicle is stopped where it
might be a traffic hazard.
ECA10061
Do not use the hazard lights for an
extended length of time with the
engine not running, otherwise the
battery may discharge.
NOTICE
INSTRUMENT AND CONTROL FUNCTIONS
3-11
3
39D-F8199-E0 4/11/09 20:21 P√°gina 26
Page 27 of 88
EAU12900
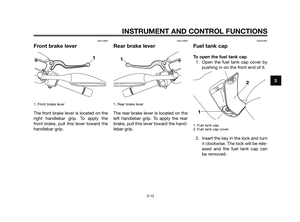
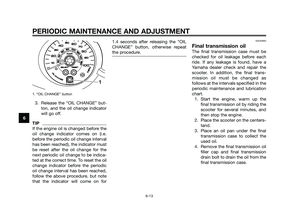
Front brake lever
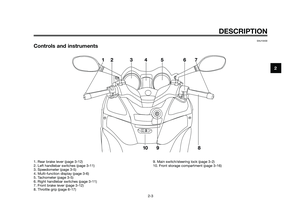
1. Front brake lever
The front brake lever is located on the
right handlebar grip. To apply the
front brake, pull this lever toward the
handlebar grip.
EAU12950
Rear brake lever
1. Rear brake lever
The rear brake lever is located on the
left handlebar grip. To apply the rear
brake, pull this lever toward the hand-
lebar grip.
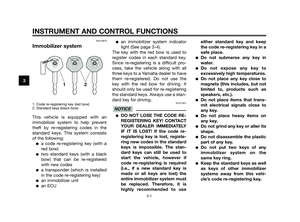
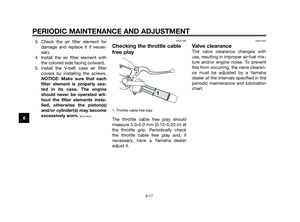
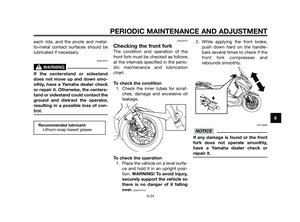
EAUS1661
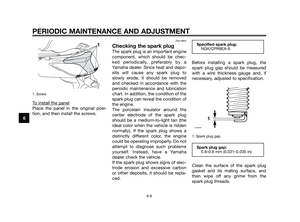
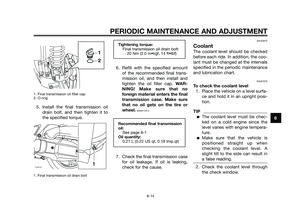
Fuel tank cap
To open the fuel tank cap
1. Open the fuel tank cap cover by
pushing in on the front end of it.
1. Fuel tank cap
2. Fuel tank cap cover
2. Insert the key in the lock and turn
it clockwise. The lock will be rele-
ased and the fuel tank cap can
be removed.
INSTRUMENT AND CONTROL FUNCTIONS
3-12
3
39D-F8199-E0 4/11/09 20:21 P√°gina 27
Page 28 of 88

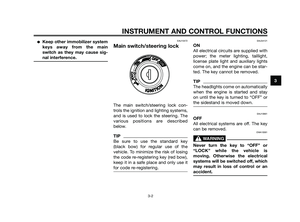
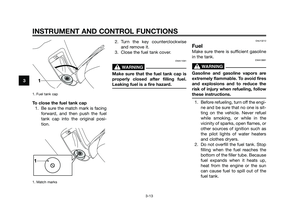
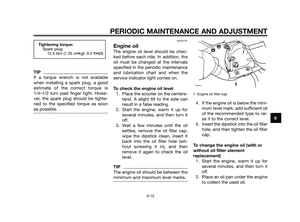
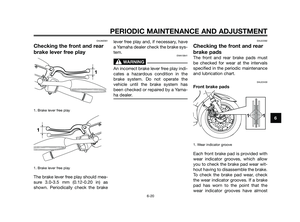
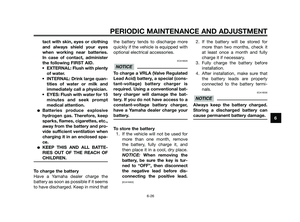
1. Fuel tank cap
To close the fuel tank cap
1. Be sure the match mark is facing
forward, and then push the fuel
tank cap into the original posi-
tion.
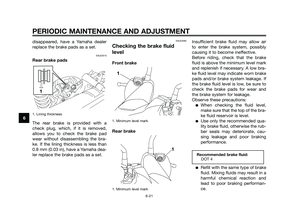
1. Match marks
2. Turn the key counterclockwise
and remove it.
3. Close the fuel tank cover.
EWA11091
Make sure that the fuel tank cap is
properly closed after filling fuel.
Leaking fuel is a fire hazard.
EAU13212
Fuel
Make sure there is sufficient gasoline
in the tank.
EWA10881
Gasoline and gasoline vapors are
extremely flammable. To avoid fires
and explosions and to reduce the
risk of injury when refueling, follow
these instructions.
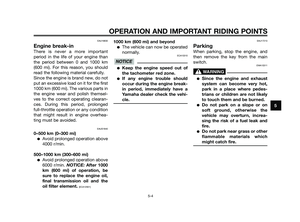
1. Before refueling, turn off the engi-
ne and be sure that no one is sit-
ting on the vehicle. Never refuel
while smoking, or while in the
vicinity of sparks, open flames, or
other sources of ignition such as
the pilot lights of water heaters
and clothes dryers.
2. Do not overfill the fuel tank. Stop
filling when the fuel reaches the
bottom of the filler tube. Because
fuel expands when it heats up,
heat from the engine or the sun
can cause fuel to spill out of the
fuel tank.
WARNINGWARNING
INSTRUMENT AND CONTROL FUNCTIONS
3-13
3
39D-F8199-E0 4/11/09 20:21 P√°gina 28
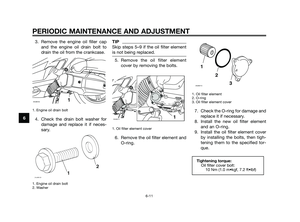
Page 29 of 88

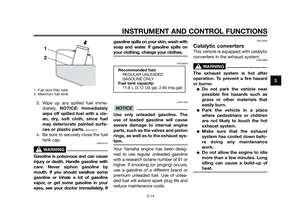
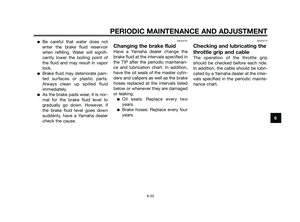
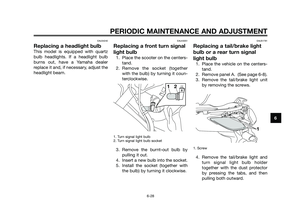
1. Fuel tank filler tube
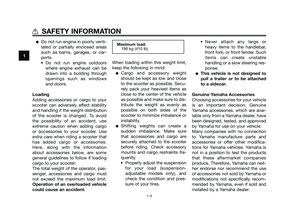
2. Maximum fuel level
3. Wipe up any spilled fuel imme-
diately. NOTICE:Immediately
wipe off spilled fuel with a cle-
an, dry, soft cloth, since fuel
may deteriorate painted surfa-
ces or plastic parts.
[ECA10071]
4. Be sure to securely close the fuel
tank cap.
EWA15151
Gasoline is poisonous and can cause
injury or death. Handle gasoline with
care. Never siphon gasoline by
mouth. If you should swallow some
gasoline or inhale a lot of gasoline
vapor, or get some gasoline in your
eyes, see your doctor immediately. Ifgasoline spills on your skin, wash with
soap and water. If gasoline spills on
your clothing, change your clothes.
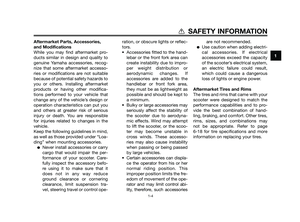
EAU33520
ECA11400
Use only unleaded gasoline. The
use of leaded gasoline will cause
severe damage to internal engine
parts, such as the valves and piston
rings, as well as to the exhaust sys-
tem.
Your Yamaha engine has been desig-
ned to use regular unleaded gasoline
with a research octane number of 91 or
higher. If knocking (or pinging) occurs,
use a gasoline of a different brand or
premium unleaded fuel. Use of unlea-
ded fuel will extend spark plug life and
reduce maintenance costs.
EAU13445
Catalytic converters
This vehicle is equipped with catalytic
converters in the exhaust system.
EWA10862
The exhaust system is hot after
operation. To prevent a fire hazard
or burns:
�Do not park the vehicle near
possible fire hazards such as
grass or other materials that
easily burn.
�Park the vehicle in a place
where pedestrians or children
are not likely to touch the hot
exhaust system.
�Make sure that the exhaust
system has cooled down befo-
re doing any maintenance
work.
�Do not allow the engine to idle
more than a few minutes. Long
idling can cause a build-up of
heat.
WARNING
NOTICE
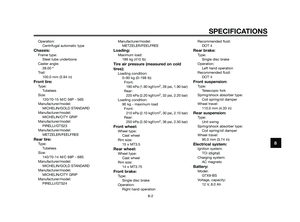
Recommended fuel:
REGULAR UNLEADED
GASOLINE ONLY
Fuel tank capacity:
11.8 L (3.12 US gal, 2.60 Imp.gal)
WARNING
INSTRUMENT AND CONTROL FUNCTIONS
3-14
3
39D-F8199-E0 4/11/09 20:21 P√°gina 29
Page 30 of 88
ECA10701
Use only unleaded gasoline. The
use of leaded gasoline will cause
unrepairable damage to the cataly-
tic converter.
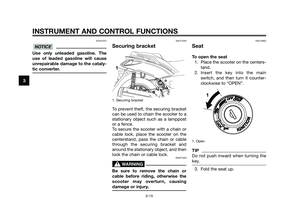
EAUT1040
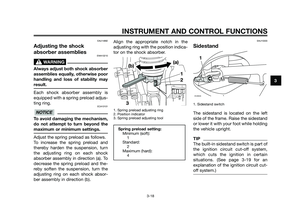
Securing bracket
1. Securing bracket
To prevent theft, the securing bracket
can be used to chain the scooter to a
stationary object such as a lamppost
or a fence.
To secure the scooter with a chain or
cable lock, place the scooter on the
centerstand, pass the chain or cable
through the securing bracket and
around the stationary object, and then
lock the chain or cable lock.
EWAT1020
Be sure to remove the chain or
cable before riding, otherwise the
scooter may overturn, causing
damage or injury.
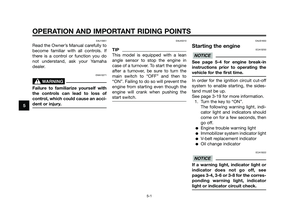
EAU13932
Seat
To open the seat
1. Place the scooter on the centers-
tand.
2. Insert the key into the main
switch, and then turn it counter-
clockwise to “OPEN”.
1. Open
TIP
Do not push inward when turning the
key.
3. Fold the seat up.
WARNING
NOTICE
INSTRUMENT AND CONTROL FUNCTIONS
3-15
3
39D-F8199-E0 4/11/09 20:21 P√°gina 30
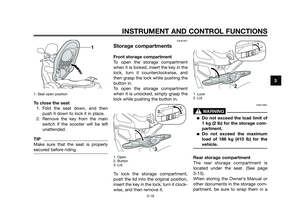
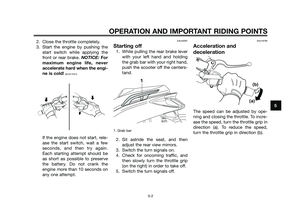
Page 31 of 88

1. Seat open position
To close the seat
1. Fold the seat down, and then
push it down to lock it in place.
2. Remove the key from the main
switch if the scooter will be left
unattended.
TIP
Make sure that the seat is properly
secured before riding.
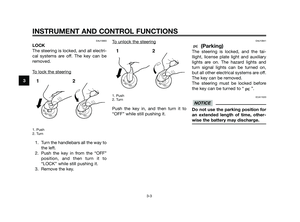
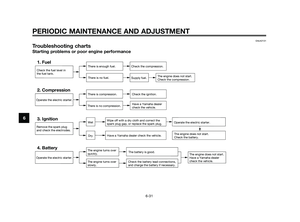
EAUS1621
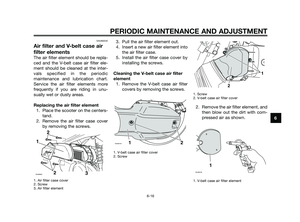
Storage compartments
Front storage compartment
To open the storage compartment
when it is locked, insert the key in the
lock, turn it counterclockwise, and
then grasp the lock while pushing the
button in.
To open the storage compartment
when it is unlocked, simply grasp the
lock while pushing the button in.
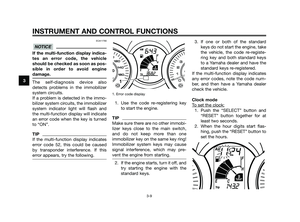
1. Open
2. Button
3. Lid
To lock the storage compartment,
push the lid into the original position,
insert the key in the lock, turn it clock-
wise, and then remove it.
1. Lock
2. Lid
EWA10961
�Do not exceed the load limit of
1 kg (2 lb) for the storage com-
partment.
�Do not exceed the maximum
load of 186 kg (410 lb) for the
vehicle.
Rear storage compartment
The rear storage compartment is
located under the seat. (See page
3-15).
When storing the Owner’s Manual or
other documents in the storage com-
partment, be sure to wrap them in a
WARNING
1
2
21
3
INSTRUMENT AND CONTROL FUNCTIONS
3-16
3
39D-F8199-E0 4/11/09 20:21 P√°gina 31
Page 32 of 88

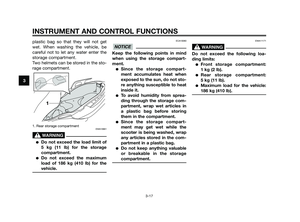
plastic bag so that they will not get
wet. When washing the vehicle, be
careful not to let any water enter the
storage compartment.
Two helmets can be stored in the sto-
rage compartment.
1. Rear storage compartment EWA10961
�Do not exceed the load limit of
5 kg (11 lb) for the storage
compartment.
�Do not exceed the maximum
load of 186 kg (410 lb) for the
vehicle.
ECA10080
Keep the following points in mind
when using the storage compart-
ment.
�Since the storage compart-
ment accumulates heat when
exposed to the sun, do not sto-
re anything susceptible to heat
inside it.
�To avoid humidity from sprea-
ding through the storage com-
partment, wrap wet articles in
a plastic bag before storing
them in the compartment.
�Since the storage compart-
ment may get wet while the
scooter is being washed, wrap
any articles stored in the com-
partment in a plastic bag.
�Do not keep anything valuable
or breakable in the storage
compartment.
EWA11171
Do not exceed the following loa-
ding limits:
�Front storage compartment:
1 kg (2 lb).
�Rear storage compartment:
5 kg (11 lb).
�Maximum load for the vehicle:
186 kg (410 lb).
WARNINGNOTICE
WARNING
INSTRUMENT AND CONTROL FUNCTIONS
3-17
3
39D-F8199-E0 4/11/09 20:21 P√°gina 32