2010 VOLKSWAGEN TRANSPORTER ESP
[x] Cancel search: ESPPage 146 of 486
m If the vehicle battery charge level is low, the W electrical connection to the trailer will be in-terrupted automatically.
Loading the trailer
ill1 First read and observe the introductory L-W.! information and safety warnings & on page 139.
Trailer weight and drawbar load
The trailer weight is the weight that the vehicle can pull &. The drawbar load is the weight that the towing bracket exerts on the ball coupling vertically from above.
The figures for trailer weights and draw bar weights that are given on the data plate of the towing bracket are for certification purposes only. The cor-rect values for your specific model, which may be lower than these figures, are given in the vehicle registration documents. All data in the official vehi-cle documents take precedence over these data.
In the interest of road safety, Volkswagen Commer-cial Vehicles recommends that you always trans-port the maximum drawbar load. The response of the trailer on the road will be poor if the drawbar load is too small.
The drawbar load increases the weight on the rear axle and reduces the maximum load level as a re-sult.
Gross combination weight rating
The combination weight is made up of the actual weight of the loaded vehicle and of the loaded trail-er.
Loading the trailer
The weight of the load should be distributed even-ly. The maximum permitted drawbar load should be utilised. Do not place the load only at the front or the rear of the trailer:
Towing a trailer
ill1 First read and observe the introductory L-W.! information and safety warnings & on page 139.
146 Before the Journey
m When the engine is running, electrical con-w sumers in the trailer are supplied with voltage via the electrical connection (pin 9 and pin 10 of the trailer socket).
• Secure all loads on the trailer properly.
Tyre pressure
Follow the trailer manufacturer's recommendations concerning the tyre pressure for the trailer tyres.
When towing a trailer, inflate the wheels on the towing vehicle with the maximum permitted tyre pressure 367.
A WARNING
Accidents and serious injuries can occur if you exceed the vehicle's maximum permitted gross axle weight rating, drawbar load, gross vehicle weight rating or gross combination weight rating.
• Never exceed the specified values .
• Never let the actual weights at the front and rear axles exceed the gross axle weight ratings. Never exceed the permissible gross vehicle weight for the vehicle with weight at the front and rear of the vehicle.
A wARNING
Loads that may slide can severely Impair sta-bility and driving safety, which can cause ac-cidents and severe injuries.
• Always load trailers correctly .
• Always secure loads using suitable and undamaged securing straps.
Headlight adjustment
Towing a trailer can raise the front end of the vehi-cle enough for the dipped beam to blind other road users. Use the headlight range control to lower the
Page 150 of 486
Practical equipment
Stowage area
o::n Introduction
This chapter contains information on the following subjects:
Stowage compartments on the dash panel . . 151 Stowage compartment on the front passenger side . . . . . . . . . . . . . . . . . . . . . . . . . 151 Other stowage compartments . . . . . . . . . . . . . 152
Only use stowage compartments to stow light or smaller objects.
A factory-fitted AUX-IN socket or the USB sock-may be located in the storage compartment on the front passenger side =>Booklet Radio, provi-sion for mobile telephone, infotainment system, navigation system.
Additional information and warnings:
• Seat functions, front => page 69
• Seat functions, rear =>page 72
• Stowage =>page 150
• Drink holder => page 153
• Central table =>page 155
• Seat functions, rear. Business =>page 182
• Seat functions, rear, California =>page 193
• Cleaning and caring for the interior =>page 388
A WARNING
Loose objects may be flung through the vehi-cle Interior In the event of a sudden driving or braking manoeuvre. This can cause serious injury and can also lead to loss of control of the vehicle.
• Do not stow any pets or any hard, heavy or sharp objects In the vehicle's open stow-age areas, on the dash panel, on the shelf be-hind the rear seats, or in items of clothing and bags in the vehicle Interior.
• Store any objects in open stowage com-partments in such a way that they do not project over the edges of the stowage com-partment.
• Always keep stowage compartments with a lid closed while the vehicle is in motion.
150 I Before the journey
A WARNING
External devices in the vehicle that are not properly secured can be flung though the in-terior and cause Injuries, if there is a sudden driving or braking manoeuvre, or in the event of an accident.
• You should never position or attach an ex-ternal device on a door, on the windscreen or above or near to the areas marked "AIRBAG" on the steering wheel, the dash panel and the seat backrests, or between these areas and the vehicle occupants. External devices can cause serious Injury in an accident, especial-ly when the alrbags deploy.
A WARNING
Objects in the driver footwell can hinder ped-al operation. This can lead to loss of control of the vehicle and increase the risk of serious injury.
• Please ensure that all pedals can always be operated without any hindrance.
• The foot mats must always be properly se-cured in the footwell.
• No additional foot mats or other floor cov-erings should be placed over the fitted foot mat.
• Ensure that no objects can enter the driv-er footwell while the vehicle Is in motion.
• If there are any objects in the footwell, re-move them when the vehicle is parked.
A WARNING
Cigarette lighters in the vehicle could be damaged or accidentally lit. This could lead to serious burns and other Injuries.
• Before adjusting the seats always make sure that there Is no lighter on or near the moveable parts of the seat.
• Before closing stowage areas or compart-ments always ensure that there Is no lighter in the way. 11>
Page 151 of 486
A WARNING (Continued)
• Never stow lighters in stowage areas or compartments or on other surfaces In the ve-hicle. Cigarette lighters may self-Ignite on high-temperature surfaces, especially in sum-mer.
CD
• Hard objects on the shelf can chafe against the wires of the heating element In the rear win-dow and cause damage.
• Objects stored In the vehicle that are made from transparent materials, such as glasses, magnifying glasses or transparent suction cups on the windows, can concentrate the sun's rays and thus cause damage to the vehi-cle.
r:F1 Always ensure that the ventilation openings W between the rear window and the stowage area are uncovered to allow stale air to escape from the vehicle.
r('n First read and observe the introductory L-Jc.lJ information and safety warnings.& on page 150.
There is a stowage compartment in the centre con-sole, which. depending on the vehicle equipment level, may have a cover flap.
To open, press the button on the cover flap. The stowage compartment opens automatically.
To close, press the cover down until it engages. Do not press the button while doing this.
Depending on the vehicle equipment level, there may be open stowage compartments under the vents on the dash panel.
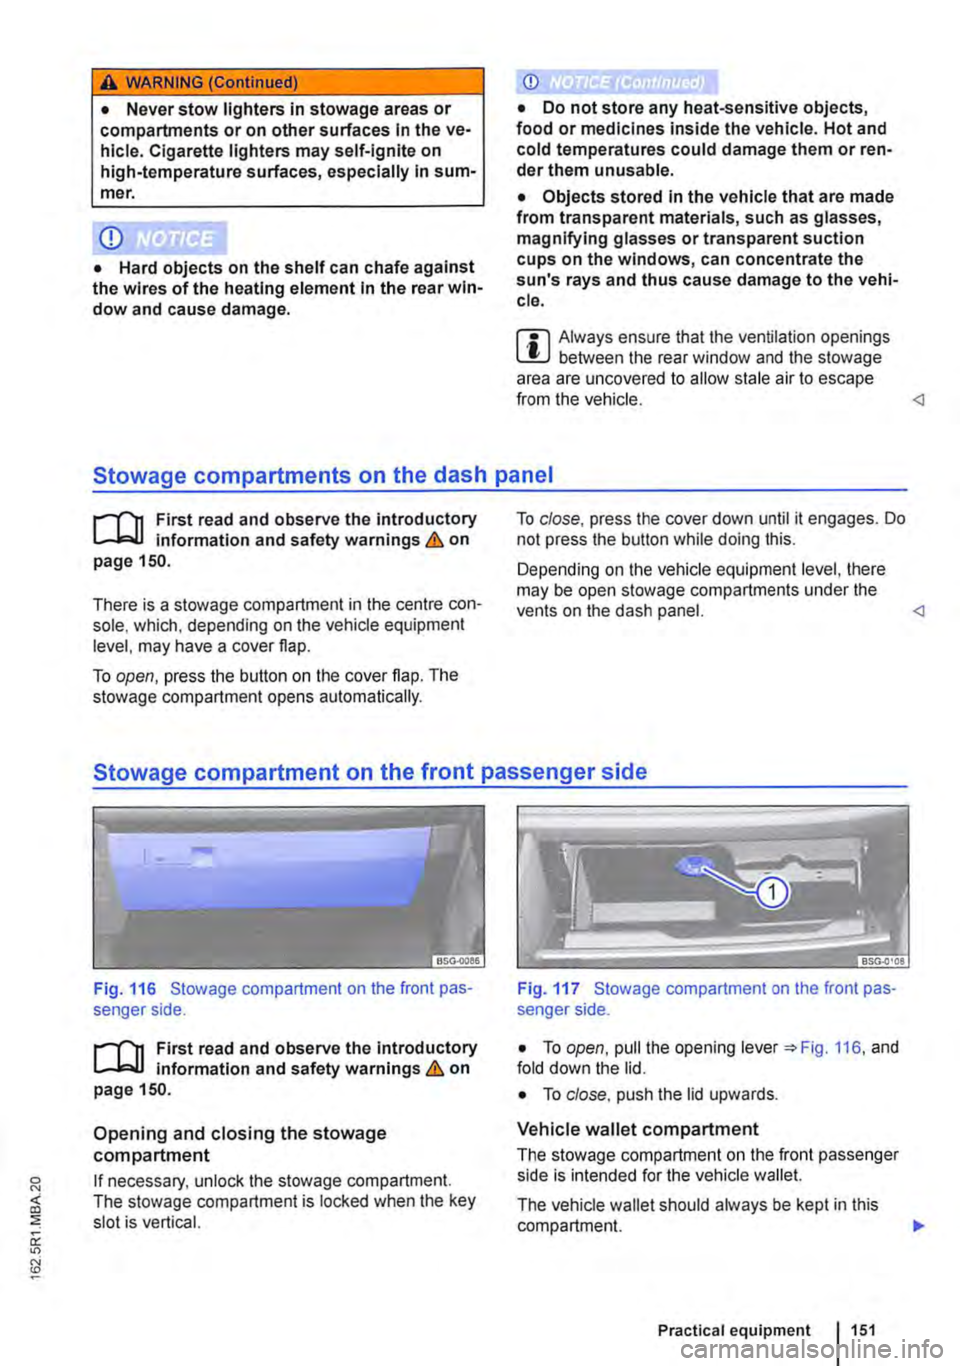
Fig. 116 Stowage compartment on the front pas-senger side.
r('n First read and observe the introductory L-Jc.lJ Information and safety warnings.& on page 150.
Opening and closing the stowage compartment
If necessary, unlock the stowage compartment. The stowage compartment is locked when the key slot is vertical.
Fig. 117 Stowage compartment on the front pas-senger side.
• To open, pull the opening lever =:.Fig. 116, and fold down the lid.
• To close. push the lid upwards.
Vehicle wallet compartment
The stowage compartment on the front passenger side is intended for the vehicle wallet.
The vehicle wallet should always be kept in this compartment. .,.
Practical equipment 1151
Page 160 of 486
• Push both handles down.
• Turn both handles through go• so that the T-shaped holding screws are across the seat rails
• Tighten both the thumb wheels firmly.
• When fitting the adapter plate ensure sufficient clearance between the adapter plate or the cool box and the bench seat
Fitting the cool box
• Fit the adapter plate.
• Pull out the handle on the adapter plate.
• Place the cool box on the adapter plate.
• Make sure that all holding screws on the cool box are fully engaged in the corresponding holes on the adapter plate &..
• Pull the handle on the adapter plate right out.
• When fitting the cool box ensure sufficient clearance between the adapter plate or the cool box and the bench seat
Removing the cool box
• Pull out the handle on the adapter plate in the direction of the arrow 126 to unlock the cool box.
• Lift up the cool box to remove it.
• Pull the handle on the adapter plate right out.
Removing the adapter plate
• Remove the cool box.
• Turn the adapter plate so that the T-shaped holding screws are lengthwise.
• Lift up the adapter plate to remove it.
A WARNING
Objects that are not secured, or are secured incorrectly, can cause serious Injuries in the event of a sudden driving or braking manoeu-vre or accident.
160 I Before the journey
A WARNING (Continued)
• Make sure that the T-shaped holding screws In the seat rails are at right-angles (90°) to the adapter plate and correctly engag-ed.
• The T-shaped holding screws should nev-er be Inserted In the seat rails near the re-movable covers.
• Make sure that the cool box Is properly fit-ted In on the adapter plate.
CD
Handling the cool box Incorrectly could dam-agelt.
• When adjusting seat positions, make sure there Is sufficient clearance between the adapt-er plate or the cool box and the bench seat.
• Do not place any objects, blankets or Items of clothing on the heater/cooler of the Insulated box. These objects/Items could cut off the air supply or ventilation and switch off the cool box.
• Do not place containers, food or other ob-jects which are wanner than +5o•c (+122.F) In the cool box.
• Do not place corrosive substances or sol-vents In the cool box.
• Never expose the cool box to rain or humid-ity.
• To prevent mould and mildew from fonnlng In the cool box when it Is not being used for long periods, place a folded dry towel between the box and Its lid.
Page 161 of 486

Switching the cool box on and off
Fig. 127 Controls on the cool box
r-f'n First read and observe the Introductory Information and safety warnings & on page 158.
The interior temperature of the cool box is dependent on the temperature in the vehicle. In cooling mode, the interior temperature can be max. 20•c (68°F) below the temperature in the vehicle. In heating mode it can be max. 35•c (95.F) de-grees above the temperature in the vehicle. If you switch directly from cooling to heating (or vice ver-sa) it will take a relatively long time for the interior to reach the desired temperature.
Switching the cool box on
• Connect the 12-volt power supply.
• Press the red Fig. 127 G) to turn on the heating mode. An indicator lamp in the but-ton lights up above the button which was pressed.
• OR: press the blue button (!)®to switch on the cooling mode. An indicator lamp in the button lights up above the button which was pressed.
Ashtray and cigarette lighter
o:n Introduction
This chapter contains information on the following subjects:
Ashtray . . . . . . . . . . . . . . . . . . . 162
Removable ashtray in the drink holder 162
Cigarette lighter . . . . . . . . . . . . . . . . . . . 163
Additional information and warnings:
• Drink holder 153
• Electrical sockets 163
Switching cooling and heating mode off
• Press the red button(!) or the blue button (!). The corresponding warning lamp goes out.
Switching the cool box completely off
• Press the@) button @.
• OR: disconnect the 12-volt power supply.
Faults
If the cool box does not work, proceed as follows:
• Check whether the plug is securely in the sock-et.
• Check the connecting cable for damage.
• Check the 12-volt socket fuses.
• Run the engine to recharge the vehicle battery.
If these steps do not help, contact a qualified work-shop.
• Consumer information 404
A WARNING
Improper use of the ashtray and cigarette lighter could cause fires, burns and other se-rious Injuries.
• Never put paper or any other combustible materials In the ashtray.
Page 166 of 486
A WARNING
LCD screens contain liquid crystal, which can escape if the screen is broken. The fluid could cause irritation to the skin, eyes and respiratory organs.
• The escaping fluid could cause irritation to the skin, eyes and respiratory organs, es-pecially in people who suffer from asthma or similar illnesses. Immediately ensure that there is a sufficient supply of fresh air and get out of the vehicle. If this is not possible, open all of the windows and doors.
• If fluid gets Into your eyes or onto your skin, Immediately wash the affected area with lots of water for at least 15 minutes and con-suit a doctor.
• If fluid gets onto shoes or clothing, wash immediately with lots of water for at least 15 minutes. Clean shoes and clothes thoroughly before wearing them again.
• If fluid is swallowed, Immediately rinse the mouth out with lots of water for at least 15 minutes. Do not Induce vomiting unless In· structed to do so by a doctor. Seek medical assistance immediately.
A WARNING
Opening a DVD player's housing can lead to injuries from invisible laser radiation.
Components
,...-('n First read and observe the introductory L-Wl Information and safety warnings & on page 165.
The rear seat entertainment system is made up of the following components:
1661 Before the journey
A WARNING (Continued)
• DVD players should only be repaired by a qualified workshop.
CD
The LCD screen can be damaged If it is not handled properly.
• Always fold the LCD screen completely open or shut.
• The LCD screen Is not a "touchscreen". Do not touch or press the surface of the LCD screen.
• Do not expose the LCD screen to direct sun-light or intensive ultraviolet light for long peri-ods. This could damage the screen.
CD
Cleaning agents containing solvents can dam-age the LCD screen.
• Use cleaning agents that do not contain sol-vents such as petrol or turpentine to clean the LCD screen.
r:(jh The LCD screen contains mercury. Dispose I!!S of the LCD screen in accordance with legal requirements.
m The rear seat entertainment system only W works if the temperature inside the vehicle is between -1s•c (+S.F) and +so•c (+140.F). At temperatures outside this range, you will not be able to switch the rear seat entertainment system on. If switched on, it will switch off automatically.
• Infrared remote control unit '*page 169.
m Two sets of infrared headphones are deliv-l!J ered with the rear seat entertainment system.
Page 172 of 486
• Press the [ENTER! button to confirm your selec-tion.
• Press the [SETUP! button again to leave the main menu.
The following settings can be made in the subme-nus:
• Picture format.
• Camera perspective.
• Language.
• Subtitles.
• Screen saver.
• Saving the last item played.
Tachograph
o::D Introduction
This chapter contains information on the following subjects:
Notes on the tachograph . . . . . . . . . . . . . . . . . 172
The function and operation of the factory-fitted ta-chograph can be found in an additional operating manual delivered with the vehicle.
If you retro-fit a tachograph to the vehicle, ensure it complies with relevant legislation.
Additional information and warnings:
• Towing a trailer 139
• Accessories. modifications, repairs and renewal of parts 394
Notes on the tachograph
I""'""'J'n First read and observe the Introductory L-lo:.l.l Information given on page 172.
Location
Depending on the model, the factory-fitted tacho-graph could be located in the middle of the dash panel or in a console on the dash panel.
Time
For the time settings, refer to the additional operat-ing instructions for the tachograph.
Please note that in digital tachographs, the time must be displayed in local time. The time on the printouts is always given in UTC (Coordinated Uni-versal Time).
1721 Before the journey
• Various audio settings.
• Colour system.
• Playback control for video COs
• Parental lock 172.
• Reset to default settings.
• Password protection.
Childproof locks
This function is only available in the case of DVDs with restricted access for young people and chil-dren. This menu is used to specify whether a DVD with access restrictions is to be played or whether a password has to be entered first.
m Manipulation of the tachograph and its signal, l.!J and misuse of the tachograph discs can re-sult in prosecution.
The digital tachograph has a buffer battery to pre-vent data loss. The buffer battery can supply power for approx. one year without an external power supply. This function is used if, for example, the digital tachograph is removed from the vehicle and stored or if left in a vehicle with a battery fault or a flat battery.
Legal requirements
By law. the tachograph must be used in:
Page 176 of 486
® Shades for the driver and front passenger door windows (with flexible frames)
® Opaque shades for the centre side windows with four-part fasteners
Q) Opaque shades for the rear side windows with two-part fasteners
Opaque shade for rear window for Multivan Start-line 177.
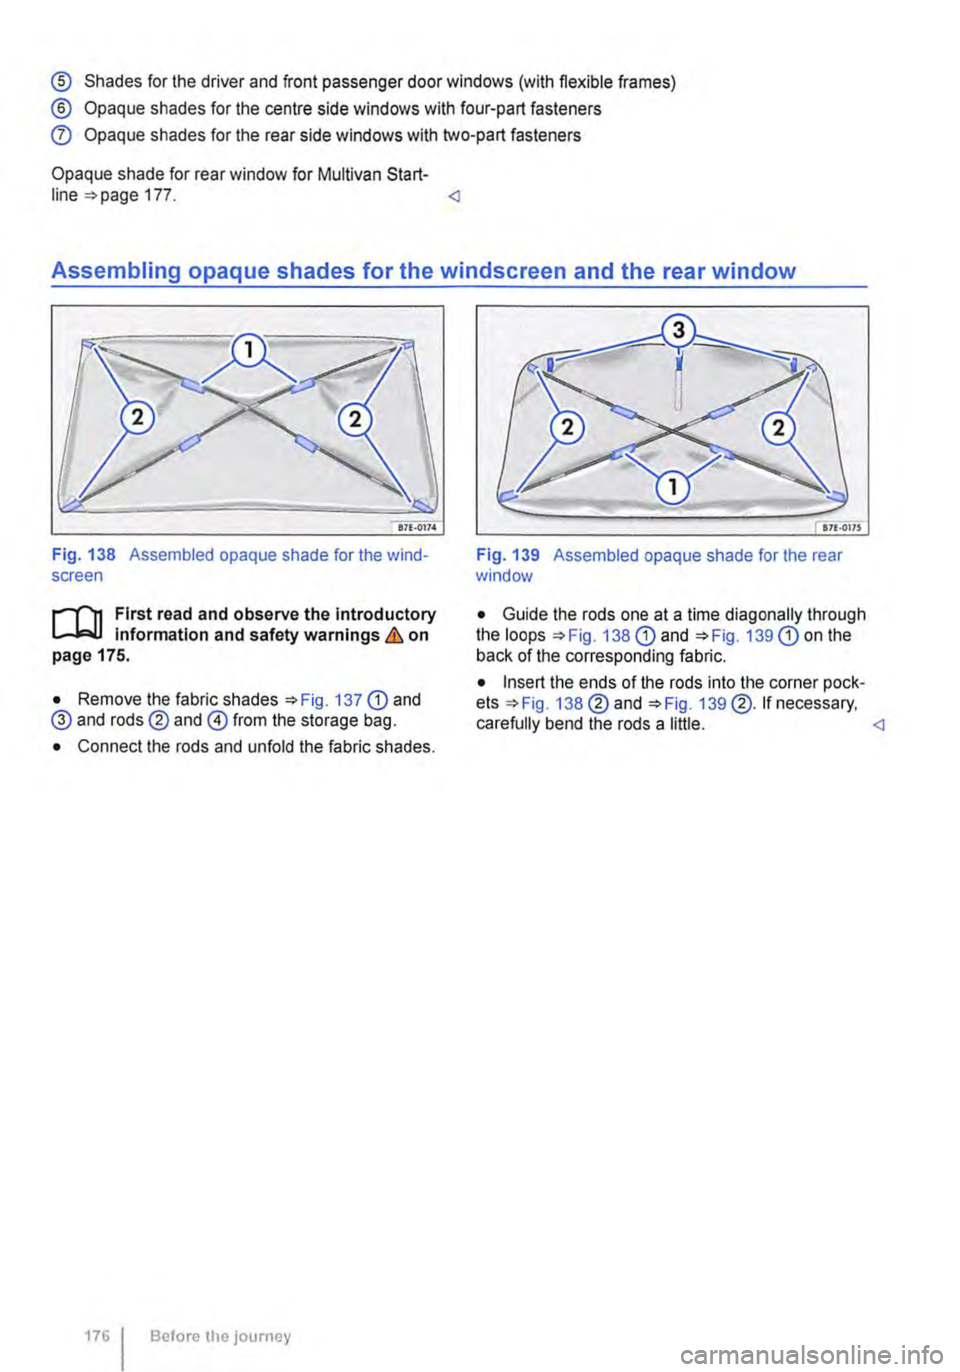
Fig. 138 Assembled opaque shade for the wind-screen
n1t First read and observe the introductory L-J,:.JJ Information and safety warnings & on page 175.
• Remove the fabric shades 137
1761 Before the journey
Fig. 139 Assembled opaque shade for the rear window
• Guide the rods one at a time diagonally through the loops 138