2010 SUBARU FORESTER CD player
[x] Cancel search: CD playerPage 195 of 402

5-24Audio
& How to eject CDs from the
player (type B)
! Ejecting a CD from the player
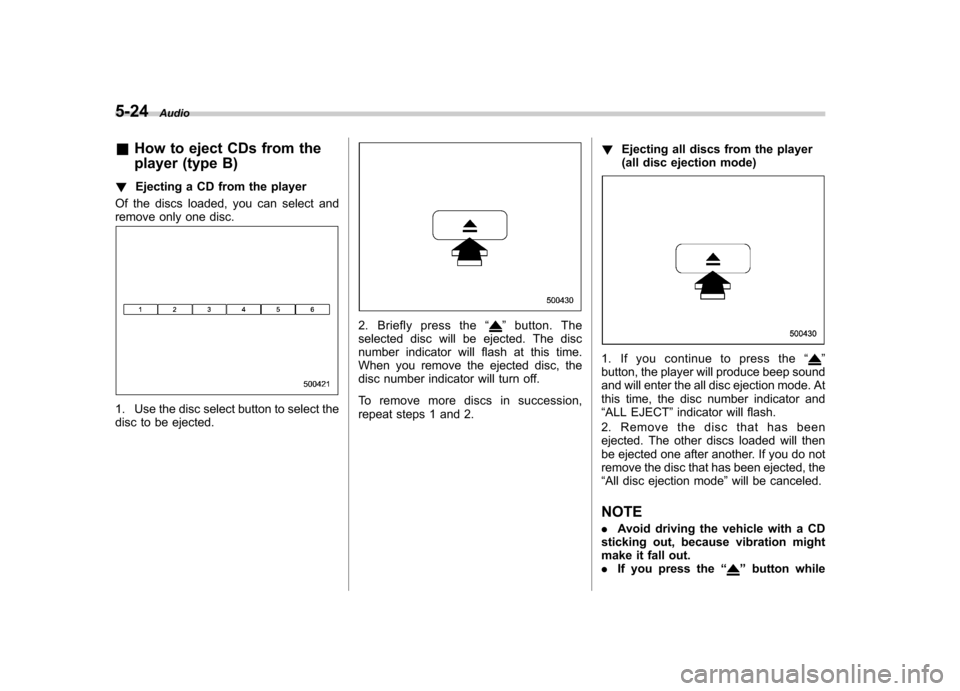
Of the discs loaded, you can select and
remove only one disc.
1. Use the disc select button to select the
disc to be ejected.
2. Briefly press the “”button. The
selected disc will be ejected. The disc
number indicator will flash at this time.
When you remove the ejected disc, the
disc number indicator will turn off.
To remove more discs in succession,
repeat steps 1 and 2. !
Ejecting all discs from the player
(all disc ejection mode)
1. If you continue to press the “”
button, the player will produce beep sound
and will enter the all disc ejection mode. At
this time, the disc number indicator and“ ALL EJECT ”indicator will flash.
2. Remove the disc that has been
ejected. The other discs loaded will then
be ejected one after another. If you do not
remove the disc that has been ejected, the“ All disc ejection mode ”will be canceled.
NOTE . Avoid driving the vehicle with a CD
sticking out, because vibration might
make it fall out.. If you press the “
”button while
Page 196 of 402

the player is in all disc ejection mode,
the mode will be cancelled following
ejection of the disc that is currently
being ejected..If you press the “CD ”button or
“ LOAD ”button while the player is in
all disc ejection mode, the player will
draw in the discs that have been
ejected and play them. & When the following mes-
sages are displayed
If one of the following messages is
displayed while operating the CD player,
determine the cause based on the follow-
ing information. If you cannot clear those
messages, please contact your SUBARU
dealer. ! When “PUSH EJECT ”is displayed
Press the eject button to unload the disc.
Check the disc for damage or deforma-
tion, and also check that the correct disc is
inserted. Do not try to unload the disc
forcibly. Single CDs (i.e., 8 cm/3 inch CDs)
are not supported, and if inserted, they will
be immediately ejected and this message
will be displayed. If the disc cannot be
unloaded or this message remains dis-
played, please contact your SUBARU
dealer. !
When “CHECK DISC ”is displayed
Press the eject button to unload the discs.
Check that the disc is not damaged or
scratched, and also check that the disc is
inserted correctly. This message may
appear when using some CD-RW discs.
Check that the disc type (i.e., 8 cm/3 inch
CDs are not supported) and data format
are correct. This player can only play MP3
and WMA data formats. If the disc cannot
be unloaded or this message remains
displayed, please contact your SUBARU
dealer. Auxiliary input jack (if
equipped)
By connecting a commercial audio pro-
duct to the vehicle, such as a portable
audio player, you can hear its sound via
the vehicle
’s speakers.
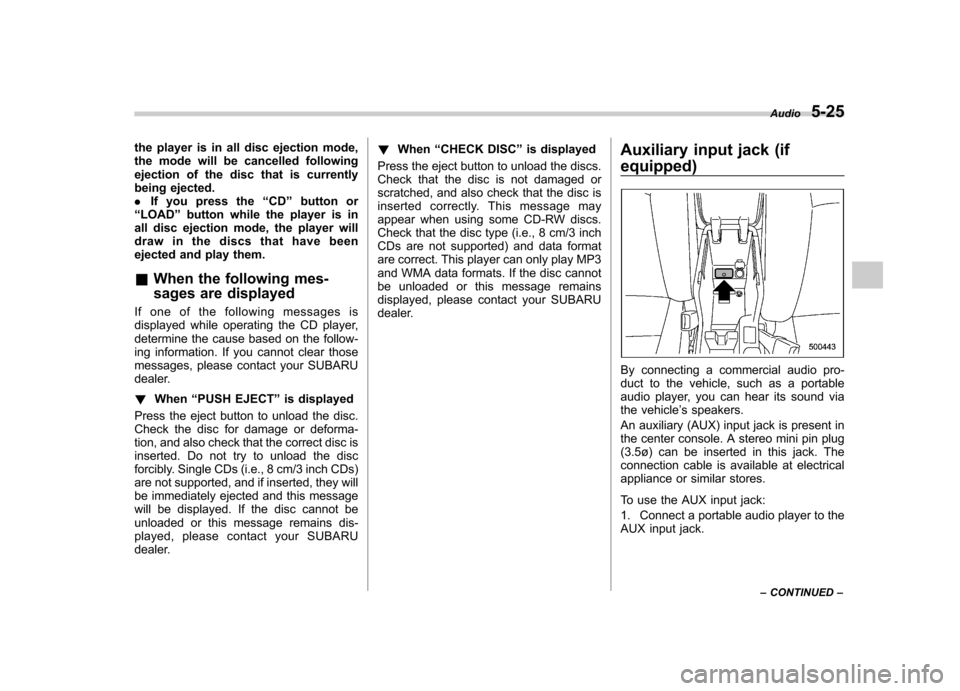
An auxiliary (AUX) input jack is present in
the center console. A stereo mini pin plug
(3.5ø) can be inserted in this jack. The
connection cable is available at electrical
appliance or similar stores.
To use the AUX input jack:
1. Connect a portable audio player to the
AUX input jack. Audio
5-25
– CONTINUED –
Page 197 of 402

5-26Audio
2. Press the “CD/AUX ”button on the
audio control panel to turn on the auxiliary
audio input.
3. Play back the portable audio player.
Refer to the Owner ’s Manual for the
portable audio player. NOTE . The AUX input jacks of the models
with the genuine SUBARU navigation
system are the RCA type. For detailed
information, refer to the Owner ’s Man-
ual supplement for the navigation sys-tem.. The output sound of the portable
audio player is not loud, and the sound
via the vehicle ’s speakers that are
connected to the vehicle audio set
may be very low. If you turn up the volume of the audio set, the volume
becomes louder. However, when you
change from one portable audio player
to another one, the volume levels via
the vehicle
’s speakers may be signifi-
cantly louder compared to the prior
device. To avoid a large volume differ-
ence, turn down the volume when you
change between portable audioplayers.. In some cases, when the sound
volume of the portable audio player is
low, the sound becomes bad when you
turn up the volume of the vehicle audio
system. In this case, adjust the sound
volume of the portable audio player. . In some cases, noise occurs be-
cause of a bad connection between the
portable player and the vehicle audio
system. Try cleaning the stereo jack
and audio plug.. If noise is not reduced, check for
disconnection of the cord or malfunc-
tions of the portable player. Precautions to observe when
handling a compact disc
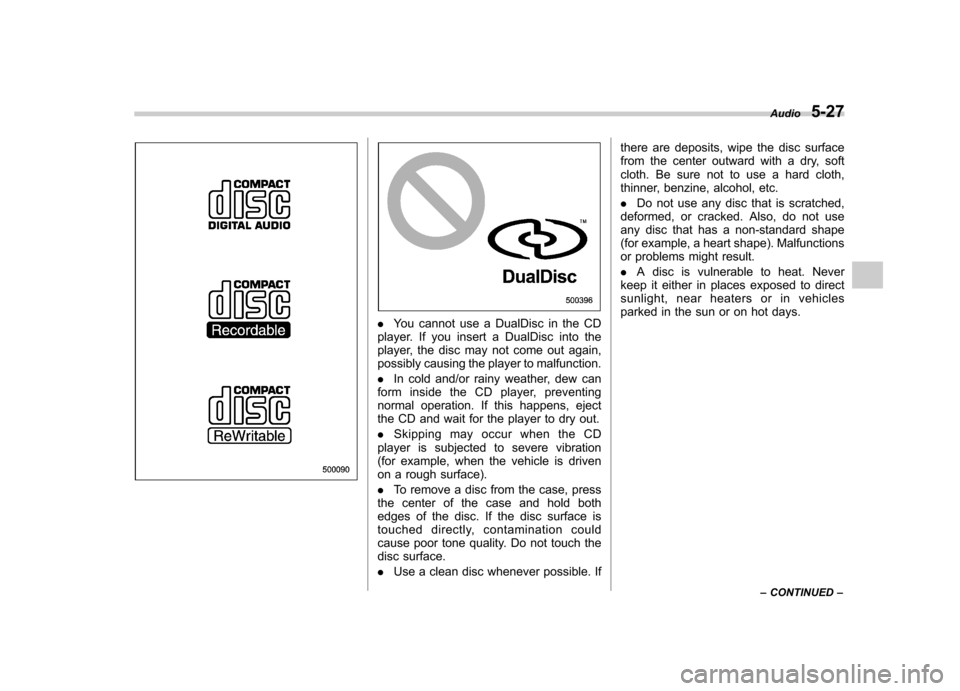
Use only compact discs (CDs, CD-Rs and
CD-RWs) that have the mark shown in the
following. Also, some compact discs
cannot be played.
Page 198 of 402

.You cannot use a DualDisc in the CD
player. If you insert a DualDisc into the
player, the disc may not come out again,
possibly causing the player to malfunction. . In cold and/or rainy weather, dew can
form inside the CD player, preventing
normal operation. If this happens, eject
the CD and wait for the player to dry out. . Skipping may occur when the CD
player is subjected to severe vibration
(for example, when the vehicle is driven
on a rough surface). . To remove a disc from the case, press
the center of the case and hold both
edges of the disc. If the disc surface is
touched directly, contamination could
cause poor tone quality. Do not touch the
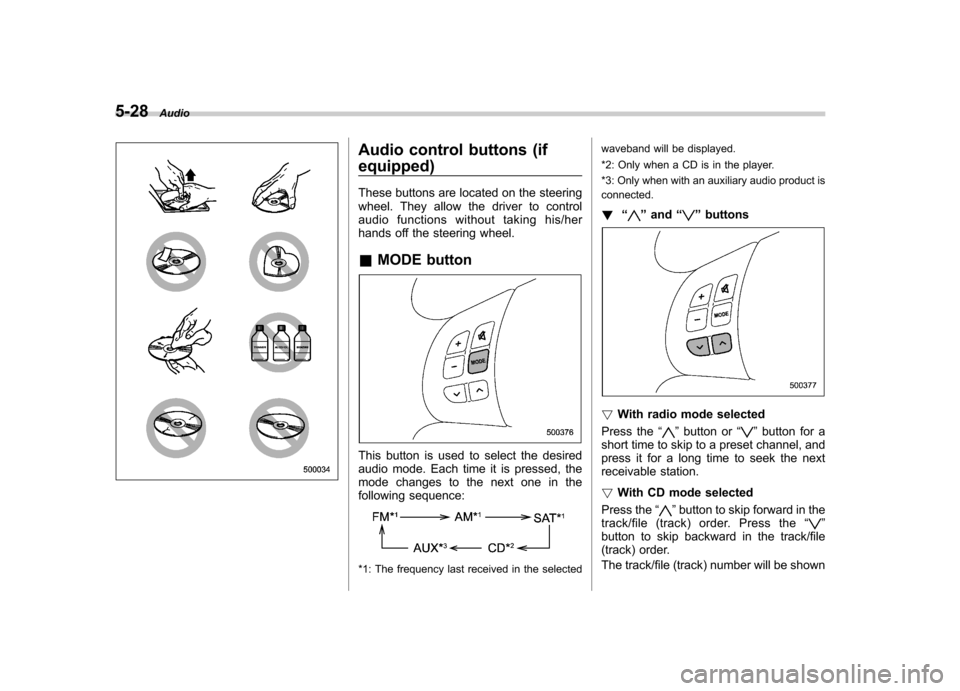
disc surface. . Use a clean disc whenever possible. If there are deposits, wipe the disc surface
from the center outward with a dry, soft
cloth. Be sure not to use a hard cloth,
thinner, benzine, alcohol, etc. .
Do not use any disc that is scratched,
deformed, or cracked. Also, do not use
any disc that has a non-standard shape
(for example, a heart shape). Malfunctions
or problems might result. . A disc is vulnerable to heat. Never
keep it either in places exposed to direct
sunlight, near heaters or in vehicles
parked in the sun or on hot days. Audio
5-27
– CONTINUED –
Page 199 of 402

5-28Audio
Audio control buttons (if equipped)
These buttons are located on the steering
wheel. They allow the driver to control
audio functions without taking his/her
hands off the steering wheel. &MODE button
This button is used to select the desired
audio mode. Each time it is pressed, the
mode changes to the next one in the
following sequence:
*1: The frequency last received in the selected waveband will be displayed.
*2: Only when a CD is in the player.
*3: Only when with an auxiliary audio product is connected.
! “
”and “”buttons
! With radio mode selected
Press the “
”button or “”button for a
short time to skip to a preset channel, and
press it for a long time to seek the next
receivable station. ! With CD mode selected
Press the “
”button to skip forward in the
track/file (track) order. Press the “”
button to skip backward in the track/file
(track) order.
The track/file (track) number will be shown
Page 391 of 402

14-2Index
A
ABS (Anti-lock Brake System) ..................................... 7-23
Warning light ................................................. 3-16, 7-23
Accessories ....................................................... 5-4, 11-46
Accessory power outlet ................................................. 6-9
Active head restraint ..................................................... 1-5
Air cleaner element ................................................... 11-15
Air conditioner Automatic climate control system ............................. 4-10
Manual climate control system ................................... 4-7
Air filtration system ..................................................... 4-13
Airflow selection Automatic climate control system ......................... 4-2, 4-9
Manual climate control system ............................. 4-2, 4-4
Alarm system ............................................................ 2-14
All-Wheel Drive warning light ....................................... 3-18
Aluminum wheel ....................................................... 11-37
Cleaning ............................................................... 10-3
Antenna system ........................................................... 5-2
Anti-lock Brake System (ABS) ..................................... 7-23
Arming the system ..................................................... 2-15
Armrest ....................................................................... 1-7
Ashtray ..................................................................... 6-11
AT OIL TEMP warning light ......................................... 3-14
Audio Antenna system ....................................................... 5-2
Auxiliary input jack ................................................. 5-25
CD player operation ............................................... 5-17
Control button ........................................................ 5-28
FM/AM radio operation ........................................... 5-10
Power and sound controls ......................................... 5-7 Satellite radio operations
......................................... 5-13
Set ........................................................................ 5-4XM
TMsatellite radio reception ................................... 5-2
Auto-dimming mirror/compass .............................. 3-32, 3-34
Automatic climate control system ................................... 4-8
Automatic headlight beam leveler ................................. 3-27
Warning light .......................................................... 3-18
Automatic transmission ............................................... 7-15
Capacities ............................................................. 12-4
Fluid ................................................................... 11-20
MANUAL mode ...................................................... 7-19
Oil temperature warning light (AT OIL TEMP) ............. 3-14
Select lever ........................................................... 7-16
Shift lock function ................................................... 7-17
Shift lock release .................................................... 7-17
SPORT mode ........................................................ 7-20
Automatic/Emergency Locking Retractor (A/ELR) ........... 1-12
Auxiliary input jack ...................................................... 5-25
BBattery .................................................................... 11-43
Drainage prevention function ..................................... 2-5
Jump starting ......................................................... 9-10
Replacement (remote engine start transmitter) ........... 7-12
Replacement (remote keyless entry system) .............. 2-10
Booster seat .............................................................. 1-29
Bottle holder ............................................................... 6-9
Brake
Assist .................................................................... 7-22
Booster ....................................................... 7-22, 11-26
Fluid ................................................................... 11-24