Page 185 of 216

Reinstalling the batteryXReinstall the charged battery. Follow the
previously described steps in reverse
order.
! The battery, its filler caps and the
ventilation hose must always be securely
installed when the vehicle is in
operation.
Reconnecting the battery
! Always connect the battery in the order
described below. Otherwise the
vehicle’s electronics can be damaged.
XTurn off all electrical accessories.XRemove the key from the starter switch.
! Never invert the terminal connections!
XConnect the battery positive lead and
fasten cover 0088 (Y page 182).XConnect battery negative lead 008A
( Y page 182).
i
After battery power (e.g. due to
reconnection) was interrupted, you will
have to set the clock ( Y page 86).
i Have the battery’s charge status and
acid level checked at the start of the cold
season at a smart center.
Jump starting
GWarning!
Failure to follow these directions will
cause damage to the electronic components,
and can lead to a battery explosion and
severe injury or death.
Never lean over batteries while connecting
or jump starting, you might get injured.
Battery fluid contains sulfuric acid. Do not
allow this fluid to come in contact with
eyes, skin or clothing. In case it does,
immediately flush affected area with
water, and seek medical help if necessary.
A battery will also produce hydrogen gas,
which is flammable and very explosive.
Keep flames or sparks away from battery,
avoid improper connection of jumper
cables, smoking, etc.
Attempting to jump start a frozen battery
can result in it exploding, causing
personal injury.
Read all instructions before proceeding.
! Do not tow‑start vehicle. You could
otherwise seriously damage the
transmission which is not covered by the
smart Limited Warranty.
! Avoid repeated and lengthy starting
attempts.
Do not attempt to start the engine using
a battery quick charge unit.
If the engine does not run after several
unsuccessful starting attempts, have it
checked at the nearest authorized smart
center.
Excessive unburned fuel generated by
repeated failed starting attempts may
damage the catalytic converter and may
present a fire risk.
Make sure the jumper cables do not have
loose or missing insulation.
Make sure the cable clamps do not touch
any other metal part while the other end
is still attached to a battery.
If the battery is discharged, the engine can
be started with jumper cables and the fully
charged battery of another vehicle or an
equivalent starter pack. Observe the
following:
R Access to the battery is not possible on
all vehicles. If you cannot access the
battery in your vehicle provide jumpJump starting183>> Practical hints.451_AKB; 3; 22, en-USd2ureepe,Version: 2.11.8.12009-07-27T09:36:34+02:00 - Seite 183Z
Page 186 of 216

start power by an external battery or
starter pack.
R Jump starting should only be performed
when the engine and catalytic converter
are cold.
R Do not start the engine if the battery is
frozen. Let the battery thaw out first.
R Only jump start from batteries with the
same voltage rating (12 V). Jump starting
with a more powerful battery could
damage the vehicle’s electrical system.
Such damage will not be covered by the
smart Limited Warranty.
R Only use jumper cables with sufficient
cross-section and insulated terminal
clamps.
R Always make sure the jumper cables are
not on or near pulleys, fans or other parts
that move when an engine is started or
running.
R Should the battery be drained
completely, let the donating power
source charge the vehicle for several
minutes before reattempting the
starting process.GWarning!
Keep flames or sparks away from battery. Do
not smoke.
Observe all safety instructions and
precautions when handling automotive
batteries.
Jump start assistance
Your vehicle’s battery is located in the
passenger footwell below the footrest
( Y page 182).
For jump starting, use the terminals of the
battery, keeping the leads connected.
XMake sure the two vehicles do not touch.XSwitch off all electrical consumers.XEngage the parking brake.XMove the gear selector lever to park
position P.XTurn off the engine.XGet access to the battery in the passenger
footwell ( Y page 181).XRemove the positive terminal cover.184Jump starting>> Practical hints.
451_AKB; 3; 22, en-USd2ureepe,Version: 2.11.8.12009-07-27T09:36:34+02:00 - Seite 184
Page 187 of 216

Position 0086 represents the charged battery
of another vehicle or an equivalent starter
pack.
! Never invert the terminal connections!XConnect positive terminal 0046 of charged
battery 0086 with positive terminal 0047 of
discharged battery 0087 with a jumper
cable. Clamp the jumper cable to
positive terminal 0046 of charged battery
0086 first.XStart the engine of the vehicle with
charged battery 0086 and run at idle speed.XConnect negative terminal 008A of charged
battery 0086 with negative terminal 0088 of
discharged battery 0087 with a jumper
cable. Clamp the jumper cable to
negative terminal 008A of charged battery
0086 first.XStart the engine of the vehicle with
discharged battery 0087 and run at idle
speed. You can now switch on the
electrical consumers. Do not switch on
the headlamps under any circumstances.XRemove the jumper cables from negative
terminals 008A and 0088 first.XRemove the jumper cables from positive
terminals 0046 and 0047.
You can now switch on the headlamps.XRemount the positive terminal cover.XHave the battery checked at the nearest
authorized smart center.
Towing
About towing
This section offers information on towing
methods for breakdown situations,
emergency towing, and flat towing smart
vehicles.
Recommended towing method -
Breakdown situation
smart recommends that the vehicle be
transported with all wheels off the ground
using a flatbed carrier truck or
appropriate wheel lift/dolly equipment.XSwitch off the tow‑away protection* and
interior motion sensor* ( Y page 48).
!
To prevent damage during transport, do
not tie down the vehicle by its chassis or
suspension parts — use only wheel straps
to position and hold down the vehicle.
Improper tie down on a flatbed carrier
truck or trailer can damage suspension
parts and body panels.
Emergency towing
When circumstances do not permit the
recommended towing method, the vehicle
may be towed with all wheels on the ground
using a strap or tow bar connected to
another vehicle. Only tow the vehicle as far
as necessary to have the vehicle moved to a
safe location where the recommended
towing method can be employed.
GWarning!
If circumstances require towing the
vehicle with all wheels on the ground,
always tow with a tow bar if:
R the engine will not run
R there is a malfunction in the brake
system
R there is a malfunction in the power
supply or in the vehicle’s electrical
system
A tow bar is necessary to adequately control
the towed vehicle.
Prior to towing the vehicle with all wheels
on the ground, make sure the gear selector
lever is in neutral position N and the
ignition is switched off.
Towing185>> Practical hints.* optional451_AKB; 3; 22, en-USd2ureepe,Version: 2.11.8.12009-07-27T09:36:34+02:00 - Seite 185Z
Page 188 of 216

GWarning!
With the engine not running, there is no
power assistance for the brake and
steering* systems. In this case, it is
important to keep in mind that a
considerably higher degree of effort is
necessary to brake and steer the vehicle.
Adapt your driving accordingly.
! Do not tow the vehicle with the front
axle raised. Doing so may cause serious
damage to the brake system which is not
covered by the smart Limited Warranty.
! Before towing the vehicle observe the
following instructions:
R Do not tow with sling-type equipment
attached to suspension parts. This may
cause damage to the radiator and other
supports if towing on a bumpy road.
R Towing the vehicle should only be done
using the properly installed towing
eye bolt. Never attach a tow cable, tow
rope, or tow rod to the vehicle chassis,
frame, or suspension parts.
! Make sure the ignition is switched off
while towing the vehicle. Doing
otherwise may result in
R the ESP ®
being activated. Active
braking action through the ESP ®
may
seriously damage the brake system
which is not covered by the smart
Limited Warranty.
R a discharged battery.
! Make sure the gear selector lever is in
neutral position N while towing the
vehicle. Doing otherwise may result in
significant transmission damage.
! Towing the vehicle with a luggage
rack* mounted is not permissible. The
vehicle must not be towed by the luggage
rack*.
i If the battery is disconnected or
discharged, the gear selector lever will
remain locked in park position P.
Contact an authorized smart center for
assistance or call Roadside Assistance.
Towing eye bolt
The towing eye bolt is located in the
passenger footwell under the carpet.
XUnscrew the carpet holder in the
passenger footwell ( Y page 148).XLift the carpet.XTake out towing eye bolt 0046.
Covers
Depending of whether you are towing a
vehicle or being towed, the towing eye bolt
can be screwed into threaded holes which
are located behind covers on the front and
rear bumper.
Front cover
186Towing>> Practical hints.* optional451_AKB; 3; 22, en-USd2ureepe,Version: 2.11.8.12009-07-27T09:36:34+02:00 - Seite 186
Page 189 of 216

XRemove cover 0046 using a suitable object
to reveal the threaded hole for the towing
eye bolt.GWarning!
High outside temperature, stop-and-go
traffic, driving on long uphill grades, or
driving at high engine speed may increase
the temperature in the engine
compartment. Therefore the area around the
air slots in the rear apron may be hot. Let
the engine cool off before touching this
area to prevent burns.
Rear cover
XRemove cover 0047 using a suitable object
to reveal the threaded hole for the towing
eye bolt.
Installing towing eye bolt
XScrew towing eye bolt in clockwise to its
stop and tighten with a suitable object.GWarning!
For safety reasons, recovery or lashing
down of the vehicle by means of the towing
eye is not allowed. Failure to observe this
could result in the towing eye being ripped
out of its mounting and people being
injured.
Towing the vehicle
XEngage the parking brake.XConnect the strap or tow bar to the towing
eye.XSwitch on the ignition.XDepress the brake pedal and keep it
pressed.XMove the gear selector lever to neutral
position N.XRelease the brake pedal.
i
With the gear selector lever in neutral
position N, the key cannot be turned fully
to starter switch position 0. Therefore
turn the key in the starter switch as far
left as it will go when switching off the
ignition.
XSwitch off the ignition.XLeave the key in the starter switch.XSwitch on the hazard warning flasher.XRelease the parking brake.
Flat towing
Flat towing is when all wheels of the
vehicle are on the ground during the tow.
For vehicles that will be flat towed over
long distances observe the following
recommendations:
XPreparing the vehicle: Contact an
authorized smart center for information
on recommended tow bar equipment and
installing a matching on/off switch on
the battery terminal.XBefore towing: Make sure the ignition is
switched on.XEngage the parking brake.XDepress the brake pedal and keep it
pressed.XMove the gear selector lever to neutral
position N.XRelease the brake pedal.
i
With the gear selector lever in neutral
position N, the key cannot be turned fully
to starter switch position 0. Therefore
turn the key in the starter switch as far
Towing187>> Practical hints.451_AKB; 3; 22, en-USd2ureepe,Version: 2.11.8.12009-07-27T09:36:34+02:00 - Seite 187Z
Page 190 of 216

left as it will go when switching off the
ignition.XSwitch off the ignition.XLeave the key in the starter switch.XWait approximately 30 seconds until the
multifunction display in the instrument
cluster is completely blank.XTurn the battery off using the previously
installed battery switch.XRelease the parking brake.XDuring towing: Make sure the gear
selector lever remains in neutral
position N with the ignition switched
off.XAfter towing: Engage the parking brake.XTurn the battery on using the previously
installed battery switch.XMove the gear selector lever to park
position P.XRemove the key from the starter switch.XLock the doors.
!
Do not flat tow the vehicle with the front
axle raised. Doing so may cause serious
damage to the brake system which is not
covered by the smart Limited Warranty.
! Failure to follow the recommendations
for flat towing can cause damage to your
vehicle:
R Not following the battery disconnect
procedure in the proper sequence may
result in data loss in the vehicle’s
control units.
R Not disconnecting the battery and
leaving the key in starter switch
position 1 (ignition on) may result in
- the vehicle locking. The vehicle will
lock if the wheels are turning at
vehicle speeds of approximately
8 mph (14 km/h) or more.
- the ESP ®
being activated. Active
braking action through the ESP ®
may
seriously damage the brake system
which is not covered by the smart
Limited Warranty.
R Not moving the gear selector lever to
neutral position N may result in
significant transmission damage.
R in a discharged battery.
Fuses
The electrical fuses in your vehicle serve
to switch off malfunctioning power
circuits.
If a fuse is blown, the components and
systems secured by that fuse will stop
operating.
GWarning!
Only use fuses approved by smart with the
specified amperage for the system in
question and do not attempt to repair or
bridge a blown fuse this may cause an
overload leading to a fire, and/or cause
damage to electrical components and/or
systems. Contact a smart center if you
encounter any electrical problems.
! A blown fuse must be replaced by an
appropriate spare fuse (recognizable by
its color or the fuse rating given on the
fuse) of the amperage recommended in
the fuse chart. Any smart center will be
glad to advise you on this subject.
If a newly inserted fuse blows again, have
the cause determined and rectified at an
authorized smart center.
Before replacing fuses:
R Engage the parking brake.
R Make sure the gear selector lever is in
park position P.
R Turn off all electrical accessories.
188Fuses>> Practical hints.
451_AKB; 3; 22, en-USd2ureepe,Version: 2.11.8.12009-07-27T09:36:34+02:00 - Seite 188
Page 191 of 216
RTurn off the engine.
R Remove the key from the starter switch.
Replacing a fuse
The fuse box is located on the driver’s side
below the dashboard.
XFrom the fuse chart ( Y page 192),
determine which fuse belongs to the
malfunctioning accessory or component.XRemove the respective fuse.XReplace the defective fuse with a new one
of the same amperage.Fuses189>> Practical hints.451_AKB; 3; 22, en-USd2ureepe,Version: 2.11.8.12009-07-27T09:36:34+02:00 - Seite 189Z
Page 192 of 216
Fuse boxFront side0046 - 006DFuse009D - 00A5Backup fuse slots190Fuses>> Practical hints.
451_AKB; 3; 22, en-USd2ureepe,Version: 2.11.8.12009-07-27T09:36:34+02:00 - Seite 190
 1
1 2
2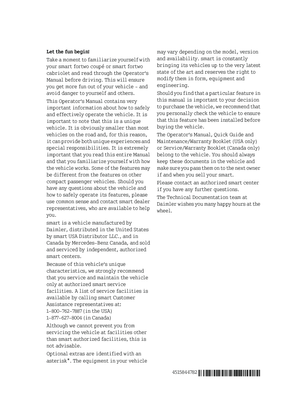 3
3 4
4 5
5 6
6 7
7 8
8 9
9 10
10 11
11 12
12 13
13 14
14 15
15 16
16 17
17 18
18 19
19 20
20 21
21 22
22 23
23 24
24 25
25 26
26 27
27 28
28 29
29 30
30 31
31 32
32 33
33 34
34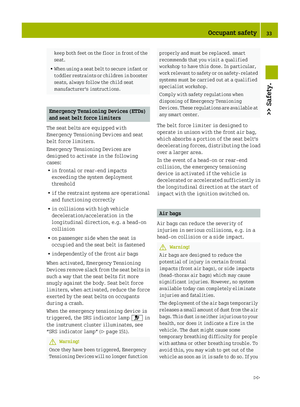 35
35 36
36 37
37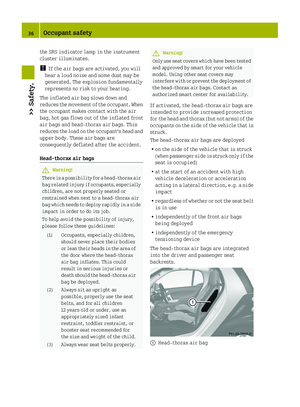 38
38 39
39 40
40 41
41 42
42 43
43 44
44 45
45 46
46 47
47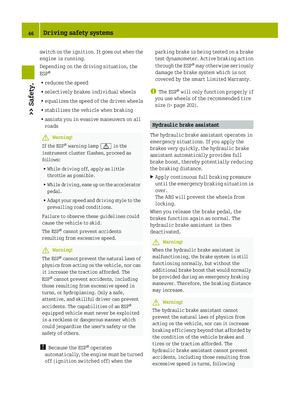 48
48 49
49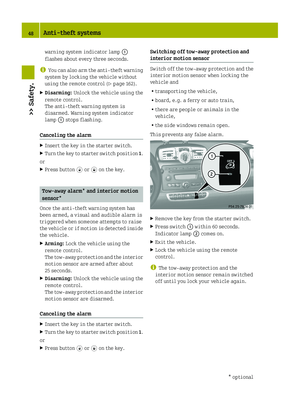 50
50 51
51 52
52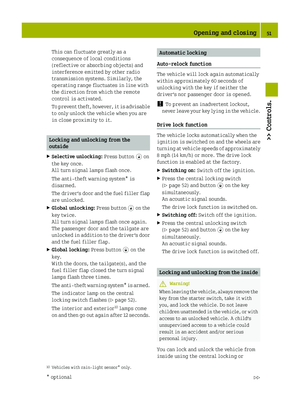 53
53 54
54 55
55 56
56 57
57 58
58 59
59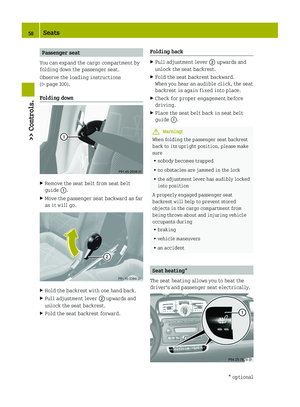 60
60 61
61 62
62 63
63 64
64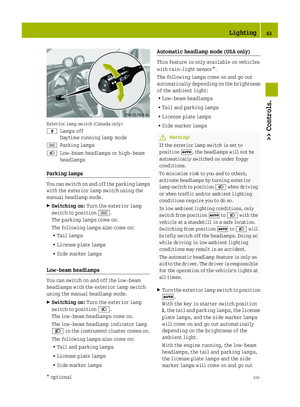 65
65 66
66 67
67 68
68 69
69 70
70 71
71 72
72 73
73 74
74 75
75 76
76 77
77 78
78 79
79 80
80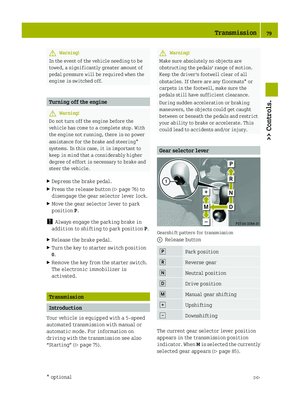 81
81 82
82 83
83 84
84 85
85 86
86 87
87 88
88 89
89 90
90 91
91 92
92 93
93 94
94 95
95 96
96 97
97 98
98 99
99 100
100 101
101 102
102 103
103 104
104 105
105 106
106 107
107 108
108 109
109 110
110 111
111 112
112 113
113 114
114 115
115 116
116 117
117 118
118 119
119 120
120 121
121 122
122 123
123 124
124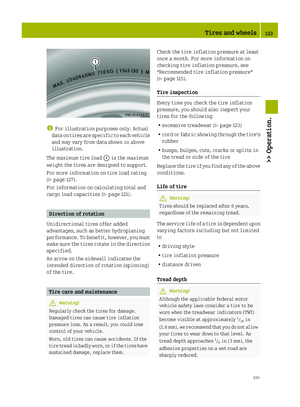 125
125 126
126 127
127 128
128 129
129 130
130 131
131 132
132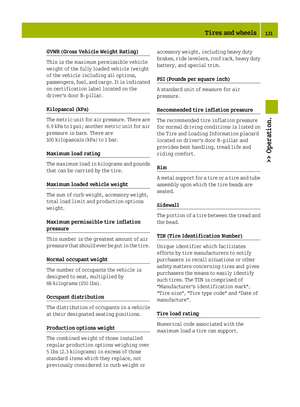 133
133 134
134 135
135 136
136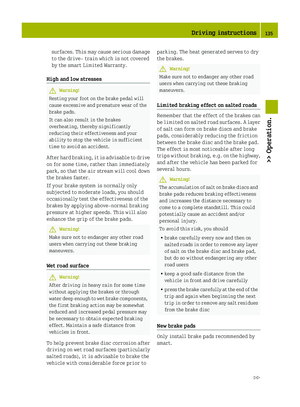 137
137 138
138 139
139 140
140 141
141 142
142 143
143 144
144 145
145 146
146 147
147 148
148 149
149 150
150 151
151 152
152 153
153 154
154 155
155 156
156 157
157 158
158 159
159 160
160 161
161 162
162 163
163 164
164 165
165 166
166 167
167 168
168 169
169 170
170 171
171 172
172 173
173 174
174 175
175 176
176 177
177 178
178 179
179 180
180 181
181 182
182 183
183 184
184 185
185 186
186 187
187 188
188 189
189 190
190 191
191 192
192 193
193 194
194 195
195 196
196 197
197 198
198 199
199 200
200 201
201 202
202 203
203 204
204 205
205 206
206 207
207 208
208 209
209 210
210 211
211 212
212 213
213 214
214 215
215,
determine which")
