Page 81 of 297

Downloaded from www.Manualslib.com manuals search engine Sunglasses holder
WARNING
The sunglasses holder should not be used
while driving so that full attention may be given
to vehicle operation.
Do not leave sunglasses in the sunglasses
holder while parking in direct sunlight. The
heat may damage the sunglasses.
The glove box contains a sunglasses storage area,
which is accessible when the glove box is open.
CONSOLE BOX
WARNING
The centre console box should not be used while
driving so that full attention may be given to ve-
hicle operation.
Pull the lid up to open the console box.
CUP HOLDERS
WARNING
Cup holders should not be used while driving so
that full attention may be given to vehicle opera-
tion.
To access the rear cup holders (where fitted), lower
the centre armrest. CAUTION
Avoid abrupt starting and braking when the
cup holder is being used to prevent spillage.
If the liquid is hot, it can scald you or your pas-
senger.
Use only soft cups in the cup holder. Hard
objects can injure you in an accident.
BOTTLE HOLDER
CAUTION
Do not use the bottle holder for any other
objects that could be thrown about in the ve-
hicle and possibly injure people during sud-
den braking or an accident.
Do not use the bottle holder for open liquid
containers.
MAP POCKET (where fitted)
Map pockets are located in the doors.
SEAT POCKET (where fitted)
A seat pocket (where fitted) is located on the back
or side of the driver and/or passenger seat.
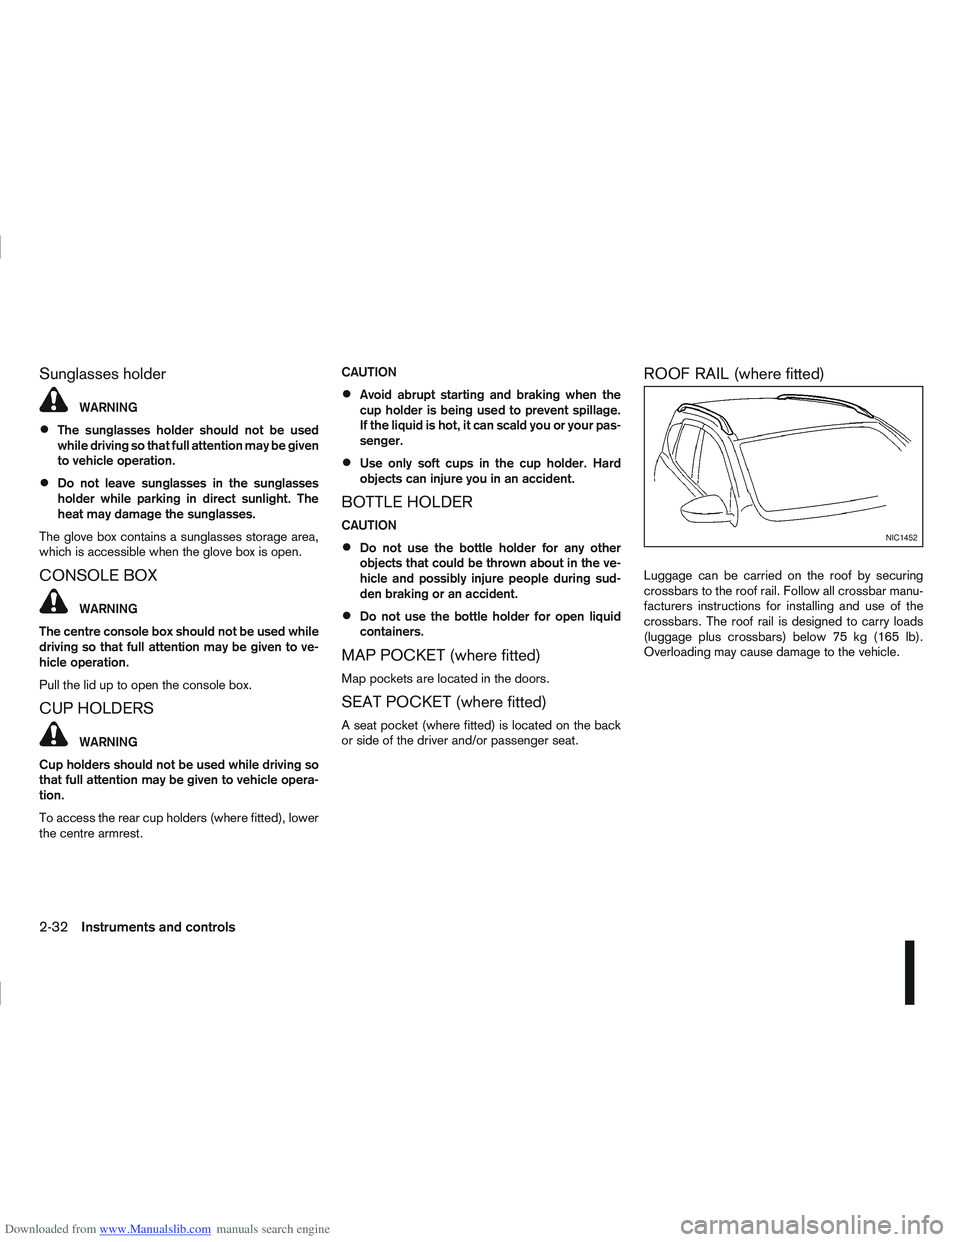
ROOF RAIL (where fitted)
Luggage can be carried on the roof by securing
crossbars to the roof rail. Follow all crossbar manu-
facturers instructions for installing and use of the
crossbars. The roof rail is designed to carry loads
(luggage plus crossbars) below 75 kg (165 lb).
Overloading may cause damage to the vehicle.
NIC1452
2-32Instruments and controls
Page 82 of 297

Downloaded from www.Manualslib.com manuals search engine WARNING
Never put anything on the rear parcel shelf, no
matter how small. Any object on it could cause
an injury in an accident or when the brakes are
applied suddenly.
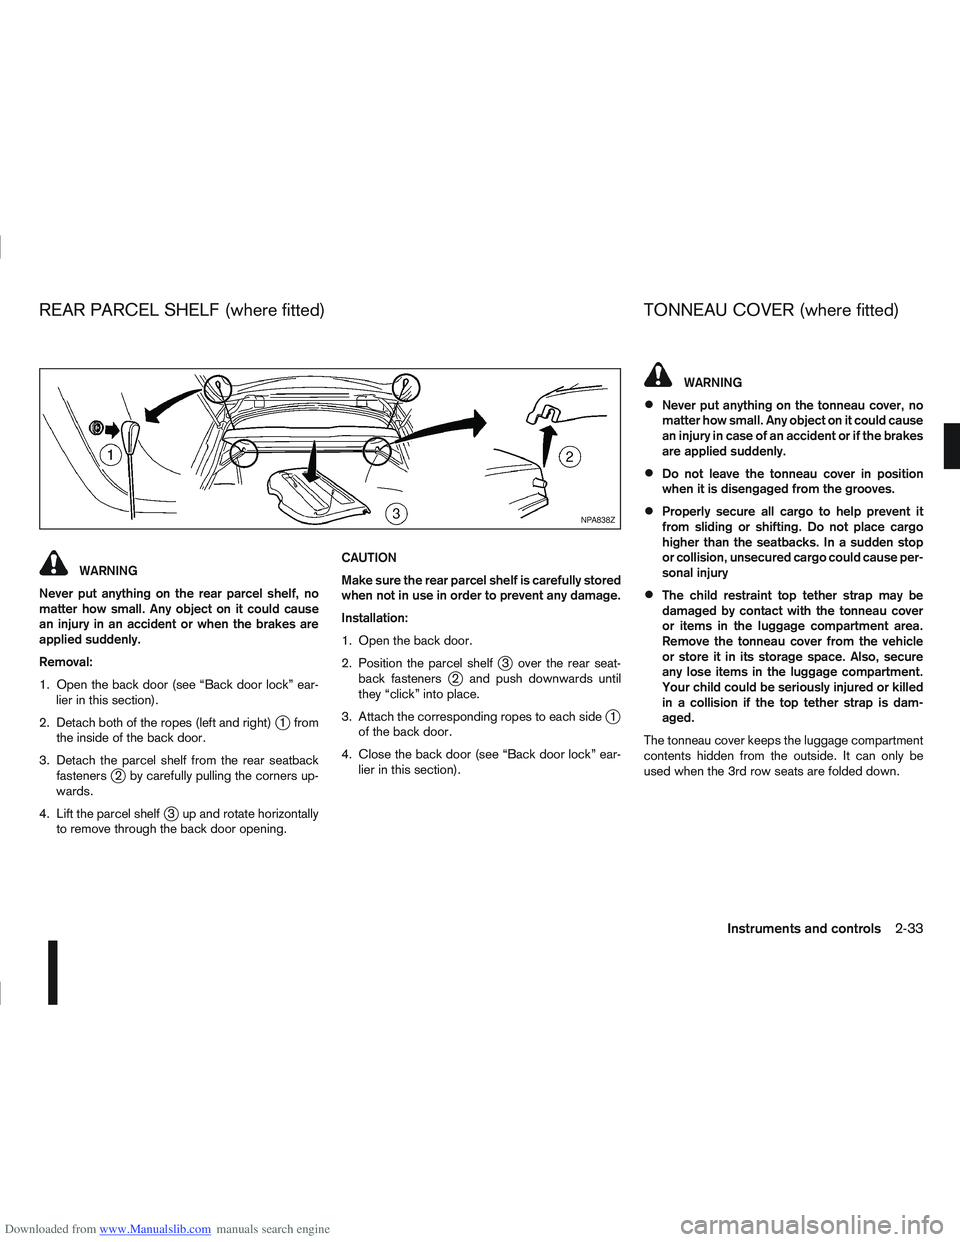
Removal:
1. Open the back door (see “Back door lock” ear- lier in this section).
2. Detach both of the ropes (left and right)
j1 from
the inside of the back door.
3. Detach the parcel shelf from the rear seatback fasteners
j2 by carefully pulling the corners up-
wards.
4. Lift the parcel shelf
j3 up and rotate horizontally
to remove through the back door opening. CAUTION
Make sure the rear parcel shelf is carefully stored
when not in use in order to prevent any damage.
Installation:
1. Open the back door.
2. Position the parcel shelf
j3 over the rear seat-
back fastenersj2 and push downwards until
they “click” into place.
3. Attach the corresponding ropes to each side
j1
of the back door.
4. Close the back door (see “Back door lock” ear- lier in this section).
WARNING
Never put anything on the tonneau cover, no
matter how small. Any object on it could cause
an injury in case of an accident or if the brakes
are applied suddenly.
Do not leave the tonneau cover in position
when it is disengaged from the grooves.
Properly secure all cargo to help prevent it
from sliding or shifting. Do not place cargo
higher than the seatbacks. In a sudden stop
or collision, unsecured cargo could cause per-
sonal injury
The child restraint top tether strap may be
damaged by contact with the tonneau cover
or items in the luggage compartment area.
Remove the tonneau cover from the vehicle
or store it in its storage space. Also, secure
any lose items in the luggage compartment.
Your child could be seriously injured or killed
in a collision if the top tether strap is dam-
aged.
The tonneau cover keeps the luggage compartment
contents hidden from the outside. It can only be
used when the 3rd row seats are folded down.
NPA838Z
REAR PARCEL SHELF (where fitted) TONNEAU COVER (where fitted)
Instruments and controls2-33
Page 83 of 297

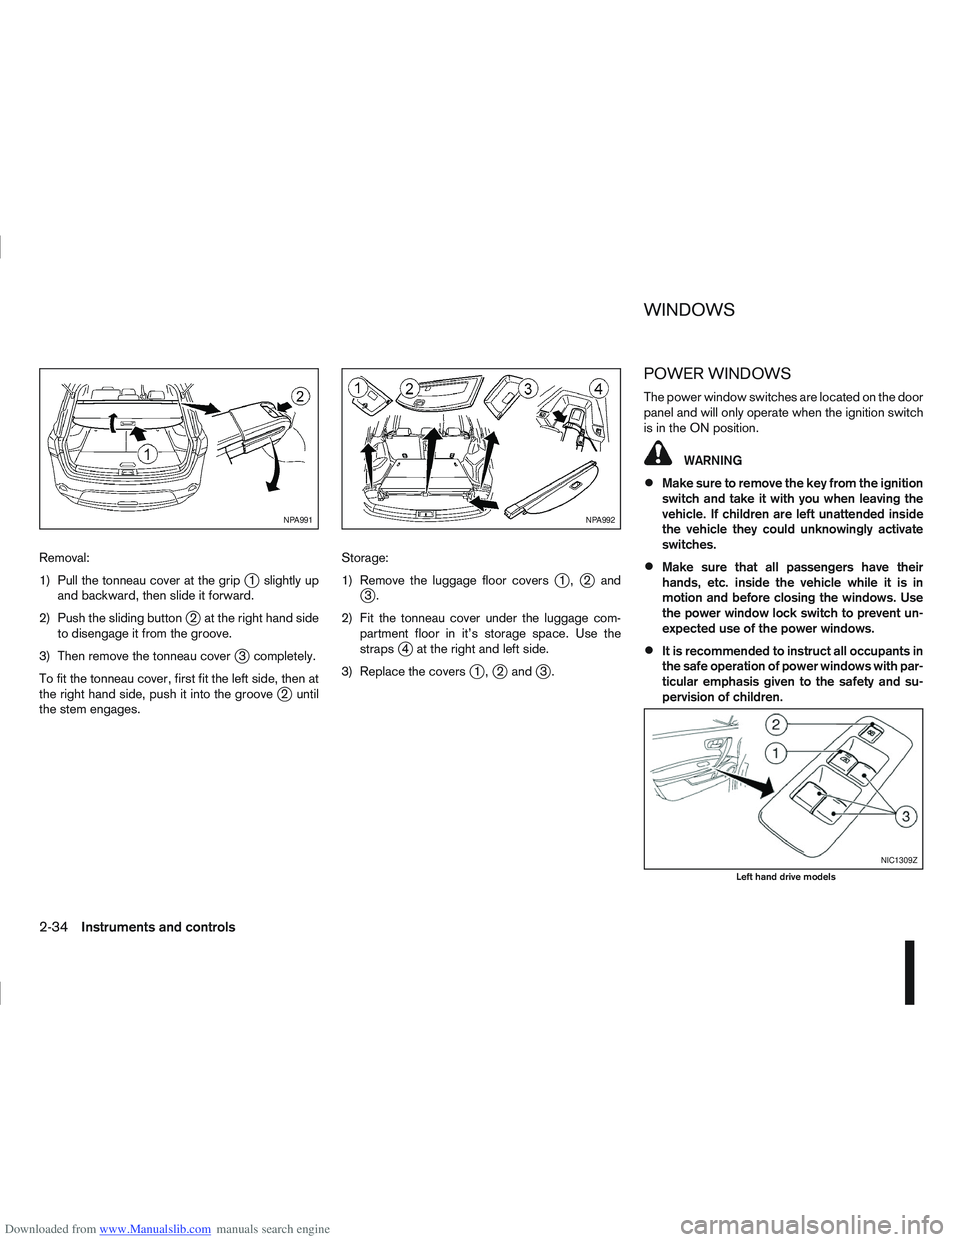
Downloaded from www.Manualslib.com manuals search engine Removal:
1) Pull the tonneau cover at the grip
j1 slightly up
and backward, then slide it forward.
2) Push the sliding button
j2 at the right hand side
to disengage it from the groove.
3) Then remove the tonneau cover
j3 completely.
To fit the tonneau cover, first fit the left side, then at
the right hand side, push it into the groove
j2 until
the stem engages. Storage:
1) Remove the luggage floor covers
j1,j2andj3.
2) Fit the tonneau cover under the luggage com- partment floor in it’s storage space. Use the
straps
j4 at the right and left side.
3) Replace the covers
j1,j2 andj3.
POWER WINDOWS
The power window switches are located on the door
panel and will only operate when the ignition switch
is in the ON position.
WARNING
Make sure to remove the key from the ignition
switch and take it with you when leaving the
vehicle. If children are left unattended inside
the vehicle they could unknowingly activate
switches.
Make sure that all passengers have their
hands, etc. inside the vehicle while it is in
motion and before closing the windows. Use
the power window lock switch to prevent un-
expected use of the power windows.
It is recommended to instruct all occupants in
the safe operation of power windows with par-
ticular emphasis given to the safety and su-
pervision of children.
NPA991NPA992
NIC1309Z
Left hand drive models
WINDOWS
2-34Instruments and controls
Page 84 of 297

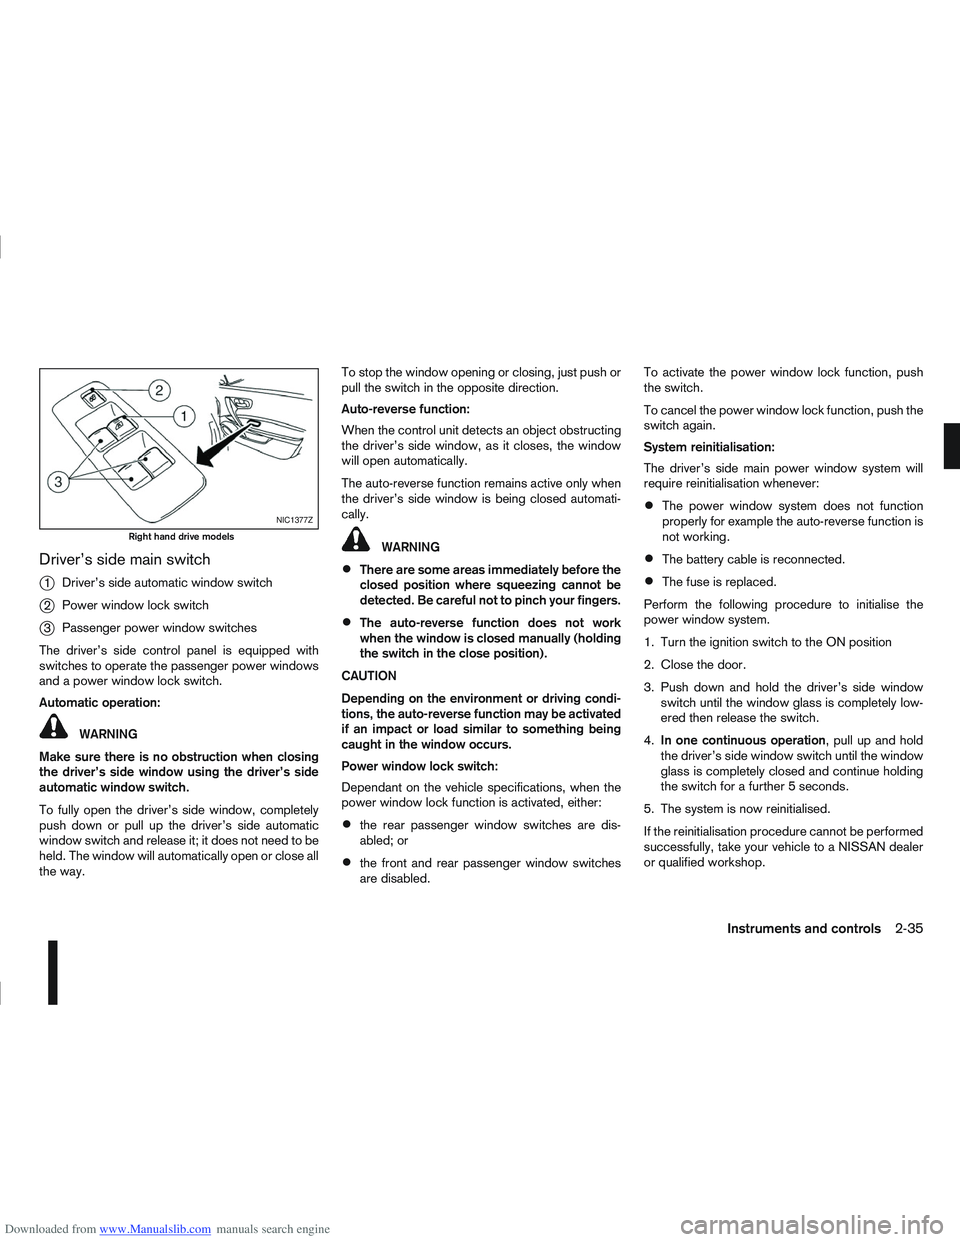
Downloaded from www.Manualslib.com manuals search engine Driver’s side main switch
j
1Driver’s side automatic window switch
j2Power window lock switch
j3Passenger power window switches
The driver’s side control panel is equipped with
switches to operate the passenger power windows
and a power window lock switch.
Automatic operation:
WARNING
Make sure there is no obstruction when closing
the driver’s side window using the driver’s side
automatic window switch.
To fully open the driver’s side window, completely
push down or pull up the driver’s side automatic
window switch and release it; it does not need to be
held. The window will automatically open or close all
the way. To stop the window opening or closing, just push or
pull the switch in the opposite direction.
Auto-reverse function:
When the control unit detects an object obstructing
the driver’s side window, as it closes, the window
will open automatically.
The auto-reverse function remains active only when
the driver’s side window is being closed automati-
cally.
WARNING
There are some areas immediately before the
closed position where squeezing cannot be
detected. Be careful not to pinch your fingers.
The auto-reverse function does not work
when the window is closed manually (holding
the switch in the close position).
CAUTION
Depending on the environment or driving condi-
tions, the auto-reverse function may be activated
if an impact or load similar to something being
caught in the window occurs.
Power window lock switch:
Dependant on the vehicle specifications, when the
power window lock function is activated, either:
the rear passenger window switches are dis-
abled; or
the front and rear passenger window switches
are disabled. To activate the power window lock function, push
the switch.
To cancel the power window lock function, push the
switch again.
System reinitialisation:
The driver’s side main power window system will
require reinitialisation whenever:
The power window system does not function
properly for example the auto-reverse function is
not working.
The battery cable is reconnected.
The fuse is replaced.
Perform the following procedure to initialise the
power window system.
1. Turn the ignition switch to the ON position
2. Close the door.
3. Push down and hold the driver’s side window switch until the window glass is completely low-
ered then release the switch.
4. In one continuous operation , pull up and hold
the driver’s side window switch until the window
glass is completely closed and continue holding
the switch for a further 5 seconds.
5. The system is now reinitialised.
If the reinitialisation procedure cannot be performed
successfully, take your vehicle to a NISSAN dealer
or qualified workshop.
NIC1377Z
Right hand drive models
Instruments and controls2-35
Page 85 of 297

Downloaded from www.Manualslib.com manuals search engine Passenger power window switches
The passenger power window switchesj4 operate
the corresponding passenger window only.
To open or close the window, push and hold the
switch down or up.
To stop the window from opening or closing, simply
release the switch.
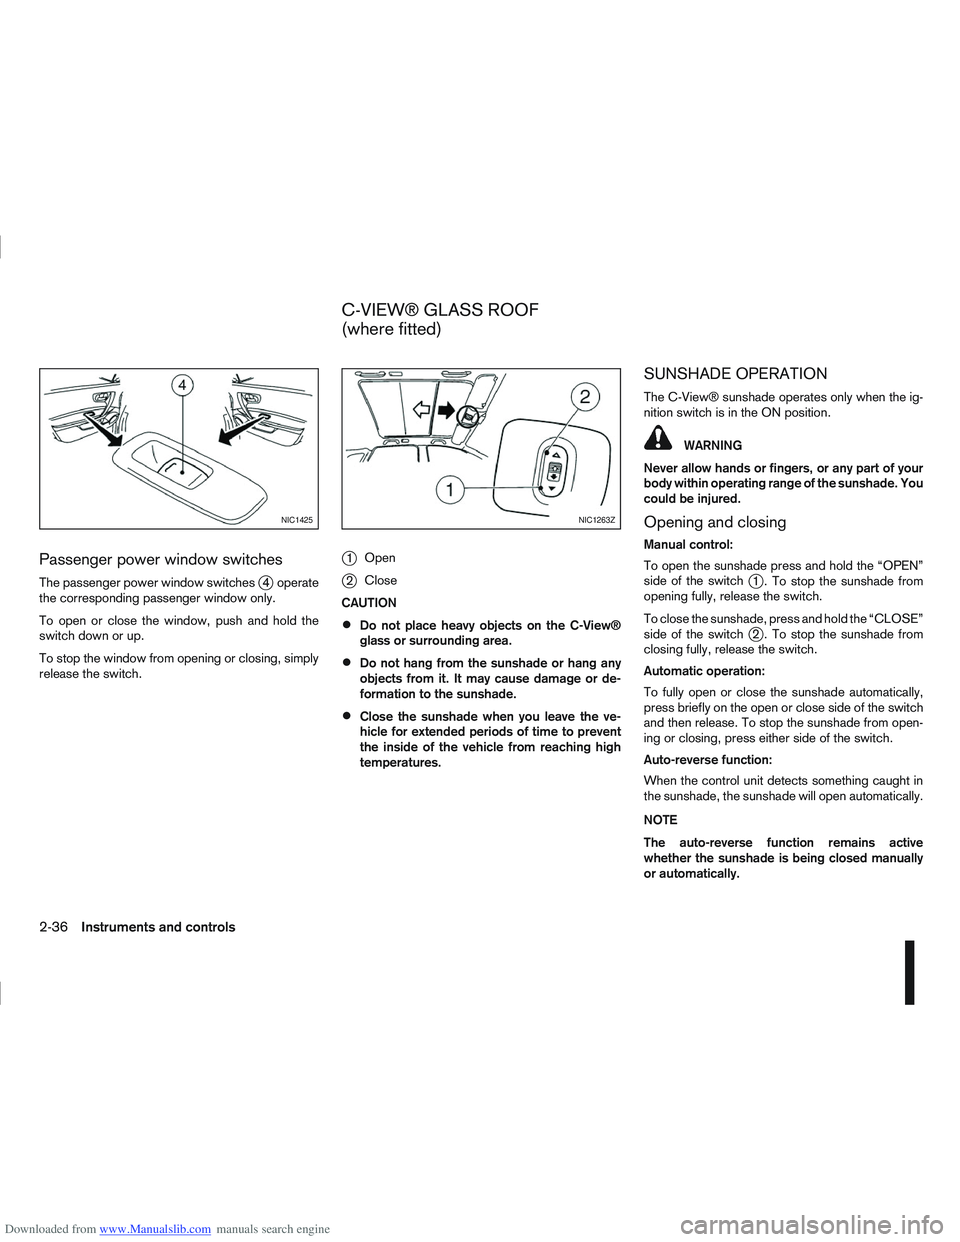
j1 Open
j2Close
CAUTION
Do not place heavy objects on the C-View®
glass or surrounding area.
Do not hang from the sunshade or hang any
objects from it. It may cause damage or de-
formation to the sunshade.
Close the sunshade when you leave the ve-
hicle for extended periods of time to prevent
the inside of the vehicle from reaching high
temperatures.
SUNSHADE OPERATION
The C-View® sunshade operates only when the ig-
nition switch is in the ON position.
WARNING
Never allow hands or fingers, or any part of your
body within operating range of the sunshade. You
could be injured.
Opening and closing
Manual control:
To open the sunshade press and hold the “OPEN”
side of the switch
j1 . To stop the sunshade from
opening fully, release the switch.
To close the sunshade, press and hold the “CLOSE”
side of the switch
j2 . To stop the sunshade from
closing fully, release the switch.
Automatic operation:
To fully open or close the sunshade automatically,
press briefly on the open or close side of the switch
and then release. To stop the sunshade from open-
ing or closing, press either side of the switch.
Auto-reverse function:
When the control unit detects something caught in
the sunshade, the sunshade will open automatically.
NOTE
The auto-reverse function remains active
whether the sunshade is being closed manually
or automatically.
NIC1425NIC1263Z
C-VIEW® GLASS ROOF
(where fitted)
2-36Instruments and controls
Page 86 of 297

Downloaded from www.Manualslib.com manuals search engine SYSTEM REINITIALISATION
The C-View® sunshade will require reinitialisation
whenever:
The sunshade system does not function prop-
erly.
The battery cable is reconnected.
The fuse is replaced.
Perform the following procedure to initialise the sun-
shade system.
1. Make sure the vehicle battery is connected.
2. Turn the ignition switch to the ON position.
3. Press and hold the “CLOSE” side of the switch. The system will now proceed as follows:
a. If open, the sunshade will start moving to the closed position.
b. After a few seconds, the system will fully open the sunshade.
c. From the fully open position, it returns to the closed position.
4. After reaching the closed position, release the sunshade switch.
5. The sunshade system is now reinitialised. NOTE
Do not disconnect the power for at least 2
seconds. If the reinitialisation procedure cannot be performed
successfully, take your vehicle to a NISSAN dealer
or qualified workshop.
CAUTION
Do not use for extended periods of time with the
engine stopped. This could discharge the bat-
tery.
NOTE
The interior lights will go off after approximately
15 minutes unless the ignition switch is in the
Acc or ON position.
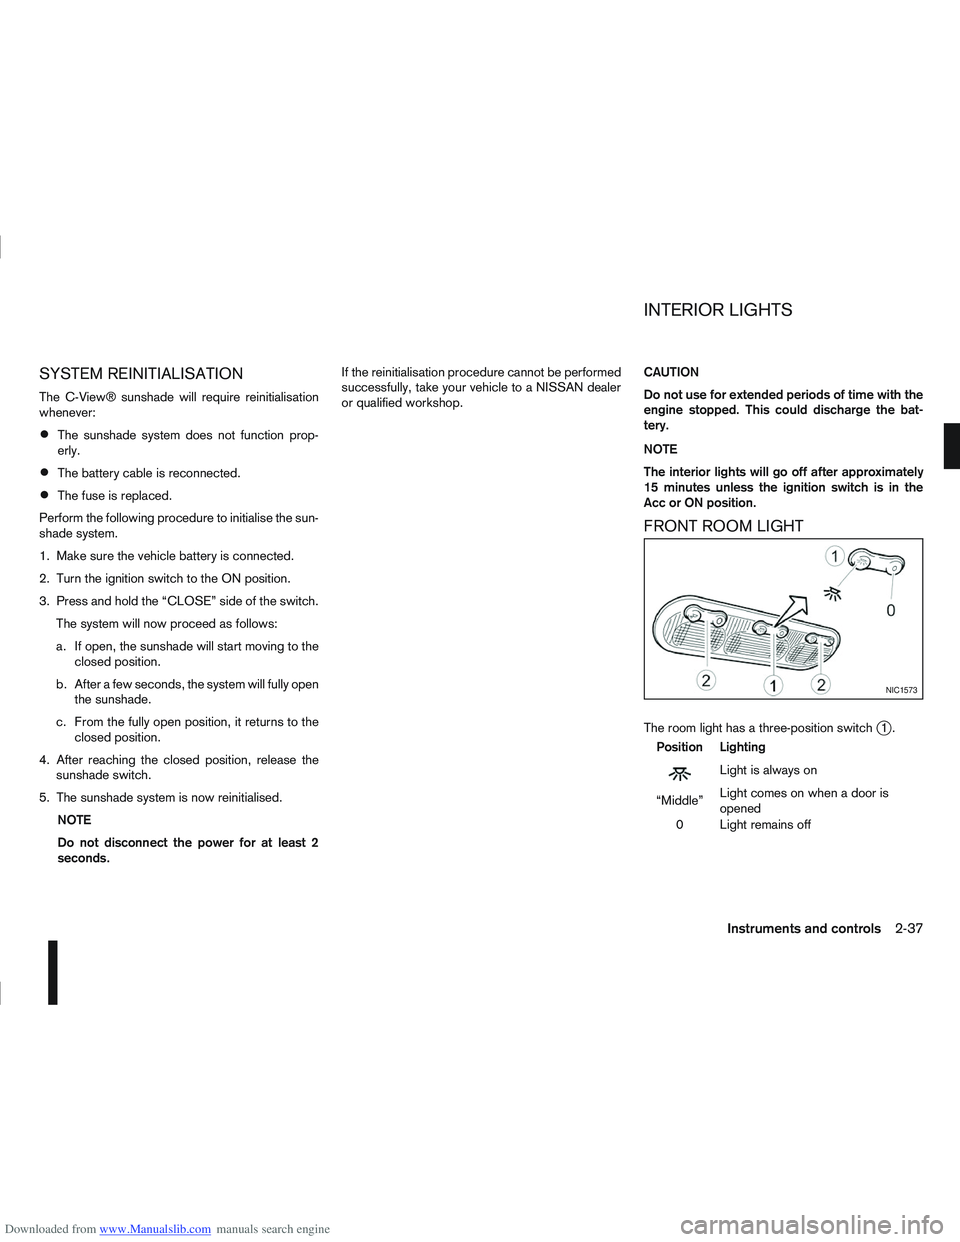
FRONT ROOM LIGHT
The room light has a three-position switchj1.
Position Lighting
mLightisalwayson
“Middle” Light comes on when a door is
opened
0 Light remains off
NIC1573
INTERIOR LIGHTS
Instruments and controls2-37
Page 87 of 297
Downloaded from www.Manualslib.com manuals search engine Room light timer (where fitted)
The room light will stay on for approximately 30 sec-
onds when:
The ignition is switched off.
The doors are unlocked.
Any door is opened and then closed.
The timer is cancelled, and the interior light will turn
off when:
The doors are locked.
The ignition switch is turned to the ON position.
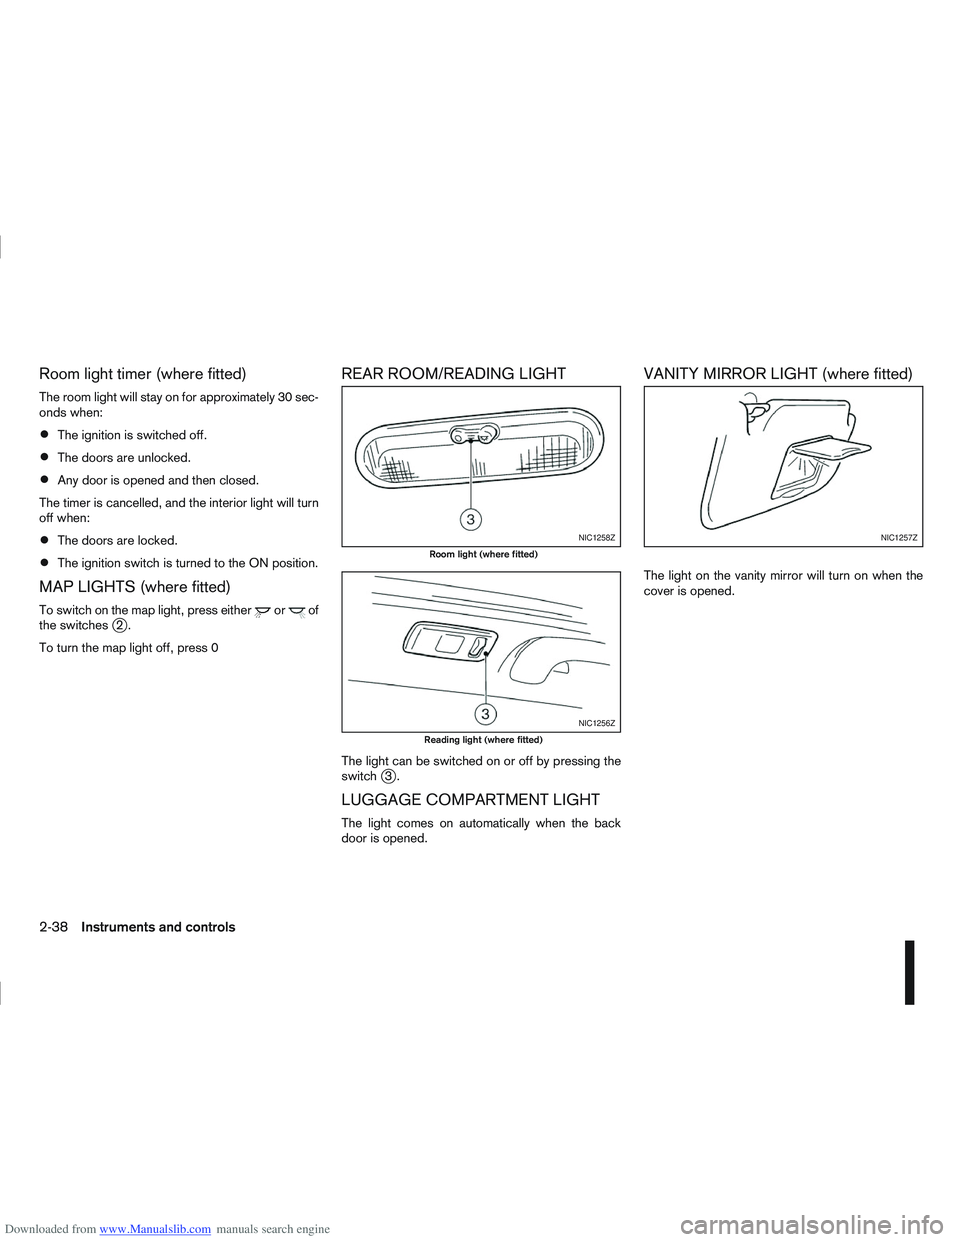
MAP LIGHTS (where fitted)
To switch on the map light, press eitherorof
the switchesj2.
To turn the map light off, press 0
REAR ROOM/READING LIGHT
The light can be switched on or off by pressing the
switchj3.
LUGGAGE COMPARTMENT LIGHT
The light comes on automatically when the back
door is opened.
VANITY MIRROR LIGHT (where fitted)
The light on the vanity mirror will turn on when the
cover is opened.
NIC1258Z
Room light (where fitted)
NIC1256Z
Reading light (where fitted)
NIC1257Z
2-38Instruments and controls
Page 88 of 297

Downloaded from www.Manualslib.com manuals search engine 3Pre-driving checks and adjustments
Pre-driving checks and adjustments
Keys ........................................................................\
3-2
NISSAN Anti-Theft System (NATS)* key ............. 3-2
Intelligent Key (where fitted)................................ 3-2
Key number ........................................................ 3-3
New keys ........................................................... 3-3
Emergency/mechanical key (Intelligent Key
models) .............................................................. 3-3
Integrated keyfob/remote control system .................. 3-3 Switching from Convenience mode to
Anti-hijack mode ................................................. 3-4
Using the remote keyless entry system ................ 3-5
Locking the doors ............................................... 3-5
Unlocking the doors ............................................ 3-5
Keyfob operation failure ...................................... 3-6
Intelligent Key system (where fitted) ......................... 3-6 Intelligent Key operating range ............................ 3-6
Using Intelligent Key system................................ 3-7
Locking/unlocking .............................................. 3-7
Starting the engine with the Intelligent Key .......... 3-8
Door locks ............................................................... 3-9 Super Lock system (RHD models) ...................... 3-9
Locking/unlocking with the key (vehicle dead
battery) ............................................................... 3-9 Inside door handle .............................................. 3-10
Power door lock switch ...................................... 3-10
Child safety lock — rear doors............................ 3-11
Back door lock ................................................... 3-12
Security system ....................................................... 3-13 Alarm system (where fitted) ................................ 3-13
NISSAN Anti-Theft System (NATS)..................... 3-13
Bonnet release ........................................................ 3-14
Fuel filler lid ............................................................. 3-15 Fuel filler lid opener lever .................................... 3-15
Fuel filler cap ...................................................... 3-15
Handbrake lever ...................................................... 3-16
Steering wheel......................................................... 3-16
Sun visors ............................................................... 3-17
Mirrors..................................................................... 3-17 Inside rear-view mirror ........................................ 3-17
Automatic anti-dazzling inside mirror (where
fitted).................................................................. 3-17
Outside rear-view mirrors.................................... 3-17
Vanity mirror ....................................................... 3-19