Page 129 of 297

Downloaded from www.Manualslib.com manuals search engine The player may skip while driving on rough
roads.
Occasionally, the CD player may not function
when the compartment temperature is ex-
tremely high. Decrease the temperature be-
fore use.
Do not expose the CD to direct sunlight.
CDs that are of poor quality, dirty, scratched,
covered with finger prints, or that have pin
holes may not work properly.
The following CDs may not work properly.
Copy control compact discs (CCCD)
Recordable compact discs (CD-R)
Rewritable compact discs (CD-RW)
Do not use the following CDs as they may
cause the CD player to malfunction.
8 cm (3.1 in) discs with an adaptor
CDs that are not round
CDs with a paper label
ANTENNA
Removing the antenna
To remove the antenna, hold the lower part of the
antenna and turn it anticlockwise.
CAUTION
Make sure to remove the antenna before the ve-
hicle enters a garage with a low ceiling or an
automatic car wash otherwise the antenna can
be damaged.
NAA956Z
4-22Display screen, heater and air conditioner, and audio system
Page 130 of 297

Downloaded from www.Manualslib.com manuals search engine –Type A: CD player
– Type B: 6 CD changer
j1 Power ON/OFF button
j2CD player: MUTE button
j2a 6 CD changer: CD Load button
j3CD play mode button
j4CD slot
j5 button
j6AUX button
j7Display
j8CD EJECT button
j9MENU button
j10Telephone button
j11Radio mode: Manual tune buttons
CD mode: Fast forward (Cue)/Fast reverse
(Review) buttons
j12Phone disconnect/BACK button
j13Phone book button
j14CD player: Preset station buttons
6 CD changer:
Radio mode: Preset station buttons
CD mode: CD select buttons
j15ENTER (Confirmation) button
j16Volume control/Menu adjustment dial
j17CD player: Preset station buttons
6 CD changer:
Radio mode: Preset station buttons
CD mode: CD select buttons
j18Sound preference button
j19RPT (Repeat)/MIX (Random) button
j20Radio mode: Seek tuning buttons
CD mode: Track Up/Down buttons
j21TA (Traffic Announcement)/NEWS button
NAA1215
LW-MW-FM RADIO WITH CD PLAYER OR 6 CD CHANGER
Display screen, heater and air conditioner, and audio system4-23
Page 131 of 297
 and therefore
cannot be transferred to")
Downloaded from www.Manualslib.com manuals search engine ANTI-THEFT SYSTEM
The audio unit is uniquely matched to the vehicle’s
NISSAN Anti Theft System (NATS) and therefore
cannot be transferred to any other vehicle. This unit
can only be activated when the ignition switch for
NATS is in the Acc or ON position.
AUDIO MAIN OPERATION
The audio unit operates when the ignition switch is
in Acc or ON position.
mPower ON/OFF button
Press thebutton to switch on the audio unit. If
the audio unit was switched off using the ignition
switch, it can also be switched on with the ignition
switch. The mode (radio or CD) that was playing
immediately before the unit was switched off will
resume playing and the volume will be set to the pre-
vious volume level.
The audio unit can be switched off either by press-
ing the
button or by turning the ignition switch to
the “OFF” or LOCK position.
mVolume level control
Turn the MENU/VOL dial in the clockwise or anti-
clockwise direction to adjust the volume level.
The audio unit is equipped with a speed control vol-
ume function, this means that the audio unit auto-
matically adjusts the volume level in relation to ve-
hicle speed. For details, see “MENU button” later in
this section.
Mute button (where fitted)
Press thebutton to mute the sound and
[MUTE] appears in the display. To cancel the mode,
use any one of the following options:
– Press the
button again.
– Turn the MENU/VOL dial.
– Press the , or button.
mSound button
Press thebutton to enter the sound menu. Each
time thebutton is pressed, the mode will change
as follows:
[BASS] →[TREBLE] →[BALANCE] →[FADE] →
[EQ] →[BASS]
When the desired mode appears in the display, turn
the MENU/VOL dial clockwise or anticlockwise to
adjust the settings. When the configuration is com-
plete, press the button repeatedly or the
button once until the sound menu screen
is exited or wait at least 5 seconds without pressing
any buttons.
BASS control
Use this control to enhance or attenuate bass re-
sponse sound.
Turn the MENU/VOL dial clockwise or anticlockwise
to adjust the bass settings.
TREBLE control
Use this control to enhance or attenuate the treble.
Turn the MENU/VOL dial clockwise or anticlockwise
to adjust the treble settings.
BALANCE control
Use this control to adjust the balance of the volume
between the left and right speakers.
Turn the MENU/VOL dial anticlockwise or clock-
wise to adjust the left/right balance.
FADE (Fader) control
Use this control to adjust the balance of the volume
between the front and rear (where fitted) speakers.
Turn the MENU/VOL dial anticlockwise or clock-
wise to adjust the front/rear balance.
EQ (Equalizer)
Use this control to change the preset sound mode.
Turn the MENU/VOL dial in the clockwise or anti-
clockwise direction and the mode will change as fol-
lows:
[OFF] ⇔[ENHANCE] ⇔[ACOUSTIC] ⇔[LIVE]
⇔ [OFF]
RADIO OPERATION
When the(Power) button is pressed, the audio
unit will switch on with the last received radio sta-
tion, if the audio unit was previously switched off in
radio mode.
4-24Display screen, heater and air conditioner, and audio system
Page 132 of 297

Downloaded from www.Manualslib.com manuals search engine Band select button
Press the button to change the reception
wave band as follows:
FM1 →FM 2 →FM T →MW →LW →FM1
When button is pressed while the igni-
tion switch is in the Acc or ON position, the radio
will come on at the last received radio station. If the
CD is already playing, pressing the but-
ton will switch off the CD play mode and the last
received radio station will be selected.
FM Auto store
When the button is pressed for more
than 1.5 seconds and the six strongest stations are
stored in the preset (1 to 6) of the FM T band. Dur-
ing the search, a notification message [AU-
TOSTORE] appears in the display and the sound is
muted until the operation is complete. Once com-
pleted, the radio selects preset 1.
Manual tuning buttons
WARNING
The radio should not be tuned while driving in
order for full attention to be given to the driving
operation.
Press the
orbutton repeatedly to in-
crease or decrease the frequency. The frequency increases or decreases in steps of
100 kHz on the FM band, 9kHz on the MW band,
and 3 kHz on the LW band.
If the
orbutton is held down with a long
press, the frequency will continuously increase or
decrease until the button is released.
SEEK tuning buttons
Pressing briefly on theorbutton starts the
tuning mode. The radio tuner seeks from low to high
or high to low frequencies and stops at the next
broadcasting station. During seek mode, the audio
output is muted. If no broadcasting station can be
found within the complete band cycle, it will return
to the initial frequency.
If the
orbutton is held down with a long
press, the seek mode will continuously increase or
decrease until the button is released. When the but-
ton is released, the seek mode will seek the next
broadcasting station.
Preset station buttonsj1j2j3j4j5j6
Pressing a preset button for less than 2 seconds will
select the stored radio station.
Pressing a preset button for more than 2 seconds
will cause the station currently being received to be
stored against that preset button.
Eighteen stations can be stored in the FM band.
(Six each for FM1, FM2 and FMT)
Six stations can be set for both the MW and LW
bands. If the battery is disconnected, or if the fuse blows,
the radio memory will be erased. In that case, reset
the desired stations after battery connection or fuse
replacement.
Radio data system (RDS) operation
The RDS is a system through which encoded digital
information is transmitted by FM radio station in ad-
dition to the normal FM-radio broadcasting. The
RDS provides information services such as station
name, traffic information and news.
NOTE
In some countries or regions, some of these ser-
vices may not be available.
Alternative Frequency (AF) mode:
The AF mode operates in the FM (radio) mode.
The AF mode operates both in the FM (radio)
and CD mode (if FM was previously selected in
the radio mode).
When AF mode has been set to the “ON” posi-
tion in the user set up menu mode, the [AF] indi-
cator comes on. For activation or deactivation
details, see “MENU button” later in this section.
The AF function compares signal strengths and se-
lects the station with the optimum reception condi-
tions for the currently tuned-in station.
Display screen, heater and air conditioner, and audio system4-25
Page 133 of 297
 function (station name
display function):
When an RDS station is tuned in with seek or manual
tuning, the")
Downloaded from www.Manualslib.com manuals search engine RDS functions
Programme Service (PS) function (station name
display function):
When an RDS station is tuned in with seek or manual
tuning, the RDS data is received and the PS name
is displayed.
Emergency broadcast interrupt function
(ALARM INTERRUPTION - EBU SPEC FOR
INFO):
When the radio receives PTY code 31 (an emer-
gency broadcast code), the sound is interrupted,
the emergency broadcast is heard, and [ALARM] is
displayed. The volume level at this time is the same
as that for traffic announcements. Once the emer-
gency broadcast is finished, the unit immediately
returns to the previous source.
REG (Regional) mode:
Some local radio stations are linked according to
region because they only offer limited coverage due
a limited number of transmitters. If the signal from
one station of these stations becomes weak while
driving, RDS mode will switch to another local sta-
tion in the region with a stronger signal.
When the REG mode is activated in the FM band
and the radio receiver is tuned to a local radio sta-
tion, it will keep receiving this radio station without
switching to another local station. For activation or
deactivation details, see “MENU button” later in this
section.
TA Traffic announcement
This function operates in both FM (radio) and CD
mode.
Pressing the button selects the TA
mode. The TA indicator is displayed while TA
mode is on.
When the button is pressed again.
The mode will be switched off and the TA indica-
tor will disappear from the display.
If the TA mode is not activated ,aTiconwill
appear in the display when the currently received
radio station is capable of broadcasting traffic
announcements. Pressing the but-
ton will activate TA mode and the indicator will
change from T to TA.
Traffic announcement interrupt function:
When a traffic announcement is received, the an-
nouncement is tuned in.
Once the traffic announcement has finished, the unit
returns to the source that was active before the traf-
fic announcement started. The volume returns to the
previous level.
If the button is pressed during a traffic
announcement, the traffic announcement interrupt
mode is cancelled. The TA mode returns to the
standby mode and the audio unit returns to the pre-
vious source. NOTE
TA mode operates regardless of whether the AF
mode is on or off.
NEWS mode
When the NEWS mode is activated and the radio
receives a NEWS code from a FM broadcasting
station, the playing mode will be interrupted. Once
the news broadcast has finished, the audio unit will
return to the previous source. During the interrup-
tion, NEWS and the broadcasting station name will
be displayed.
To enable or disable the NEWS mode, press the
button for more than 2 seconds. When
the NEWS mode is enabled, the NEWS icon will be
displayed.
1. NEWS standby mode
The NEWS standby mode can be activated while
in FM or CD mode.
Pressing the TA NEWS button for more than 2
seconds, the NEWS standby mode will switch
off and the NEWS icon will disappear from the
display.
2. NEWS interruption mode
Pressing the button for more than
2 seconds, the NEWS standby mode will switch
off and the NEWS icon will disappear from the
display.
4-26Display screen, heater and air conditioner, and audio system
Page 134 of 297

Downloaded from www.Manualslib.com manuals search engine When theor button is pressed
during a NEWS interruption, the NEWS standby
mode remains active.
However, if the button is pressed and
the radio wave band changes to the MW or LW,
then the NEWS standby mode will be switched
off.
MENU BUTTON
To configure Alternative Frequency (AF), Regional
(REG) and Language settings, perform the follow-
ing procedure:
1) Press and hold the
Page 135 of 297

Insert the CD into the slot with the label side facing
up. The CD will be guided automatically into the slot
and will sta")
Downloaded from www.Manualslib.com manuals search engine CD insert (CD player)
Insert the CD into the slot with the label side facing
up. The CD will be guided automatically into the slot
and will start playing. After loading the CD, the track
information will be displayed.
If the radio is already operating, it will be automati-
cally turned off and the CD player will start playing.
CD Play button
Press thebutton to start playing the loaded
CD. Playing starts from the track that was being
played when the CD play mode was switched off.
CD Load button (6 CD
Changer)
To insert a CD into the CD changer proceed as fol-
lows:
1) Press the
button for less than 1.5 seconds
2) Select an unoccupied slot by pressing the corre- sponding CD select button. If no slot is selected,
the CD changer will select the first available slot
after 5 seconds. If the selected slot is already
occupied with a CD then the display will show a
notification message that this slot is not avail-
able.
3) Insert the CD into the slot with the CD label side facing up when the display shows [LOAD CD].
The CD will be guided automatically into the slot
and will start playing. After loading the disc, the track number and the
occupied slot number will appear in the display.
If the CD is not loaded within 10 seconds, the CD
changer will start to play the last CD or return to the
last received radio station.
To insert 6 CDs into the CD changer in succession,
press and hold the
button for more than 1.5
seconds.
CD select buttonsj1j2j3j4j5j6(6
CD Changer)
To change to another CD stored in the CD changer,
press the corresponding CD select button. When a
CD is selected, it will start to play from the first
track.
Fast Forward (Cue),
Fast reverse (Review)
buttons
When the(Cue) or(Review) button is
pressed continuously, the track will be played at
high speed. When the button is released, the CD
will return to normal playing speed.
Track up/down buttons
Pressing theorbutton once will cause the
CD to skip forward or backward to the beginning of
the next track. Press the
orbutton to skip
through the CD tracks. The CD will skip the number
of times the button is pressed.
Repeat/MIX button
Pressing thebutton repeatedly will change the
play mode as follows:
CD player:
[RPT TRACK] →[MIX DISC] →[RPT ALL] →[RPT
TRACK]
[RPT TRACK]: The current track will be played continuously.
[MIX DISC]: All the tracks will be played in a random order.
[RPT ALL]: All the tracks will be played in sequential order.
6 CD changer:
[RPT TRACK] →[RPT DISC] →[MIX DISC] →
[MIX ALL] →[RPT ALL] →[RPT TRACK]
[RPT
TRACK]: The current track will be played
continuously.
[RPT
DISC]: The currently played CD will be
played repeatedly.
[MIX
DISC]: All the tracks on the currently
played CD will be played in a
random order.
[MIX ALL]: All the tracks on all of the CDs will be played in a random order.
[RPT ALL]: All the tracks on all the CDs will be played continuously in sequential
order.
4-28Display screen, heater and air conditioner, and audio system
Page 136 of 297
 button and the CD will be
ejected.
6 CD changer:
1. A CD can be ejected by:
Pressing the eject (")
Downloaded from www.Manualslib.com manuals search engine CD eject button
CD player:
Press the eject (
) button and the CD will be
ejected.
6 CD changer:
1. A CD can be ejected by:
Pressing the eject () button (the currently
played CD will be ejected).
Pressing a CD select button followed by the
eject () button.
Pressing the eject () button followed by a
CD select button.
2. After pressing the eject (
) button, a notifica-
tion message appears in the display.
3. When the CD slot door opens, the CD is ejected and the CD can now be removed.
4. If necessary, insert another CD into the respec- tive CD slot or wait to let the system close the
CD slot door.
To eject all the discs sequentially, press and hold
the eject (
) button for longer than 1.5 seconds.
The CD changer will start to eject from the current
or last used CD. After removing an ejected CD, the
next CD will be ejected. Ejecting CD (with ignition switch in “OFF” or
LOCK):
When the ignition switch is in the “OFF” or LOCK
position it is possible to eject the currently played
CD. However the audio unit will not be activated.
CD player:
Press the eject (
) button and the CD will be
ejected.
6 CD changer:
Press the eject () button less than 1.5 sec-
onds and the CD will be ejected.
To eject all CD’s in sequential order, keep the
eject () button pressed for longer than 1.5
seconds. The CD changer starts to eject from
the current or last used CD onwards. After re-
moving an ejected CD, the next one comes out.
NOTE
When the CD is ejected and not removed
within 15 seconds, it will automatically retract
into the slot to protect it from damage.
If an error message appears in the display,
press the eject () button to eject the faulty
CD and insert another CD or check if the
ejected CD is inserted upside down.
AUX SOCKET
Open the lid and connect the lead with the jack of a
compatible player (e.g. MP3 player) to the socket
jA.
Press the button for the AUX mode.
BLUETOOTH®MOBILE PHONE
FEATURE
This system offers a hands-free facility for your mo-
bile telephone with Bluetooth®to enhance driving
comfort.
For details, see “Mobile phone integration for LW-
MW-FM radio with CD player or 6 CD changer
(Type A)” later in this section.
NAA1092
Display screen, heater and air conditioner, and audio system4-29
 1
1 2
2 3
3 4
4 5
5 6
6 7
7 8
8 9
9 10
10 11
11 12
12 13
13 14
14 15
15 16
16 17
17 18
18 19
19 20
20 21
21 22
22 23
23 24
24 25
25 26
26 27
27 28
28 29
29 30
30 31
31 32
32 33
33 34
34 35
35 36
36 37
37 38
38 39
39 40
40 41
41 42
42 43
43 44
44 45
45 46
46 47
47 48
48 49
49 50
50 51
51 52
52 53
53 54
54 55
55 56
56 57
57 58
58 59
59 60
60 61
61 62
62 63
63 64
64 65
65 66
66 67
67 68
68 69
69 70
70 71
71 72
72 73
73 74
74 75
75 76
76 77
77 78
78 79
79 80
80 81
81 82
82 83
83 84
84 85
85 86
86 87
87 88
88 89
89 90
90 91
91 92
92 93
93 94
94 95
95 96
96 97
97 98
98 99
99 100
100 101
101 102
102 103
103 104
104 105
105 106
106 107
107 108
108 109
109 110
110 111
111 112
112 113
113 114
114 115
115 116
116 117
117 118
118 119
119 120
120 121
121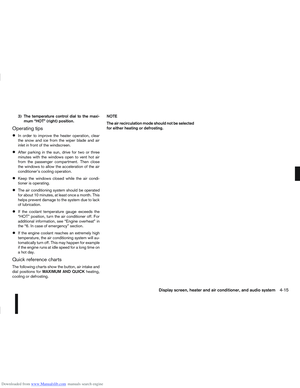 122
122 123
123 124
124 125
125 126
126 127
127 128
128 129
129 130
130 131
131 132
132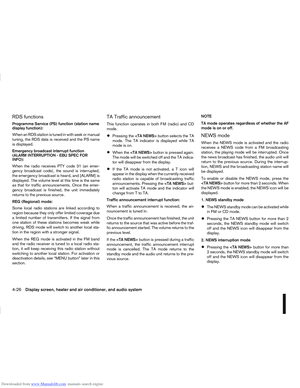 133
133 134
134 135
135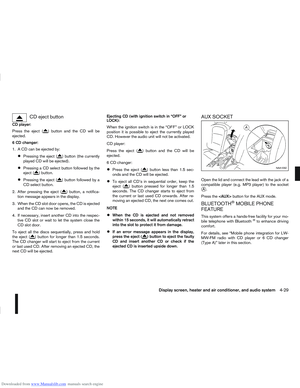 136
136 137
137 138
138 139
139 140
140 141
141 142
142 143
143 144
144 145
145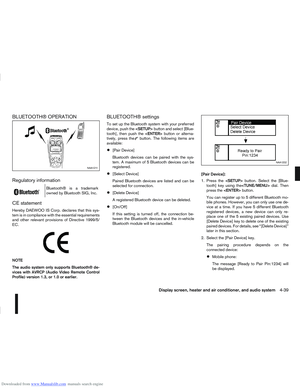 146
146 147
147 148
148 149
149 150
150 151
151 152
152 153
153 154
154 155
155 156
156 157
157 158
158 159
159 160
160 161
161 162
162 163
163 164
164 165
165 166
166 167
167 168
168 169
169 170
170 171
171 172
172 173
173 174
174 175
175 176
176 177
177 178
178 179
179 180
180 181
181 182
182 183
183 184
184 185
185 186
186 187
187 188
188 189
189 190
190 191
191 192
192 193
193 194
194 195
195 196
196 197
197 198
198 199
199 200
200 201
201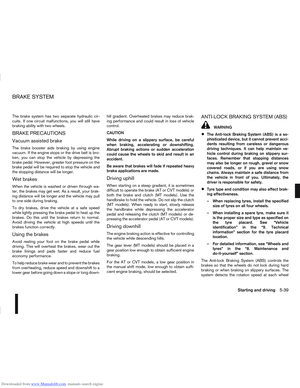 202
202 203
203 204
204 205
205 206
206 207
207 208
208 209
209 210
210 211
211 212
212 213
213 214
214 215
215 216
216 217
217 218
218 219
219 220
220 221
221 222
222 223
223 224
224 225
225 226
226 227
227 228
228 229
229 230
230 231
231 232
232 233
233 234
234 235
235 236
236 237
237 238
238 239
239 240
240 241
241 242
242 243
243 244
244 245
245 246
246 247
247 248
248 249
249 250
250 251
251 252
252 253
253 254
254 255
255 256
256 257
257 258
258 259
259 260
260 261
261 262
262 263
263 264
264 265
265 266
266 267
267 268
268 269
269 270
270 271
271 272
272 273
273 274
274 275
275 276
276 277
277 278
278 279
279 280
280 281
281 282
282 283
283 284
284 285
285 286
286 287
287 288
288 289
289 290
290 291
291 292
292 293
293 294
294 295
295 296
296