2010 MITSUBISHI L200 change
[x] Cancel search: changePage 123 of 369

Have the vehicle inspected at a
MITSUBISHI
MOTORS Authorized Service
Point. • When the wipers operate at a constant in-terval despite changes in the extent of rain.
• When the wipers do not operate even though it is raining.
l The wipers may automatically operate when
things such as insects or foreign objects are
affixed to the windscreen on top of the rain
sensor or when the windscreen is frozen. Ob-
jects affixed to the windscreen will stop the
wipers when the wipers cannot remove them.
To make the wipers operate again, place the
lever in the “LO” or “HI” position.
Also, the wipers may operate automatically
due to strong direct sunlight or electromag-
netic wave. To stop the wipers, place the lev-
er in the “OFF” position.
l Contact a MITSUBISHI MOTORS Author-
ized Service Point when replacing the wind-
screen or reinforcing the glass around the sen-
sor. To adjust the sensitivity of the rain sensor
With
the lever in the “AUTO” (rain sensor) posi-
tion, it is possible to adjust the sensitivity of the
rain sensor by turning the knob (A). "+"- Higher sensitivity to rain
"-"- Lower sensitivity to rain
NOTE l It
is possible to activate the following func-
tions. For further information, we recom-
mend you to consult a MITSUBISHI
MOTORS Authorized Service Point. • Automatic operation (rain droplet sensi-tive) can be changed to intermittent oper-
ation (vehicle-speed sensitive).
• Automatic operation (rain droplet sensi- tive) can be changed to intermittent oper-
ation (except vehicle-speed sensitive).
Misting function
Move the lever in the direction of the arrow and re-
lease, to operate the wipers once.
Use this function when you are driving in mist or
drizzle. If the lever is held in the upward position (MIST),
the
wipers continue operating until the lever is re-
leased. The wipers will operate once if the lever is moved
to
the “AUTO” position and the knob (A) is turned
in the “+” direction when the ignition switch is
“ON” position. Windscreen washer
E00507200805
The windscreen washer can be operated with the ig-
nition switch in the “ON” or “ACC” position. Instruments and controls
3-38
3
OCRE12E1
Page 139 of 369
l
When the engine has not been started within
about 5 seconds after the diesel preheat indi-
cation lamp went out, return the ignition key
to the “LOCK” position. Then, turn the key
to the “ON” position to preheat the engine
again.
l When the engine is warm, the diesel preheat
indication lamp does not come on even if the
ignition key is placed in the “ON” position.
Start the engine by turning the ignition key
right to the “START” position.
6. Operate the accelerator pedal as described be- low in accordance with the atmospheric tem-
perature and/or engine condition and then
start the engine.
l When the atmospheric temperature is
moderate or the engine is warm, start the
engine without depressing the accelerator
pedal.
l When the atmospheric temperature is low
and the engine is cold, start the engine
while depressing the accelerator pedal.
Fuel injection amount learning process E00616000028
To keep exhaust emissions and engine noise low,
the
engine very occasionally performs a learning
process for the fuel injection amount.
The engine sounds slightly different from usual
while the learning process is taking place. The
change in the engine sound does not indicate a fault. Diesel particulate filter (DPF)*
E00619800232
The
diesel particulate filter (DPF) is a device that
captures most of the particulate matter (PM) in the
exhaust emissions of the diesel engine. The DPF au-
tomatically burns away trapped PM during vehicle
operation. Under certain driving conditions, howev-
er, the DPF is not able to burn away all of the trap-
ped PM and, as a result, an excessive amount of
PM accumulates inside it. WARNING
l The DPF reaches very high temperatures.
Do
not park your vehicle in areas where
combustible materials such as dry grass
or leaves can come in contact with a hot
exhaust system since a fire could occur. CAUTION
l
Do
not use any type of fuel or engine oil
that is not specified for your vehicle. Al-
so, do not use any moisture-removing
agent or other fuel additive. Such substan-
ces could have a detrimental effect on the
DPF.
Refer to “Fuel selection” on page 02 and
“Engine oil” on page 8-04.
NOTE l To
minimize the likelihood of excessive ac-
cumulation of PM, try to avoid driving for
long periods at low speeds and repeatedly
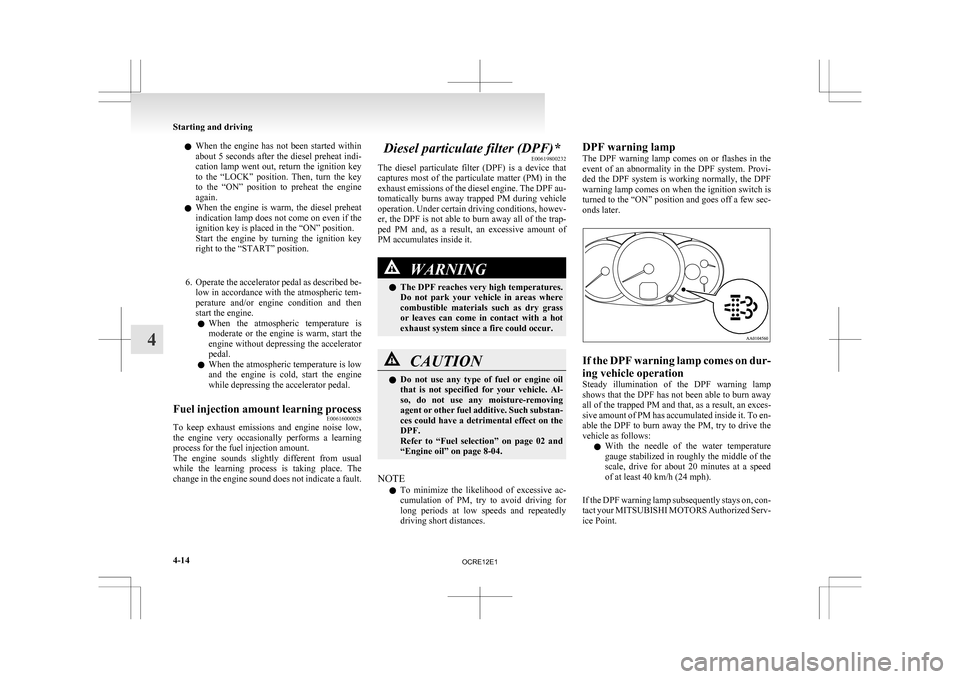
driving short distances. DPF warning lamp
The
DPF warning lamp comes on or flashes in the
event of an abnormality in the DPF system. Provi-
ded the DPF system is working normally, the DPF
warning lamp comes on when the ignition switch is
turned to the “ON” position and goes off a few sec-
onds later. If the DPF warning lamp comes on dur-
ing vehicle operation
Steady
illumination of the DPF warning lamp
shows that the DPF has not been able to burn away
all of the trapped PM and that, as a result, an exces-
sive amount of PM has accumulated inside it. To en-
able the DPF to burn away the PM, try to drive the
vehicle as follows:
l With the needle of the water temperature
gauge stabilized in roughly the middle of the
scale, drive for about 20 minutes at a speed
of at least 40 km/h (24 mph).
If the DPF warning lamp subsequently stays on, con-
tact your MITSUBISHI MOTORS Authorized Serv-
ice Point. Starting and driving
4-14
4
OCRE12E1
Page 140 of 369
CAUTION
l
You do not have to continuously drive ex-
actly as indicated above. Always strive to
drive safely in accordance with road con-
ditions.
If the DPF warning lamp flashes dur-
ing vehicle operation
Flashing
of the DPF warning lamp indicates an ab-
normality in the DPF system. Have the system in-
spected at a MITSUBISHI MOTORS Authorized
Service Point. CAUTION
l
Continuing
to drive with the DPF warn-
ing lamp flashing could result in engine
trouble and DPF damage. Manual transmission
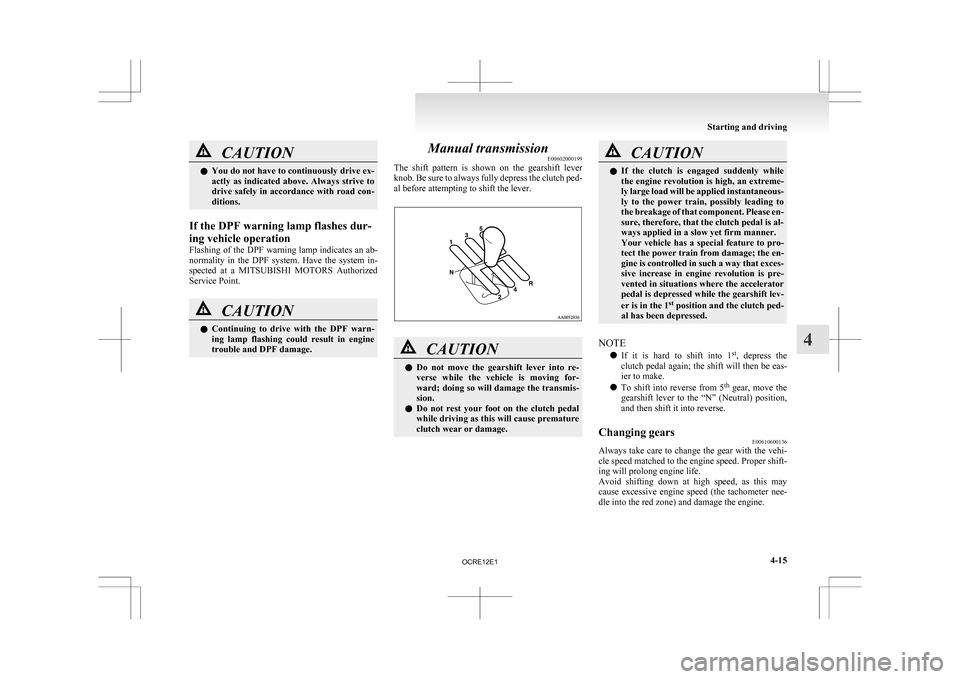
E00602000199
The
shift pattern is shown on the gearshift lever
knob. Be sure to always fully depress the clutch ped-
al before attempting to shift the lever. CAUTION
l
Do
not move the gearshift lever into re-
verse while the vehicle is moving for-
ward; doing so will damage the transmis-
sion.
l Do not rest your foot on the clutch pedal
while driving as this will cause premature
clutch wear or damage. CAUTION
l
If
the clutch is engaged suddenly while
the engine revolution is high, an extreme-
ly large load will be applied instantaneous-
ly to the power train, possibly leading to
the breakage of that component. Please en-
sure, therefore, that the clutch pedal is al-
ways applied in a slow yet firm manner.
Your vehicle has a special feature to pro-
tect the power train from damage; the en-
gine is controlled in such a way that exces-
sive increase in engine revolution is pre-
vented in situations where the accelerator
pedal is depressed while the gearshift lev-
er is in the 1 st
position and the clutch ped-
al has been depressed.
NOTE l If
it is hard to shift into 1 st
, depress the
clutch pedal again; the shift will then be eas-
ier to make.
l To shift into reverse from 5 th
gear, move the
gearshift lever to the “N” (Neutral) position,
and then shift it into reverse.
Changing gears E00610600136
Always take care to change the gear with the vehi-
cle
speed matched to the engine speed. Proper shift-
ing will prolong engine life.
Avoid shifting down at high speed, as this may
cause excessive engine speed (the tachometer nee-
dle into the red zone) and damage the engine. Starting and driving
4-15 4
OCRE12E1
Page 146 of 369

When the automatic transmission makes no speed
change
E00604800478
If
the transmission does not change speeds while
driving, or your vehicle does not pick up enough
speed when starting on an uphill slope, it may be
that there is something unusual happening in the
transmission, causing a safety device to activate.
We recommend you to have your checked as soon
as possible.
NOTE
l When the selector lever position indicator in
the instrument panel blinks, it means that
there is an abnormal condition in the trans-
mission. Refer to “When the selector lever po-
sition indicator blinks” on page 4-19. Automatic transmission Sports
Mode 5A/T E00603200576
NOTE l During
running-in period or immediately af-
ter reconnection of the battery cable, there
may be a case where gear shifts are not made
smoothly. This does not indicate a faulty trans-
mission.
Gear shifts will become smooth after the trans-
mission has been shifted several times by the
electronic control system.
Selector lever operation E00603300867
The transmission has 5 forward gears and 1 reverse
gear.
The
individual gears are selected automatically, de-
pending on the position of the gear selector lever,
the speed of the vehicle and the position of the ac-
celerator pedal.
The selector lever has 2 gates; the main gate (1)
and the manual gate (2). NOTE
l For
information on manual gate operation,
please refer to “Sports mode” on page 4-23.
In the main gate, selector lever has 4 positions, and
is equipped with a lock button (A) to avoid inadver-
tent selection of the wrong gear. The lock button must be pushed to move the
selector lever.
The lock button need not be pushed to move
the selector lever. Starting and driving
4-21 4
OCRE12E1
Page 150 of 369
CAUTION
l
Operating the accelerator pedal while the
other foot is resting on the brake pedal
will affect braking efficiency and may
cause premature wear of brake pads.
l Use the selector lever in the correct shift
position in accordance with driving condi-
tions.
Never coast downhill backward with the
driving shift position {“D” (DRIVE) or
sports mode} or coast forward with the
“R” (REVERSE) position.
The engine stops and the brake pedal ef-
fort or the steering wheel handling weight
increasing could lead to an accident.
l Do not race the engine with brake pedal
pressed when the vehicle is stationary.
This can damage the automatic transmis-
sion.
Passing acceleration E00604500329
To gain extra acceleration in “D” (DRIVE) posi-
tion,
push the accelerator to the floor. The automat-
ic transmission will automatically downshift.
NOTE
l In “Sports mode”, downshifts do not take
place when the accelerator is depressed all
the way to the floor.
Waiting E00604600304
For short waiting periods, such as at traffic signals,
the
vehicle can be left in gear and held stationary
with the service brake. For longer waiting periods with the engine running,
place
the selector lever in the “N” (NEUTRAL) po-
sition.. CAUTION
l
Never
hold the vehicle stationary on a hill
using the accelerator pedal (without us-
ing the brake pedal). Always apply the
parking brake and/or service brakes.
l Unexpected acceleration may occur if the
selector lever is in a position other than
“P” (PARK) or “N” (NEUTRAL). Prior
to moving off after having stopped the ve-
hicle, make sure that the selector lever is
in the “D” (DRIVE) position.
Parking E00604700262
To park the vehicle, first bring it to a complete
stop,
fully engage the parking brake, and then
move the selector lever to the “P” (PARK) position.
If you are going to leave the vehicle unattended, al-
ways switch off the engine and remove the ignition
key. NOTE
l On
a slope, be sure to apply the parking
brake before moving the selector lever to the
“P” (PARK) position. If you move the selec-
tor lever to the “P” (PARK) position before
applying the parking brake, it may be diffi-
cult to disengage the selector lever from the
“P” (PARK) position when next you drive
the vehicle, requiring application of a strong
force to the selector lever to move from the
“P” (PARK) position.
When the automatic transmission makes no speed
change E00604800683
If the transmission does not change speeds while
driving,
or your vehicle does not pick up enough
speed when starting on an uphill slope, it may be
that there is something unusual happening in the
transmission, causing a safety device to activate.
We recommend you to have your checked as soon
as possible. 1. If your vehicle has difficulty moving uphill,
shift the selector lever into 2 nd
gear of the
“Sports mode”.
This method might not work depending on
the type of transmission malfunction.
2. Once the vehicle is moving on a level road, move the selector lever back to “D” (DRIVE).
NOTE l When the selector lever position indicator in
the instrument panel blinks, it means that
there is an abnormal condition in the trans-
mission. Refer to “When the selector lever po-
sition indicator blinks” on page 4-19. Starting and driving
4-25 4
OCRE12E1
Page 159 of 369
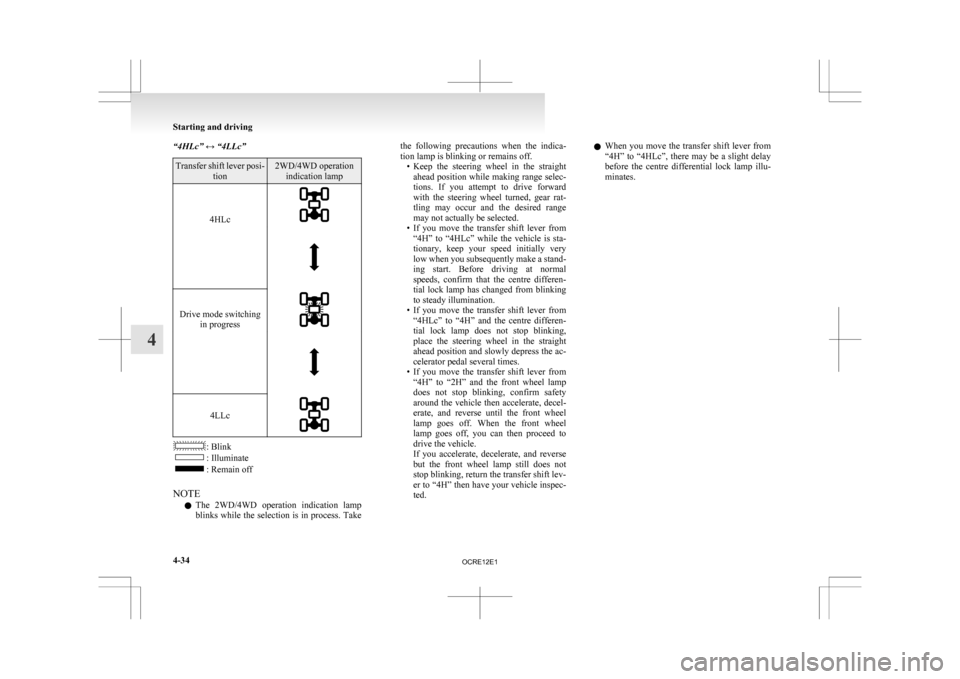
“4HLc” ↔ “4LLc”
Transfer shift lever posi-
tion 2WD/4WD operation
indication lamp
4HLc
Drive mode switching
in progress
4LLc
: Blink
: Illuminate
: Remain off
NOTE l The
2WD/4WD operation indication lamp
blinks while the selection is in process. Take the following precautions when the indica-
tion lamp is blinking or remains off.
• Keep
the steering wheel in the straight
ahead position while making range selec-
tions. If you attempt to drive forward
with the steering wheel turned, gear rat-
tling may occur and the desired range
may not actually be selected.
• If you move the transfer shift lever from “4H” to “4HLc” while the vehicle is sta-
tionary, keep your speed initially very
low when you subsequently make a stand-
ing start. Before driving at normal
speeds, confirm that the centre differen-
tial lock lamp has changed from blinking
to steady illumination.
• If you move the transfer shift lever from “4HLc” to “4H” and the centre differen-
tial lock lamp does not stop blinking,
place the steering wheel in the straight
ahead position and slowly depress the ac-
celerator pedal several times.
• If you move the transfer shift lever from “4H” to “2H” and the front wheel lamp
does not stop blinking, confirm safety
around the vehicle then accelerate, decel-
erate, and reverse until the front wheel
lamp goes off. When the front wheel
lamp goes off, you can then proceed to
drive the vehicle.
If you accelerate, decelerate, and reverse
but the front wheel lamp still does not
stop blinking, return the transfer shift lev-
er to “4H” then have your vehicle inspec-
ted. l
When you move the transfer shift lever from
“4H” to “4HLc”, there may be a slight delay
before the centre differential lock lamp illu-
minates. Starting and driving
4-34
4
OCRE12E1
Page 163 of 369

WARNING
• If the rear differential lock is used by mistake when driving on a paved
road: With the rear differential lock
on, the power to drive the vehicle
straight ahead becomes very strong,
which may make it difficult to turn
the steering wheel. WARNING
l If
the rear differential lock is used by mis-
take when turning a curve or making a
right or left turn at a crossing or the like:
The vehicle is unable to make a turn and
may go straight ahead. WARNING
l If
the rear differential lock is used by mis-
take except when making an emergency
escape on snow or frozen road: It be-
comes difficult to make a steady turn.
l In the case where the condition of the
road is different for the right tyre to
drive from the left tyre (such as one tyre
on a paved road and the other on ice), di-
rection of the vehicle may change abrupt-
ly when engine braking or accelerating.
Do not use the rear differential lock ex-
cept when making an emergency escape
on a snow or frozen road, but drive with
4WD. Starting and driving
4-38
4
OCRE12E1
Page 165 of 369
WARNING
l When attempting to rock your vehicle out
of
a stuck position, be sure that the area
around the vehicle is clear of people and
physical objects. The rocking motion may
cause the vehicle to suddenly launch for-
ward or backward, causing injury or dam-
age to nearby people or objects.
NOTE l Avoid
sudden braking, acceleration, and turn-
ing; such operations could result in the vehi-
cle becoming stuck.
l If the vehicle becomes stuck in sandy or mud-
dy roads, it can often be moved a rocking mo-
tion. Move the selector lever rhythmically be-
tween the “D” (DRIVE) and “R” (RE-
VERSE) position (with M/T, between 1 st
and
Reverse), while applying slight pressure to
the accelerator pedal.
l It is recommended to start the vehicle with
parking brake partially, but not completely,
applied by slightly pulling the parking brake
lever.
After the vehicle has become free, do not for-
get to release the parking brake.
l If it is necessary to drive in extremely muddy
conditions, the use of tyre chains is recom-
mended. Because the extent of muddy condi-
tions is difficult to judge and the vehicle
could become bogged down very deeply, op-
eration should be at a low speed. If possible,
get out of the vehicle and check the condi-
tions ahead before proceeding. l
Driving
over roads in coastal areas or roads
on which anti-skid preparations have been
spread can cause rust on the vehicle; wash
the vehicle thoroughly as soon as possible af-
ter such use.
Climbing sharp grades
Set the transfer shift lever to “4L” position (easy se-
lect 4WD), “4LLc” position (super select 4WD) to
maximize the engine torque. WARNING
l Go
straight up. Do not try to traverse
across a steep slope.
l If you begin to lose traction, ease off the
accelerator pedal and gently turn the
steering wheel alternatively left and right
to regain adequate traction again.
NOTE l Choose
as smooth a slope as possible with
few stones or other obstacles.
l Before attempting to drive up the slope, walk
up it to confirm that the vehicle can handle
the grade.
Descending sharp grades
Set the transfer shift lever to “4L” position (easy se-
lect 4WD), “4LLc” position (super select 4WD),
use the engine brake (downshifting) and descend
slowly. WARNING
l Avoid
snaking down a sharp grade. De-
scend the grade as straight as possible.
NOTE l When descending a sharp grade, if the brakes
are
applied suddenly because of an obstacle
encountered, control of the vehicle could be
lost. Before descending the slope, walk down
it and confirm the path.
l Before descending a grade, it is necessary to
choose the appropriate gear. Avoid changing
gears or depressing the clutch while descend-
ing the grade.
l MITSUBISHI MOTORS is not responsible
to the operator for any damage or injury
caused or liability incurred by improper and
negligent operation of a vehicle. All techni-
ques of vehicle operation described herein de-
pend on the skill and experience of the opera-
tor and other participating parties and any de-
viation from the recommended operation in-
structions above is at their own risk.
Turning sharp corners
When turning a sharp corner in “4H” or “4L” posi-
tion (easy select 4WD), “4HLc” or “4LLc” posi-
tion (super select 4WD) at low speed, a slight dif-
ference in steering may be experienced similar to
as if the brakes were applied. This is called tight cor-
ner braking and results from each of the 4 tyres be-
ing at a different distance from the corner.
The phenomenon is peculiar to 4-wheel drive vehi-
cles. If this occurs, either straighten the steering
wheel, or change to rear-wheel drive. Starting and driving
4-40
4
OCRE12E1