2010 MERCEDES-BENZ SLS COUPE charging
[x] Cancel search: chargingPage 8 of 361
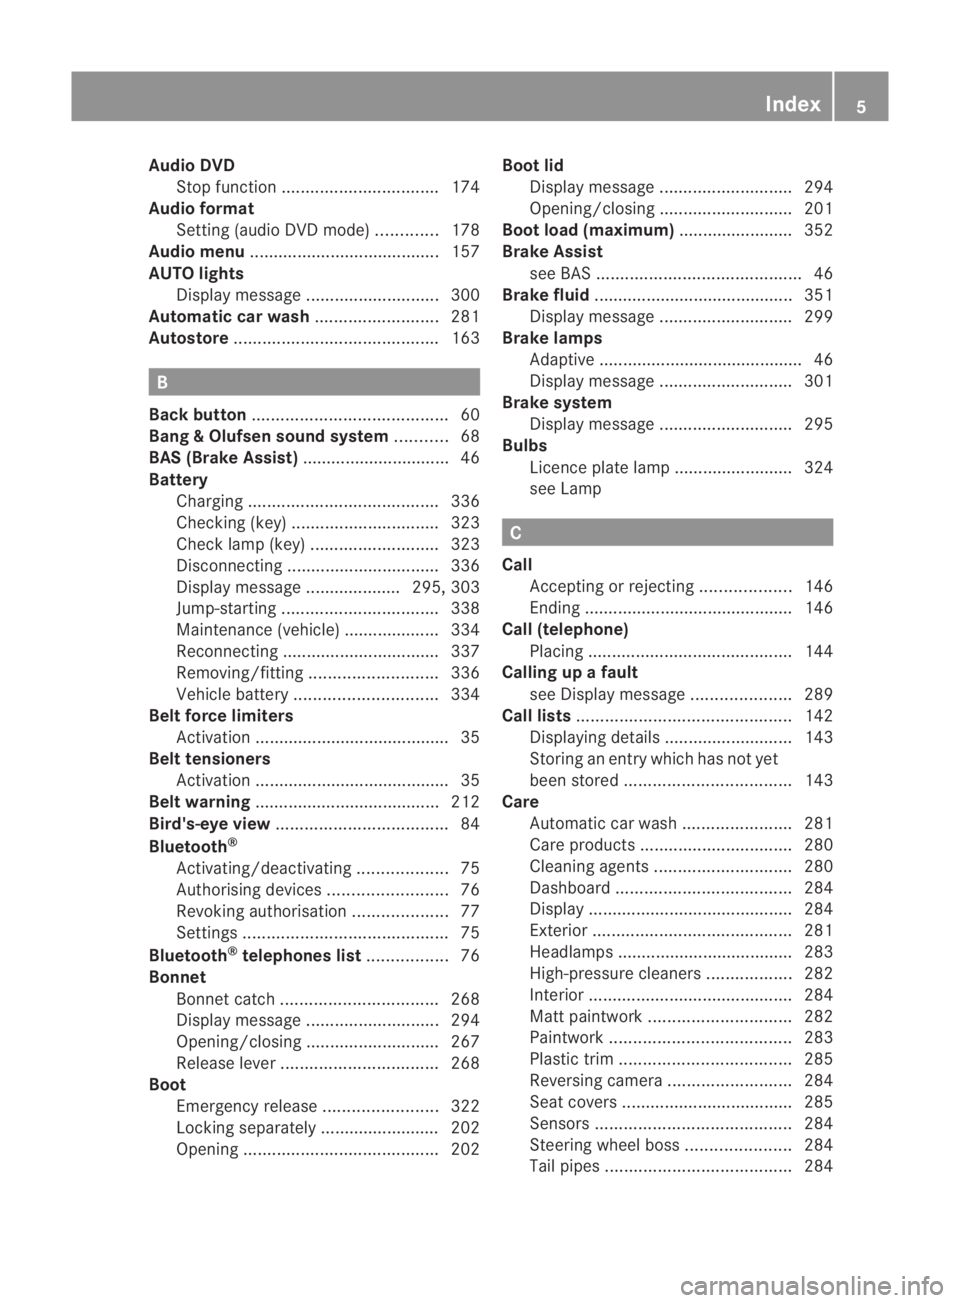
Audio DVD
Stop function ................................. 174
Audio format
Setting (audio DVD mode )............. 178
Audio menu ........................................ 157
AUTO lights Display message ............................ 300
Automatic car wash ..........................281
Autostore ........................................... 163B
Back button ......................................... 60
Bang &Olufsen sound system ...........68
BAS (Brake Assist) ............................... 46
Battery Charging ........................................ 336
Checking (key )............................... 323
Check lamp (key )........................... 323
Disconnecting ................................ 336
Display message .................... 295, 303
Jump-starting ................................. 338
Maintenance (vehicle) .................... 334
Reconnecting ................................. 337
Removing/fitting ........................... 336
Vehicle battery .............................. 334
Belt force limiters
Activation ......................................... 35
Belt tensioners
Activation ......................................... 35
Belt warning ....................................... 212
Bird's-eye view .................................... 84
Bluetooth ®
Activating/deactivating ...................75
Authorising devices .........................76
Revoking authorisatio n.................... 77
Settings ........................................... 75
Bluetooth ®
telephones list .................76
Bonnet Bonnet catch ................................. 268
Display message ............................ 294
Opening/closing ............................ 267
Releas elever ................................. 268
Boot
Emergency release ........................322
Locking separatel y......................... 202
Opening ......................................... 202Boot lid
Display message ............................ 294
Opening/closing ............................ 201
Boot load (maximum) ........................ 352
Brake Assist see BAS ........................................... 46
Brake fluid .......................................... 351
Display message ............................ 299
Brake lamps
Adaptive .......................................... .46
Display message ............................ 301
Brake system
Display message ............................ 295
Bulbs
Licence plate lamp ......................... 324
see Lamp C
Call Accepting or rejecting ...................146
Ending ............................................ 146
Call (telephone)
Placing ........................................... 144
Calling up a fault
see Display message .....................289
Call lists ............................................. 142
Displaying details ........................... 143
Storing an entry which has not yet
bee nstore d................................... 143
Care
Automatic car wash .......................281
Care products ................................ 280
Cleaning agents ............................. 280
Dashboard ..................................... 284
Display ........................................... 284
Exterior .......................................... 281
Headlamps ..................................... 283
High-pressure cleaners ..................282
Interior ........................................... 284
Matt paintwork .............................. 282
Paintwork ...................................... 283
Plastic trim .................................... 285
Reversing camera ..........................284
Seat covers .................................... 285
Sensors ......................................... 284
Steering wheel boss ......................284
Tai lpipes ....................................... 284 Index
5 BA 197 ECE RE 2010/6a; 1; 2, en-GB
sabbae uV ersion: 3.0.3.6
2010-05-07T14:19:43+02:00 - Seite 5
Page 217 of 361
Lights
Exterior lighting
Notes For reasons of safety, Mercedes-Ben
zrecom-
mends that you drive with the lights switched
on even during the daytime. In some coun-
tries, operation of the headlamps varies due
to legal requirements and self-imposed obli-
gations .Inthese countries, the daytime driv-
ing lights are automatically switched on when
the engine is started.
i The dipped-beamh eadlamps are asym-
metrical. In countries in which traffic drives
on the opposite side of the road to the
country where the vehicle is registered,
oncoming traffic may be dazzled. Have the
headlamps changed to symmetrical dipped
beam when driving in these countries. You
can obtain information about this from any
Mercedes-Benz Service Centre.
The exterior lighting (except for the parking
lamps/side lamps) switches off automatically
when the ignition is switched off.
! Switch off the side lamps and parking
lamp when you leave the vehicle. This pre-
vents the battery from discharging. 214
LightsControls
BA 197 ECE RE 2010/6a; 1; 2, en-GB
sabbaeu
Version: 3.0.3.6 2010-05-07T14:19:43+02:00 - Seite 214
Page 267 of 361
Deleting the remote control memory
X
Selec tkey position 2with the Start/Stop
button (Y page 202).
X Press and hold transmitter buttons 0002
and 0014for approximately 20 seconds until
indicator lamp 0001flashes rapidly.
The memory is cleared.
i You should clear the remot econtrol mem-
ory before selling the vehicle. Charge maintenance socket*
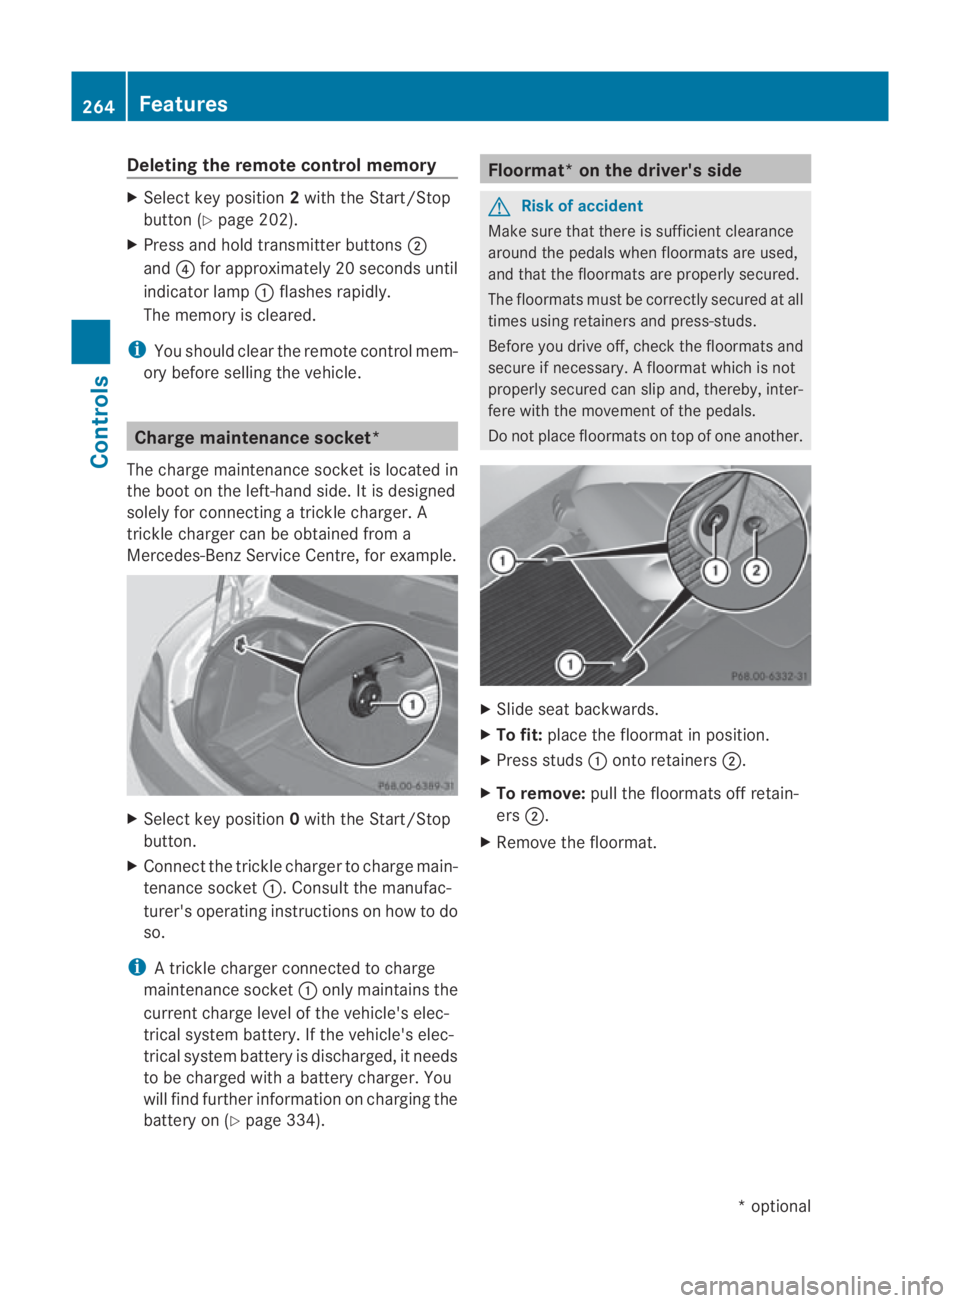
The charge maintenance socket is located in
the boot on the left-hand side. It is designed
solely for connecting a trickle charger. A
trickle charger can be obtained from a
Mercedes-Benz Service Centre, for example. X
Select key position 0with the Start/Stop
button.
X Connect the trickle charger to charge main-
tenance socket 0001. Consult the manufac-
turer's operating instructions on how to do
so.
i A trickle charger connected to charge
maintenance socket 0001only maintains the
current charge level of the vehicle's elec-
trical system battery. If the vehicle's elec-
trical system battery is discharged, it needs
to be charged with a battery charger. You
will find further information on charging the
battery on (Y page 334). Floormat* on the driver's side
G
Risk of accident
Make sure that there is sufficient clearance
around the pedals when floormats are used,
and that the floormats are properly secured.
The floormats must be correctly secured at all
times using retainers and press-studs.
Before you drive off, check the floormats and
secure if necessary. Afloormat which is not
properly secured can slip and, thereby, inter-
fere with the movemen tofthe pedals.
Do not place floormats on top of one another. X
Slide seat backwards.
X To fit: place the floormat in position.
X Press studs 0001onto retainers 0002.
X To remove: pull the floormats off retain-
ers 0002.
X Remove the floormat. 264
FeaturesControls
*o
ptional
BA 197 ECE RE 2010/6a; 1; 2, en-GB
sabbaeu
Version: 3.0.3.6 2010-05-07T14:19:43+02:00 - Seite 264
Page 301 of 361
Display messages Possible causes/consequences and
0003 Solutions
0009
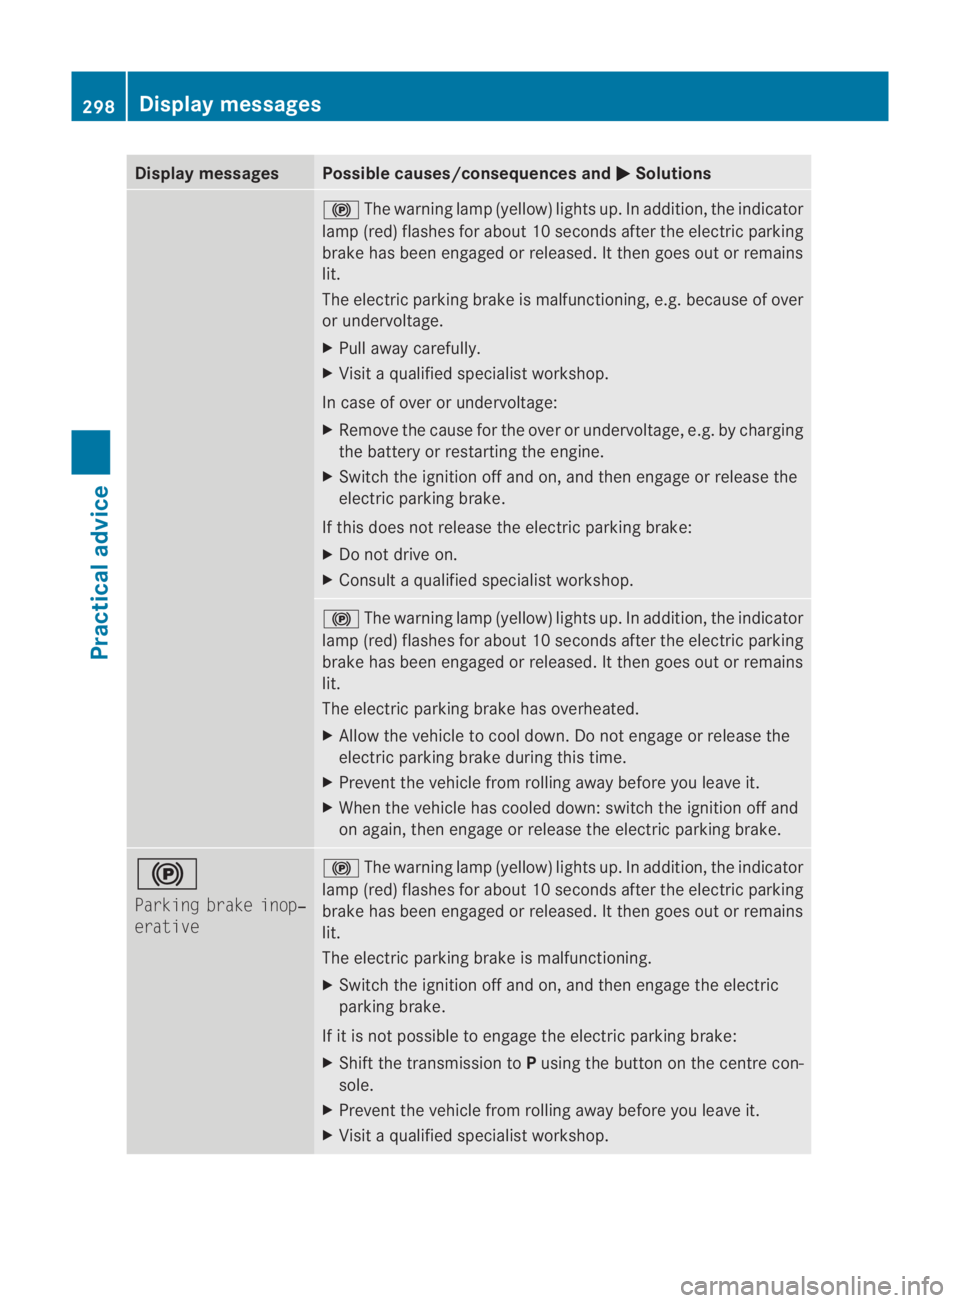
The warning lamp (yellow) lights up. In addition ,the indicator
lamp (red) flashes for about 10 seconds after the electric parking
brake has been engaged or released. It then goes out or remains
lit.
The electric parking brake is malfunctioning, e.g. because of over
or undervoltage.
X Pull away carefully.
X Visit a qualified specialist workshop.
In case of over or undervoltage:
X Remove the cause for the over or undervoltage, e.g. by charging
the battery or restarting the engine.
X Switch the ignition off and on, and then engage or release the
electric parking brake.
If this does not release the electric parking brake:
X Do not drive on.
X Consult a qualified specialist workshop. 0009
The warning lamp (yellow) lights up. In addition, the indicator
lamp (red) flashes for about 10 seconds after the electric parking
brake has been engaged or released. It then goes out or remains
lit.
The electric parking brake has overheated.
X Allow the vehicle to cool down. Do not engage or release the
electric parking brake during this time.
X Prevent the vehicle from rolling away before you leave it.
X When the vehicle has cooled down: switch the ignition off and
on again, then engage or release the electric parking brake. 0009
Parking brake inop‐
erative 0009
The warning lamp (yellow) lights up. In addition, the indicator
lamp (red) flashes for about 10 seconds after the electric parking
brake has been engaged or released. It then goes out or remains
lit.
The electric parking brake is malfunctioning.
X Switch the ignition off and on, and then engage the electric
parking brake.
If it is not possible to engage the electric parking brake:
X Shift the transmission to Pusing the button on the centre con-
sole.
X Prevent the vehicle from rolling away before you leave it.
X Visit a qualified specialist workshop. 298
Display messagesPractical advice
BA 197 ECE RE 2010/6a; 1; 2, en-GB
sabbaeu
Version: 3.0.3.6 2010-05-07T14:19:43+02:00 - Seite 298
Page 338 of 361
gloves, an apron and a face
mask.
Immediately rinse acid
splashes off with clean
water. Consult a doctor if
necessary.
Wear eye protection.
Keep children away.
Observe this Owner's Man-
ual.
H
Environmental note
Do not dispose of batteries in the household
rubbish. Dispose of defective batteries in an
environmentally responsible manner. Take
them to a Mercedes-Benz Service Centre or
to a special collection point for old batteries. G
Risk of injury
For safety reasons, Mercedes-Benz recom-
mends that you only use batteries which have
been tested and approved for your vehicle by
Mercedes-Benz. These batteries provide
increased impact protection to prevent vehi-
cle occupants from suffering acid burns
should the battery be damaged in the event
of an accident.
To prevent acid burns, observe the following
safety notes when handling batteries:
R do not lean over the battery.
R do not place any metal objects on a battery.
Otherwise, you could cause a short circuit
and the battery's gas mixture could ignite.
R make sure that you do not create an elec-
trostatic charge, e.g. by wearing synthetic
clothing or as a result of friction on fabrics.
Therefore, you should not pull or slide the
battery over carpets or other synthetic
materials. R
never touch the battery first. To discharge
a possible electrostatic charge, step out of
the vehicle first and touch the bodywork.
R do not wipe the battery using a cloth. The
battery may explode as a result of electro-
static charge or due to flying sparks.
! Switch off the engine and ensure that no
ignition position has been selected before
detaching the battery terminals. All indica-
tor lights must be off in the instrument
cluster. Otherwise, you may destroy elec-
tronic components such as the alternator.
i Mercedes-Benz recommends that you
have work involving the battery, e.g.
removal, charging and replacement, car-
ried out at a qualified specialist workshop,
e.g. a Mercedes-Benz Service Centre.
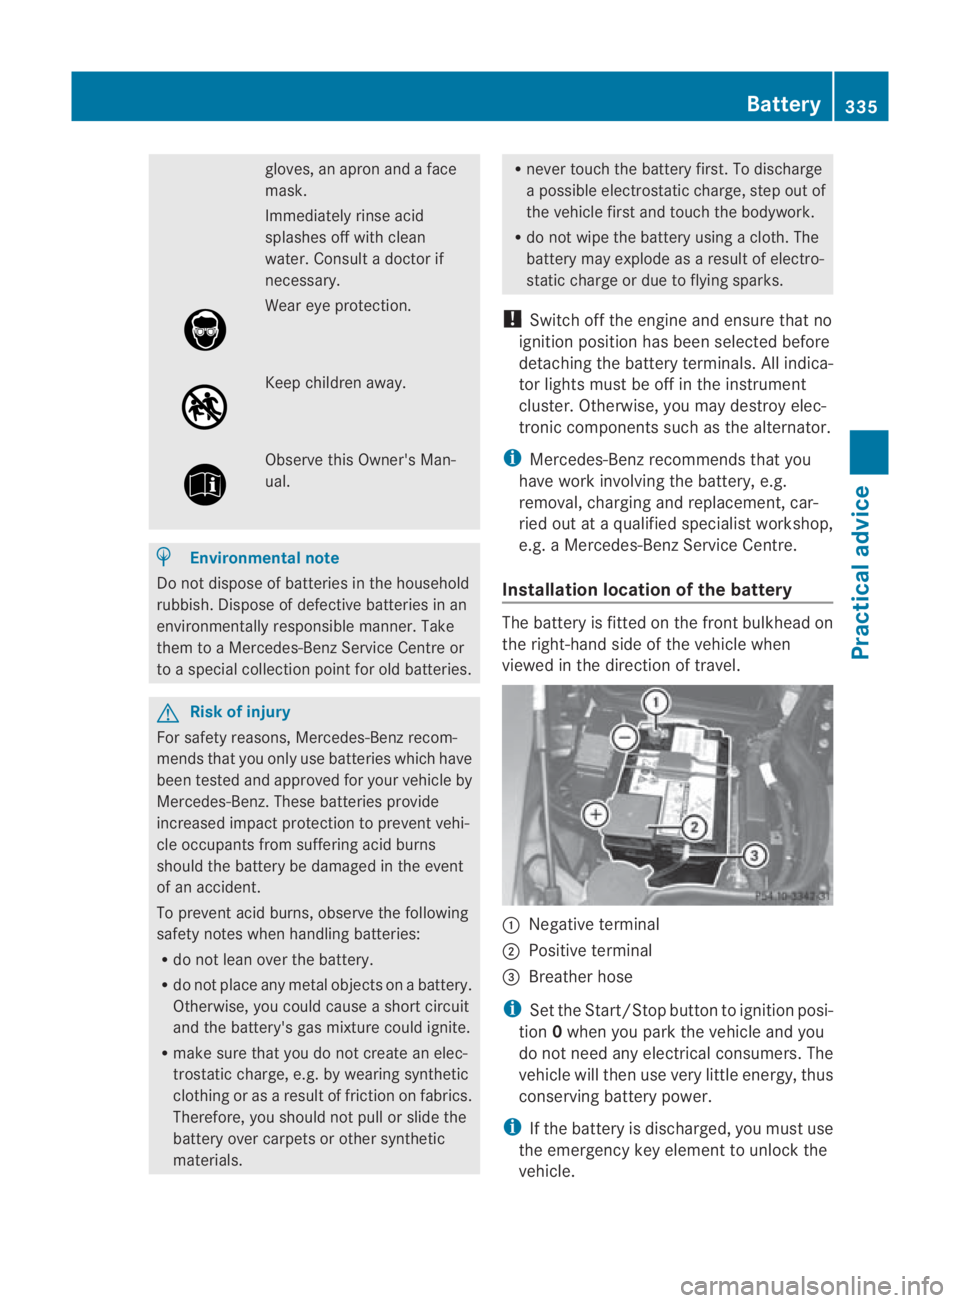
Installation location of the battery The battery is fitted on the front bulkhead on
the right-hand side of the vehicle when
viewed in the direction of travel.
0001
Negative terminal
0002 Positive terminal
0015 Breather hose
i Set the Start/Stop button to ignition posi-
tion 0when you park the vehicle and you
do not need any electrical consumers .The
vehicle will then use very little energy, thus
conserving battery power.
i If the battery is discharged, you must use
the emergency key element to unlock the
vehicle. Battery
335Practical advice
BA 197 ECE RE 2010/6a; 1; 2, en-GB
sabbaeu Version: 3.0.3.6 2010-05-07T14:19:43+02:00 - Seite 335 Z
Page 339 of 361
Disconnecting the battery
G
Risk of accident
If the battery is disconnected:
R the brake boosting effect will no tbe avail-
able. Greater braking force will then be
required and brake pedal travel will be lon-
ger. If necessary, depress the brake pedal
with full force.
R the transmission is locked in position P.
! Always disconnect the battery in the
order described below. Never mix up the
terminal clamp disconnection/connection
order and never mix up the terminal
clamps. You may otherwise damage the
vehicle electronics.
Disconnecting the battery X
Press the electric parking brake handle.
X Shift the transmission to Pwith the button
in the centre console.
X Switch off all electrical consumers (e.g.
radio, blower etc.).
X Set the Start/Stop button to key position
0(Y page 202).
X To disconnect the battery: open the bon-
net.
X Remove the negative terminal clamp from
the battery.
X Remove the cover from the positive termi-
nal clamp.
X Remove the positive terminal clamp from
the battery.
X Disconnect the breather hose. Removing the battery
X Disconnect the batter y(Ypage 336).
The bar over the battery prevents it from slip-
ping.
X Loosen the screw on the bar.
X Remove the bar. X
Loosen and remove the two screws on the
clamping plate.
X Remove the clamping plate.
X Remove the battery. Charging and fitting the battery
G
Risk of injury
Only charge the battery in a well-ventilated
area. As the battery is being charged, gases
can escape and generate minor explosions.
This could injure you and other persons or
cause damage to the paintwor koracid cor-
rosion on the vehicle.
You can obtain information abou tbattery
chargers which allow the battery to be
charged while still installed from a qualified
specialist workshop, e.g .aMercedes-Benz
Service Centre. G
Risk of injury
There is a risk of acid burns during the charg-
ing process due to the gases which escape
from the battery. Do not lean over the battery
during the charging process. G
Risk of injury
Battery acid is caustic. Avoid contact with the
skin, eyes or clothing.
! Never charge the batter ywhen it is instal-
led unless the battery charger has been
tested and approved by Mercedes-Benz.
These battery chargers allow the battery to
be charged while it is still installed.
! Only use battery chargers with a maxi-
mum charging voltage of 14.8 V.
X Charge the battery. Observe the notes in
the operating instructions for your battery
charger.
X Refit the charged battery.
To do this, follow the steps described in
"Removing the battery" (Y page 336) in
reverse order. 336
BatteryPractical advice
BA 197 ECE RE 2010/6a; 1; 2, en-GB
sabbaeu
Version: 3.0.3.6 2010-05-07T14:19:43+02:00 - Seite 336
Page 341 of 361
Jump-starting
If your vehicle's battery is discharged, the engine can be jump-started from another vehicle
or from an external battery using jump leads.
Observe the following points:
R you may only jump-start the vehicle when the engine and catalytic converter are cold.
R do not start the engine if the battery is frozen. Let the battery thaw first.
R jump-starting may only be performed from batteries with a nominal voltage of 12 V.
R only use jump leads which have a sufficient cross-section and insulated terminal clamps.
i Jump leads and further information about jump-starting can be obtained from any
Mercedes-Benz Service Centre.
! Avoid repeated and lengthy starting attempts. Only use the jump-starting procedure for
the battery in the engine compartment.
Do not use a rapid-charging device to start the engine. G
Risk of injury
There is a risk of acid burns when jump-starting a vehicle due to the gases which escape from
the battery. Do not lean over the battery while the engine is being jump-started. G
Risk of explosion
Gases escaping from the battery during jump-starting may cause minor explosions. Avoid cre-
ating sparks. Keep naked flames away from the battery, and do not smoke.
Comply with safety precautions and take protective measures when handling batteries. You will
find these under "Battery" in the index.
X Make sure that the two vehicles do not touch.
X Press the electric parking brake handle.
X Shift the transmission to Pwith the button in the centre console.
X Switch off all electrical consumers (e.g. radio, blower etc.).
X Open the bonnet (Y page 267).338
Jump-startingPractical advice
BA 197 ECE RE 2010/6a; 1; 2, en-GB
sabbaeu
Version: 3.0.3.6 2010-05-07T14:19:43+02:00 - Seite 338