2010 MERCEDES-BENZ SLS COUPE display
[x] Cancel search: displayPage 276 of 361
G
Risk of accident
Do not fit anything else to the tyre valve other
than the standard valve cap .Inparticular, ret-
rofitted tyre pressure monitors which are
screwed on to the valve may overload it and
cause it to fail. Due to their design, the valve
is kept open continuously, which may lead to
air loss. G
Ris
kofa ccident
Should the tyre pressure drop repeatedly:
R check the tyre for foreign bodies.
R check whether the wheel is losing air or the
valve is leaking.
R make sure that only a valve cap approved
by Mercedes-Ben zhas been fitted on the
tyre valve.
Tyre pressures that are to olow have a nega-
tive effect on vehicle safety, which could lead
to your causing an accident.
If possible, you should only correc ttyre pres-
sures when the tyres are cold. Depending on
the ambien ttemperature, the speed you are
driving at and the load on the tyres, the tyre
temperature and thus the tyre pressure may
change by approximately 0.1 bar per 10 †.
Take this into account when checking the
pressure of warm tyres and only correct it if
it is too low for the current operating condi-
tions.
Driving with tyre pressure that is too high or
too low can:
R shorten the service life of the tyres
R cause increased tyre damage
R have a negative effec tonhandling charac-
teristics and thus the driving safety (e.g. by
causing aquaplaning) H
Environmental note
Chec kthe tyre pressure regularly, at least
every 14 days. Tyre pressure monitor
If a tyre pressure monitor system is fitted, the
vehicle's wheels have sensors fitted that
monitor the tyre pressures in all four tyres.
The tyre pressure monitor warns you when
the pressure drops in one or more of the
tyres. The tyre pressure monitor only func-
tions if the correct wheel electronics units are
fitted to all wheels. G
Risk of accident
The tyre pressure monitor does not warn you
of an incorrectly set tyre pressure. The table
on the inside of the fuel filler flap will help you
decide whether the tyre pressures should be
corrected.
The tyre pressure monitor is not able to warn
you of a sudden loss of pressure, e.g. if the
tyre is penetrated by a foreign object. In the
event of a sudden loss of pressure, bring the
vehicle to a halt by braking carefully. Do not
make any sudden steering movements when
doing so.
i The operation of the tyre pressure moni-
tor can be affected by interference from
radio transmitting equipment (e.g. radio
headphones, two-way radios) that may be
being operated in or near the vehicle.
Checking tyre pressure electronically X
Select key position 2with the Start/Stop
button (Y page 202).
X Press the 0008or000E button to select the
Service menu.
X Press the 000For000C button to select
Tyre pressure.
X Press the 000Abutton.
The current tyre pressure for each wheel will
be displayed in the multifunction display.
If the vehicle has been parked for longer than
20 minutes or if you have not driven faster
than 25 km/h since starting the vehicle, the
following message appears: Tyres and wheels
273Operation
BA 197 ECE RE 2010/6a; 1; 2, en-GB
sabbaeu Version: 3.0.3.6 2010-05-07T14:19:43+02:00 - Seite 273 Z
Page 277 of 361
Tyre pressures will be displayed
after a few minutes of driving
i
The tyre pressure values indicated by the
on-board computer may differ from those
measured at a filling station with a pressure
gauge.T he tyre pressures shown by the on-
board computer refer to those measured at
sea level. At high altitudes, the tyre pres-
sure values indicated by a pressure gauge
are higher than those shown by the on-
board computer. In this case, do not reduce
the tyre pressures.
i After a teach-in period, the tyre pressure
monitor automatically recognises new
wheels or new sensors. As long as a clear
allocation of the tyre pressure values to the
individual wheels is not possible, the Tyre
press. monitor active display message
is shown instead of the tyre pressure dis-
play.T he tyre pressures are already being
monitored.
Restarting the tyre pressure monitor When you restart the tyre pressure monitor,
all existing warning messages are deleted and
the warning lamps go out. The monitor uses
the currently set tyre pressures as the speci-
fied values for monitoring.
In most cases, the tyre pressure monitor will
automatically detect the new reference val-
ues, e.g. if you have:
R changed the tyre pressure
R changed the wheels or tyres
R fitted new wheels or tyres
i For an overview of the menus, see
(Y page 232).
If you wish to define the new reference values
manually:
X Use the table on the inside of the fuel filler
flap to ensure that the tyre pressure is set
correctly in all four tyres for the current
operating conditions. Also observe the notes in the section on
tyre pressures (Y
page 272).
X Select key position 2with the Start/Stop
button.
X Press the 0008or000E button to select the
Service menu.
X Press the 000For000C button to select
Tyre pressure.
X Press the 000Abutton.
The current pressure in each individual tyre
is displayed, or the following message
appears:
Tyre pressures will be displayed
after a few minutes of driving
X Press the 000Cbutton.
The following message appears in the mul-
tifunction display:
Use current pressures as new ref‐
erence values
X Press the 000Abutton.
The following message appears in the mul-
tifunction display:
Tyre press. monitor restarted
After a few minutes of driving, the current
pressures are adopted as the new monitor-
ing values.
Cancelling the restart X
Press the 0001button.
or
X Press the 000Fbutton to leave the menu.
Other messages in the multifunction
display If the following message appears in the mul-
tifunction display:
Please correct tyre pressure
X
Check the tyre pressure on all four wheels
and correct it if necessary.
i If the wheel positions on the vehicle are
interchanged, the tyre pressures may be
displayed for the wrong positions for a 274
Tyres and wheelsOperation
BA 197 ECE RE 2010/6a; 1; 2, en-GB
sabbaeu
Version: 3.0.3.6 2010-05-07T14:19:43+02:00 - Seite 274
Page 278 of 361
short time. This is rectified after a few
minutes of driving, and the tyre pressures
are displayed for the correct positions.
Interchanging the wheels
G
Risk of accident
Interchange the front and rear wheels only if
they have the same dimensions: for example
size, offset, etc.
After every wheel interchange/change, have
the tightening torque checked at a qualified
specialist workshop that has the necessary
specialist knowledge and tools to carry out
the work required. Mercedes-Benz recom-
mends that you use a Mercedes-Benz Service
Centre for this purpose. In particular, work
relevant to safety or on safety-related sys-
tems must be carried out at a qualified spe-
cialist workshop.
The wheels could work loose if they are not
tightened to a torque of 130 Nm.
For safety reasons, Mercedes-Benz recom-
mends that you only use wheel bolts of the
correct size which have been approved for
Mercedes-Benz vehicles.
The wear patterns on the front and rear tyres
differ, depending on the operating conditions.
Interchange the wheels before a clear wear
pattern has formed on the tyres. Front tyres
typically wear more on the tyre shoulders and
the rear tyres in the centre.
On vehicles that have the same size front and
rear wheels, you can interchange the wheels
every 5000 km to 10,000 km depending on
the degree of tyre wear. Do not reverse the
direction of tyre rotation.
Cleant he contact surfaces of the wheel and
the brake disc thoroughly every time a wheel
is interchanged. Check the tyre pressure and
reactivate the tyre pressure monitor if neces-
sary.
! As your vehicle is fitted with a tyre pres-
sure monitor, electronic components are
located in the wheel. Tyre-fitting tools should not be applied in
the area of the valve, as this could damage
the electronic components.
Always have the wheels interchanged/
changed at a qualified specialist workshop,
e.g. a Mercedes-Benz Service Centre.
Winter operation
Please bear the following in mind
Have your vehicle winterproofed at a qualified
specialist workshop, e.g. at a Mercedes-Benz
Service Centre, at the onset of winter.
Observe the notes in the "Changing a wheel"
section (Y page 275). Winter tyres
Use winter tyres at temperatures below
+7 ˚C and in wintry road conditions. Only
winter tyres displaying the 0001snowflake
symbol in addition to the M+S marking pro-
vide optimum grip in wintry road conditions.
Only these tyres will allow the ABS and
ESP ®
driving safety systems to function opti-
mally in winter, as these tyres have been
designed specifically for driving on snow.
Use winter tyres of the same make and tread
on all wheels to maintain safe handling char-
acteristics. G
Risk of accident
Winter tyres with a tread depth of less than
4mmm ust be replace dimmediately. They are
no longer suitable for winter use and can no
longer provide sufficient grip. This could
cause you to lose control of yourv ehicle and
cause an accident.
Always observe the maximum permissible
speed specified for the winter tyres you have
fitted. If you fit winter tyres which have a
lower maximum permissible speed than that
of the vehicle, affix an appropriate warning
sign in the driver's field of vision. This can be Winter operation
275Operation
BA 197 ECE RE 2010/6a; 1; 2, en-GB
sabbaeu Version: 3.0.3.6 2010-05-07T14:19:43+02:00 - Seite 275 Z
Page 282 of 361
waves. This may cause the maximum per-
missible water depth to be exceeded.
Failure to observe these notes may result
in damage to the engine, electrical systems
and transmission.
Driving abroad
Please bear the following in mind
An extensive Mercedes–Benz Service net-
work is also available in other countries. The
Service Hotline's curren ttelephone numbers
for use when you are abroad are to be found
in the "Service24h" chapter of the Service
Booklet.
Only low-octane fuel is available in certain
countries.
You can find further information about fuel
grades on (Y page 266). Symmetrical dipped-beam head-
lamps
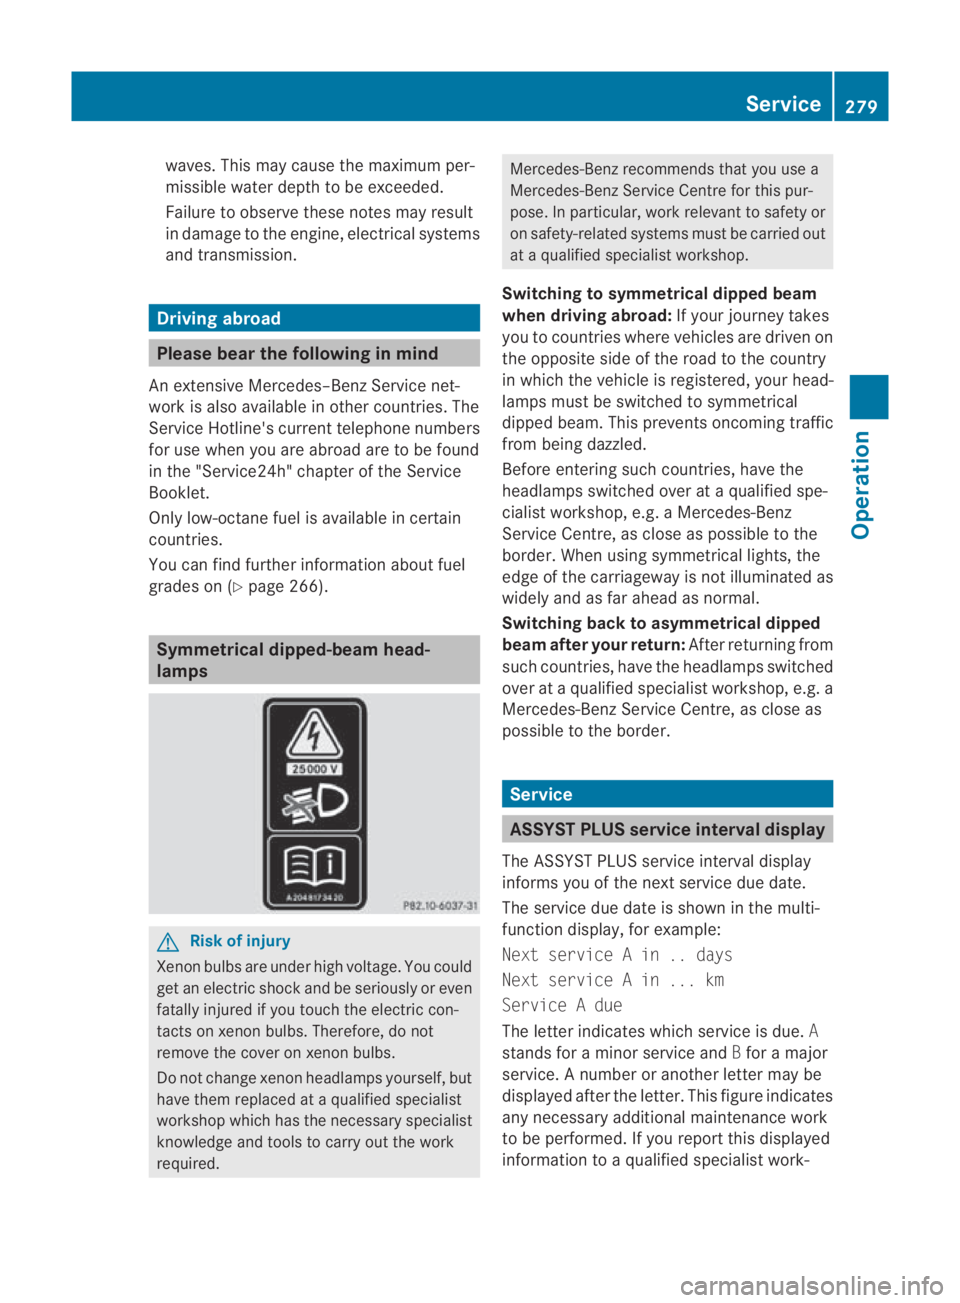
G
Risk of injury
Xenon bulbs are under high voltage. You could
get an electric shock and be seriously or even
fatally injured if you touch the electric con-
tacts on xenon bulbs. Therefore, do not
remove the cover on xenon bulbs.
Do not change xenon headlamps yourself, but
have them replaced at a qualified specialist
workshop which has the necessary specialist
knowledge and tools to carry out the work
required. Mercedes-Benz recommends that you use a
Mercedes-Benz Service Centre for this pur-
pose. In particular, work relevant to safety or
on safety-related systems must be carried out
at a qualified specialist workshop.
Switching to symmetrical dipped beam
when driving abroad: If your journey takes
you to countries where vehicles are driven on
the opposite side of the road to the country
in which the vehicle is registered, your head-
lamps must be switched to symmetrical
dipped beam. This prevents oncoming traffic
from being dazzled.
Before entering such countries, have the
headlamps switched over at a qualified spe-
cialist workshop, e.g. a Mercedes-Benz
Service Centre, as close as possible to the
border. When using symmetrical lights, the
edge of the carriageway is not illuminated as
widely and as far ahead as normal.
Switching back to asymmetrical dipped
beam after your return: After returning from
such countries, have the headlamps switched
over at a qualified specialist workshop, e.g. a
Mercedes-BenzS ervice Centre, as close as
possible to the border. Service
ASSYST PLUS service interval display
The ASSYST PLUS service interval display
informs you of the nexts ervice due date.
The service due date is shown in the multi-
function display, for example:
Next service A in .. days
Next service A in ... km
Service A due
The letter indicates which service is due. A
stands for a minor service and Bfor a major
service. A number or another letter may be
displayed after the letter. This figure indicates
any necessary additional maintenance work
to be performed. If you report this displayed
information to a qualified specialist work- Service
279Operation
BA 197 ECE RE 2010/6a; 1; 2, en-GB
sabbaeu Version: 3.0.3.6 2010-05-07T14:19:43+02:00 - Seite 279 Z
Page 283 of 361
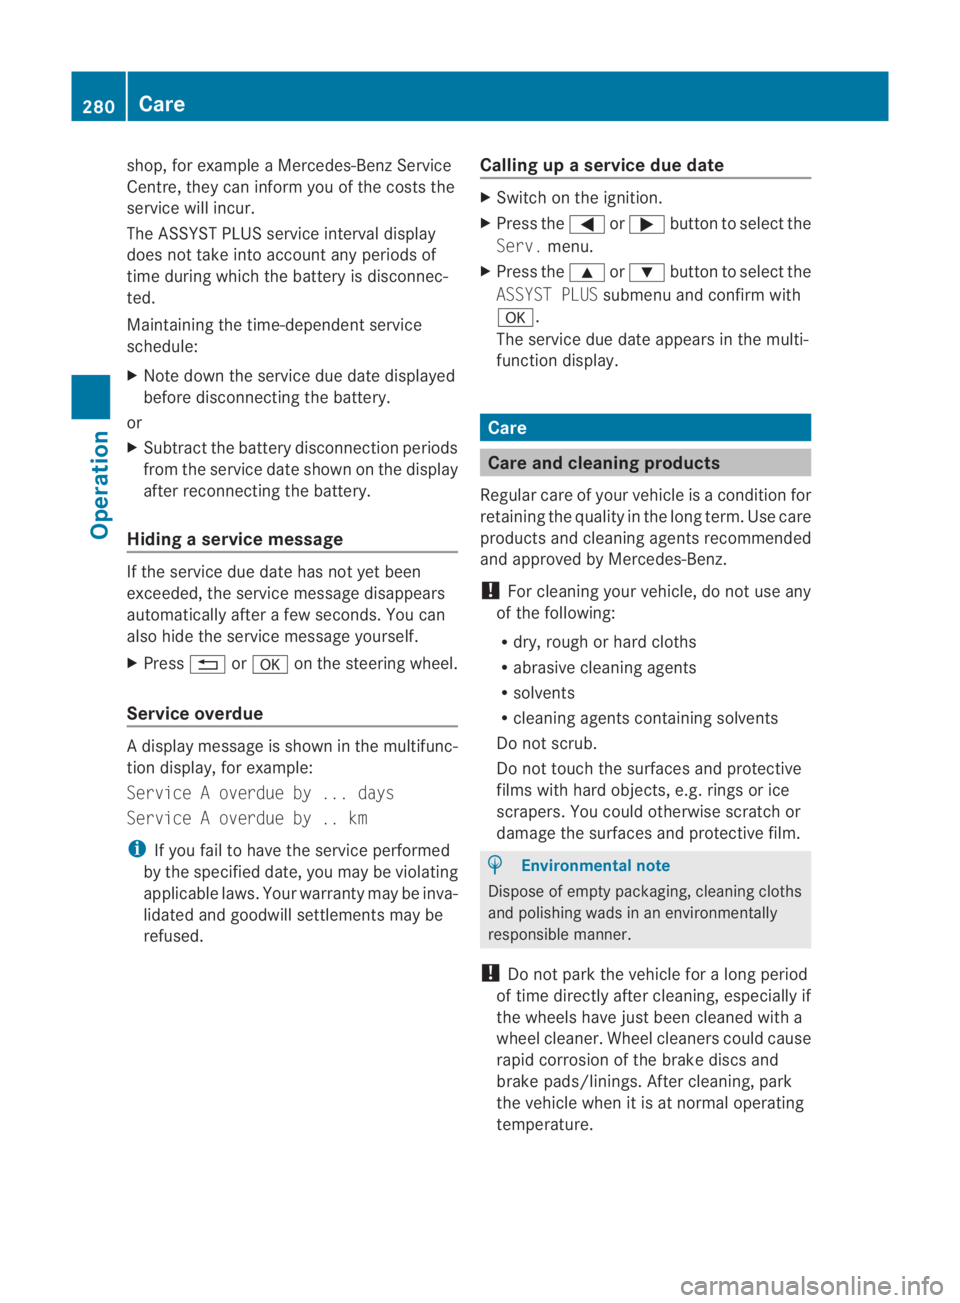
shop, for example a Mercedes-Benz Service
Centre, they can inform you of the costs the
service will incur.
The ASSYST PLUS service interval display
does not take into account any periods of
time during which the battery is disconnec-
ted.
Maintaining the time-dependent service
schedule:
X Note down the service due date displayed
before disconnecting the battery.
or
X Subtract the battery disconnection periods
from the service date shown on the display
after reconnecting the battery.
Hiding aservice message If the service due date has no
tyet been
exceeded, the service message disappears
automatically after a few seconds. You can
also hide the service message yourself.
X Press 0001or000A on the steering wheel.
Service overdue Ad
isplay message is shown in the multifunc-
tion display, for example:
Service A overdue by ... days
Service A overdue by .. km
i If you fail to have the service performed
by the specified date, you may be violating
applicable laws. Your warranty may be inva-
lidated and goodwill settlements may be
refused. Calling up a service due date X
Switch on the ignition.
X Press the 0008or000E button to selec tthe
Serv. menu.
X Press the 000For000C button to select the
ASSYST PLUS submenu and confirm with
000A.
The service due date appears in the multi-
function display. Care
Care and cleaning products
Regular care of your vehicle is a condition for
retaining the quality in the long term. Use care
products and cleaning agents recommended
and approved by Mercedes-Benz.
! For cleaning your vehicle, do not use any
of the following:
R dry, rough or hard cloths
R abrasive cleaning agents
R solvents
R cleaning agents containing solvents
Do not scrub.
Do not touch the surfaces and protective
films with hard objects, e.g. rings or ice
scrapers. You could otherwise scratch or
damage the surfaces and protective film. H
Environmental note
Dispose of empty packaging, cleaning cloths
and polishing wads in an environmentally
responsible manner.
! Do not park the vehicle for a long period
of time directly after cleaning, especially if
the wheels have just been cleaned with a
wheel cleaner. Wheel cleaners could cause
rapid corrosion of the brake discs and
brake pads/linings. After cleaning, park
the vehicle when it is at normal operating
temperature. 280
CareOperation
BA 197 ECE RE 2010/6a; 1; 2, en-GB
sabbaeu
Version: 3.0.3.6 2010-05-07T14:19:43+02:00 - Seite 280
Page 287 of 361
scratch or damage the plastic lamp lenses
of the headlamps and rear lighting.
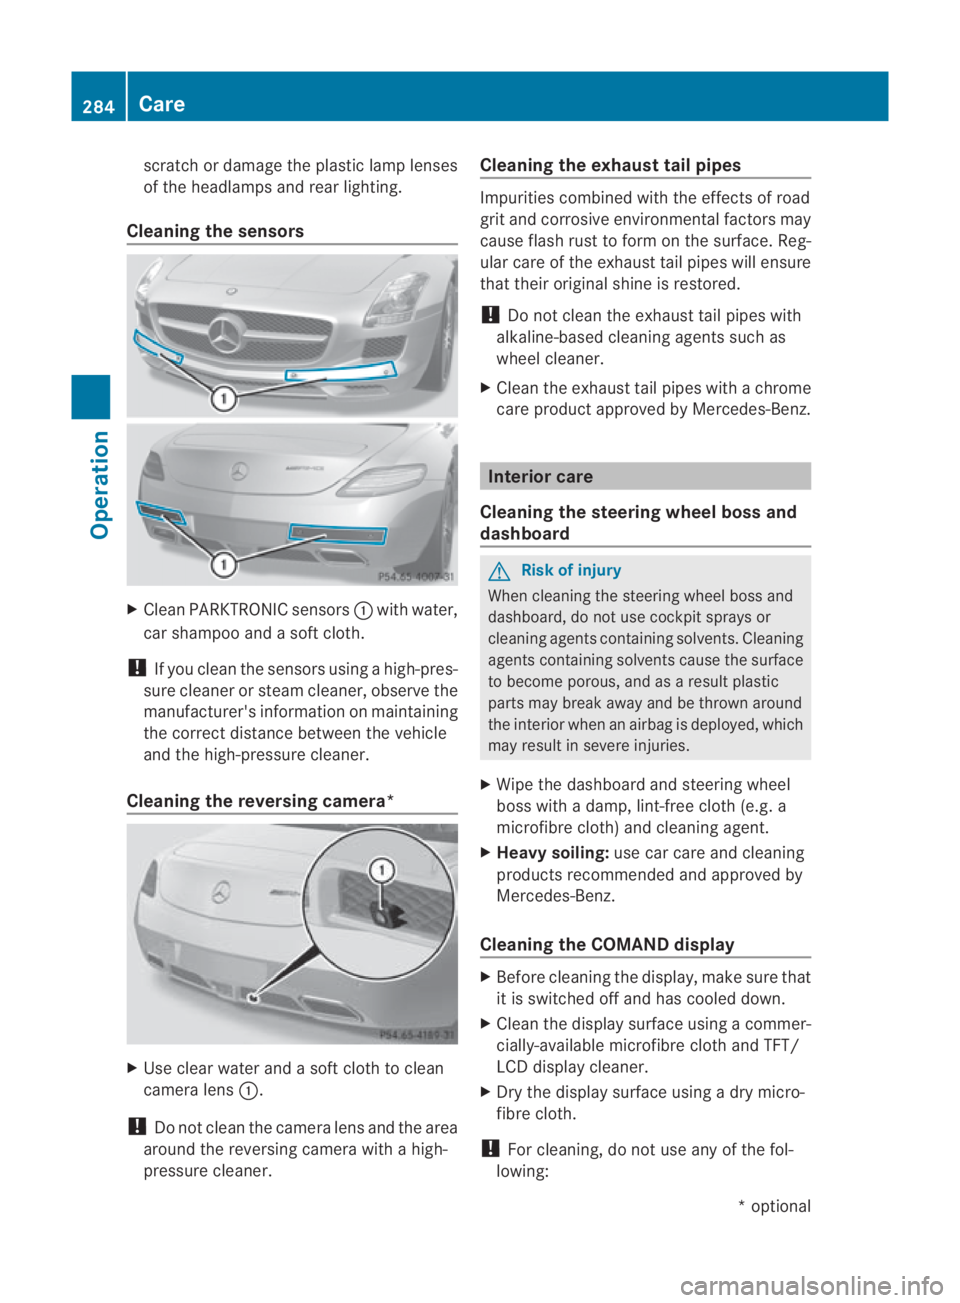
Cleaning the sensors X
CleanP ARKTRONIC sensors 0001with water,
car shampoo and a sof tcloth.
! If you clean the sensors using a high-pres-
sure cleaner or steam cleaner, observe the
manufacturer' sinformation on maintaining
the correct distance between the vehicle
and the high-pressure cleaner.
Cleaning the reversing camera* X
Use clear water and a sof tcloth to clean
camera lens 0001.
! Do not clean the camera lens and the area
around the reversing camera with a high-
pressure cleaner. Cleaning the exhaust tail pipes Impurities combined with the effects of road
grit and corrosive environmental factors may
cause flash rust to for monthe surface. Reg-
ular care of the exhaust tail pipes will ensure
that their original shine is restored.
! Do not clean the exhaust tail pipes with
alkaline-based cleaning agents such as
wheel cleaner.
X Cleant he exhaust tail pipes with a chrome
care product approved by Mercedes-Benz. Interior care
Cleaning the steering wheel boss and
dashboard G
Risk of injury
When cleaning the steering wheel boss and
dashboard, do not use cockpit sprays or
cleaning agents containing solvents. Cleaning
agents containing solvents cause the surface
to become porous, and as aresult plastic
parts may break away and be thrown around
the interior when an airbag is deployed, which
may result in severe injuries.
X Wipe the dashboard and steerin gwheel
boss with a damp, lint-free cloth (e.g. a
microfibre cloth) and cleaning agent.
X Heavy soiling: use car care and cleaning
products recommended and approved by
Mercedes-Benz.
Cleaning the COMAND display X
Before cleaning the display, make sure that
it is switched off and has cooled down.
X Cleant he display surface using a commer-
cially-available microfibre cloth and TFT/
LCD display cleaner.
X Dry the display surface using a dry micro-
fibre cloth.
! For cleaning, do not use any of the fol-
lowing: 284
CareOperation
*o
ptional
BA 197 ECE RE 2010/6a; 1; 2, en-GB
sabbaeu
Version: 3.0.3.6 2010-05-07T14:19:43+02:00 - Seite 284
Page 288 of 361
R
alcohol-based solvents or petrol
R abrasive cleaning agents
R commercially-available household clean-
ing agents
These may damage the display surface. Do
no te xert pressure when cleaning the dis-
play surface as this ma ylead to irreversible
damage.
Cleaning the seat covers !
Do not use microfibre cloths to clean gen-
uine leather covers, as these are too
aggressive and, if used often, may damage
the cover.
! Clean genuine leather cover swith a damp
cloth, the nwipe the covers down with a dry
cloth. Make sure that the leathe rdoes not
become soaked. Only use leather care
agents that have been tested and approved
by Mercedes-Benz. You can obtain these
from any Mercedes-Benz Service Centre.
i Note that regular care is essential to
ensure that the quality (both appearance
and comfort) of the covers is retained over
time.
Cleaning the plastic trim !
Do not affix to plastic surfaces:
R stickers
R films
R scented oil bottles or similar items
You can otherwise damage the plastic.
! Ensure that cosmetics, insect repellent
and suntan lotion do not come into contact
with the vehicle's trim. This will protec tthe
vehicle's high-quality trim and help retain
its overall appearance.
X Wipe the plastic trim with a damp, lint-free
cloth (e.g. a microfibre cloth).
X Heavy soiling: use car care and cleaning
products recommended and approved by
Mercedes-Benz. Cleaning trim strips X
Wipe the trim strips with a damp, lint-free
cloth (e.g. a microfibre cloth).
X Heavy soiling: use car care and cleaning
products recommended and approved by
Mercedes-Benz. Care
285Operation
BA 197 ECE RE 2010/6a; 1; 2, en-GB
sabbaeu Version: 3.0.3.6 2010-05-07T14:19:43+02:00 - Seite 285 Z
Page 290 of 361
Where will I find...?
...........................288
Display messages ............................. 289
Troubleshooting ................................ 306
Locking/unlocking in an emer-
gency ................................................. 321
Changing batteries (key) ..................323
Changing bulbs ................................. 323
Replacing the wiper blades ..............325
Flat tyre ............................................. 325
Battery ............................................... 334
Jump-starting .................................... 338
Towing and tow-starting ..................339
Fuses .................................................. 342 287Practical advice
BA 197 ECE RE 2010/6a; 1; 2, en-GB
sabbaeu
Version: 3.0.3.6 2010-05-07T14:19:43+02:00 - Seite 287