2010 MERCEDES-BENZ R320 key
[x] Cancel search: keyPage 117 of 364
i
Always engage the parking brake in
addition to shifting the automatic
transmission into park position P.
i Observe instructions if you want the
automatic transmission to remain in
neutral position N, see “Remaining in
neutral position N” ( Y page 117).
With SmartKey X
Turn the SmartKey in the starter switch to
position 0.
X Remove the SmartKey from the starter
switch.
When you turn off the engine using the
SmartKey, and remove the SmartKey from
the starter switch or open a front door, the
automatic transmission will shift into park
position P automatically. G
Warning!
Keep in mind that turning off the engine alone
only will shift the automatic transmission into
neutral position N automatically.
Always shift the automatic transmission into
park position P before turning off the engine.
Otherwise the vehicle could roll away which
could result in an accident and/or serious
personal injury.
With KEYLESS-GO X
Press the KEYLESS-GO start/stop button.
With the driver’s door closed, the starter
switch
is now in position 1. With the driver’s
door opened, the starter switch is set to
position 0, same as the SmartKey removed
from the starter switch (Y page 79).
When you turn off the engine using the
KEYLESS-GO start/stop button and open a
front door, the automatic transmission will
shift into park position P automatically. G
Warning!
Keep in mind that turning off the engine alone
only
will shift the automatic transmission into
neutral position N automatically.
Always shift the automatic transmission into
park position P before turning off the engine.
Otherwise the vehicle could roll away which
could result in an accident and/or serious
personal injury.
i In an emergency you can turn off the
engine while driving by pressing and
holding the KEYLESS-GO start/stop button
for approximately 3 seconds.
If you have started the engine with the
KEYLESS-GO start/stop button and cannot
turn it off as described above:
X Remove the KEYLESS-GO start/stop
button from the starter switch.
X Insert the SmartKey into the starter switch.
The engine turns off. The starter switch is
in position 0 (Y page 79). Automatic transmission
Introduction
For information on driving with an automatic
transmission, see “Driving and parking”
(Y page 110). G
Warning!
Make sure absolutely no objects are
obstructing the pedals’ range of movement.
Keep the driver’s footwell clear of all
obstacles. If there are any floormats or
carpets
in the footwell, make sure the pedals
still have sufficient clearance.
During sudden driving or braking maneuvers
the objects could get caught between the
pedals. You could then no longer brake or
accelerate. This could lead to accidents and
injury. Automatic transmission
115
Controls in detail
251_AKB; 4; 52, en-US
d2ureepe, Version: 2.11.8.1 2009-03-23T09:22:52+01:00 - Seite 115 Z
Page 118 of 364
!
Allow the engine to warm up under low
load use. Do not place full load on the
engine until the operating temperature has
been reached.
Avoid spinning of a drive wheel for an
extended period when driving off on
slippery road surfaces.
This may cause serious damage to the
engine and the drivetrain which is not
covered by the Mercedes-Benz Limited
Warranty.
i During the brief warm-up, transmission
upshifting is delayed. This allows the
catalytic converter (gasoline engine) or
oxidation catalyst (diesel engine) to heat up
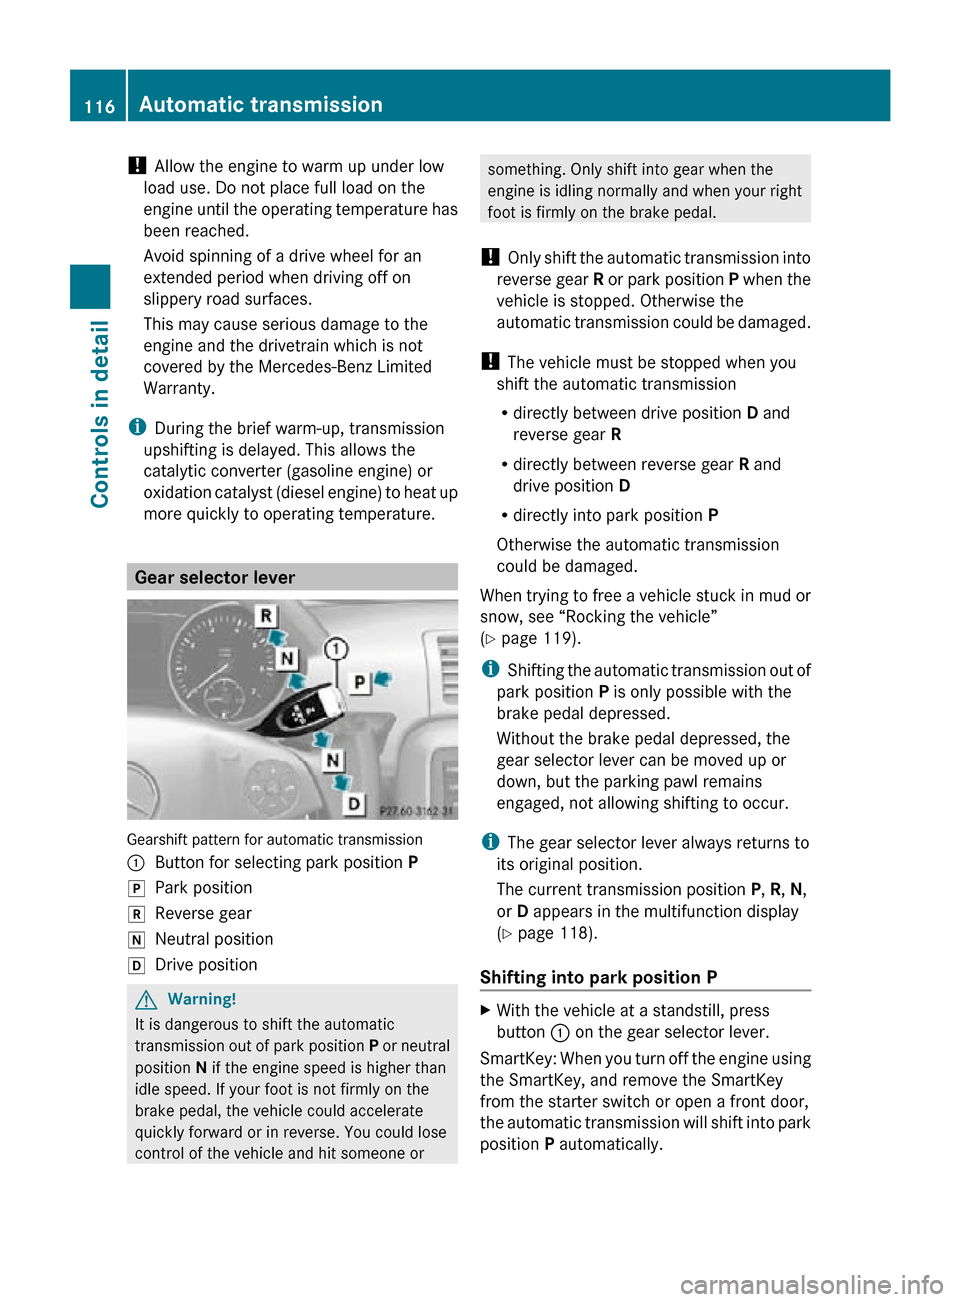
more quickly to operating temperature. Gear selector lever
Gearshift pattern for automatic transmission
:
Button for selecting park position P
j Park position
k Reverse gear
i Neutral position
h Drive position G
Warning!
It is dangerous to shift the automatic
transmission out of park position P or neutral
position N if the engine speed is higher than
idle speed. If your foot is not firmly on the
brake pedal, the vehicle could accelerate
quickly forward or in reverse. You could lose
control of the vehicle and hit someone or something. Only shift into gear when the
engine is idling normally and when your right
foot is firmly on the brake pedal.
! Only shift the automatic transmission into
reverse gear R or park position P when the
vehicle is stopped. Otherwise the
automatic transmission could be damaged.
! The vehicle must be stopped when you
shift the automatic transmission
R directly between drive position D and
reverse gear R
R directly between reverse gear R and
drive position D
R directly into park position P
Otherwise the automatic transmission
could be damaged.
When trying to free a vehicle stuck in mud or
snow, see “Rocking the vehicle”
(Y page 119).
i Shifting the automatic transmission out of
park position P is only possible with the
brake pedal depressed.
Without the brake pedal depressed, the
gear selector lever can be moved up or
down, but the parking pawl remains
engaged, not allowing shifting to occur.
i The gear selector lever always returns to
its original position.
The current transmission position P, R, N,
or D appears in the multifunction display
(Y page 118).
Shifting into park position P X
With the vehicle at a standstill, press
button : on the gear selector lever.
SmartKey: When you turn off the engine using
the SmartKey, and remove the SmartKey
from the starter switch or open a front door,
the automatic transmission will shift into park
position P automatically. 116
Automatic transmissionControls in detail
251_AKB; 4; 52, en-US
d2ureepe,
Version: 2.11.8.1 2009-03-23T09:22:52+01:00 - Seite 116
Page 119 of 364
KEYLESS-GO: When you turn off the engine
using
the KEYLESS-GO start/stop button and
open a front door, the automatic transmission
will shift into park position P automatically.G
Warning!
Keep in mind that turning off the engine alone
only
will shift the automatic transmission into
neutral position N automatically.
Always shift the automatic transmission into
park position P before turning off the engine.
Otherwise the vehicle could roll away which
could result in an accident and/or serious
personal injury.
i Moving the gear selector lever up or down
shifts the automatic transmission out of
park position P.
Shifting into neutral position N X
With the vehicle at a standstill, depress the
brake pedal.
X Move the gear selector lever up or down to
the resistance point to select neutral
position N.
When you turn off the engine, the automatic
transmission will shift into neutral position
N automatically.
SmartKey: Removing the SmartKey from the
starter switch or opening a front door after
turning
off the engine will shift the automatic
transmission into park position P
automatically.
KEYLESS-GO: Opening a front door after
turning off the engine will shift the automatic
transmission into park position P
automatically.
Remaining in neutral position N
If you want the automatic transmission to
remain in neutral position N, e.g. when taking
the vehicle through an automatic conveyor-
type car wash, observe the following
instructions. G
Warning!
When leaving the SmartKey in the starter
switch, do not leave children unattended in
the
vehicle. It is possible for children to switch
on the ignition which could result in
unsupervised use of vehicle equipment.
Unsupervised use of vehicle equipment could
result in an accident and/or serious personal
injury.
With SmartKey:
X Make sure the ignition is switched on.
X With the vehicle at a standstill, depress the
brake pedal and keep it pressed.
X Shift the automatic transmission into
neutral position N.
X Release the brake pedal.
X If engaged, release the parking brake.
X Switch off the ignition and leave the
SmartKey in the starter switch.
With KEYLESS-GO:
X Make sure the ignition is switched on.
X With the vehicle at a standstill, depress the
brake pedal and keep it pressed.
X Shift the automatic transmission into park
position P.
X Release the brake pedal.
X Remove the KEYLESS-GO start/stop
button from the starter switch.
X Insert the SmartKey into the starter switch.
X Switch on the ignition.
X Depress the brake pedal and keep it
pressed.
X Shift the automatic transmission into
neutral position N.
X Release the brake pedal.
X If engaged, release the parking brake.
X Switch off the ignition and leave the
SmartKey in the starter switch. Automatic transmission
117
Controls in detail
251_AKB; 4; 52, en-US
d2ureepe, Version: 2.11.8.1 2009-03-23T09:22:52+01:00 - Seite 117 Z
Page 124 of 364

Transfer case
The vehicle is equipped with all-wheel drive
(4MATIC). Both the front and rear axles are
powered at all times when the vehicle is being
operated.
! Only conduct operational or performance
tests on a two-axle dynamometer. If such
tests are necessary, contact an authorized
Mercedes-Benz Center. You could
otherwise seriously damage the brake
system or the transfer case which is not
covered by the Mercedes-Benz Limited
Warranty.
! Because the ESP ®
operates
automatically, the engine and ignition must
be shut off (SmartKey in starter switch
position 0 or 1 or KEYLESS-GO start/stop
button in position 0 or 1) when the parking
brake is being tested on a brake test
dynamometer. Such testing should be no
longer than 10 seconds.
Active braking action through the ESP ®
may otherwise seriously damage the brake
system which is not covered by the
Mercedes-Benz Limited Warranty. Instrument cluster
Introduction
For a full view illustration of the instrument
cluster, see “Instrument cluster”
(Y page 28). G
Warning!
No messages will be displayed if either the
instrument cluster or the multifunction
display is inoperative.
As a result, you will not be able to see
information about your driving conditions,
such as
R speed
R outside temperature R
warning/indicator lamps
R malfunction/warning messages
R failure of any systems
Driving characteristics may be impaired.
If you must continue to drive, do so with added
caution. Contact an authorized Mercedes-
Benz Center as soon as possible. :
To dim instrument cluster illumination
; Reset button
= To brighten instrument cluster
illumination
For information on changing the instrument
cluster settings, e.g. the language, see
(Y page 132). Activating the instrument cluster
The instrument cluster is activated when you
R open the driver’s door
R switch on the ignition
R press button :, ; or =
i Opening the driver’s door or pressing
button :, ; or = without switching on
the ignition activates the instrument
cluster illumination only for 30 seconds. 122
Instrument clusterControls in detail
251_AKB; 4; 52, en-US
d2ureepe,
Version: 2.11.8.1 2009-03-23T09:22:52+01:00 - Seite 122
Page 132 of 364
Vehicle status message memory
menu
Use the Vehicle status message memory
menu to scan malfunction and warning
messages that may be stored in the memory.
Such messages appear in the multifunction
display and are based on conditions or
system status the vehicle’s system has
recorded.
The Vehicle status message memory menu
only appears if messages have been stored. G
Warning!
Malfunction and warning messages are only
indicated for certain systems and are
intentionally not very detailed. The
malfunction and warning messages are
simply a reminder with respect to the
operation of certain systems. They do not
replace the owner’s and/or driver’s
responsibility to maintain the vehicle’s
operating safety. Have all required
maintenance and safety checks performed on
the vehicle. Bring the vehicle to an authorized
Mercedes-Benz Center to address the
malfunction and warning messages.
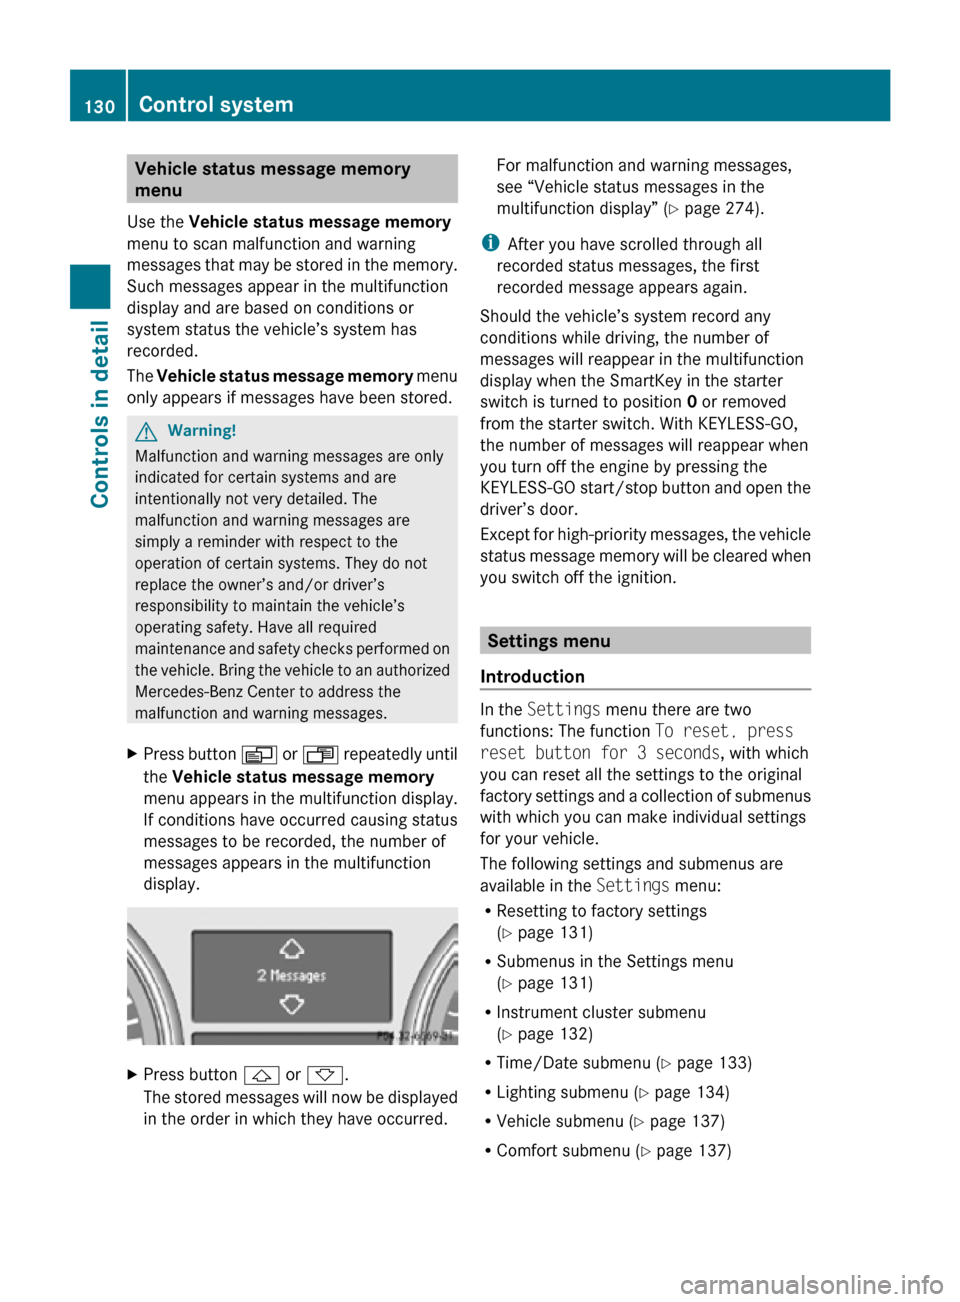
X Press button V or U repeatedly until
the Vehicle status message memory
menu appears in the multifunction display.
If conditions have occurred causing status
messages to be recorded, the number of
messages appears in the multifunction
display. X
Press button & or *.
The stored messages will now be displayed
in the order in which they have occurred. For malfunction and warning messages,
see “Vehicle status messages in the
multifunction display” (
Y page 274).
i After you have scrolled through all
recorded status messages, the first
recorded message appears again.
Should the vehicle’s system record any
conditions while driving, the number of
messages will reappear in the multifunction
display when the SmartKey in the starter
switch is turned to position 0 or removed
from the starter switch. With KEYLESS-GO,
the number of messages will reappear when
you turn off the engine by pressing the
KEYLESS-GO start/stop button and open the
driver’s door.
Except for high-priority messages, the vehicle
status message memory will be cleared when
you switch off the ignition. Settings menu
Introduction In the
Settings menu there are two
functions: The function To reset, press
reset button for 3 seconds, with which
you can reset all the settings to the original
factory settings and a collection of submenus
with which you can make individual settings
for your vehicle.
The following settings and submenus are
available in the Settings menu:
R Resetting to factory settings
(Y page 131)
R Submenus in the Settings menu
(Y page 131)
R Instrument cluster submenu
(Y page 132)
R Time/Date submenu ( Y page 133)
R Lighting submenu ( Y page 134)
R Vehicle submenu ( Y page 137)
R Comfort submenu ( Y page 137)130
Control systemControls in detail
251_AKB; 4; 52, en-US
d2ureepe,
Version: 2.11.8.1 2009-03-23T09:22:52+01:00 - Seite 130
Page 137 of 364
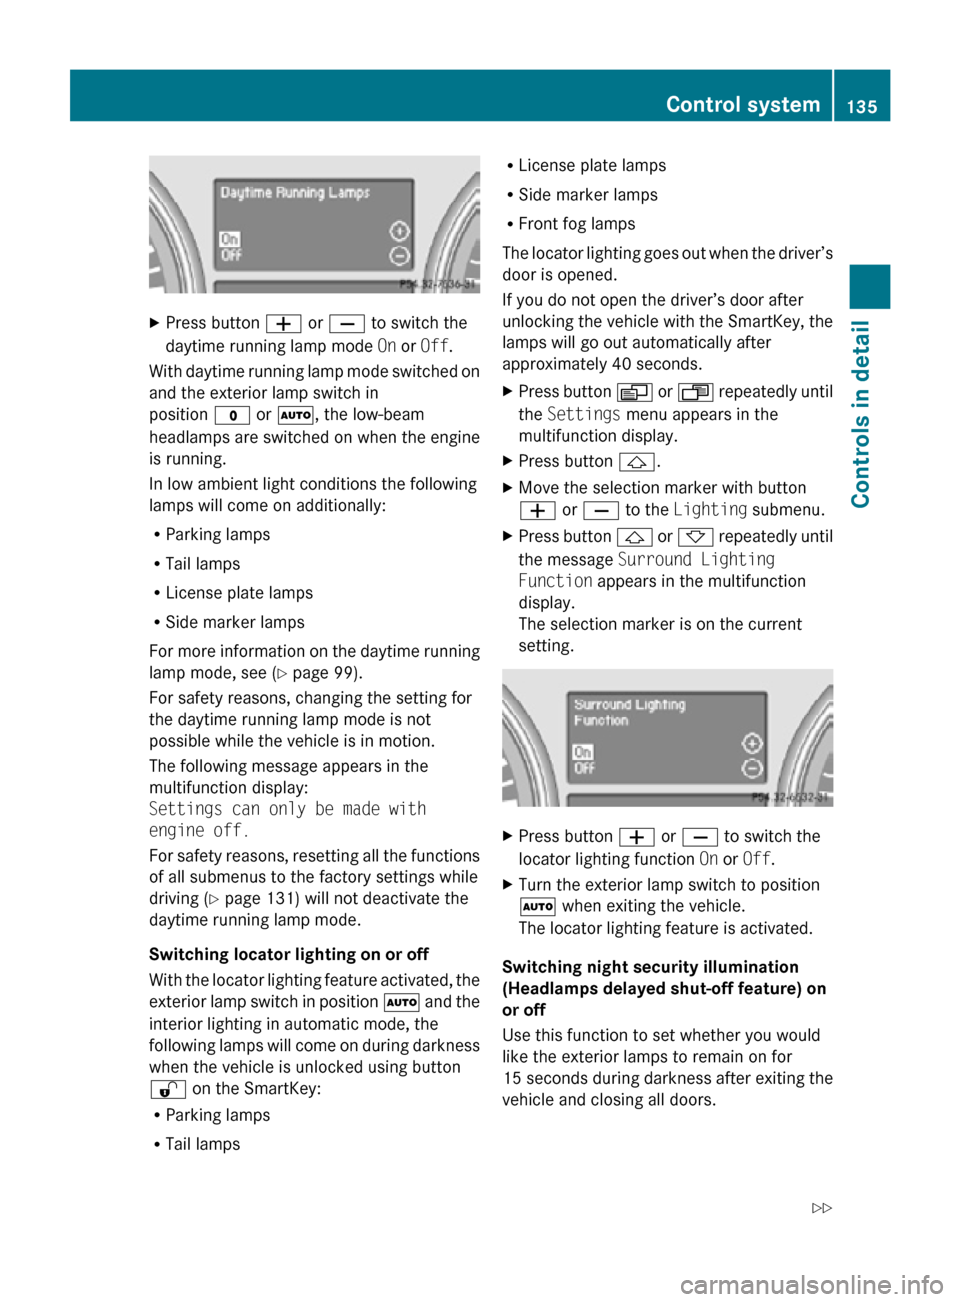
X
Press button W or X to switch the
daytime running lamp mode On or Off.
With daytime running lamp mode switched on
and the exterior lamp switch in
position $ or Ã, the low-beam
headlamps are switched on when the engine
is running.
In low ambient light conditions the following
lamps will come on additionally:
R Parking lamps
R Tail lamps
R License plate lamps
R Side marker lamps
For more information on the daytime running
lamp mode, see ( Y page 99).
For safety reasons, changing the setting for
the daytime running lamp mode is not
possible while the vehicle is in motion.
The following message appears in the
multifunction display:
Settings can only be made with
engine off.
For safety reasons, resetting all the functions
of all submenus to the factory settings while
driving ( Y page 131) will not deactivate the
daytime running lamp mode.
Switching locator lighting on or off
With the locator lighting feature activated, the
exterior lamp switch in position à and the
interior lighting in automatic mode, the
following lamps will come on during darkness
when the vehicle is unlocked using button
% on the SmartKey:
R Parking lamps
R Tail lamps R
License plate lamps
R Side marker lamps
R Front fog lamps
The locator lighting goes out when the driver’s
door is opened.
If you do not open the driver’s door after
unlocking the vehicle with the SmartKey, the
lamps will go out automatically after
approximately 40 seconds.
X Press button V or U repeatedly until
the Settings menu appears in the
multifunction display.
X Press button &.
X Move the selection marker with button
W or X to the Lighting submenu.
X Press button & or * repeatedly until
the message Surround Lighting
Function appears in the multifunction
display.
The selection marker is on the current
setting. X
Press button W or X to switch the
locator lighting function On or Off.
X Turn the exterior lamp switch to position
à when exiting the vehicle.
The locator lighting feature is activated.
Switching night security illumination
(Headlamps delayed shut-off feature) on
or off
Use this function to set whether you would
like the exterior lamps to remain on for
15 seconds during darkness after exiting the
vehicle and closing all doors. Control system
135Controls in detail
251_AKB; 4; 52, en-US
d2ureepe, Version: 2.11.8.1 2009-03-23T09:22:52+01:00 - Seite 135 Z
Page 138 of 364
With the headlamps delayed shut-off feature
activated and the exterior lamp switch in
position
à before the engine is turned off,
the following lamps will come on when the
engine is turned off:
R Parking lamps
R Tail lamps
R License plate lamps
R Side marker lamps
R Front fog lamps
If, after turning off the engine, you do not
open a door or do not close an opened door,
the lamps will automatically go out after
60 seconds.
X Press button V or U repeatedly until
the Settings menu appears in the
multifunction display.
X Press button &.
X Move the selection marker with button
W or X to the Lighting submenu.
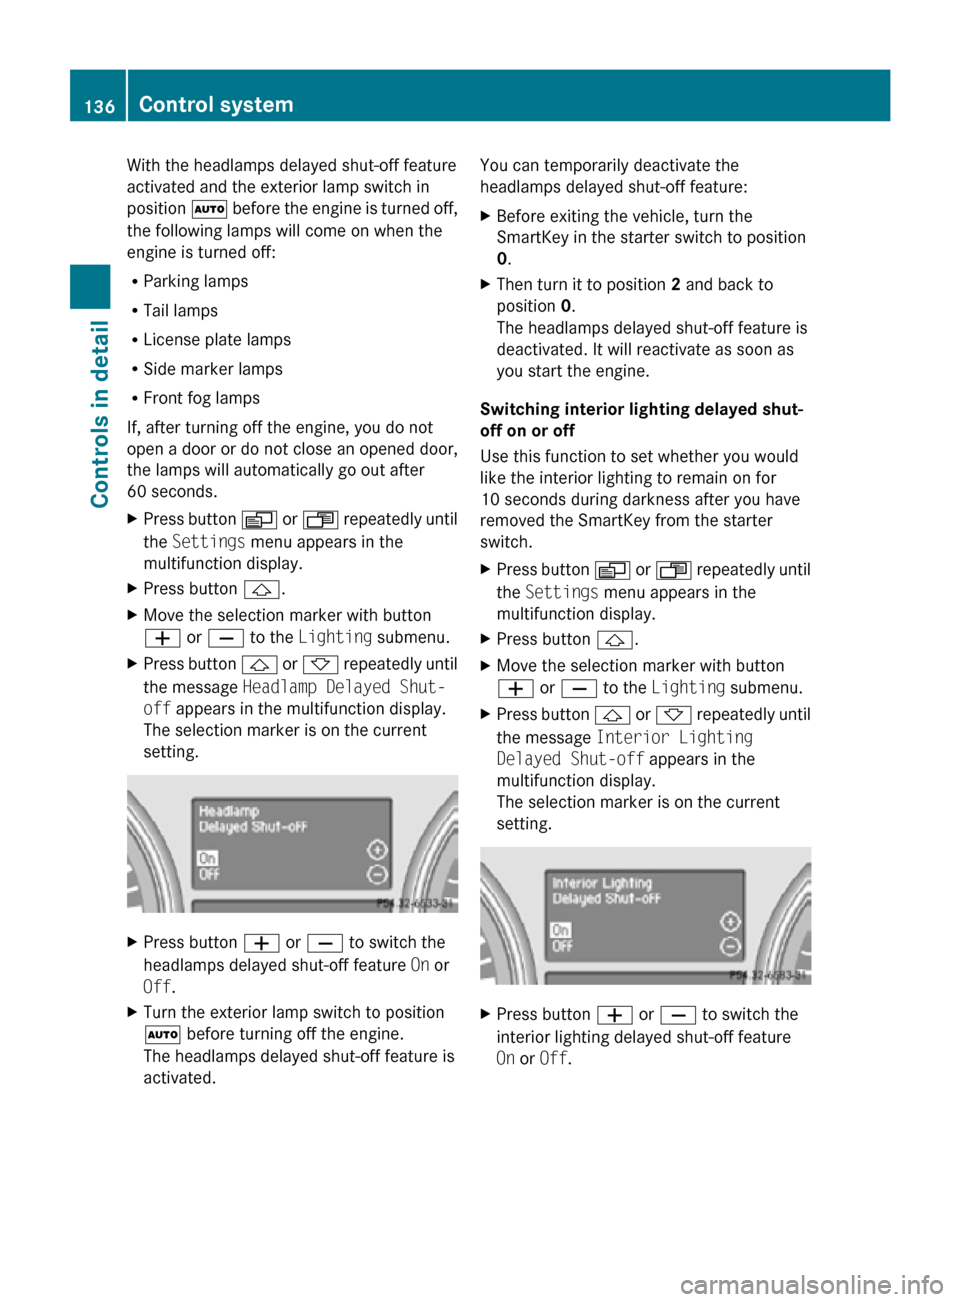
X Press button & or * repeatedly until
the message Headlamp Delayed Shut-
off appears in the multifunction display.
The selection marker is on the current
setting. X
Press button W or X to switch the
headlamps delayed shut-off feature On or
Off.
X Turn the exterior lamp switch to position
à before turning off the engine.
The headlamps delayed shut-off feature is
activated. You can temporarily deactivate the
headlamps delayed shut-off feature:
X
Before exiting the vehicle, turn the
SmartKey in the starter switch to position
0.
X Then turn it to position 2 and back to
position 0.
The headlamps delayed shut-off feature is
deactivated. It will reactivate as soon as
you start the engine.
Switching interior lighting delayed shut-
off on or off
Use this function to set whether you would
like the interior lighting to remain on for
10 seconds during darkness after you have
removed the SmartKey from the starter
switch.
X Press button V or U repeatedly until
the Settings menu appears in the
multifunction display.
X Press button &.
X Move the selection marker with button
W or X to the Lighting submenu.
X Press button & or * repeatedly until
the message Interior Lighting
Delayed Shut-off appears in the
multifunction display.
The selection marker is on the current
setting. X
Press button W or X to switch the
interior lighting delayed shut-off feature
On or Off. 136
Control systemControls in detail
251_AKB; 4; 52, en-US
d2ureepe,
Version: 2.11.8.1 2009-03-23T09:22:52+01:00 - Seite 136
Page 141 of 364
slower vehicle moving in your vehicle’s path
and the danger of a collision exists, even
when the Distronic is switched off.
X
Press button V or U repeatedly until
the message Distance Warning appears
in the multifunction display.
The selection marker is on the current
setting. X
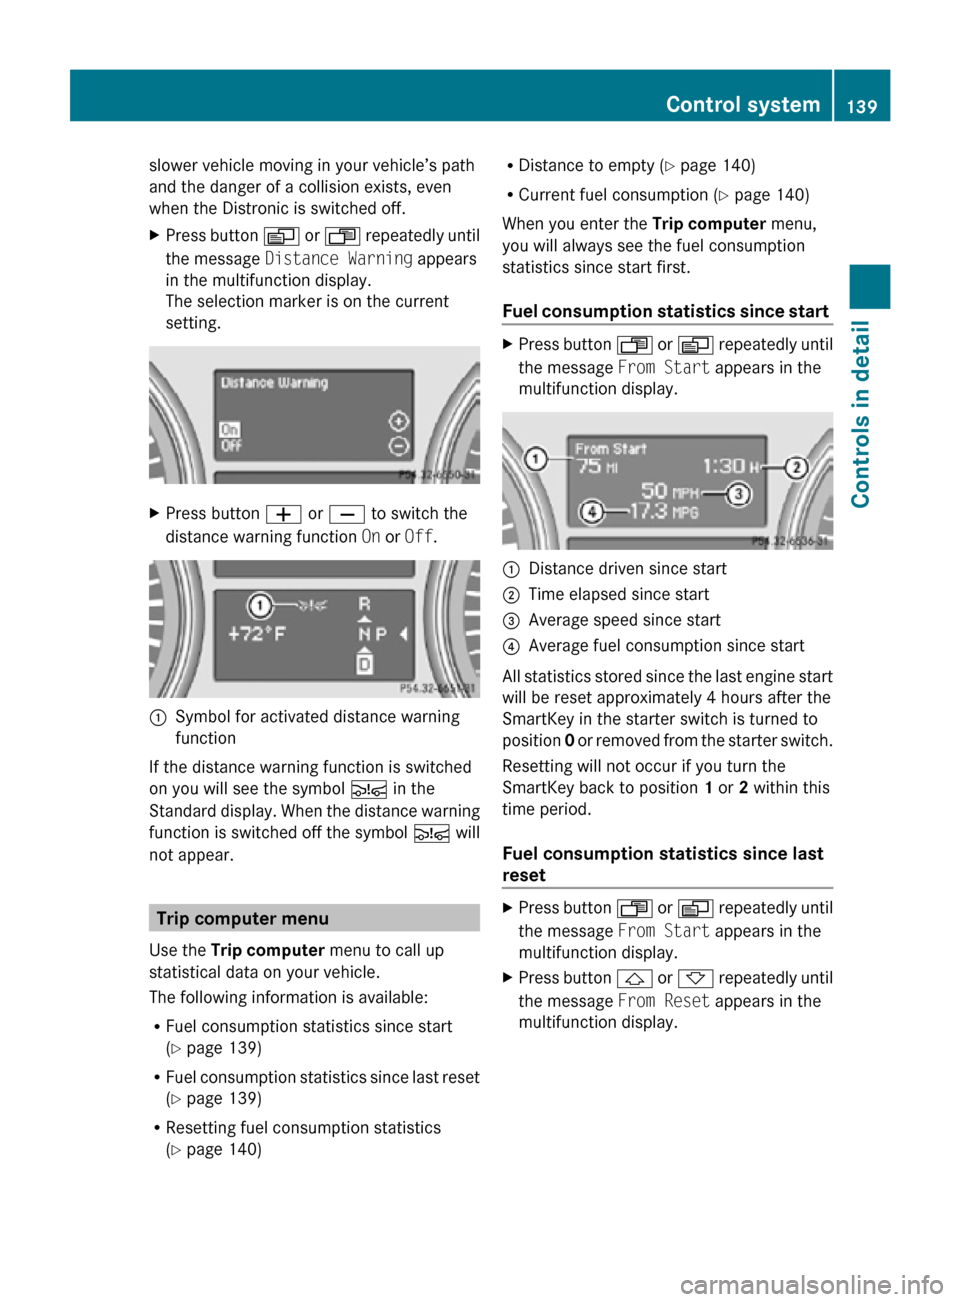
Press button W or X to switch the
distance warning function On or Off.:
Symbol for activated distance warning
function
If the distance warning function is switched
on you will see the symbol Ä in the
Standard display. When the distance warning
function is switched off the symbol Ä will
not appear. Trip computer menu
Use the Trip computer menu to call up
statistical data on your vehicle.
The following information is available:
R Fuel consumption statistics since start
(Y page 139)
R Fuel consumption statistics since last reset
(Y page 139)
R Resetting fuel consumption statistics
(Y page 140) R
Distance to empty ( Y page 140)
R Current fuel consumption (Y page 140)
When you enter the Trip computer menu,
you will always see the fuel consumption
statistics since start first.
Fuel consumption statistics since start X
Press button U or V repeatedly until
the message From Start appears in the
multifunction display. :
Distance driven since start
; Time elapsed since start
= Average speed since start
? Average fuel consumption since start
All statistics stored since the last engine start
will be reset approximately 4 hours after the
SmartKey in the starter switch is turned to
position 0 or removed from the starter switch.
Resetting will not occur if you turn the
SmartKey back to position 1 or 2 within this
time period.
Fuel consumption statistics since last
reset X
Press button U or V repeatedly until
the message From Start appears in the
multifunction display.
X Press button & or * repeatedly until
the message From Reset appears in the
multifunction display. Control system
139Controls in detail
251_AKB; 4; 52, en-US
d2ureepe, Version: 2.11.8.1 2009-03-23T09:22:52+01:00 - Seite 139 Z