2010 MERCEDES-BENZ R320 change time
[x] Cancel search: change timePage 24 of 364
determined by our authorized technician and
tow service provider.
For additional information refer to the
Mercedes-Benz Roadside Assistance
Program brochure (in the USA) or the
Roadside Assistance section of the Service
and Warranty Information Booklet (in
Canada) in your vehicle literature portfolio.
Change of address or ownership
If you change your address, be sure to send
in the “Change of Address Notice” found in
the Service and Warranty Information
Booklet, or simply call the Mercedes-Benz
Customer Assistance Center (in the USA) at
1-800-FOR-MERCedes, or Customer Service
(in Canada) at
1-800-387-0100. This will
assist us in contacting you in a timely manner
should the need arise.
If you sell your Mercedes, please leave all
literature with the vehicle to make it available
to the next operator.
If you bought this vehicle used, be sure to
send in the “Notice of Purchase of Used
Truck” found in the Service and Warranty
Information Booklet, or call the Mercedes-
Benz Customer Assistance Center (in the
USA) at 1-800-FOR-MERCedes, or Customer
Service (in Canada) at 1-800-387-0100. Operating your vehicle outside the
USA or Canada
If you plan to operate your vehicle in foreign
countries, please be aware that:
R Service
facilities or replacement parts may
not be readily available.
R Unleaded gasoline for vehicles with
catalytic converters may not be available;
the use of leaded fuels will damage the
catalysts.
R Gasoline may have a considerably lower
octane rating, and improper fuel can cause
engine damage. Operating safety
G
Warning!
Work improperly carried out on electronic
components and associated software could
cause
them to cease functioning. Because the
vehicle’s electronic components are
interconnected, any modifications made may
produce an undesired effect on other
systems. Electronic malfunctions could
seriously impair the operating safety of your
vehicle.
Contact an authorized Mercedes-Benz Center
for repairs or modifications to electronic
components.
Other improper work or modifications on the
vehicle could also have a negative impact on
the operating safety of the vehicle.
Some safety systems only function while the
engine is running. You should therefore never
turn off the engine while driving. G
Warning!
Heavy blows against the vehicle underbody or
tires/wheels may cause serious damage and
impair the operating safety of your vehicle.
Such blows can be caused, for example, by
running over an obstacle, road debris or a
pothole. If you feel a sudden significant
vibration or ride disturbance, or you suspect
that damage to your vehicle as occurred:
R turn on your hazard warning flashers
R slow down carefully
R drive
with caution to an area which is a safe
distance from the road
Inspect the vehicle underbody and tires/
wheels for possible damage. If the vehicle
appears unsafe, have it towed to the nearest
authorized Mercedes-Benz Center or other
qualified maintenance or repair facility for
further inspection or repairs. 22
Introduction 251_AKB; 4; 52, en-US
d2ureepe,
Version: 2.11.8.1 2009-03-23T09:22:52+01:00 - Seite 22
Page 41 of 364
bags repaired. This will help to make sure the
air
bags will continue to provide supplemental
crash protection for occupants.
Safety guidelines for the seat belt,
Emergency Tensioning Device (ETD)
and air bag G
Warning!
R Damaged
seat belts or seat belts that have
been subjected to stress in an accident
must be replaced. Their anchoring points
must also be checked. Only use seat belts
installed or supplied by an authorized
Mercedes-Benz Center.
R Air bags and pyrotechnic Emergency
Tensioning Devices (ETDs) contain
perchlorate material, which may require
special handling and regard for the
environment. Check with your local
government’s disposal guidelines.
California residents, see
www.dtsc.ca.gov/HazardousWaste/
Perchlorate/index.cfm.
R Air bags and ETDs are designed to function
on a one-time-only basis. An air bag or ETD
that has deployed must be replaced. PRE-
SAFE ®
has electrically operated reversible
pre-tensioners in addition to the
pyrotechnic ETDs.
R Do not pass seat belts over sharp edges.
They could tear.
R Do not make any modification that could
change the effectiveness of the seat belts.
R Do not bleach or dye seat belts as this may
severely weaken them. In a crash they may
not be able to provide adequate protection.
R No modifications of any kind may be made
to any components or wiring of the SRS.
R Do no change or remove any component or
part of the SRS.
R Do not install additional trim material, seat
covers, badges, etc. over the steering
wheel hub, front passenger front air bag cover, outboard sides of the seat
backrests, door trim panels, or door frame
trims.
R Do not install additional electrical/
electronic equipment on or near SRS
components and wiring.
R Keep
area between air bags and occupants
free of objects (e.g. packages, purses,
umbrellas, etc.).
R Do not hang items such as coat hangers
from the coat hooks or handles over the
door. These items may be thrown around in
the vehicle and cause head and other
injuries when the window curtain air bag is
deployed.
R Air bag system components will be hot after
an air bag has inflated. Do not touch them.
R Never place your feet on the instrument
panel, dashboard, or on the seat. Always
keep both feet on the floor in front of the
seat.
R Improper repair work on the SRS creates a
risk of rendering the SRS inoperative or
causing unintended air bag deployment.
Work on the SRS must therefore only be
performed by qualified technicians.
Contact an authorized Mercedes-Benz
Center.
R For your protection and the protection of
others, when scrapping the air bag unit or
ETD, our safety instructions must be
followed. These instructions are available
from any authorized Mercedes-Benz
Center.
R Given the considerable deployment speed,
required inflation volume, and the material
of the air bags, there is the possibility of
abrasions or other, potentially more serious
injuries resulting from air bag deployment.
If you sell your vehicle, we strongly
recommend that you inform the subsequent
owner that the vehicle is equipped with SRS.
Also refer them to the applicable section in
the Operator’s Manual. Occupant safety
39
Safety and security
251_AKB; 4; 52, en-US
d2ureepe, Version: 2.11.8.1 2009-03-23T09:22:52+01:00 - Seite 39 Z
Page 57 of 364
R
Adjust the seat cushion so that the front
edge of the seat cushion lightly supports
your legs.
R Adjust the head restraint so that it is as
close to the head as possible and the
center of the head restraint supports the
back of the head at eye level.
R Never place hands under the seat or near
any moving parts while the seat is being
adjusted. Children in the vehicle
Safety notes If an infant or child is traveling with you in the
vehicle:
X
Secure the child using an infant or child
restraint
appropriate to the age and size of
the child.
X Make sure the infant or child is properly
secured at all times while the vehicle is in
motion. G
Warning!
When leaving the vehicle, always remove the
SmartKey from the starter switch. Always
take the SmartKey with you and lock the
vehicle. Do not leave children unattended in
the
vehicle, even if they are secured in a child
restraint system, or with access to an
unlocked vehicle. A child’s unsupervised
access to a vehicle could result in an accident
and/or serious personal injury. The children
could
R injure themselves on parts of the vehicle
R be seriously or fatally injured through
excessive exposure to extreme heat or cold
R injure themselves or cause an accident with
vehicle equipment that can be operated
even if the SmartKey is removed from the
starter switch or removed from the vehicle,
such as seat adjustment, steering wheel
adjustment, or the memory function If children open a door, they could injure other
persons or get out of the vehicle and injure
themselves or be injured by following traffic.
Do not expose the child restraint system to
direct sunlight. The child restraint system’s
metal parts, for example, could become very
hot, and the child could be burned by these
parts.
G
Warning!
Do not carry heavy or hard objects in the
passenger
or cargo compartment unless they
are firmly secured in place.
Unsecured or improperly positioned cargo
increases a child’s risk of injury in the event
of
R strong braking maneuvers
R sudden changes of direction
R an accident
Infant and child restraint systems G
Observe Safety notes, see page 55.
We recommend all infants and children be
properly restrained at all times while the
vehicle is in motion.
Canada only:
Only use a BabySmart™ compatible child
restraint for the front passenger seat in this
vehicle.
All
lap/shoulder belts except the driver’s seat
belt have special seat belt retractors for
secure fastening of child restraints.
To fasten a child restraint, follow the child
restraint manufacturer’s instructions for
mounting.
To activate the special seat belt retractor:
X Pull the shoulder belt out completely and
let it retract. Occupant safety
55
Safety and security
251_AKB; 4; 52, en-US
d2ureepe, Version: 2.11.8.1 2009-03-23T09:22:52+01:00 - Seite 55 Z
Page 102 of 364
G
Warning!
In low ambient lighting or foggy conditions,
only switch from position à to L with
the vehicle at a standstill in a safe location.
Switching from à to L will briefly
switch off the headlamps. Doing so while
driving in low ambient lighting conditions may
result in an accident.
Fog lamps will operate with the parking lamps
and/or the low-beam headlamps on. Fog
lamps should only be used in conjunction with
low-beam headlamps. Consult your State or
Province Motor Vehicle Regulations
regarding permissible lamp operation.
X Switch on the ignition.
X Turn the exterior lamp switch to position
T or L (Y page 97).
X Switching on front fog lamps: Pull out the
exterior lamp switch to first stop.
The green indicator lamp N in the
exterior lamp switch comes on.
X Switching on rear fog lamp: Pull out the
exterior lamp switch to second stop.
The rear fog lamp, the front fog lamps, the
green and the yellow indicator lamp R
in the exterior lamp switch come on.
X Switching off front fog lamps/rear fog
lamp: Push in the exterior lamp switch to
its stop.
Locator lighting and night security
illumination Locator lighting and night security
illumination are described in the “Control
system” section, see “Switching locator
lighting on or off” (Y page 135) and
“Switching night security illumination
(Headlamps delayed shut-off feature) on or
off” (Y page 135). Combination switch
Turn signals
X
Press the combination switch in direction
of arrow ; or ?.
The corresponding turn signal indicator
lamp ! or # in the instrument
cluster flashes.
The combination switch resets automatically
after major steering wheel movements.
i To signal minor directional changes such
as changing lanes, press the combination
switch only to point of resistance and
release. The corresponding turn signal
lamps will flash three times.
High beam X
Turn the exterior lamp switch to position
L (Y page 97).
X Switching on: Push the combination
switch in direction of arrow :.
The high-beam headlamp indicator lamp
K in the instrument cluster comes on.
X Switching off: Pull the combination switch
in direction of arrow = to its original
position.
i Also note the information on high-beam
headlamps with activated automatic
headlamp mode (Y page 98) or the daytime
running lamp mode ( Y page 99).100
LightingControls in detail
251_AKB; 4; 52, en-US
d2ureepe,
Version: 2.11.8.1 2009-03-23T09:22:52+01:00 - Seite 100
Page 133 of 364
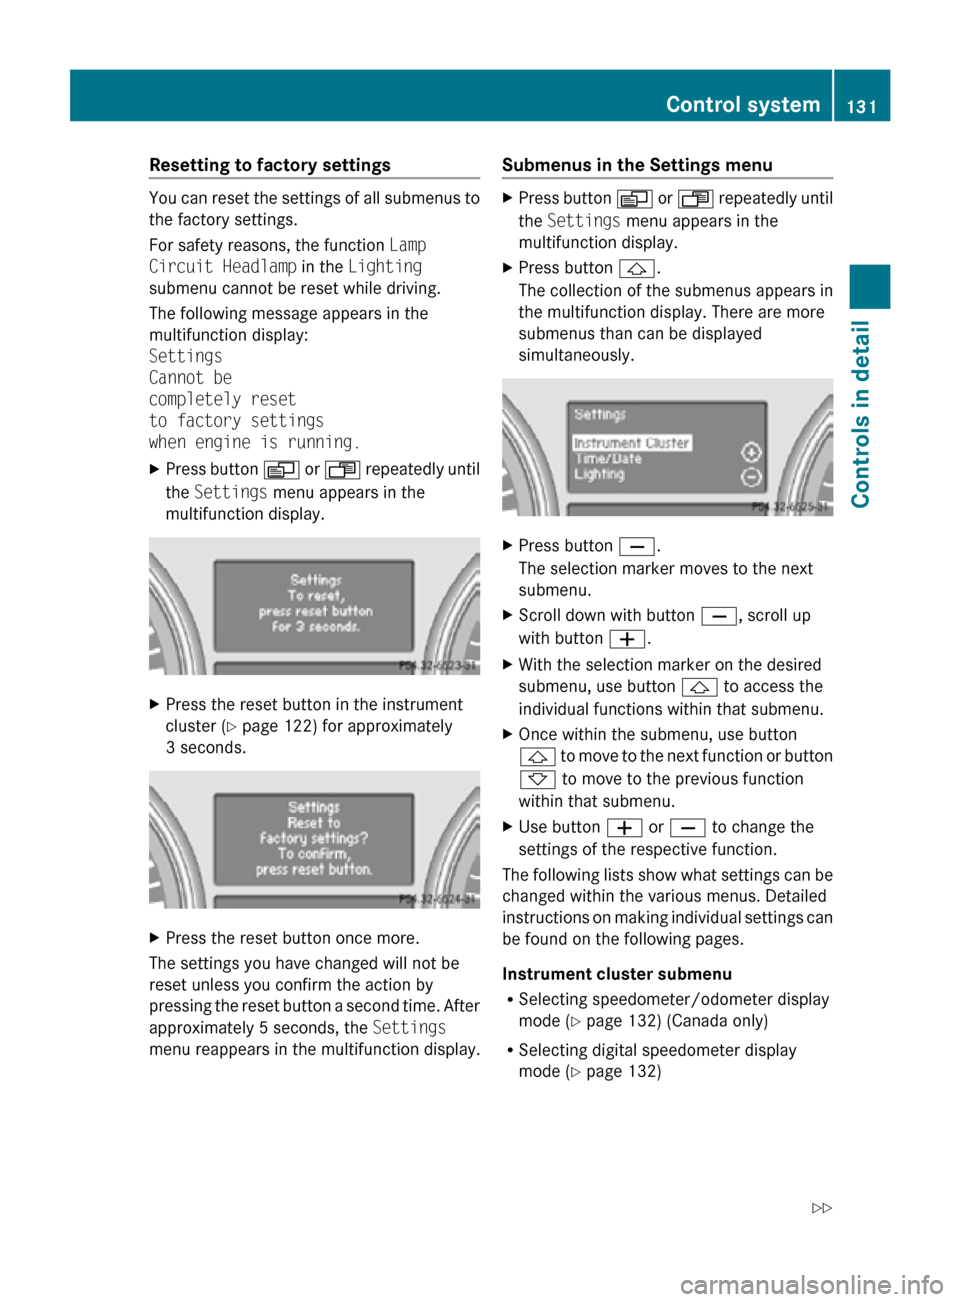
Resetting to factory settings
You can reset the settings of all submenus to
the factory settings.
For safety reasons, the function
Lamp
Circuit Headlamp in the Lighting
submenu cannot be reset while driving.
The following message appears in the
multifunction display:
Settings
Cannot be
completely reset
to factory settings
when engine is running.
X Press button V or U repeatedly until
the Settings menu appears in the
multifunction display. X
Press the reset button in the instrument
cluster (Y page 122) for approximately
3 seconds. X
Press the reset button once more.
The settings you have changed will not be
reset unless you confirm the action by
pressing the reset button a second time. After
approximately 5 seconds, the Settings
menu reappears in the multifunction display. Submenus in the Settings menu X
Press button V or U repeatedly until
the Settings menu appears in the
multifunction display.
X Press button &.
The collection of the submenus appears in
the multifunction display. There are more
submenus than can be displayed
simultaneously. X
Press button X.
The selection marker moves to the next
submenu.
X Scroll down with button X, scroll up
with button W.
X With the selection marker on the desired
submenu, use button & to access the
individual functions within that submenu.
X Once within the submenu, use button
& to move to the next function or button
* to move to the previous function
within that submenu.
X Use button W or X to change the
settings of the respective function.
The following lists show what settings can be
changed within the various menus. Detailed
instructions on making individual settings can
be found on the following pages.
Instrument cluster submenu
R Selecting speedometer/odometer display
mode ( Y page 132) (Canada only)
R Selecting digital speedometer display
mode ( Y page 132) Control system
131Controls in detail
251_AKB; 4; 52, en-US
d2ureepe, Version: 2.11.8.1 2009-03-23T09:22:52+01:00 - Seite 131 Z
Page 134 of 364
R
Selecting language ( Y page 133)
R Selecting display (digital speedometer or
outside temperature) for status indicator
(Y page 133)
Time/Date submenu
R Setting the time ( Y page 133)
R Setting the date (Y page 134)
Lighting submenu
R Switching daytime running lamp mode on
or off (USA only) (Y page 134)
R Switching locator lighting on or off
(Y page 135)
R Switching night security illumination
(Headlamps delayed shut-off feature) on or
off (Y page 135)
R Switching interior lighting delayed shut-off
on or off ( Y page 136)
Vehicle submenu
R Switching automatic central locking on or
off (Y page 137)
Comfort submenu
R Activating easy-entry/exit feature
(Y page 137)
R Activating/deactivating seat belt
adjustment feature (Y page 138)
R Switching fold-in function for exterior rear
view mirrors on or off (Y page 138)
Instrument cluster submenu Access the
Instrument Cluster submenu
via the Settings menu. Use the
Instrument Cluster submenu to change
the instrument cluster display settings.
The following functions are available:
R Selecting speedometer/odometer display
mode ( Y page 132) (Canada only)
R Selecting digital speedometer display
mode ( Y page 132) R
Selecting language ( Y page 133)
R Selecting display (digital speedometer or
outside temperature) for status indicator
(Y page 133)
Selecting speedometer/odometer
display mode (Canada only)
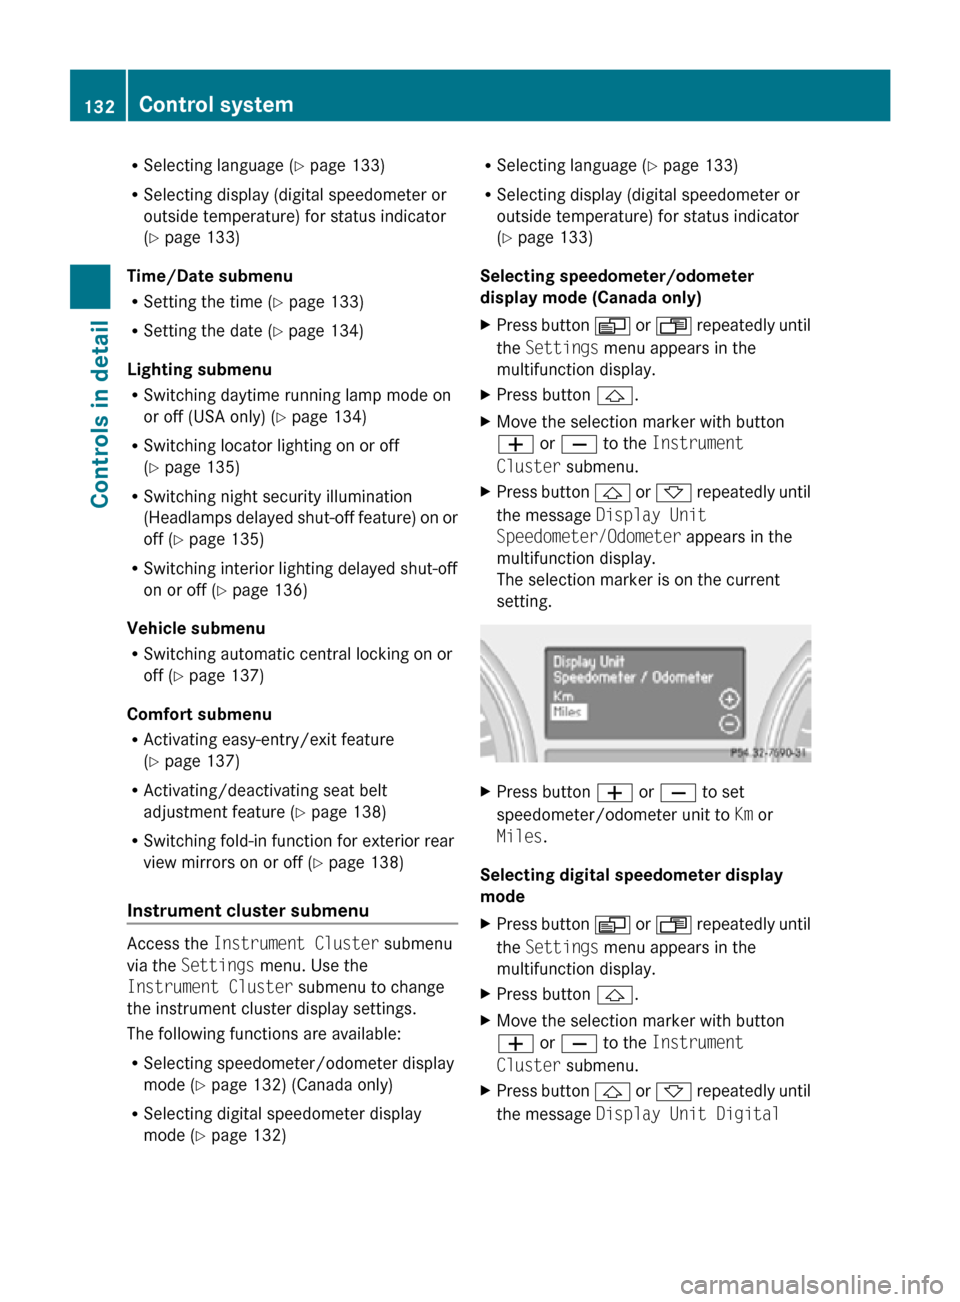
X Press button V or U repeatedly until
the Settings menu appears in the
multifunction display.
X Press button &.
X Move the selection marker with button
W or X to the Instrument
Cluster submenu.
X Press button & or * repeatedly until
the message Display Unit
Speedometer/Odometer appears in the
multifunction display.
The selection marker is on the current
setting. X
Press button W or X to set
speedometer/odometer unit to Km or
Miles.
Selecting digital speedometer display
mode
X Press button V or U repeatedly until
the Settings menu appears in the
multifunction display.
X Press button &.
X Move the selection marker with button
W or X to the Instrument
Cluster submenu.
X Press button & or * repeatedly until
the message Display Unit Digital 132
Control systemControls in detail
251_AKB; 4; 52, en-US
d2ureepe,
Version: 2.11.8.1 2009-03-23T09:22:52+01:00 - Seite 132
Page 135 of 364

Speedometer appears in the multifunction
display.
The selection marker is on the current
setting.
X
Press button W or X to set digital
speedometer unit to Km or Miles.
Selecting language
X Press button V or U repeatedly until
the Settings menu appears in the
multifunction display.
X Press button &.
X Move the selection marker with button
W or X to the Instrument
Cluster submenu.
X Press button & or * repeatedly until
the message Language appears in the
multifunction display.
The selection marker is on the current
setting. X
Press button W or X to select the
language to be used for the multifunction
display messages.
Selecting display (digital speedometer or
outside temperature) for status indicator
X Press button V or U repeatedly until
the Settings menu appears in the
multifunction display.
X Press button &. X
Move the selection marker with button
W or X to the Instrument
Cluster submenu.
X Press button & or * repeatedly until
the message Status Line Display
appears in the multifunction display.
The selection marker is on the current
setting. X
Press button W or X to select the
desired setting.
The selected display is then shown
continuously in the status indicator (lower
display).
The other display now appears in the
Standard display menu (Y page 126).
Time/Date submenu Access the
Time/Date submenu via the
Settings menu. Use the Time/Date
submenu to change the time and date display
settings.
The following functions are available:
R Setting the time ( Y page 133)
R Setting the date (Y page 134)
If your vehicle is equipped with the COMAND
system and navigation module, see separate
COMAND system operating instructions for
information on how to set the time and date.
Setting the time
This function is not available if your vehicle is
equipped with the COMAND system and
navigation module. Control system
133Controls in detail
251_AKB; 4; 52, en-US
d2ureepe, Version: 2.11.8.1 2009-03-23T09:22:52+01:00 - Seite 133 Z
Page 136 of 364

X
Press button V or U repeatedly until
the Settings menu appears in the
multifunction display.
X Press button &.
X Move the selection marker with button
W or X to the Time/Date submenu.
X Press button & or * repeatedly until
the message Clock Set Hour or Clock
Set Minute(s) appears in the
multifunction display.
The selection marker is on the current
setting. Example illustration for setting the hour
X
Press button W or X to set the hours
or minute(s).
Setting the date
This function is not available if your vehicle is
equipped with the COMAND system and
navigation module.
X Press button V or U repeatedly until
the Settings menu appears in the
multifunction display.
X Press button &.
X Move the selection marker with button
W or X to the Time/Date submenu.
X Press button & or * repeatedly until
the message Date Set Month , Date Set
Day, or Date Set Year appears in the
multifunction display.
The selection marker is on the current
setting. Example illustration for setting the month
X
Press button W or X to set the
month, day, or year.
Lighting submenu Access the
Lighting submenu via the
Settings menu. Use the Lighting submenu
to change the lamp and lighting settings on
your vehicle.
The following functions are available:
R Switching daytime running lamp mode on
or off (USA only) (Y page 134)
R Switching locator lighting on or off
(Y page 135)
R Switching night security illumination on or
off (Y page 135)
R Switching interior lighting delayed shut-off
on or off ( Y page 136)
Switching daytime running lamp mode on
or off (USA only)
X Press button V or U repeatedly until
the Settings menu appears in the
multifunction display.
X Press button &.
X Move the selection marker with button
W or X to the Lighting submenu.
X Press button & or * repeatedly until
the message Daytime Running Lamps
appears in the multifunction display.
The selection marker is on the current
setting. 134
Control systemControls in detail
251_AKB; 4; 52, en-US
d2ureepe,
Version: 2.11.8.1 2009-03-23T09:22:52+01:00 - Seite 134