2010 MERCEDES-BENZ R320 light
[x] Cancel search: lightPage 108 of 364
If the windshield wipers fail to function at
all with the combination switch in position
Ä or Å,
R
set the combination switch to the next
higher wiper speed
R have the windshield wipers checked at
the nearest authorized Mercedes-Benz
Center Power windows
Opening and closing
The door windows and the hinged quarter
windows are opened and closed electrically.
The switches for all door windows and the
hinged quarter windows are located on the
driver’s door control panel. The switches for
the respective door windows are located on
the front passenger door and the rear doors.
The
hinged quarter windows can be operated
from the driver’s seat only.
i Operating the rear door windows from
the rear is not possible when you activate
the override switch (Y page 62). G
Observe Safety notes, see page 55. G
Warning!
When opening or closing the windows, make
sure there is no danger of anyone being
harmed by the opening/closing procedure.
The door windows are equipped with the
express operation and automatic reversal
function.
If in express operation mode a door
window encounters an obstruction that
blocks its path, the automatic reversal
function will stop the door window and open
it slightly.
The door windows operate differently when
the switch is pulled and held. See the “Closing
when a door window is blocked” section in
this chapter for details.
The closing of a door window can be
immediately halted by releasing the switch or, if the switch was pulled past the resistance
point and released, by either pressing or
pulling the respective switch.
The
closing of the hinged quarter windows can
be immediately halted by pressing or pulling
the switch.
If a window encounters an obstruction that
blocks its path in a circumstance where you
are closing the windows by pressing and
holding button & on the SmartKey or by
pressing and holding the lock button (vehicles
with KEYLESS-GO) on an outside door handle,
the automatic reversal function will not
operate.
Activate the override switch when children
are riding in the back seats of the vehicle. The
children may otherwise injure themselves,
e.g. by becoming trapped in the window
opening. G
Warning!
Do not keep any part of your body up against
the
window pane when opening a window. The
downward motion of the pane may pull that
part of your body down between the window
pane and the door frame and trap it there. If
there is a risk of entrapment, release the
switch and pull it to close the window.
i You can also open or close the windows
using the SmartKey, see “Summer opening
feature” ( Y page 108) and “Convenience
closing feature” ( Y page 108).
i After switching off the ignition or
removing the SmartKey from the starter
switch, you can operate the windows until
you open the driver’s or front passenger
door. If no door was opened you can
operate the windows for up to 5 minutes. 106
Power windows
Controls in detail
251_AKB; 4; 52, en-US
d2ureepe,
Version: 2.11.8.1 2009-03-23T09:22:52+01:00 - Seite 106
Page 109 of 364
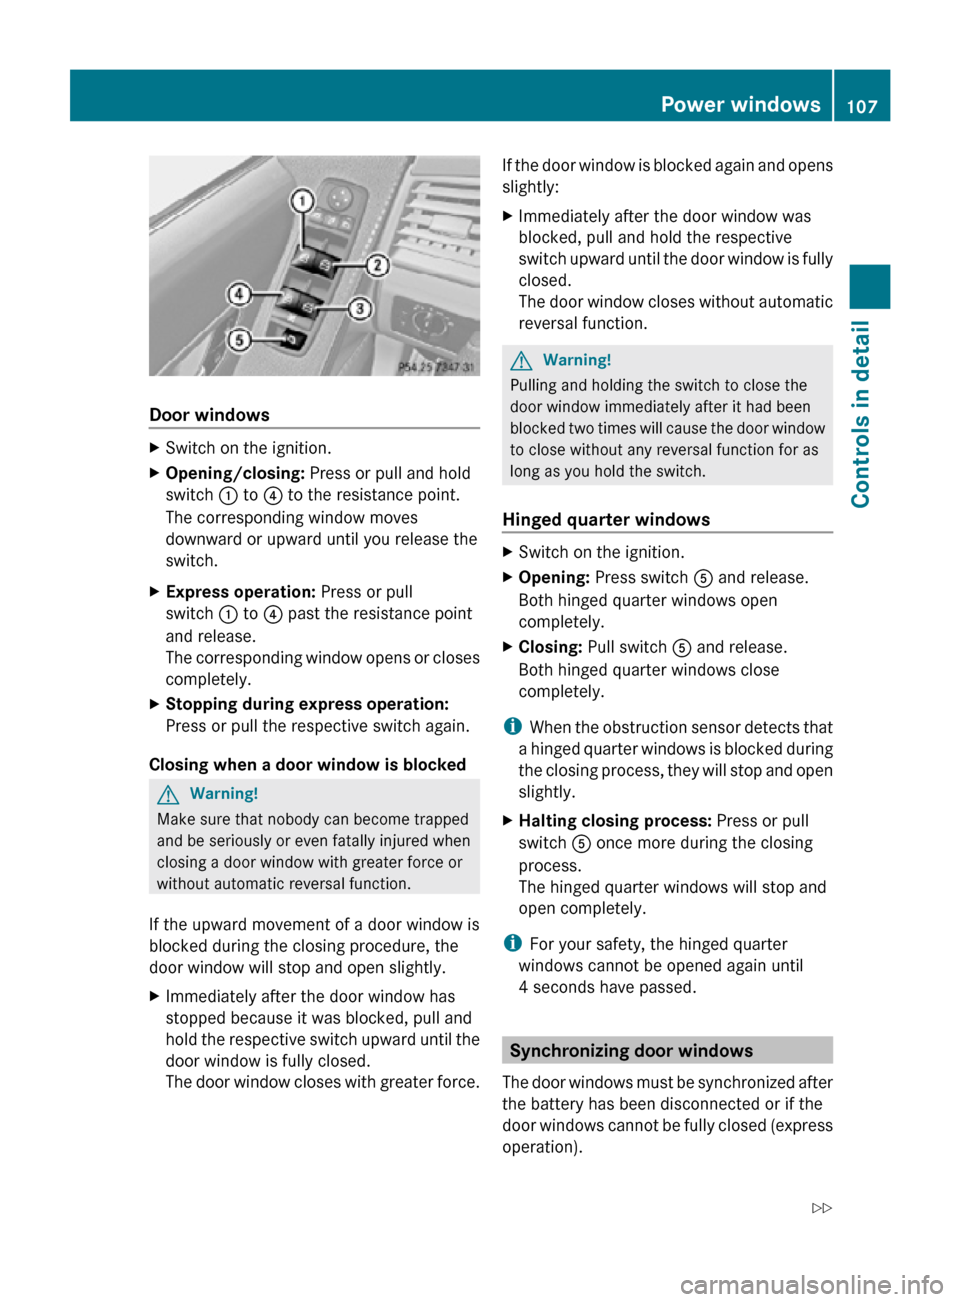
Door windows
X
Switch on the ignition.
X Opening/closing: Press or pull and hold
switch : to ? to the resistance point.
The corresponding window moves
downward or upward until you release the
switch.
X Express operation: Press or pull
switch : to ? past the resistance point
and release.
The corresponding window opens or closes
completely.
X Stopping during express operation:
Press or pull the respective switch again.
Closing when a door window is blocked G
Warning!
Make sure that nobody can become trapped
and be seriously or even fatally injured when
closing a door window with greater force or
without automatic reversal function.
If the upward movement of a door window is
blocked during the closing procedure, the
door window will stop and open slightly.
X Immediately after the door window has
stopped because it was blocked, pull and
hold the respective switch upward until the
door window is fully closed.
The door window closes with greater force. If the door window is blocked again and opens
slightly:
X
Immediately after the door window was
blocked, pull and hold the respective
switch upward until the door window is fully
closed.
The door window closes without automatic
reversal function. G
Warning!
Pulling and holding the switch to close the
door window immediately after it had been
blocked two times will cause the door window
to close without any reversal function for as
long as you hold the switch.
Hinged quarter windows X
Switch on the ignition.
X Opening: Press switch A and release.
Both hinged quarter windows open
completely.
X Closing: Pull switch A and release.
Both hinged quarter windows close
completely.
i When the obstruction sensor detects that
a hinged quarter windows is blocked during
the closing process, they will stop and open
slightly.
X Halting closing process: Press or pull
switch A once more during the closing
process.
The hinged quarter windows will stop and
open completely.
i For your safety, the hinged quarter
windows cannot be opened again until
4 seconds have passed. Synchronizing door windows
The door windows must be synchronized after
the battery has been disconnected or if the
door windows cannot be fully closed (express
operation). Power windows
107Controls in detail
251_AKB; 4; 52, en-US
d2ureepe, Version: 2.11.8.1 2009-03-23T09:22:52+01:00 - Seite 107 Z
Page 110 of 364
Each door window must be synchronized
separately.
X
Close all doors.
X Switch on the ignition.
X Pull and hold switch :, ;, = or ?
(Y page 107) until the respective door
window is closed.
The door window opens again slightly.
X Pull and hold the respective switch once
more
immediately until the door window is
closed completely.
X Hold the respective switch for
approximately 1 second.
The door window is synchronized. Summer opening feature
When
the weather is warm, you can ventilate
the vehicle before driving off by
simultaneously
R opening the door windows
R opening the hinged quarter windows
R opening the tilt/sliding sunroof
R opening the panorama roof with power tilt/
sliding panel and roller sunblinds
The summer opening feature can only be
activated via the remote control of the
SmartKey. The SmartKey must be in close
proximity to the driver’s outside door handle.
X Aim the transmitter eye of the SmartKey at
the driver’s outside door handle.
Vehicles without panorama roof with
power tilt/sliding panel X
Press and hold button % on the
SmartKey until the windows and the tilt/
sliding sunroof have reached the desired
position.
The vehicle unlocks.
X Release button % on the SmartKey to
interrupt the opening procedure. Vehicles with panorama roof with
power tilt/sliding panel When roller sunblinds are extended:
X
Press and hold button % on the
SmartKey.
The vehicle unlocks.
The
windows open and the roller sunblinds
begin to retract after approximately
1 second.
X With the windows opened and the roller
sunblinds fully retracted, press and hold
button % on the SmartKey again.
The tilt/sliding panel opens.
X Release button % on the SmartKey to
interrupt the opening procedure.
When roller sunblinds are retracted:
X Press and hold button % on the
SmartKey.
The vehicle unlocks.
The windows and the tilt/sliding panel
opens after approximately 1 second.
X Release button % on the SmartKey to
interrupt the opening procedure. Convenience closing feature
When locking the vehicle, you can
simultaneously close
R the door windows
R the hinged quarter windows
R the tilt/sliding sunroof
R the panorama roof with power tilt/sliding
panel
Afterward, you can extend the roller
sunblinds of the panorama roof with power
tilt/sliding panel. G
Warning!
When closing the windows and the tilt/sliding
sunroof or panorama roof with power tilt/
sliding
panel, make sure there is no danger of 108
Power windows
Controls in detail
251_AKB; 4; 52, en-US
d2ureepe,
Version: 2.11.8.1 2009-03-23T09:22:52+01:00 - Seite 108
Page 116 of 364
Parking
G
Warning!
Do not park this vehicle in areas where
combustible materials such as grass, hay or
leaves can come into contact with the hot
exhaust system. These materials could be
ignited and cause a vehicle fire.
Vehicle movement may result in serious
personal injury or damage to the vehicle or
vehicle drivetrain. Therefore, always do the
following before turning off the engine and
leaving the vehicle:
R Keep right foot on the brake pedal.
R Engage the parking brake.
R Shift the automatic transmission into park
position P.
R Slowly release the brake pedal.
R When parked on an incline, always turn the
front wheels towards the road curb.
R Turn the SmartKey in the starter switch to
position 0 and remove the SmartKey from
the starter switch, or press the KEYLESS-
GO start/stop button.
R Take the SmartKey with you and lock the
vehicle when leaving.
Parking brake G
Warning!
Engaging the parking brake while the vehicle
is in motion can cause the rear wheels to lock
up. You could lose control of the vehicle and
cause an accident. In addition, the vehicle’s
brake lights do not light up when the parking
brake is engaged. G
Warning!
When leaving the vehicle, always remove the
SmartKey from the starter switch, take it with
you, and lock the vehicle. Do not leave
children unattended in the vehicle, or with
access to an unlocked vehicle. Children could
release the parking brake and/or shift the automatic transmission out of park position
P, either of which could result in an accident
and/or serious personal injury.
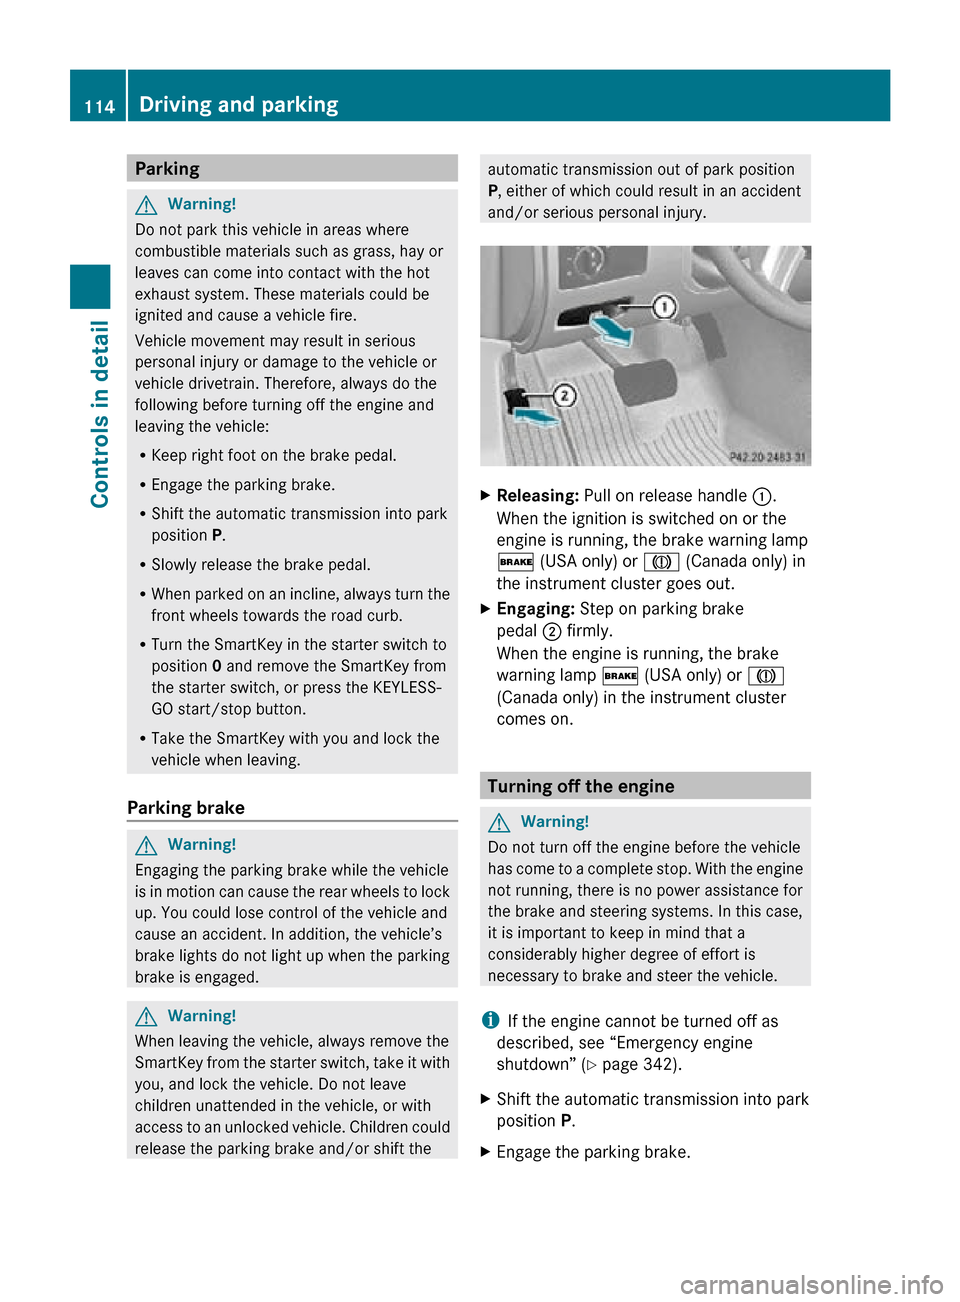
X
Releasing: Pull on release handle :.
When the ignition is switched on or the
engine is running, the brake warning lamp
$ (USA only) or J (Canada only) in
the instrument cluster goes out.
X Engaging: Step on parking brake
pedal ; firmly.
When the engine is running, the brake
warning lamp $ (USA only) or J
(Canada only) in the instrument cluster
comes on. Turning off the engine
G
Warning!
Do not turn off the engine before the vehicle
has come to a complete stop. With the engine
not running, there is no power assistance for
the brake and steering systems. In this case,
it is important to keep in mind that a
considerably higher degree of effort is
necessary to brake and steer the vehicle.
i If the engine cannot be turned off as
described, see “Emergency engine
shutdown” ( Y page 342).
X Shift the automatic transmission into park
position P.
X Engage the parking brake. 114
Driving and parkingControls in detail
251_AKB; 4; 52, en-US
d2ureepe,
Version: 2.11.8.1 2009-03-23T09:22:52+01:00 - Seite 114
Page 125 of 364
Adjusting the instrument cluster
illumination
X To brighten illumination: Press and hold
button = until the desired level of
illumination is reached.
X To dim illumination: Press and hold
button : until the desired level of
illumination is reached.
i The instrument cluster illumination is
dimmed
or brightened automatically to suit
ambient light conditions.
The instrument cluster illumination will also
be adjusted automatically when you switch
on the vehicle’s exterior lamps.
i With the exterior lighting switched on, the
brightness of the switches in the center
console will also be adjusted when using
button : or =. Resetting trip odometer
X Make sure you are viewing the standard
display
(Y page 126) in the multifunction
display.
X Press and hold the reset button in the
instrument cluster
(Y page 122) until the
trip odometer is reset. Tachometer
The red marking on the tachometer
(Y
page 29) denotes excessive engine speed.
! Avoid driving at excessive engine speeds,
as it may result in serious engine damage
that is not covered by the Mercedes-Benz
Limited Warranty.
To help protect the engine, the fuel supply is
interrupted if the engine is operated within
the red marking. Control system
Introduction
The
control system is activated as soon as the
starter switch is in position 1 (Y page 79).
The control system enables you to call up
information about your vehicle and to change
vehicle settings.
For example, you can use the control system
to find out when your vehicle is next due for
maintenance service, to set the language for
messages in the instrument cluster display,
and much more. G
Warning!
A driver’s attention to the road and traffic
conditions must always be his/her primary
focus when driving.
For your safety and the safety of others,
selecting features through the multifunction
steering wheel should only be done by the
driver
when traffic and road conditions permit
it to be done safely.
Bear in mind that at a speed of just 30 mph
(approximately 50 km/h), your vehicle is
covering a distance of 44 feet (approximately
14 m) every second.
The control system relays information to the
multifunction display. Multifunction steering wheel
The displays in the multifunction display and
the settings in the control system are
controlled by using the buttons on the
multifunction steering wheel. Control system
123Controls in detail
251_AKB; 4; 52, en-US
d2ureepe, Version: 2.11.8.1 2009-03-23T09:22:52+01:00 - Seite 123 Z
Page 132 of 364
Vehicle status message memory
menu
Use the Vehicle status message memory
menu to scan malfunction and warning
messages that may be stored in the memory.
Such messages appear in the multifunction
display and are based on conditions or
system status the vehicle’s system has
recorded.
The Vehicle status message memory menu
only appears if messages have been stored. G
Warning!
Malfunction and warning messages are only
indicated for certain systems and are
intentionally not very detailed. The
malfunction and warning messages are
simply a reminder with respect to the
operation of certain systems. They do not
replace the owner’s and/or driver’s
responsibility to maintain the vehicle’s
operating safety. Have all required
maintenance and safety checks performed on
the vehicle. Bring the vehicle to an authorized
Mercedes-Benz Center to address the
malfunction and warning messages.
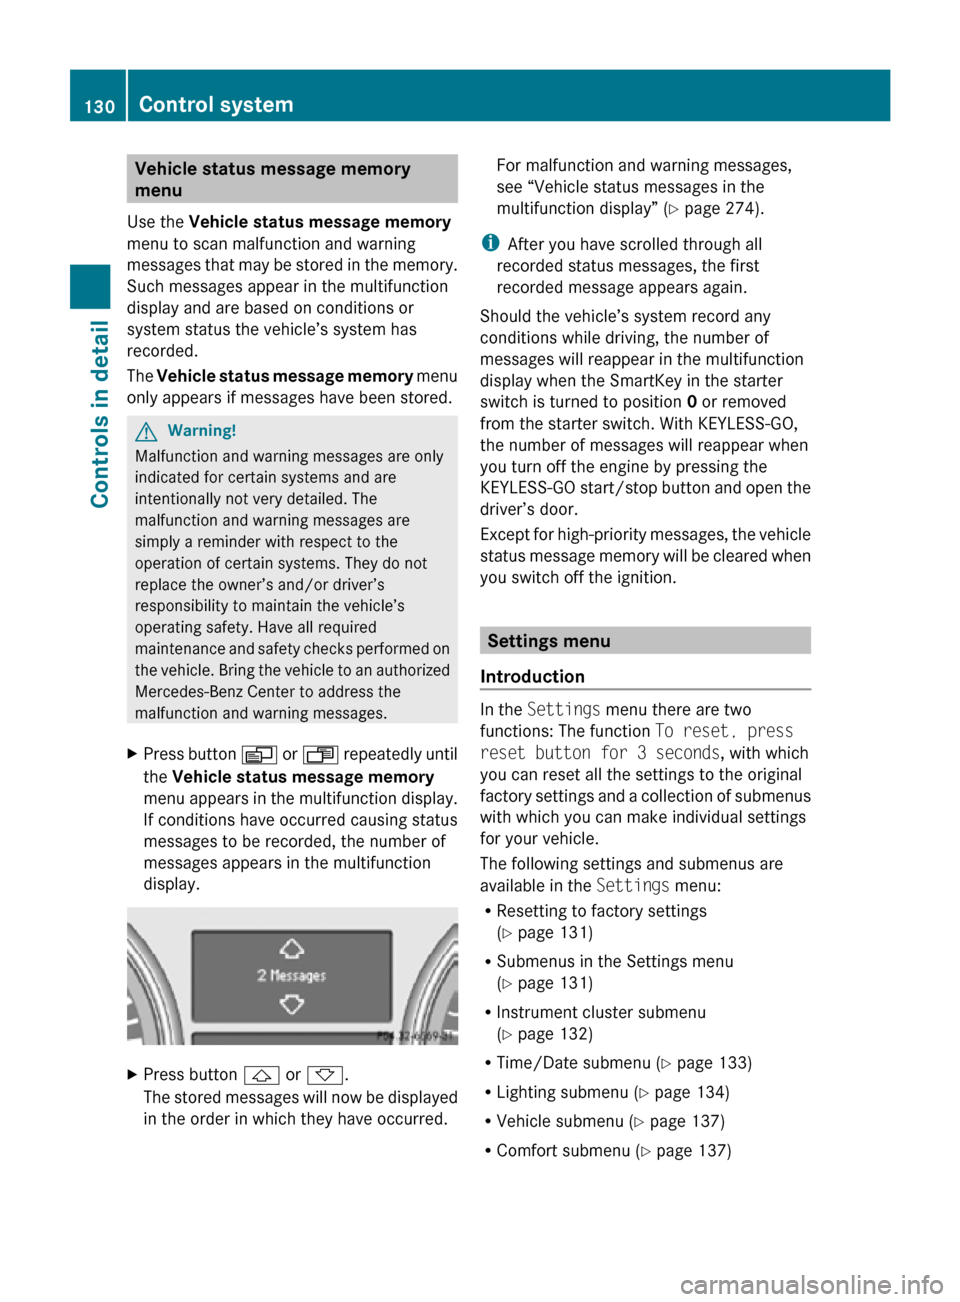
X Press button V or U repeatedly until
the Vehicle status message memory
menu appears in the multifunction display.
If conditions have occurred causing status
messages to be recorded, the number of
messages appears in the multifunction
display. X
Press button & or *.
The stored messages will now be displayed
in the order in which they have occurred. For malfunction and warning messages,
see “Vehicle status messages in the
multifunction display” (
Y page 274).
i After you have scrolled through all
recorded status messages, the first
recorded message appears again.
Should the vehicle’s system record any
conditions while driving, the number of
messages will reappear in the multifunction
display when the SmartKey in the starter
switch is turned to position 0 or removed
from the starter switch. With KEYLESS-GO,
the number of messages will reappear when
you turn off the engine by pressing the
KEYLESS-GO start/stop button and open the
driver’s door.
Except for high-priority messages, the vehicle
status message memory will be cleared when
you switch off the ignition. Settings menu
Introduction In the
Settings menu there are two
functions: The function To reset, press
reset button for 3 seconds, with which
you can reset all the settings to the original
factory settings and a collection of submenus
with which you can make individual settings
for your vehicle.
The following settings and submenus are
available in the Settings menu:
R Resetting to factory settings
(Y page 131)
R Submenus in the Settings menu
(Y page 131)
R Instrument cluster submenu
(Y page 132)
R Time/Date submenu ( Y page 133)
R Lighting submenu ( Y page 134)
R Vehicle submenu ( Y page 137)
R Comfort submenu ( Y page 137)130
Control systemControls in detail
251_AKB; 4; 52, en-US
d2ureepe,
Version: 2.11.8.1 2009-03-23T09:22:52+01:00 - Seite 130
Page 133 of 364
Resetting to factory settings
You can reset the settings of all submenus to
the factory settings.
For safety reasons, the function
Lamp
Circuit Headlamp in the Lighting
submenu cannot be reset while driving.
The following message appears in the
multifunction display:
Settings
Cannot be
completely reset
to factory settings
when engine is running.
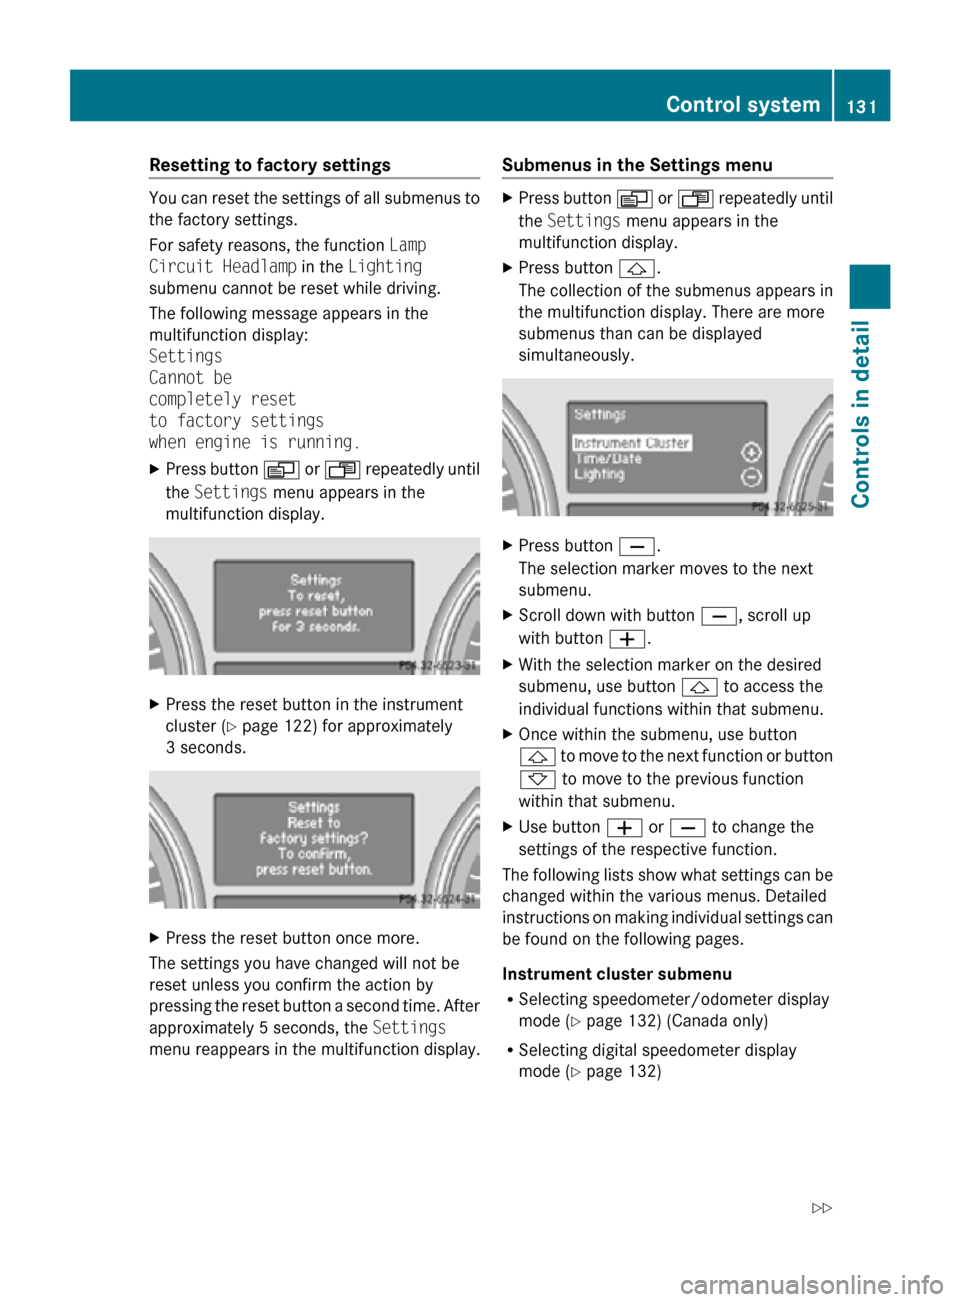
X Press button V or U repeatedly until
the Settings menu appears in the
multifunction display. X
Press the reset button in the instrument
cluster (Y page 122) for approximately
3 seconds. X
Press the reset button once more.
The settings you have changed will not be
reset unless you confirm the action by
pressing the reset button a second time. After
approximately 5 seconds, the Settings
menu reappears in the multifunction display. Submenus in the Settings menu X
Press button V or U repeatedly until
the Settings menu appears in the
multifunction display.
X Press button &.
The collection of the submenus appears in
the multifunction display. There are more
submenus than can be displayed
simultaneously. X
Press button X.
The selection marker moves to the next
submenu.
X Scroll down with button X, scroll up
with button W.
X With the selection marker on the desired
submenu, use button & to access the
individual functions within that submenu.
X Once within the submenu, use button
& to move to the next function or button
* to move to the previous function
within that submenu.
X Use button W or X to change the
settings of the respective function.
The following lists show what settings can be
changed within the various menus. Detailed
instructions on making individual settings can
be found on the following pages.
Instrument cluster submenu
R Selecting speedometer/odometer display
mode ( Y page 132) (Canada only)
R Selecting digital speedometer display
mode ( Y page 132) Control system
131Controls in detail
251_AKB; 4; 52, en-US
d2ureepe, Version: 2.11.8.1 2009-03-23T09:22:52+01:00 - Seite 131 Z
Page 134 of 364
R
Selecting language ( Y page 133)
R Selecting display (digital speedometer or
outside temperature) for status indicator
(Y page 133)
Time/Date submenu
R Setting the time ( Y page 133)
R Setting the date (Y page 134)
Lighting submenu
R Switching daytime running lamp mode on
or off (USA only) (Y page 134)
R Switching locator lighting on or off
(Y page 135)
R Switching night security illumination
(Headlamps delayed shut-off feature) on or
off (Y page 135)
R Switching interior lighting delayed shut-off
on or off ( Y page 136)
Vehicle submenu
R Switching automatic central locking on or
off (Y page 137)
Comfort submenu
R Activating easy-entry/exit feature
(Y page 137)
R Activating/deactivating seat belt
adjustment feature (Y page 138)
R Switching fold-in function for exterior rear
view mirrors on or off (Y page 138)
Instrument cluster submenu Access the
Instrument Cluster submenu
via the Settings menu. Use the
Instrument Cluster submenu to change
the instrument cluster display settings.
The following functions are available:
R Selecting speedometer/odometer display
mode ( Y page 132) (Canada only)
R Selecting digital speedometer display
mode ( Y page 132) R
Selecting language ( Y page 133)
R Selecting display (digital speedometer or
outside temperature) for status indicator
(Y page 133)
Selecting speedometer/odometer
display mode (Canada only)
X Press button V or U repeatedly until
the Settings menu appears in the
multifunction display.
X Press button &.
X Move the selection marker with button
W or X to the Instrument
Cluster submenu.
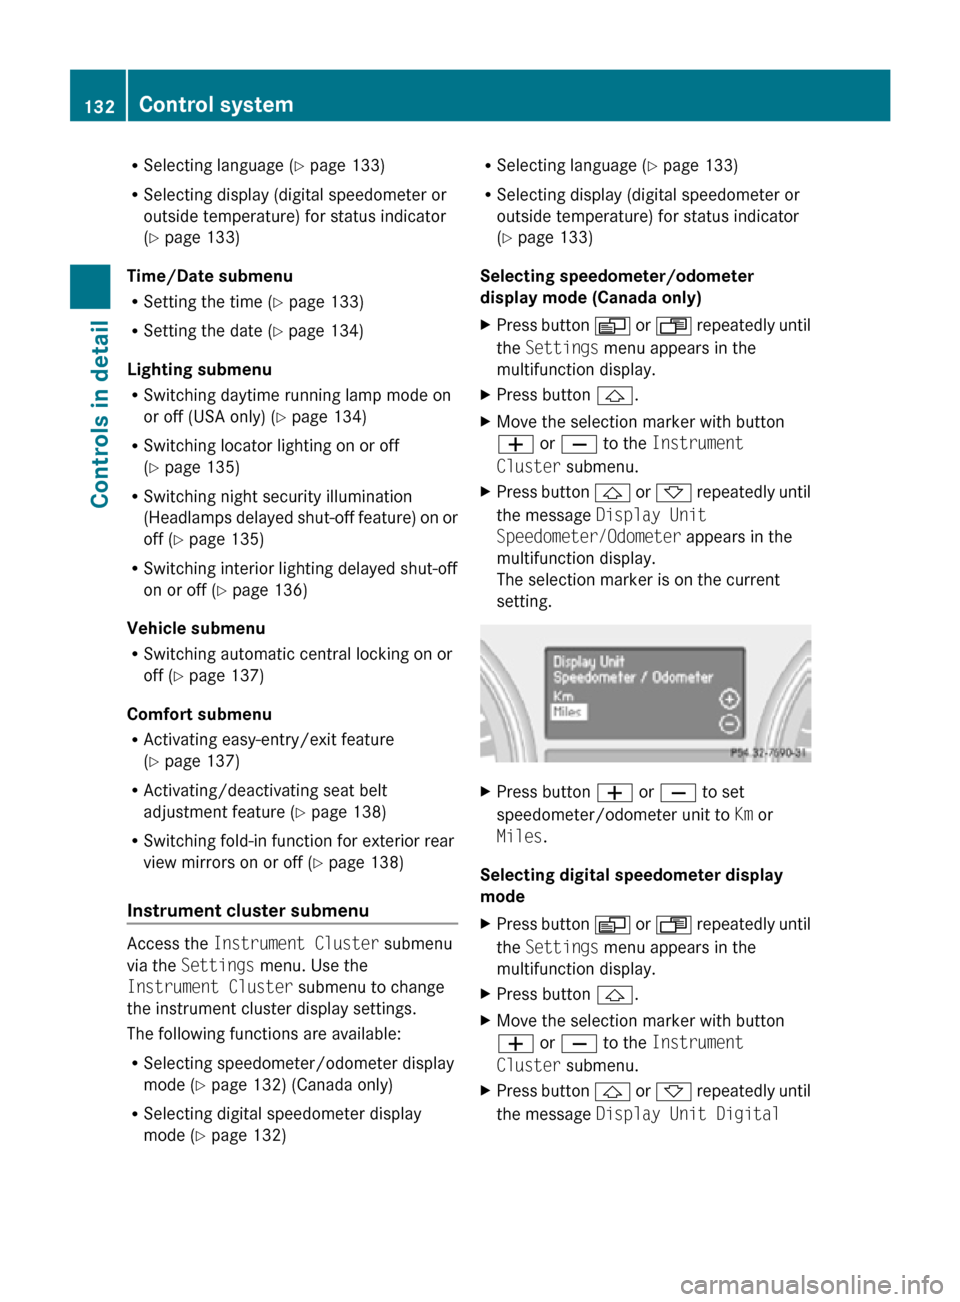
X Press button & or * repeatedly until
the message Display Unit
Speedometer/Odometer appears in the
multifunction display.
The selection marker is on the current
setting. X
Press button W or X to set
speedometer/odometer unit to Km or
Miles.
Selecting digital speedometer display
mode
X Press button V or U repeatedly until
the Settings menu appears in the
multifunction display.
X Press button &.
X Move the selection marker with button
W or X to the Instrument
Cluster submenu.
X Press button & or * repeatedly until
the message Display Unit Digital 132
Control systemControls in detail
251_AKB; 4; 52, en-US
d2ureepe,
Version: 2.11.8.1 2009-03-23T09:22:52+01:00 - Seite 132