2010 MERCEDES-BENZ R320 parking brake
[x] Cancel search: parking brakePage 159 of 364
distance between the vehicle and an obstacle
visually and audibly.
The Parktronic system is activated
automatically when
R
you switch on the ignition
and
R you release the parking brake
and
R the automatic transmission is in drive
position D, reverse gear R, or neutral
position N
The Parktronic system deactivates at speeds
above approximately 11 mph (18 km/h). At
lower speeds, the Parktronic system
activates again.
The Parktronic system also deactivates when
you shift the automatic transmission into
park position P or engage the parking brake.
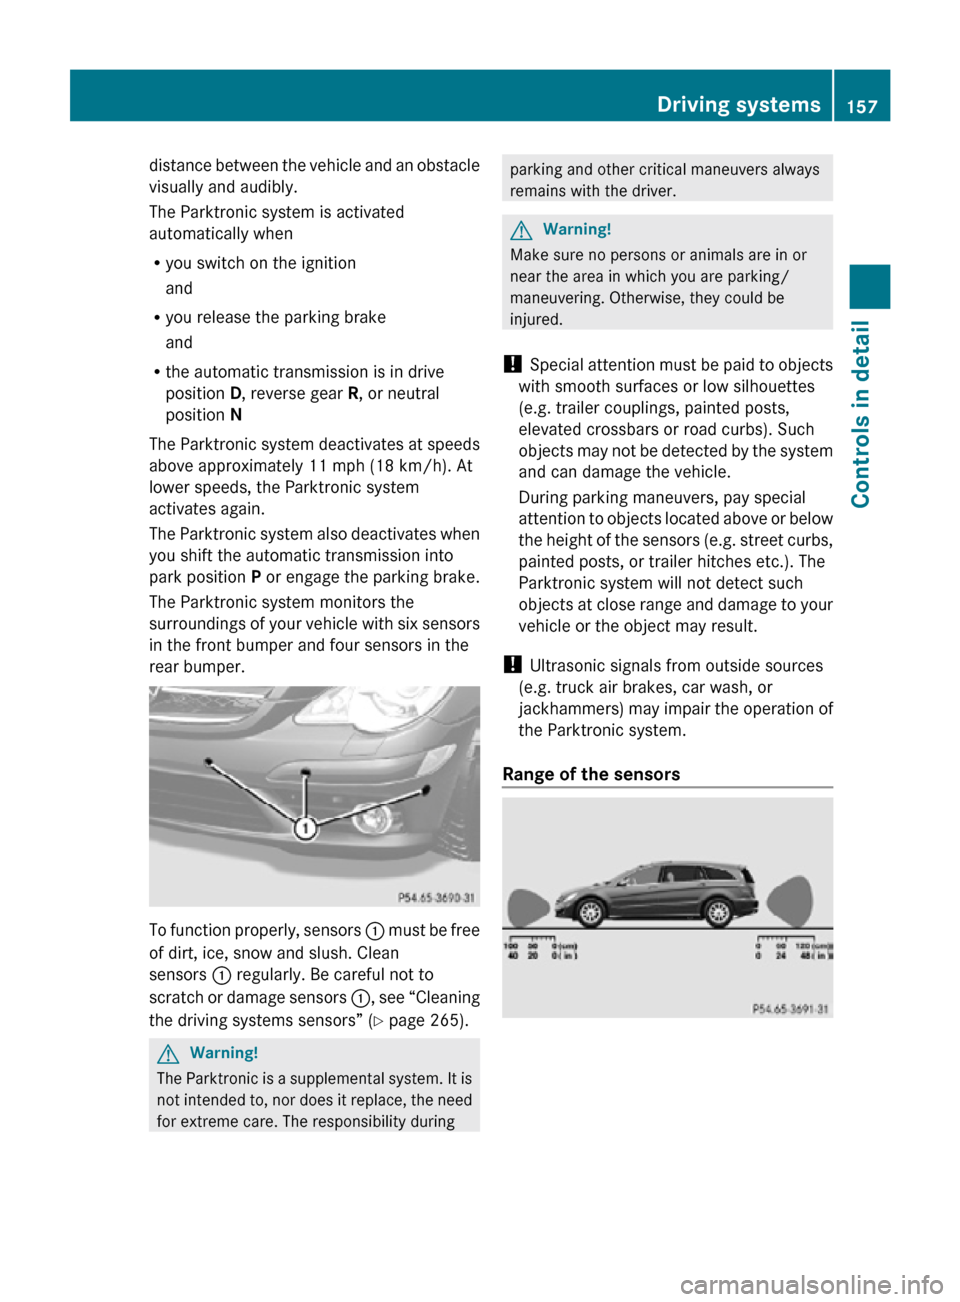
The Parktronic system monitors the
surroundings of your vehicle with six sensors
in the front bumper and four sensors in the
rear bumper. To function properly, sensors
: must be free
of dirt, ice, snow and slush. Clean
sensors : regularly. Be careful not to
scratch or damage sensors :, see “Cleaning
the driving systems sensors” (Y page 265). G
Warning!
The Parktronic is a supplemental system. It is
not intended to, nor does it replace, the need
for extreme care. The responsibility during parking and other critical maneuvers always
remains with the driver.
G
Warning!
Make sure no persons or animals are in or
near the area in which you are parking/
maneuvering. Otherwise, they could be
injured.
! Special attention must be paid to objects
with smooth surfaces or low silhouettes
(e.g. trailer couplings, painted posts,
elevated crossbars or road curbs). Such
objects may not be detected by the system
and can damage the vehicle.
During parking maneuvers, pay special
attention to objects located above or below
the height of the sensors (e.g. street curbs,
painted posts, or trailer hitches etc.). The
Parktronic system will not detect such
objects at close range and damage to your
vehicle or the object may result.
! Ultrasonic signals from outside sources
(e.g. truck air brakes, car wash, or
jackhammers) may impair the operation of
the Parktronic system.
Range of the sensors Driving systems
157Controls in detail
251_AKB; 4; 52, en-US
d2ureepe, Version: 2.11.8.1 2009-03-23T09:22:52+01:00 - Seite 157 Z
Page 161 of 364
R
Front area: An intermittent acoustic
warning lasting a maximum of 2 seconds
will sound as the first red distance segment
illuminates. A constant acoustic warning
lasting a maximum of 2 seconds will sound
for the second red distance segment. The
signal is canceled when the automatic
transmission is shifted into park
position P or the parking brake is engaged.
R Rear area: An intermittent acoustic
warning lasting a maximum of 2 seconds
will sound as the first red distance segment
illuminates. A constant acoustic warning
lasting a maximum of 2 seconds will sound
for the second red distance segment. The
signal is canceled when the automatic
transmission is shifted into drive
position D, or park position P, or the
parking brake is engaged.
Switching the Parktronic system on/
off The Parktronic system switches on
automatically when the ignition is switched
on.
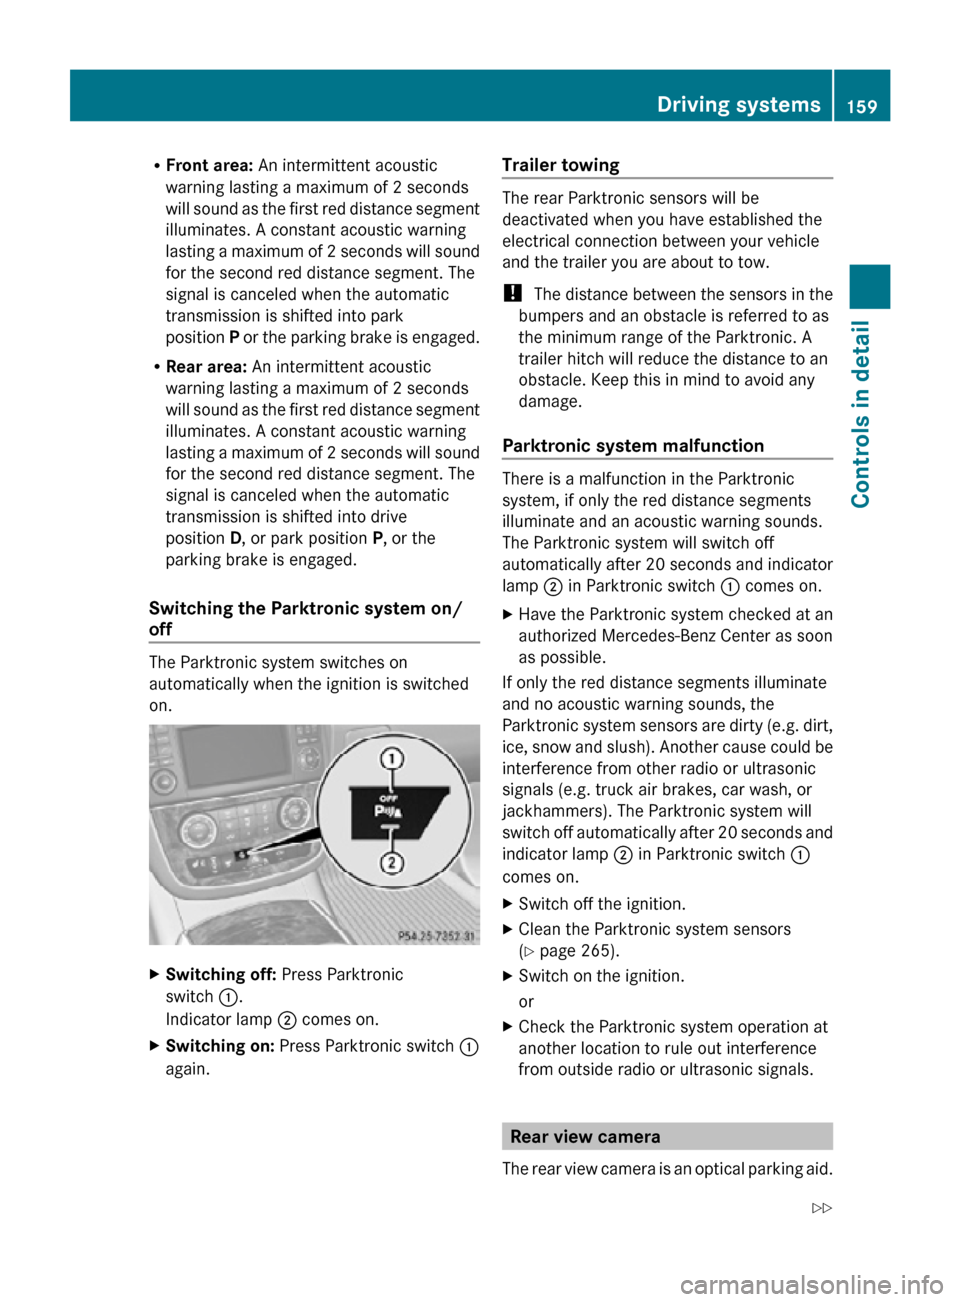
X
Switching off: Press Parktronic
switch :.
Indicator lamp ; comes on.
X Switching on: Press Parktronic switch :
again. Trailer towing The rear Parktronic sensors will be
deactivated when you have established the
electrical connection between your vehicle
and the trailer you are about to tow.
!
The distance between the sensors in the
bumpers and an obstacle is referred to as
the minimum range of the Parktronic. A
trailer hitch will reduce the distance to an
obstacle. Keep this in mind to avoid any
damage.
Parktronic system malfunction There is a malfunction in the Parktronic
system, if only the red distance segments
illuminate and an acoustic warning sounds.
The Parktronic system will switch off
automatically after 20 seconds and indicator
lamp
; in Parktronic switch : comes on.
X Have the Parktronic system checked at an
authorized Mercedes-Benz Center as soon
as possible.
If only the red distance segments illuminate
and no acoustic warning sounds, the
Parktronic system sensors are dirty (e.g. dirt,
ice, snow and slush). Another cause could be
interference from other radio or ultrasonic
signals (e.g. truck air brakes, car wash, or
jackhammers). The Parktronic system will
switch off automatically after 20 seconds and
indicator lamp ; in Parktronic switch :
comes on.
X Switch off the ignition.
X Clean the Parktronic system sensors
(Y page 265).
X Switch on the ignition.
or
X Check the Parktronic system operation at
another location to rule out interference
from outside radio or ultrasonic signals. Rear view camera
The rear view camera is an optical parking aid. Driving systems
159Controls in detail
251_AKB; 4; 52, en-US
d2ureepe, Version: 2.11.8.1 2009-03-23T09:22:52+01:00 - Seite 159 Z
Page 256 of 364
When using the engine’s braking power, a
drive wheel may not spin for an extended
period of time, e.g. on slippery road
surfaces. This may cause serious damage
to
the drivetrain which is not covered by the
Mercedes-Benz Limited Warranty.
Continuous or hard braking G
Warning!
Resting your foot on the brake pedal will
cause excessive and premature wear of the
brake pads.
It can also result in the brakes overheating,
thereby significantly reducing their
effectiveness. It may not be possible to stop
the vehicle in sufficient time to avoid an
accident.
After hard braking, it is advisable to drive on
for
some time, rather than immediately park,
so that the air stream will cool down the
brakes faster.
Wet roads G
Warning!
After driving in heavy rain for some time
without
applying the brakes or through water
deep enough to wet brake components, the
first braking action may be somewhat
reduced and increased pedal pressure may be
necessary to obtain expected brake effect.
Maintain a safe distance from vehicles in
front.
To help prevent brake disk corrosion after
driving on wet or salt-covered roads, it is
advisable to brake the vehicle with
considerable force prior to parking. The heat
generated serves to dry the brakes.
Salt-covered roads G
Warning!
A layer of salt on the brake discs and the brake
linings may cause a delay in the braking
effect, resulting in a significantly increased braking distance, which could lead to an
accident.
To avoid this danger, you should:
R
occasionally brake carefully when you are
driving on salt-covered roads, so that any
layer of salt that may have built up on the
brake discs and the brake linings is
removed without putting other road users
at risk
R maintain a greater distance to the vehicle
ahead and drive with particular care
R carefully apply the brakes at the end of a
trip and immediately after commencing a
new
trip, so that salt residues are removed
from the brake disc
Brake service !
The brake fluid level in the reservoir may
be
too low if the brake warning lamp in the
instrument cluster comes on and an
acoustic warning sounds although the
parking brake is released. Observe
additional messages in the multifunction
display that may appear.
Brake pad wear or a leak in the system may
be the reason for low brake fluid in the
reservoir.
Have the brake system inspected
immediately. Contact an authorized
Mercedes-Benz Center.
All checks and service work on the brake
system should be carried out by qualified
technicians only. Contact an authorized
Mercedes-Benz Center.
Only install brake pads and use brake fluid
recommended by Mercedes-Benz. G
Warning!
If other than recommended brake pads are
installed, or other than recommended brake
fluid is used, the braking properties of the
vehicle
can be degraded to an extent that safe
braking is substantially impaired. This could
result in an accident. 254
Driving instructions
Operation
251_AKB; 4; 52, en-US
d2ureepe,
Version: 2.11.8.1 2009-03-23T09:22:52+01:00 - Seite 254
Page 257 of 364
!
Only conduct operational or performance
tests on a two-axle dynamometer. If such
tests are necessary, contact an authorized
Mercedes-Benz Center. You could
otherwise seriously damage the brake
system or the transfer case which is not
covered by the Mercedes-Benz Limited
Warranty.
! Because the ESP ®
operates
automatically, the engine and ignition must
be shut off (SmartKey in starter switch
position 0 or 1 or KEYLESS-GO start/stop
button in position 0 or 1) when the parking
brake is being tested on a brake test
dynamometer. Such testing should be no
longer than 10 seconds.
Active braking action through the ESP ®
may otherwise seriously damage the brake
system which is not covered by the
Mercedes-Benz Limited Warranty.
If your brake system is only subjected to
moderate loads, you should occasionally test
the effectiveness of the brakes by applying
above-normal braking pressure at higher
speeds. This will also enhance the grip of the
brake pads. G
Warning!
Make sure not to endanger any other road
users when carrying out these braking
maneuvers.
Refer to the description of the Brake Assist
System (BAS) ( Y page 64).
Parking brake When driving on wet roads or dirt covered
surfaces, road salt and/or dirt can get into
the parking brake. To prevent corrosion and a reduction in the
braking power of the parking brake, observe
the following:
X
From time to time, lightly engage the
parking brake before driving off.
X Drive a distance of approximately 110 yds
(100 m) at a maximum speed of 12 mph
(20 km/h). G
Warning!
While performing this procedure please
assure that the vehicle is stopped before
applying the parking brake. Otherwise the
rear wheels could lock up. You could lose
control of the vehicle and cause an accident.
In addition, the vehicle’s brake lights do not
light up when the parking brake is engaged.
Make sure not to endanger any other road
users when you engage the parking brake. Driving off
Warm up the engine smoothly. Do not place
full load on the engine until the operating
temperature has been reached.
! When
driving off on a slippery surface, do
not allow a drive wheel to spin for an
extended period with the ESP ®
switched
off. Doing so may cause serious damage to
the drivetrain which is not covered by the
Mercedes-Benz Limited Warranty.
! Simultaneously depressing the
accelerator pedal and applying the brakes
reduces engine performance and causes
premature brake and drivetrain wear which
is not covered by the Mercedes-Benz
Limited Warranty. Hydroplaning
Depending
on the depth of the water layer on
the road, hydroplaning may occur, even at low
speeds and with new tires. In heavy rain or
when conditions indicate possible
hydroplaning: Driving instructions
255
Operation
251_AKB; 4; 52, en-US
d2ureepe, Version: 2.11.8.1 2009-03-23T09:22:52+01:00 - Seite 255 Z
Page 260 of 364
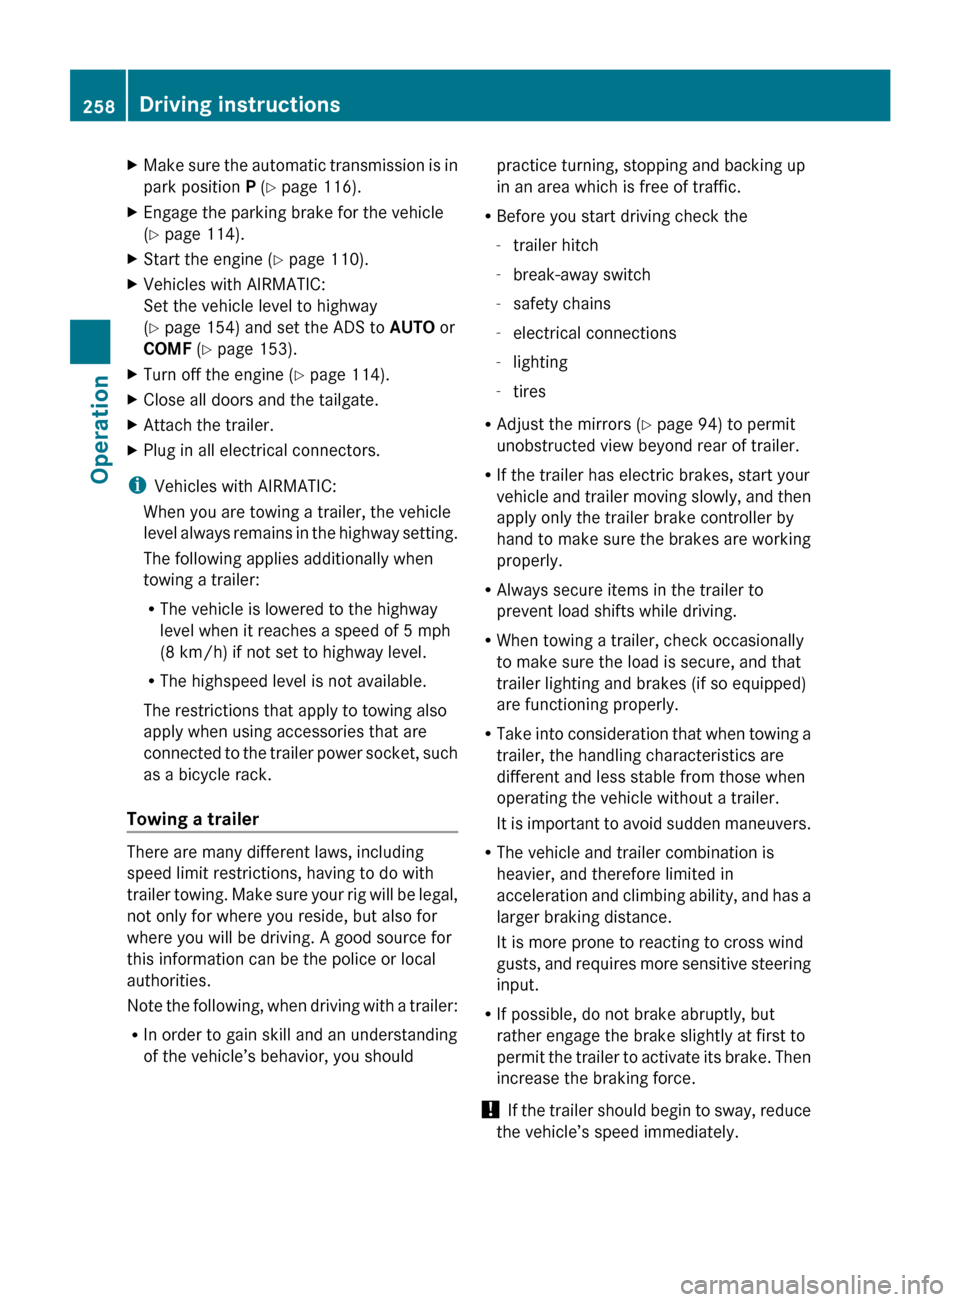
X
Make sure the automatic transmission is in
park position P (Y page 116).
X Engage the parking brake for the vehicle
(Y page 114).
X Start the engine (Y page 110).
X Vehicles with AIRMATIC:
Set the vehicle level to highway
(Y page 154) and set the ADS to AUTO or
COMF (Y page 153).
X Turn off the engine ( Y page 114).
X Close all doors and the tailgate.
X Attach the trailer.
X Plug in all electrical connectors.
i Vehicles with AIRMATIC:
When you are towing a trailer, the vehicle
level
always remains in the highway setting.
The following applies additionally when
towing a trailer:
R The vehicle is lowered to the highway
level when it reaches a speed of 5 mph
(8 km/h) if not set to highway level.
R The highspeed level is not available.
The restrictions that apply to towing also
apply when using accessories that are
connected to the trailer power socket, such
as a bicycle rack.
Towing a trailer There are many different laws, including
speed limit restrictions, having to do with
trailer
towing. Make sure your rig will be legal,
not only for where you reside, but also for
where you will be driving. A good source for
this information can be the police or local
authorities.
Note the following, when driving with a trailer:
R In order to gain skill and an understanding
of the vehicle’s behavior, you should practice turning, stopping and backing up
in an area which is free of traffic.
R Before you start driving check the
-trailer hitch
- break-away switch
- safety chains
- electrical connections
- lighting
- tires
R Adjust the mirrors
(Y page 94) to permit
unobstructed view beyond rear of trailer.
R If the trailer has electric brakes, start your
vehicle and trailer moving slowly, and then
apply only the trailer brake controller by
hand to make sure the brakes are working
properly.
R Always secure items in the trailer to
prevent load shifts while driving.
R When towing a trailer, check occasionally
to make sure the load is secure, and that
trailer lighting and brakes (if so equipped)
are functioning properly.
R Take into consideration that when towing a
trailer, the handling characteristics are
different and less stable from those when
operating the vehicle without a trailer.
It is important to avoid sudden maneuvers.
R The vehicle and trailer combination is
heavier, and therefore limited in
acceleration and climbing ability, and has a
larger braking distance.
It is more prone to reacting to cross wind
gusts, and requires more sensitive steering
input.
R If possible, do not brake abruptly, but
rather engage the brake slightly at first to
permit the trailer to activate its brake. Then
increase the braking force.
! If the trailer should begin to sway, reduce
the vehicle’s speed immediately. 258
Driving instructions
Operation
251_AKB; 4; 52, en-US
d2ureepe,
Version: 2.11.8.1 2009-03-23T09:22:52+01:00 - Seite 258
Page 261 of 364
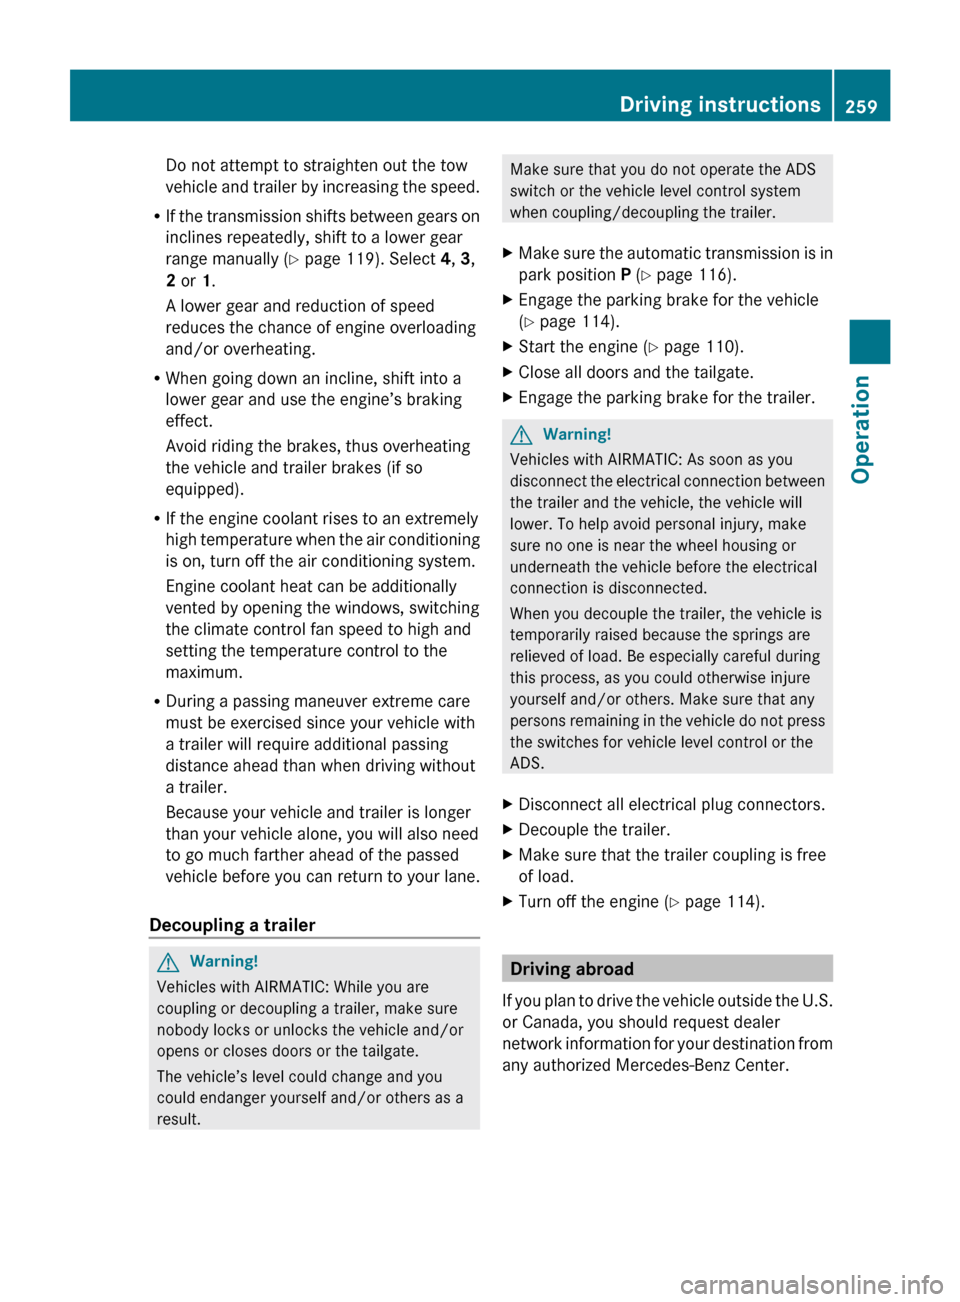
Do not attempt to straighten out the tow
vehicle
and trailer by increasing the speed.
R If the transmission shifts between gears on
inclines repeatedly, shift to a lower gear
range manually ( Y page 119). Select 4, 3,
2 or 1.
A lower gear and reduction of speed
reduces the chance of engine overloading
and/or overheating.
R When going down an incline, shift into a
lower gear and use the engine’s braking
effect.
Avoid riding the brakes, thus overheating
the vehicle and trailer brakes (if so
equipped).
R If the engine coolant rises to an extremely
high temperature when the air conditioning
is on, turn off the air conditioning system.
Engine coolant heat can be additionally
vented by opening the windows, switching
the climate control fan speed to high and
setting the temperature control to the
maximum.
R During a passing maneuver extreme care
must be exercised since your vehicle with
a trailer will require additional passing
distance ahead than when driving without
a trailer.
Because your vehicle and trailer is longer
than your vehicle alone, you will also need
to go much farther ahead of the passed
vehicle before you can return to your lane.
Decoupling a trailer G
Warning!
Vehicles with AIRMATIC: While you are
coupling or decoupling a trailer, make sure
nobody locks or unlocks the vehicle and/or
opens or closes doors or the tailgate.
The vehicle’s level could change and you
could endanger yourself and/or others as a
result. Make sure that you do not operate the ADS
switch or the vehicle level control system
when coupling/decoupling the trailer.
X Make sure the automatic transmission is in
park position P (Y page 116).
X Engage the parking brake for the vehicle
(Y page 114).
X Start the engine (Y page 110).
X Close all doors and the tailgate.
X Engage the parking brake for the trailer. G
Warning!
Vehicles with AIRMATIC: As soon as you
disconnect
the electrical connection between
the trailer and the vehicle, the vehicle will
lower. To help avoid personal injury, make
sure no one is near the wheel housing or
underneath the vehicle before the electrical
connection is disconnected.
When you decouple the trailer, the vehicle is
temporarily raised because the springs are
relieved of load. Be especially careful during
this process, as you could otherwise injure
yourself and/or others. Make sure that any
persons remaining in the vehicle do not press
the switches for vehicle level control or the
ADS.
X Disconnect all electrical plug connectors.
X Decouple the trailer.
X Make sure that the trailer coupling is free
of load.
X Turn off the engine ( Y page 114). Driving abroad
If
you plan to drive the vehicle outside the U.S.
or Canada, you should request dealer
network information for your destination from
any authorized Mercedes-Benz Center. Driving instructions
259
Operation
251_AKB; 4; 52, en-US
d2ureepe, Version: 2.11.8.1 2009-03-23T09:22:52+01:00 - Seite 259 Z
Page 279 of 364
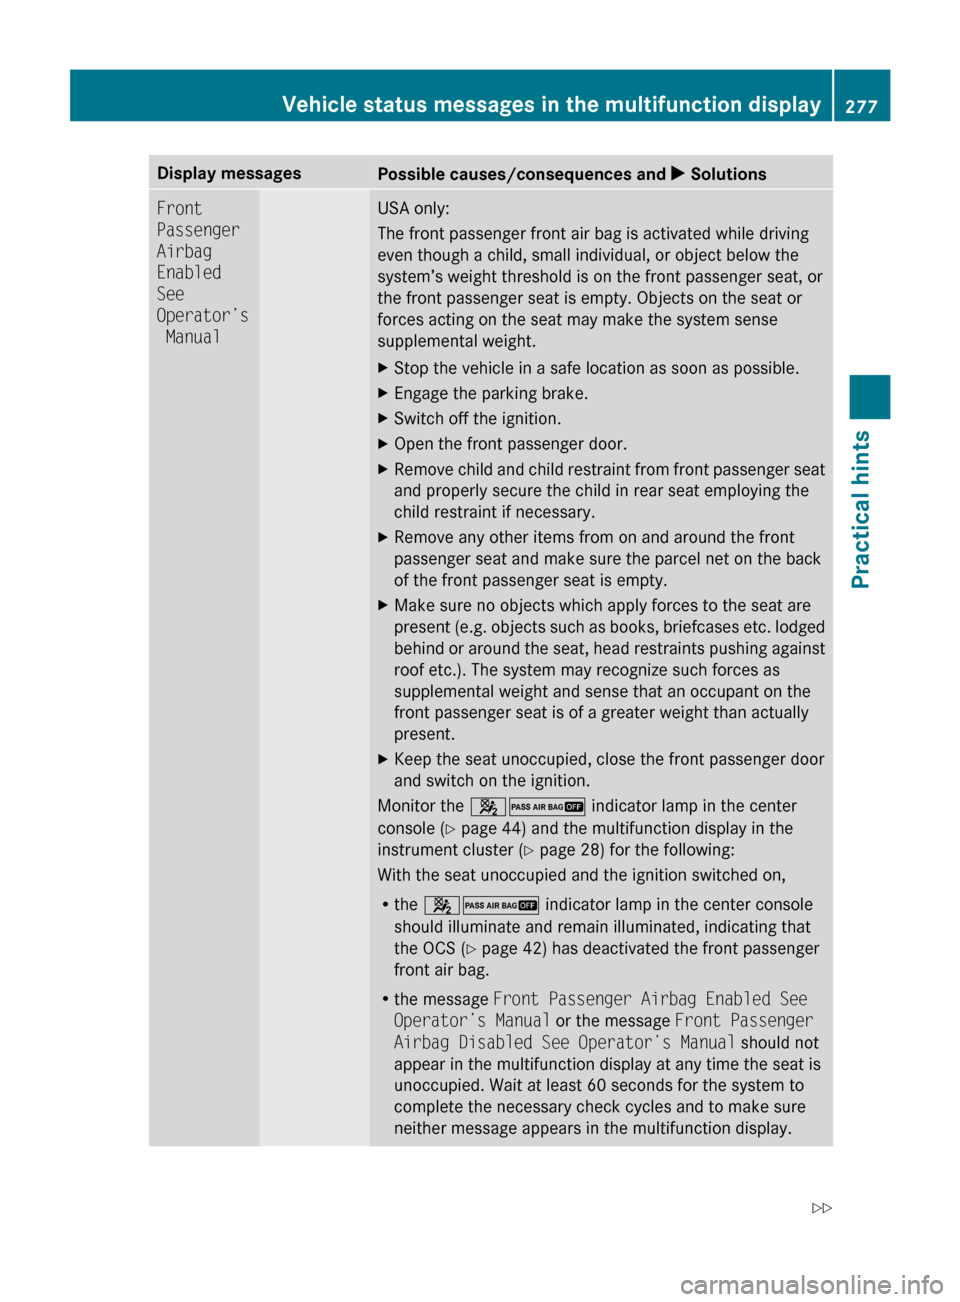
Display messages
Possible causes/consequences and
X SolutionsFront
Passenger
Airbag
Enabled
See
Operator’s
Manual USA only:
The front passenger front air bag is activated while driving
even though a child, small individual, or object below the
system’s weight threshold is on the front passenger seat, or
the front passenger seat is empty. Objects on the seat or
forces acting on the seat may make the system sense
supplemental weight.
X
Stop the vehicle in a safe location as soon as possible.
X Engage the parking brake.
X Switch off the ignition.
X Open the front passenger door.
X Remove child and child restraint from front passenger seat
and properly secure the child in rear seat employing the
child restraint if necessary.
X Remove any other items from on and around the front
passenger seat and make sure the parcel net on the back
of the front passenger seat is empty.
X Make sure no objects which apply forces to the seat are
present
(e.g. objects such as books, briefcases etc. lodged
behind or around the seat, head restraints pushing against
roof etc.). The system may recognize such forces as
supplemental weight and sense that an occupant on the
front passenger seat is of a greater weight than actually
present.
X Keep the seat unoccupied, close the front passenger door
and switch on the ignition.
Monitor the 42 indicator lamp in the center
console (Y page 44) and the multifunction display in the
instrument cluster
(Y page 28) for the following:
With the seat unoccupied and the ignition switched on,
R the 42 indicator lamp in the center console
should illuminate and remain illuminated, indicating that
the OCS (Y page 42) has deactivated the front passenger
front air bag.
R the message Front Passenger Airbag Enabled See
Operator’s Manual or the message Front Passenger
Airbag Disabled See Operator’s Manual should not
appear in the multifunction display at any time the seat is
unoccupied. Wait at least 60 seconds for the system to
complete the necessary check cycles and to make sure
neither message appears in the multifunction display. Vehicle status messages in the multifunction display
277
Practical hints
251_AKB; 4; 52, en-US
d2ureepe,Version: 2.11.8.1 2009-03-23T09:22:52+01:00 - Seite 277 Z
Page 281 of 364
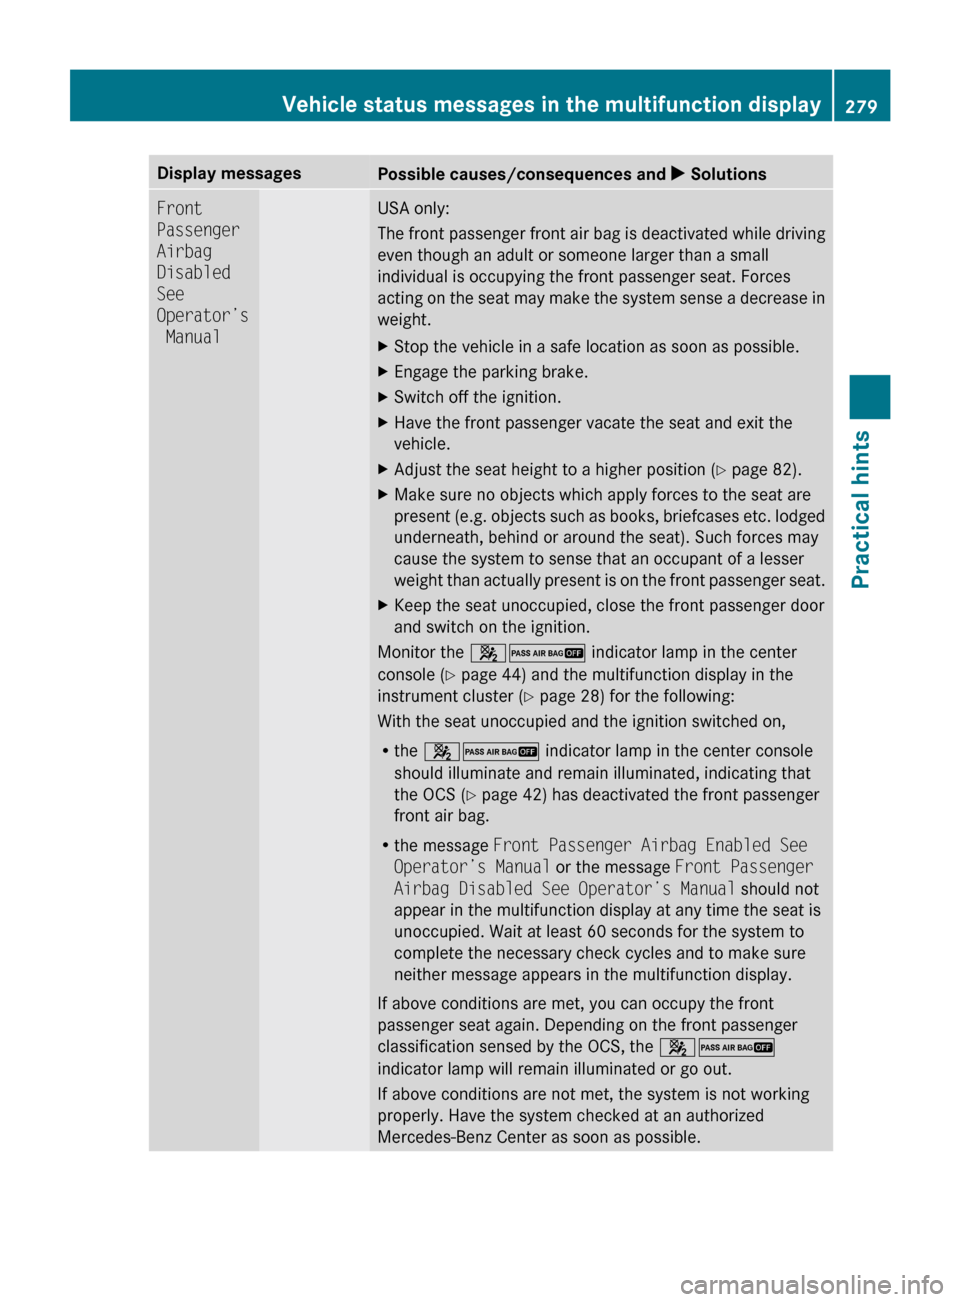
Display messages
Possible causes/consequences and
X SolutionsFront
Passenger
Airbag
Disabled
See
Operator’s
Manual USA only:
The
front passenger front air bag is deactivated while driving
even though an adult or someone larger than a small
individual is occupying the front passenger seat. Forces
acting on the seat may make the system sense a decrease in
weight.
X Stop the vehicle in a safe location as soon as possible.
X Engage the parking brake.
X Switch off the ignition.
X Have the front passenger vacate the seat and exit the
vehicle.
X Adjust the seat height to a higher position (Y page 82).
X Make sure no objects which apply forces to the seat are
present
(e.g. objects such as books, briefcases etc. lodged
underneath, behind or around the seat). Such forces may
cause the system to sense that an occupant of a lesser
weight than actually present is on the front passenger seat.
X Keep the seat unoccupied, close the front passenger door
and switch on the ignition.
Monitor the 42 indicator lamp in the center
console (Y page 44) and the multifunction display in the
instrument cluster
(Y page 28) for the following:
With the seat unoccupied and the ignition switched on,
R the 42 indicator lamp in the center console
should illuminate and remain illuminated, indicating that
the OCS (Y page 42) has deactivated the front passenger
front air bag.
R the message Front Passenger Airbag Enabled See
Operator’s Manual or the message Front Passenger
Airbag Disabled See Operator’s Manual should not
appear in the multifunction display at any time the seat is
unoccupied. Wait at least 60 seconds for the system to
complete the necessary check cycles and to make sure
neither message appears in the multifunction display.
If above conditions are met, you can occupy the front
passenger seat again. Depending on the front passenger
classification sensed by the OCS, the 42
indicator lamp will remain illuminated or go out.
If above conditions are not met, the system is not working
properly. Have the system checked at an authorized
Mercedes-Benz Center as soon as possible. Vehicle status messages in the multifunction display
279
Practical hints
251_AKB; 4; 52, en-US
d2ureepe,Version: 2.11.8.1 2009-03-23T09:22:52+01:00 - Seite 279 Z