2010 MERCEDES-BENZ GLK350 4MATIC hood release
[x] Cancel search: hood releasePage 29 of 344
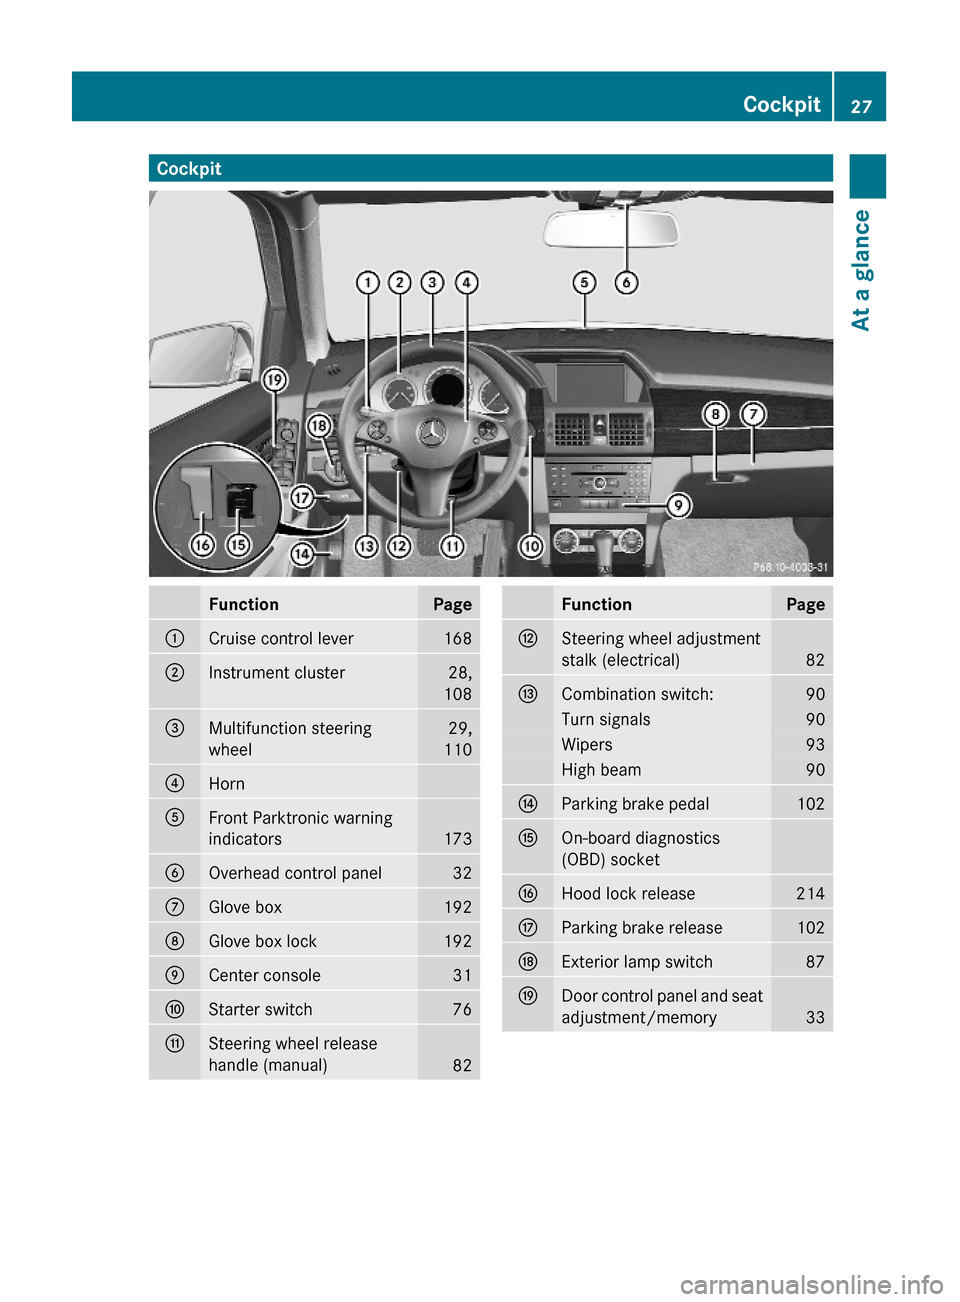
CockpitFunctionPage:Cruise control lever168;Instrument cluster28,
108
=Multifunction steering
wheel
29,
110
?Horn AFront Parktronic warning
indicators173
BOverhead control panel32CGlove box192DGlove box lock192ECenter console31FStarter switch76GSteering wheel release
handle (manual)82
FunctionPageHSteering wheel adjustment
stalk (electrical)82
ICombination switch:90Turn signals90Wipers93High beam90JParking brake pedal102KOn-board diagnostics
(OBD) socket
LHood lock release214MParking brake release102NExterior lamp switch87ODoor control panel and seat
adjustment/memory33
Cockpit27At a glanceX204_AKB; 3; 23, en-USd2ureepe,Version: 2.11.8.12009-07-16T19:16:58+02:00 - Seite 27Z
Page 210 of 344
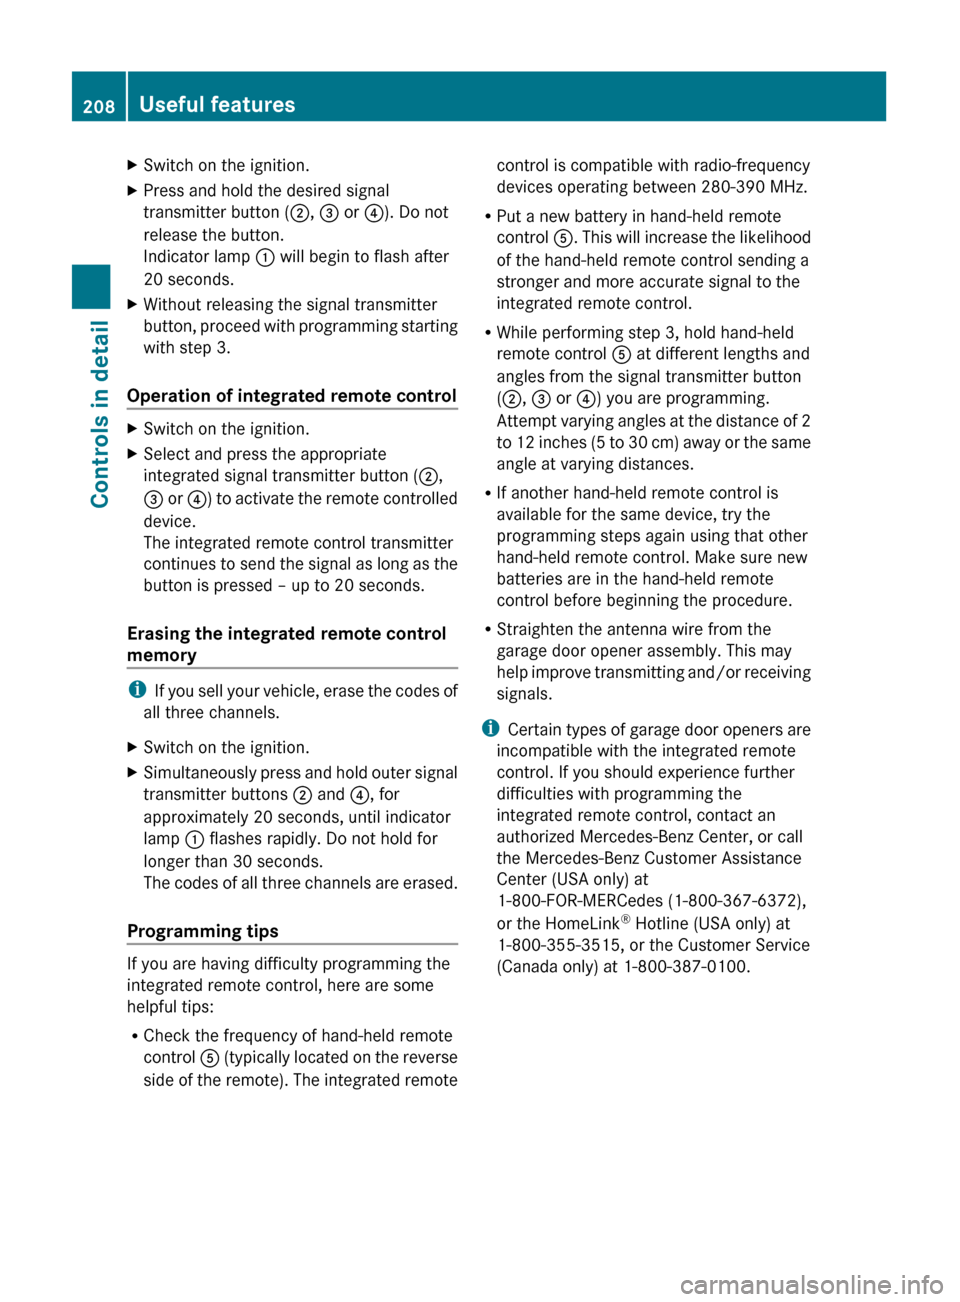
XSwitch on the ignition.XPress and hold the desired signal
transmitter button ( ;, = or ?). Do not
release the button.
Indicator lamp : will begin to flash after
20 seconds.XWithout releasing the signal transmitter
button, proceed with programming starting
with step 3.
Operation of integrated remote control
XSwitch on the ignition.XSelect and press the appropriate
integrated signal transmitter button ( ;,
= or ?) to activate the remote controlled
device.
The integrated remote control transmitter
continues to send the signal as long as the
button is pressed – up to 20 seconds.
Erasing the integrated remote control
memory
i If you sell your vehicle, erase the codes of
all three channels.
XSwitch on the ignition.XSimultaneously press and hold outer signal
transmitter buttons ; and ?, for
approximately 20 seconds, until indicator
lamp : flashes rapidly. Do not hold for
longer than 30 seconds.
The codes of all three channels are erased.
Programming tips
If you are having difficulty programming the
integrated remote control, here are some
helpful tips:
R Check the frequency of hand-held remote
control A (typically located on the reverse
side of the remote). The integrated remote
control is compatible with radio-frequency
devices operating between 280-390 MHz.
R Put a new battery in hand-held remote
control A. This will increase the likelihood
of the hand-held remote control sending a
stronger and more accurate signal to the
integrated remote control.
R While performing step 3, hold hand-held
remote control A at different lengths and
angles from the signal transmitter button
( ; , = or ?) you are programming.
Attempt varying angles at the distance of 2
to 12 inches (5 to 30 cm) away or the same
angle at varying distances.
R If another hand-held remote control is
available for the same device, try the
programming steps again using that other
hand-held remote control. Make sure new
batteries are in the hand-held remote
control before beginning the procedure.
R Straighten the antenna wire from the
garage door opener assembly. This may
help improve transmitting and/or receiving
signals.
i Certain types of garage door openers are
incompatible with the integrated remote
control. If you should experience further
difficulties with programming the
integrated remote control, contact an
authorized Mercedes-Benz Center, or call
the Mercedes-Benz Customer Assistance
Center (USA only) at
1-800-FOR-MERCedes (1-800-367-6372),
or the HomeLink ®
Hotline (USA only) at
1-800-355-3515, or the Customer Service
(Canada only) at 1-800-387-0100.208Useful featuresControls in detail
X204_AKB; 3; 23, en-USd2ureepe,Version: 2.11.8.12009-07-16T19:16:58+02:00 - Seite 208
Page 216 of 344
Engine compartment
Hood
GWarning!
Do not pull the release lever while the vehicle
is in motion. Otherwise the hood could be
forced open by passing air flow.
This could cause the hood to come loose and
injure you and/or others.
Opening
GWarning!
Do not open the hood when the engine is
overheated. You could be seriously injured.
Observe the coolant temperature gauge to
determine whether the engine may be
overheated. If you see flames or smoke
coming from the engine compartment, move
away from the vehicle. Wait until the engine
has cooled. If necessary, call the fire
department.
GWarning!
You could be injured when the hood is open –
even when the engine is turned off.
Parts of the engine can become very hot. To
prevent burns, let the engine cool completely
before touching any components on the
vehicle. Comply with all relevant safety
precautions.
GWarning!
To help prevent personal injury, stay clear of
moving parts when the hood is open and the
engine is running.
The radiator fan may continue to run for
approximately 30 seconds or may even
restart after the engine has been turned off.
Stay clear of fan blades.
GWarning!
The engine is equipped with a transistorized
ignition system. Because of the high voltage
it is dangerous to touch any components
(ignition coils, spark plug sockets, diagnostic
socket) of the ignition system
Rwith the engine running
Rwhile starting the engine
Rwhen the ignition is switched on and the
engine is turned manually
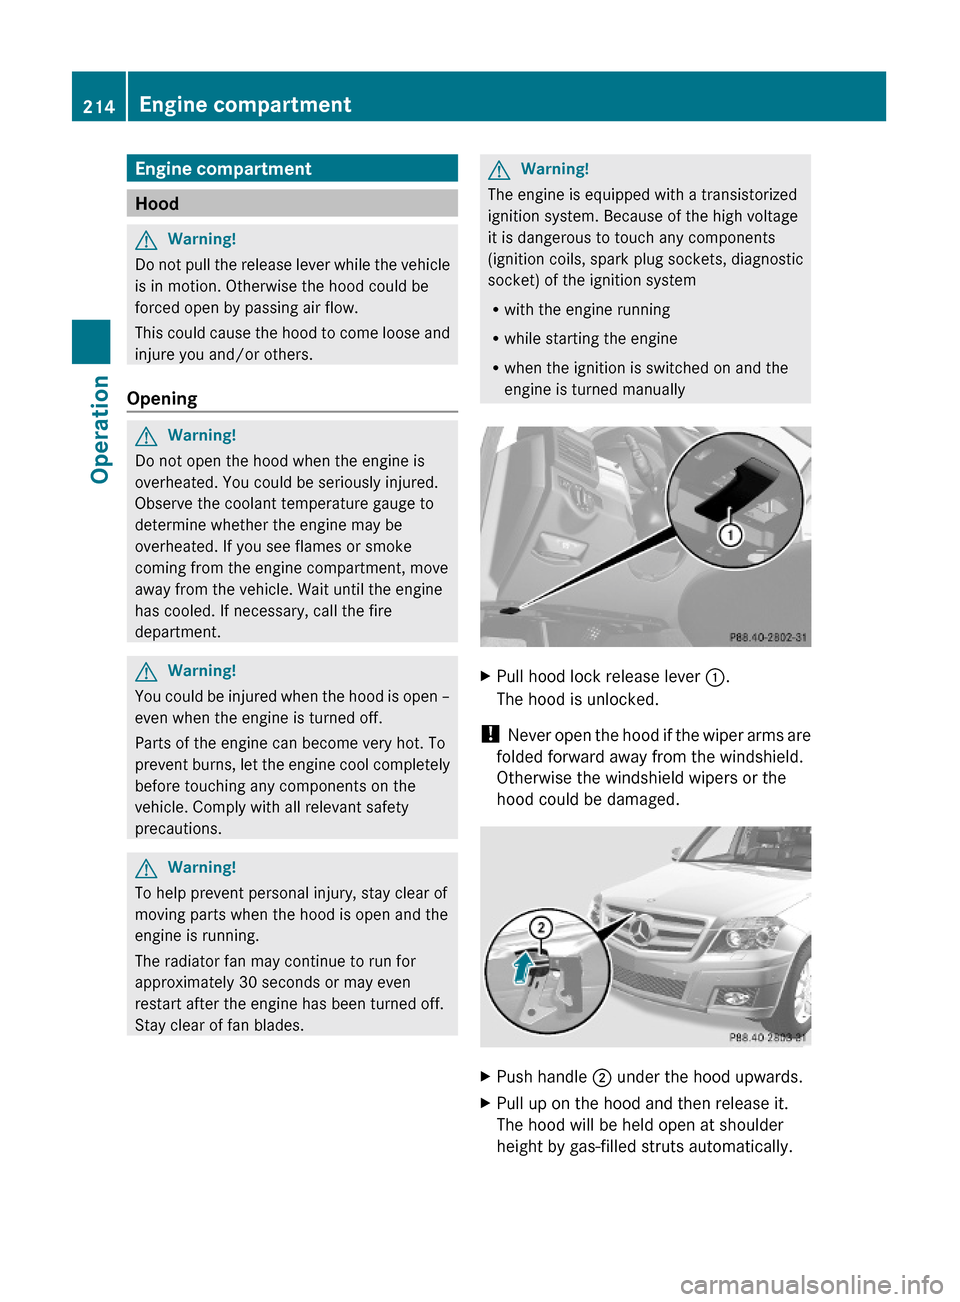
XPull hood lock release lever :.
The hood is unlocked.
! Never open the hood if the wiper arms are
folded forward away from the windshield.
Otherwise the windshield wipers or the
hood could be damaged.
XPush handle ; under the hood upwards.XPull up on the hood and then release it.
The hood will be held open at shoulder
height by gas-filled struts automatically.
214Engine compartmentOperation
X204_AKB; 3; 23, en-USd2ureepe,Version: 2.11.8.12009-07-16T19:16:58+02:00 - Seite 214
Page 257 of 344
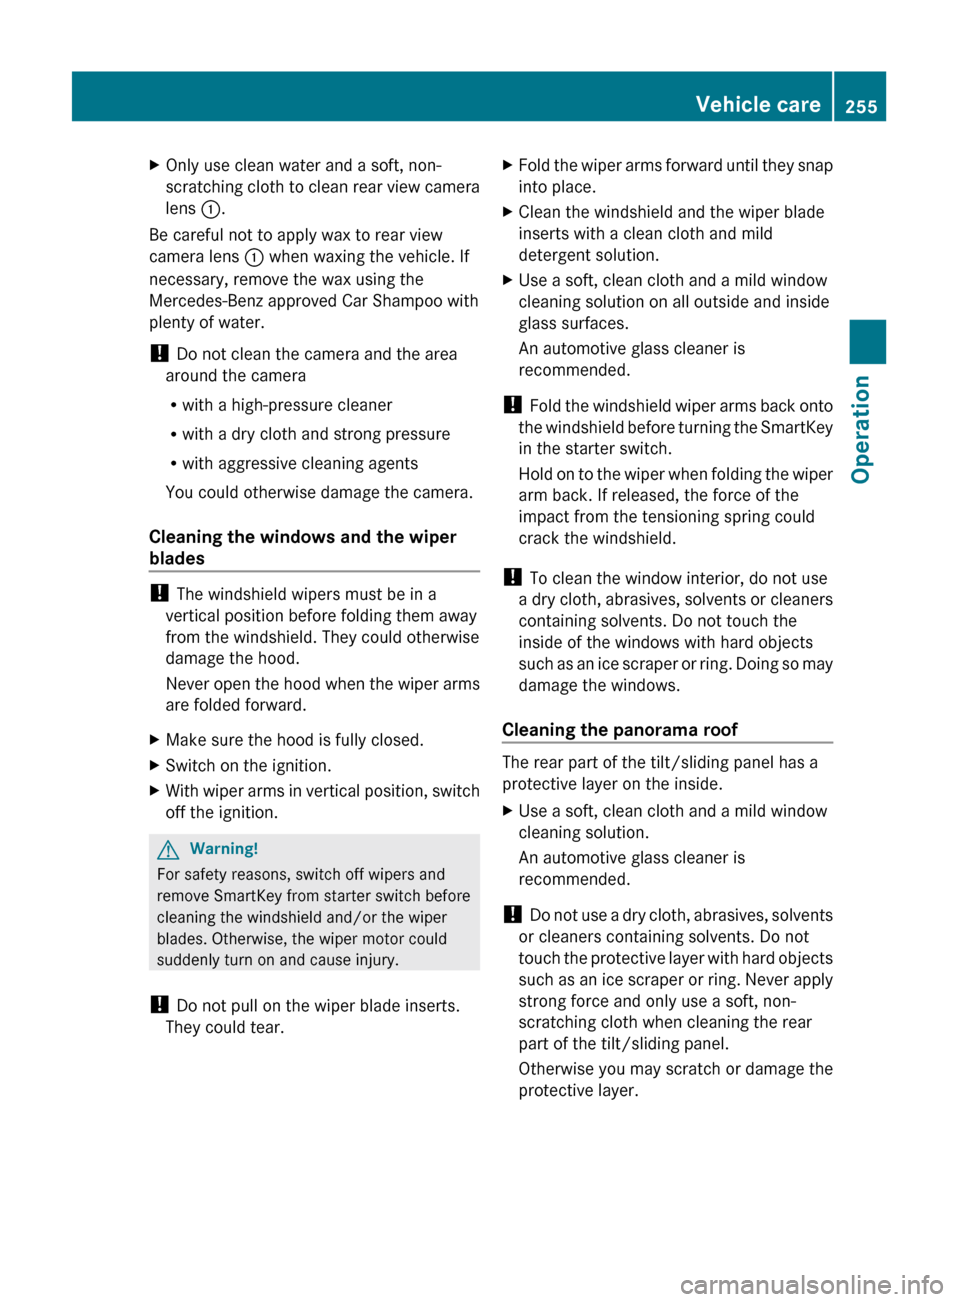
XOnly use clean water and a soft, non-
scratching cloth to clean rear view camera
lens :.
Be careful not to apply wax to rear view
camera lens : when waxing the vehicle. If
necessary, remove the wax using the
Mercedes-Benz approved Car Shampoo with
plenty of water.
! Do not clean the camera and the area
around the camera
R with a high-pressure cleaner
R with a dry cloth and strong pressure
R with aggressive cleaning agents
You could otherwise damage the camera.
Cleaning the windows and the wiper
blades
! The windshield wipers must be in a
vertical position before folding them away
from the windshield. They could otherwise
damage the hood.
Never open the hood when the wiper arms
are folded forward.
XMake sure the hood is fully closed.XSwitch on the ignition.XWith wiper arms in vertical position, switch
off the ignition.GWarning!
For safety reasons, switch off wipers and
remove SmartKey from starter switch before
cleaning the windshield and/or the wiper
blades. Otherwise, the wiper motor could
suddenly turn on and cause injury.
! Do not pull on the wiper blade inserts.
They could tear.
XFold the wiper arms forward until they snap
into place.XClean the windshield and the wiper blade
inserts with a clean cloth and mild
detergent solution.XUse a soft, clean cloth and a mild window
cleaning solution on all outside and inside
glass surfaces.
An automotive glass cleaner is
recommended.
! Fold the windshield wiper arms back onto
the windshield before turning the SmartKey
in the starter switch.
Hold on to the wiper when folding the wiper
arm back. If released, the force of the
impact from the tensioning spring could
crack the windshield.
! To clean the window interior, do not use
a dry cloth, abrasives, solvents or cleaners
containing solvents. Do not touch the
inside of the windows with hard objects
such as an ice scraper or ring. Doing so may
damage the windows.
Cleaning the panorama roof
The rear part of the tilt/sliding panel has a
protective layer on the inside.
XUse a soft, clean cloth and a mild window
cleaning solution.
An automotive glass cleaner is
recommended.
! Do not use a dry cloth, abrasives, solvents
or cleaners containing solvents. Do not
touch the protective layer with hard objects
such as an ice scraper or ring. Never apply
strong force and only use a soft, non-
scratching cloth when cleaning the rear
part of the tilt/sliding panel.
Otherwise you may scratch or damage the
protective layer.
Vehicle care255OperationX204_AKB; 3; 23, en-USd2ureepe,Version: 2.11.8.12009-07-16T19:16:58+02:00 - Seite 255Z
Page 308 of 344
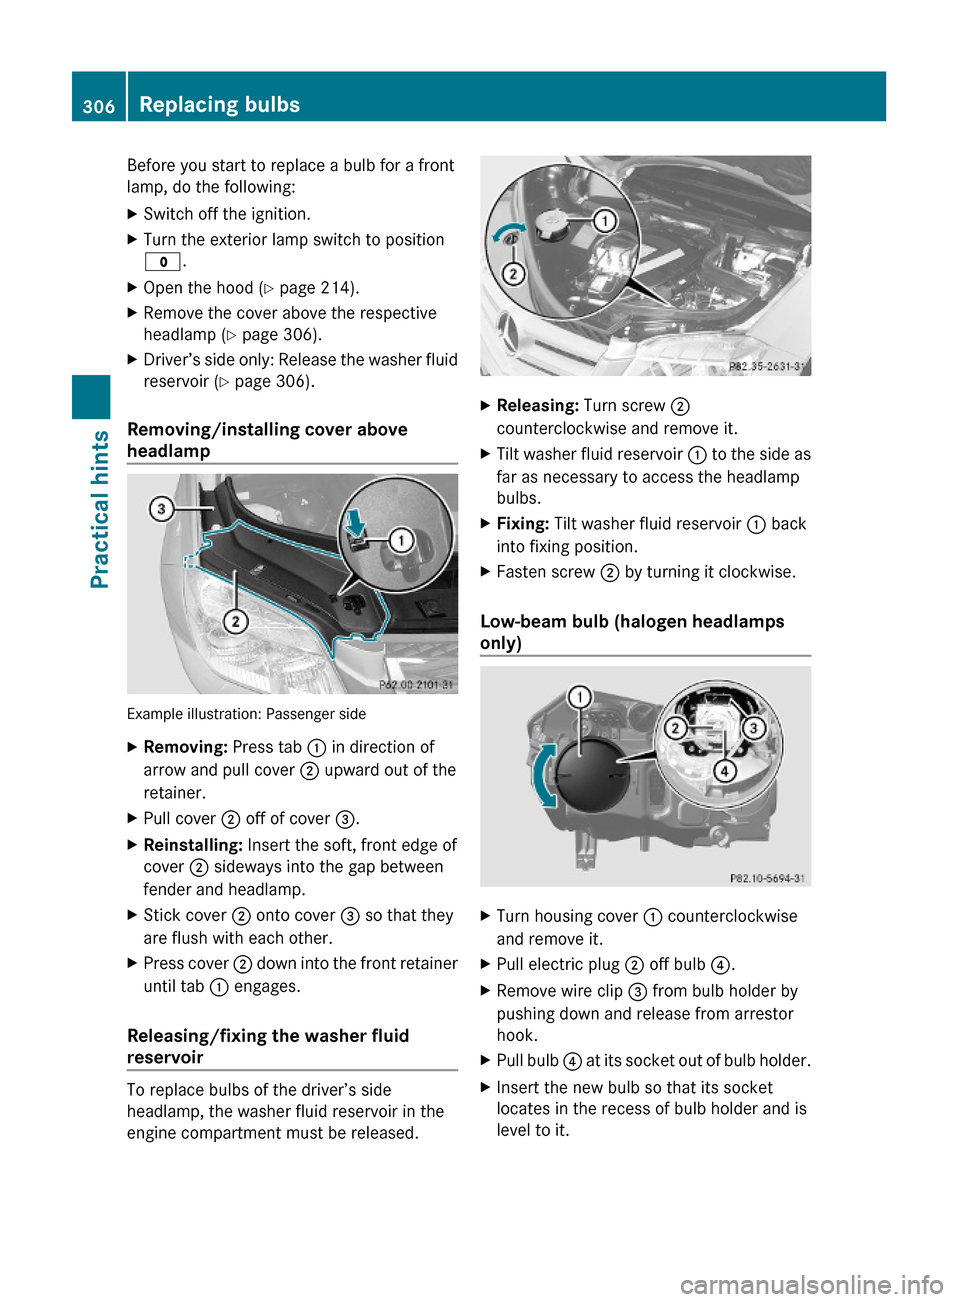
Before you start to replace a bulb for a front
lamp, do the following:
XSwitch off the ignition.XTurn the exterior lamp switch to position
$.
XOpen the hood (Y page 214).XRemove the cover above the respective
headlamp (Y page 306).
XDriver’s side only: Release the washer fluid
reservoir (Y page 306).
Removing/installing cover above
headlamp
Example illustration: Passenger side
XRemoving: Press tab : in direction of
arrow and pull cover ; upward out of the
retainer.
XPull cover ; off of cover =.XReinstalling: Insert the soft, front edge of
cover ; sideways into the gap between
fender and headlamp.
XStick cover ; onto cover = so that they
are flush with each other.
XPress cover ; down into the front retainer
until tab : engages.
Releasing/fixing the washer fluid
reservoir
To replace bulbs of the driver’s side
headlamp, the washer fluid reservoir in the
engine compartment must be released.
XReleasing: Turn screw ;
counterclockwise and remove it.
XTilt washer fluid reservoir : to the side as
far as necessary to access the headlamp
bulbs.
XFixing: Tilt washer fluid reservoir : back
into fixing position.
XFasten screw ; by turning it clockwise.
Low-beam bulb (halogen headlamps
only)
XTurn housing cover : counterclockwise
and remove it.
XPull electric plug ; off bulb ?.XRemove wire clip = from bulb holder by
pushing down and release from arrestor
hook.
XPull bulb ? at its socket out of bulb holder.XInsert the new bulb so that its socket
locates in the recess of bulb holder and is
level to it.
306Replacing bulbsPractical hints
X204_AKB; 3; 23, en-USd2ureepe,Version: 2.11.8.12009-07-16T19:16:58+02:00 - Seite 306
Page 312 of 344
XInsert the new bulb into the bulb carrier and
turn the bulb clockwise.
XInsert the bulb carrier and press it in.
The bulb carrier retainers ; engage
audibly.
XReconnect the plug.XClose the side trim panel (Y page 309).
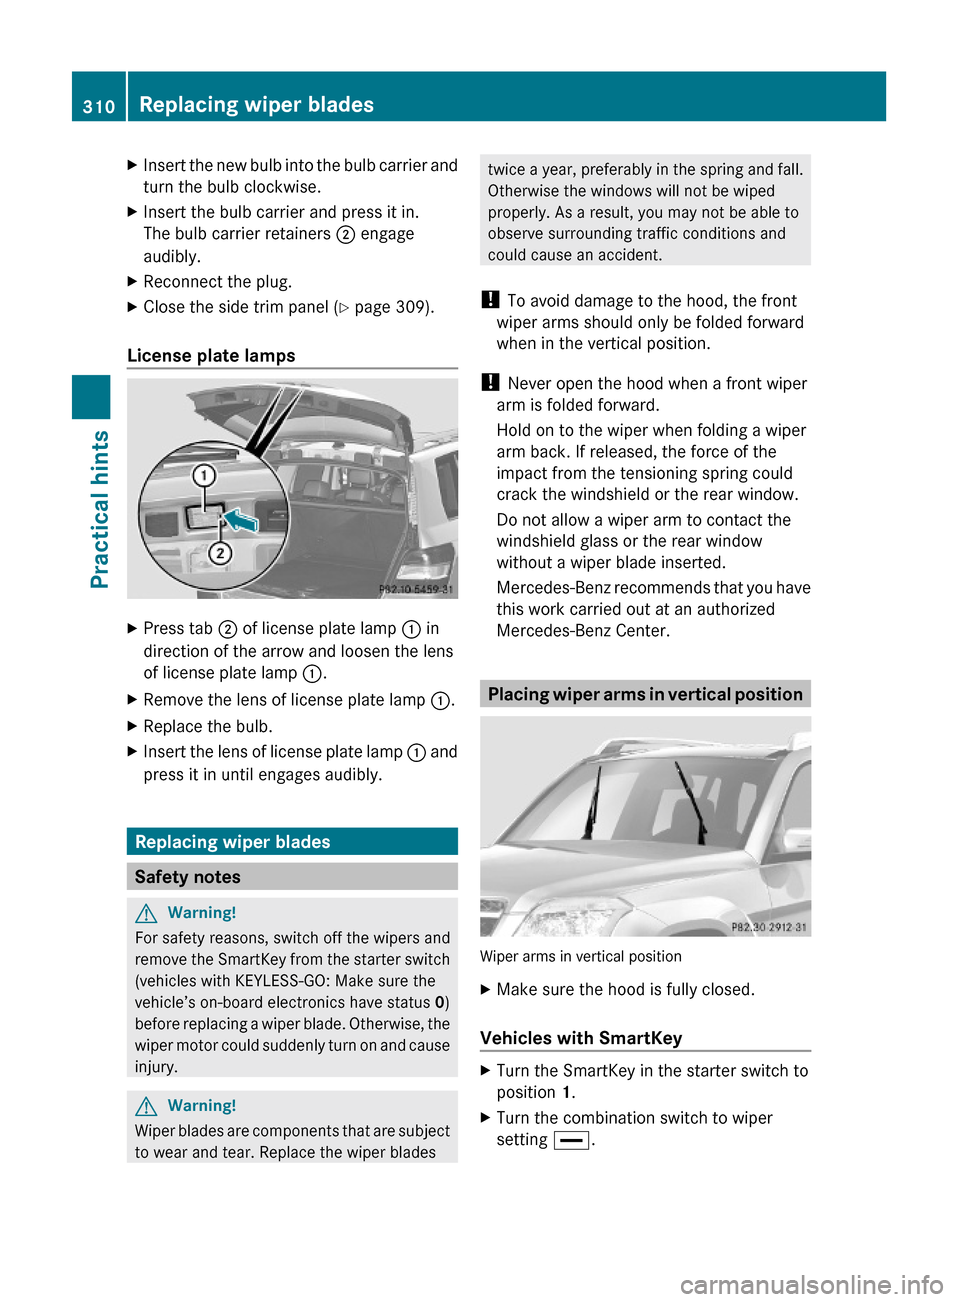
License plate lamps
XPress tab ; of license plate lamp : in
direction of the arrow and loosen the lens
of license plate lamp :.
XRemove the lens of license plate lamp :.XReplace the bulb.XInsert the lens of license plate lamp : and
press it in until engages audibly.
Replacing wiper blades
Safety notes
GWarning!
For safety reasons, switch off the wipers and
remove the SmartKey from the starter switch
(vehicles with KEYLESS-GO: Make sure the
vehicle’s on-board electronics have status 0)
before replacing a wiper blade. Otherwise, the
wiper motor could suddenly turn on and cause
injury.
GWarning!
Wiper blades are components that are subject
to wear and tear. Replace the wiper blades
twice a year, preferably in the spring and fall.
Otherwise the windows will not be wiped
properly. As a result, you may not be able to
observe surrounding traffic conditions and
could cause an accident.
! To avoid damage to the hood, the front
wiper arms should only be folded forward
when in the vertical position.
! Never open the hood when a front wiper
arm is folded forward.
Hold on to the wiper when folding a wiper
arm back. If released, the force of the
impact from the tensioning spring could
crack the windshield or the rear window.
Do not allow a wiper arm to contact the
windshield glass or the rear window
without a wiper blade inserted.
Mercedes-Benz recommends that you have
this work carried out at an authorized
Mercedes-Benz Center.
Placing wiper arms in vertical position
Wiper arms in vertical position
XMake sure the hood is fully closed.
Vehicles with SmartKey
XTurn the SmartKey in the starter switch to
position 1.
XTurn the combination switch to wiper
setting °.
310Replacing wiper bladesPractical hints
X204_AKB; 3; 23, en-USd2ureepe,Version: 2.11.8.12009-07-16T19:16:58+02:00 - Seite 310
Page 328 of 344
moisture or dirt could enter the fuse box
and possibly impair fuse operation.
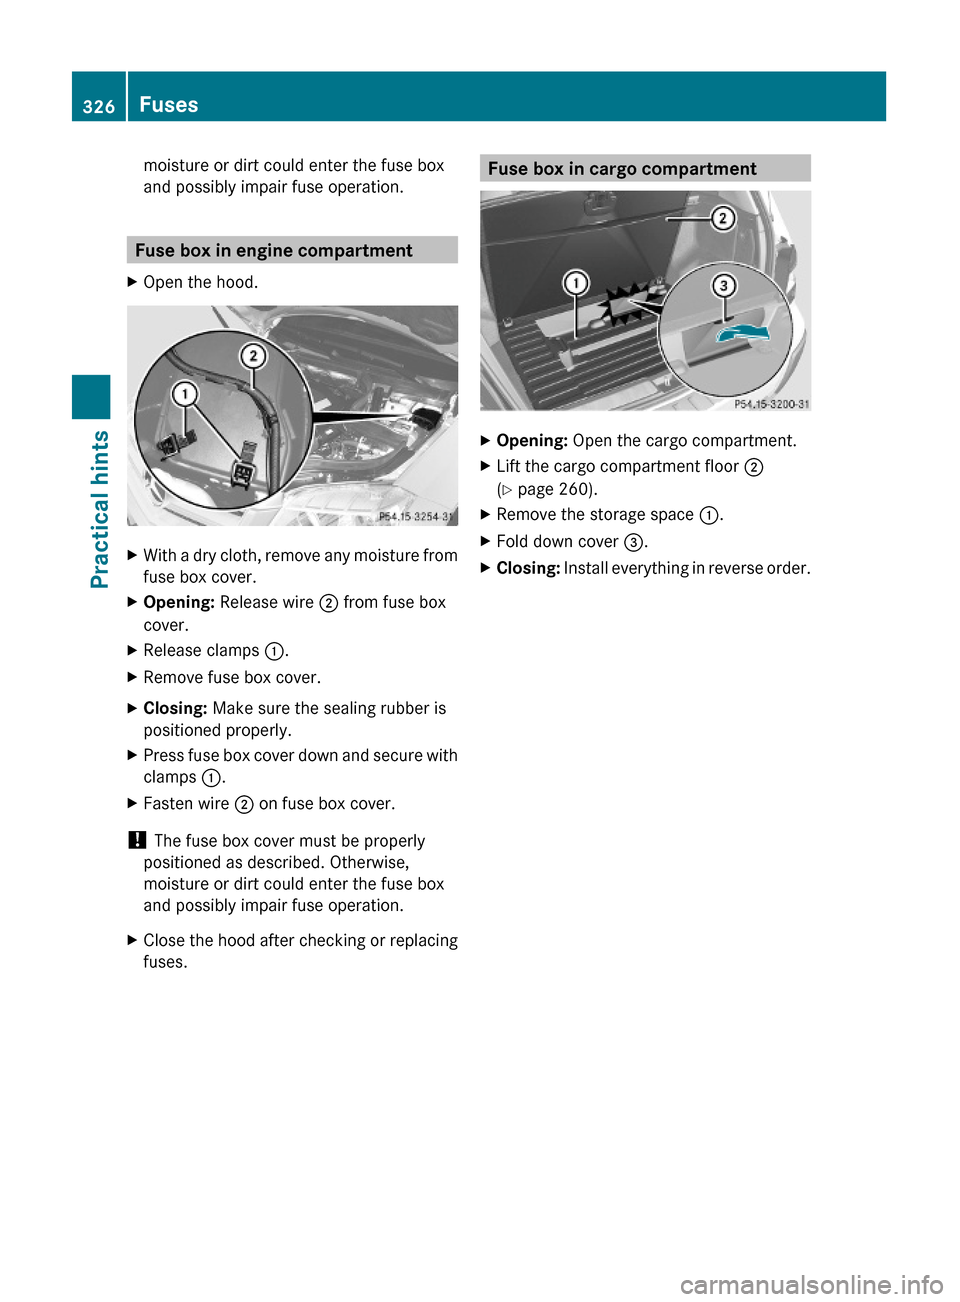
Fuse box in engine compartment
XOpen the hood.XWith a dry cloth, remove any moisture from
fuse box cover.
XOpening: Release wire ; from fuse box
cover.
XRelease clamps :.XRemove fuse box cover.XClosing: Make sure the sealing rubber is
positioned properly.
XPress fuse box cover down and secure with
clamps :.
XFasten wire ; on fuse box cover.
! The fuse box cover must be properly
positioned as described. Otherwise,
moisture or dirt could enter the fuse box
and possibly impair fuse operation.
XClose the hood after checking or replacing
fuses.Fuse box in cargo compartmentXOpening: Open the cargo compartment.XLift the cargo compartment floor ;
(Y page 260).
XRemove the storage space :.XFold down cover =.XClosing: Install everything in reverse order.326FusesPractical hints
X204_AKB; 3; 23, en-USd2ureepe,Version: 2.11.8.12009-07-16T19:16:58+02:00 - Seite 326