2010 Lexus GX460 CD player
[x] Cancel search: CD playerPage 10 of 428
9
11 Setup
General settings330
..........................................
Clock settings 335
............................................
Voice settings 337
............................................
Navigation settings 340
.......................................
Detailed navigation settings 340
................................
Telephone settings 349
......................................
Volume setting 350
........................................
Manage phone 351 ........................................
Phonebook 359 ...........................................
Setting the phonebook 360 .................................
Speed dials setting 368 ....................................
Deleting call history 375 ....................................
Setting the voice tag 376 ...................................
Bluetooth r 380
............................................
Details 385 ...............................................
Audio settings 388
..........................................
Select portable player 388 ..................................
Setting Bluetooth raudio 390 ...............................
Vehicle settings 395
.........................................
Maintenance 395 ..........................................
Vehicle customization 400 ..................................
Intuitive parking assist setting 401 ...........................
Other settings 403 ............................................
12 Appendix
Limitations of the navigation system 406
.........................
Map database information and updates 408
......................
Index 419
.............................................
GX460 Navi (U)
OM60E73U
09.09.24
Page 185 of 428
AUDIO/VIDEO SYSTEM
184
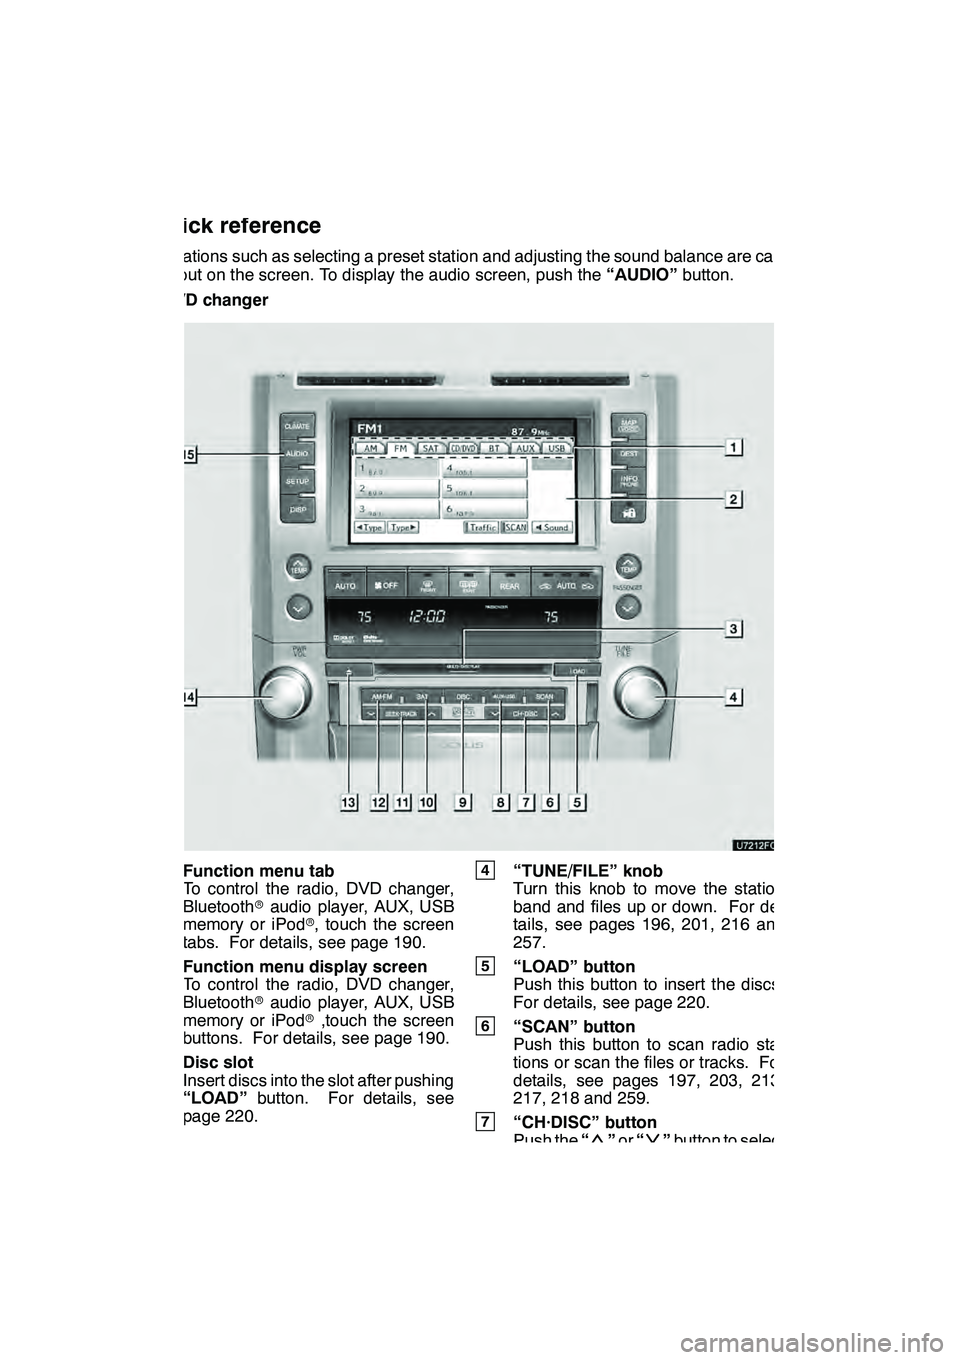
Operations such as selecting a preset station and adjusting the sound balance are car-
ried out on the screen. To display the audio screen, push the“AUDIO”button.
" DVD changer
1Function menu tab
To control the radio, DVD changer,
Bluetooth raudio player, AUX, USB
memory or iPod r, touch the screen
tabs. For details, see page 190.
2Function menu display screen
To control the radio, DVD changer,
Bluetooth raudio player, AUX, USB
memory or iPod r,touch the screen
buttons. For details, see page 190.
3Disc slot
Insert discs into the slot after pushing
“LOAD” button. For details, see
page 220.
4“TUNE/FILE” knob
Turn this knob to move the station
band and files up or down. For de-
tails, see pages 196, 201, 216 and
257.
5“LOAD” button
Push this button to insert the discs.
For details, see page 220.
6“SCAN” button
Push this button to scan radio sta-
tions or scan the files or tracks. For
details, see pages 197, 203, 213,
217, 218 and 259.
7“CH·DISC” button
Push the “”or “”button to select
a preset turning or a selected disc.
For details, see pages 197, 203, 223
and 225.
GX460 Navi (U)
OM60E73U
Finish
09.09.24
Quick reference
Page 186 of 428
AUDIO/VIDEO SYSTEM
185
8“AUX·USB” button
Push this button to turn the
Bluetoothraudio player, AUX, USB
memory or iPod ron. For details, see
pages 190, 195, 245 and 253.
9“DISC” button
Push this button to turn the DVD
changer on. For details, see pages
190 and 225.
10“SAT” button
Push this button to choose an SAT
station. For details, see pages 190
and 200.
11“SEEK·TRACK” button
Push the “”or “”button to seek
up or down for a station, or to access
a desired track, file or chapter. For
details, see pages 197, 203, 212,
215, 231, 242, 251 and 257.
12“AM·FM” button
Push this button to choose a radio
station. (AM, FM1, FM2)
For details, see pages 190 and 196.
13“” button
Push this button to eject the discs.
For details, see page 223.
14“PWR/VOL” knob
Push this knob to turn the audio sys-
tem on and off, and turn it to adjust the
volume. For details, see page 189.
15“AUDIO” button
Push this button to display the audio
control screen. For details, see page
189.
GX460 Navi (U)
OM60E73U
Finish
09.09.24
7
Page 187 of 428

AUDIO/VIDEO SYSTEM
186
"CD changer
1Function menu tab
To control the radio, CD changer,
Bluetooth raudio player, AUX, USB
memory or iPod r, touch the screen
tabs. For details, see page 190.
2Function menu display screen
To control the radio, CD changer,
Bluetooth raudio player, AUX, USB
memory or iPod r, touch the screen
buttons. For details, see page 190.
3Disc slot
Insert discs into the slot after pushing
“LOAD” button. For details, see
page 206.
4“TUNE/FILE” knob
Turn this knob to move the station
band and files up or down. For de-
tails, see pages 196, 201, 216 and
257.
5“LOAD” button
Push this button to insert the discs.
For details, see page 206.
6“SCAN” button
Push this button to scan radio sta-
tions or scan the files or tracks. For
details, see pages 197, 203, 213,
217, 218 and 259.
7“CH·DISC” button
Push the “”or “”button to select
a preset turning or a selected disc.
For details, see pages 197, 203 and
208.
GX460 Navi (U)
OM60E73U
Finish
09.09.24
Page 188 of 428
AUDIO/VIDEO SYSTEM
187
8“AUX·USB” button
Push this button to turn the
Bluetoothraudio player, AUX, USB
memory or iPod ron. For details, see
pages 190, 195, 245 and 253.
9“CD” button
Push this button to turn the CD
changer on. For details, see pages
190 and 210.
10“SAT” button
Push this button to choose an SAT
station. For details, see pages 190
and 200.
11“SEEK·TRACK” button
Push the “”or “”button to seek
up or down for a station, or to access
a desired track or file. For details, see
pages 197, 203, 212, 215, 251 and
257.
12“AM·FM” button
Push this button to choose a radio
station. (AM, FM1, FM2)
For details, see pages 190 and 196.
13“” button
Push this button to eject the discs.
For details, see page 208.
14“PWR/VOL” knob
Push this knob to turn the audio sys-
tem on and off, and turn it to adjust the
volume. For details, see page 189.
15“AUDIO” button
Push this button to display the audio
control screen. For details, see page
189. This section describes some of the basic
features of your audio/video system.
Some information may not pertain to your
system.
Your audio/video system works when the
“ENGINE START STOP” switch is turned
to ACCESSORY or IGNITION ON mode.
FCCID:AJDK021
IC ID : 775E
−K021
This device complies with Part 15 of the
FCC Rules and RSS −Gen and
RSS− 210 of IC Rules. Operation is sub-
ject to the following two conditions : (1)
This device may not cause harmful inter-
ference, and (2) this device must accept
any interference received, including in-
terference that may cause undesired
operation.
CAUTION
FCC WARNING: Changes or modifi-
cations not expressly approved by
the party responsible for compliance
could void the user’s authority to op-
erate the equipment.
CAUTION: Radio Frequency Radi-
ation Exposure
This equipment complies with FCC
radiation exposure limits set forth for
uncontrolled equipment and meets
the FCC radio frequency (RF) Expo-
sure Guidelines in Supplement C to
OET65. This equipment has very low
levels of RF energy that it deemed to
comply without maximum permis-
sive exposure evaluation (MPE). But
it is desirable that it should be
installed and operated with at least 20
cm and more between the radiator
and person’s body (excluding ex-
tremities: hands, wrists, feet and
ankles).
GX460 Navi (U)
OM60E73U
Finish
09.09.24
7
Using your audio/video
system —
— Some basics
Page 189 of 428
AUDIO/VIDEO SYSTEM
188
Co−location: This transmitter must
not be co −located or operated in con-
junction with any other antenna or
transmitter.
DLaser products
D Do not take this unit apart or at-
tempt to make any changes
yourself. This is an intricate unit
that uses a laser pickup to re-
trieve information from the sur-
face of compact discs. The la-
ser is carefully shielded so that
its rays remain inside the cabi-
net. Therefore, never try to dis-
assemble the player or alter any
of its parts since you may be ex-
posed to laser rays and danger-
ous voltages.
D This product utilizes a laser.
Use of controls or adjustments
or performance of procedures
other than those specified here-
in may result in hazardous radi-
ation exposure.
NOTICE
To prevent the battery from being dis-
charged, do not leave the audio/video
system on longer than necessary
when the engine is not running.
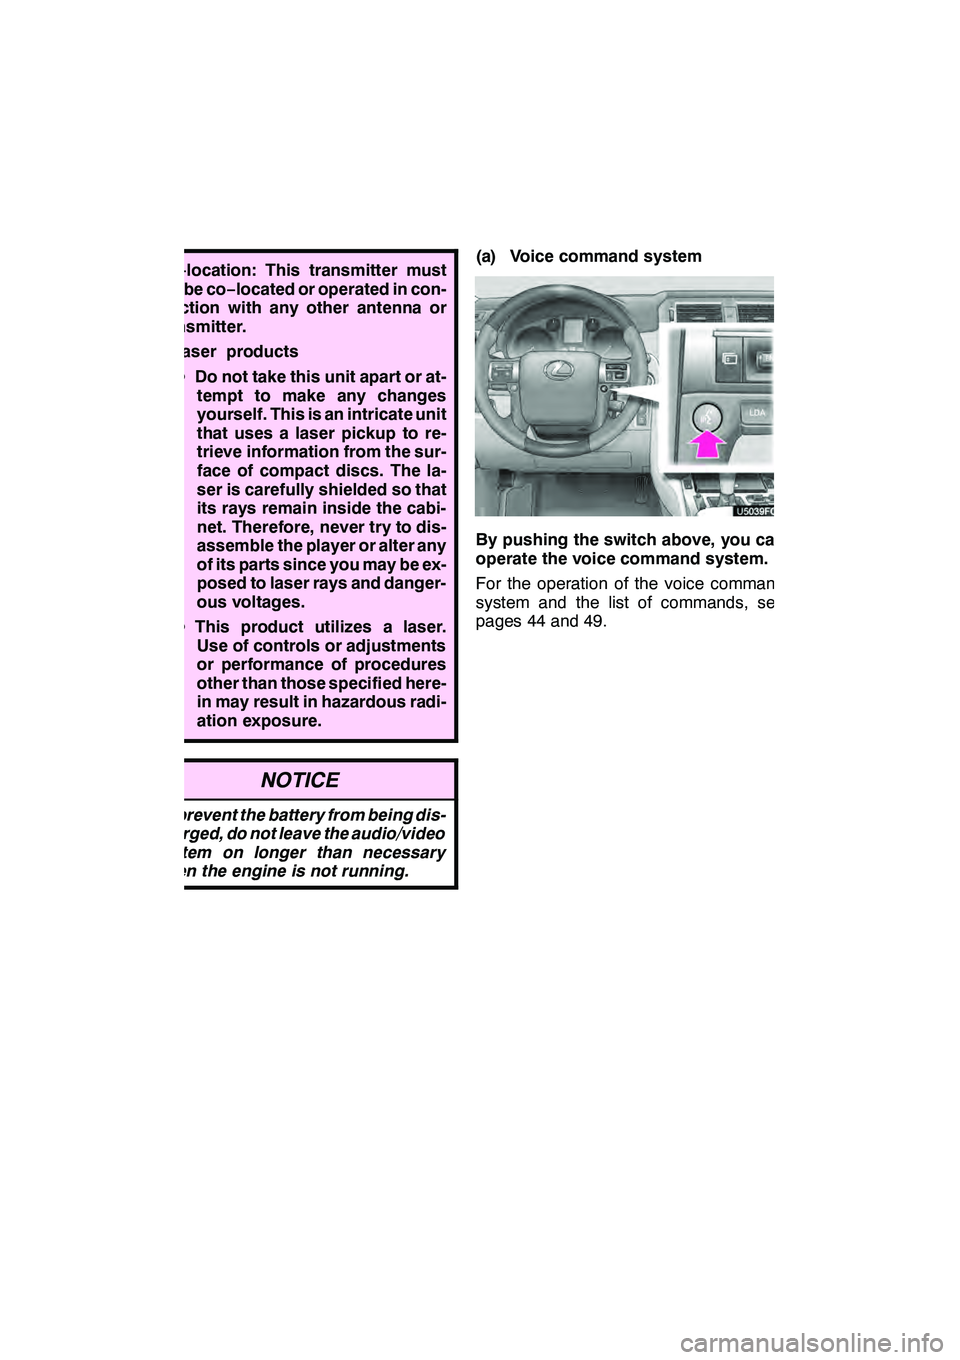
(a) Voice command system
By pushing the switch above, you can
operate the voice command system.
For the operation of the voice command
system and the list of commands, see
pages 44 and 49.
GX460 Navi (U)
OM60E73U
Finish
09.09.24
Page 193 of 428
AUDIO/VIDEO SYSTEM
192
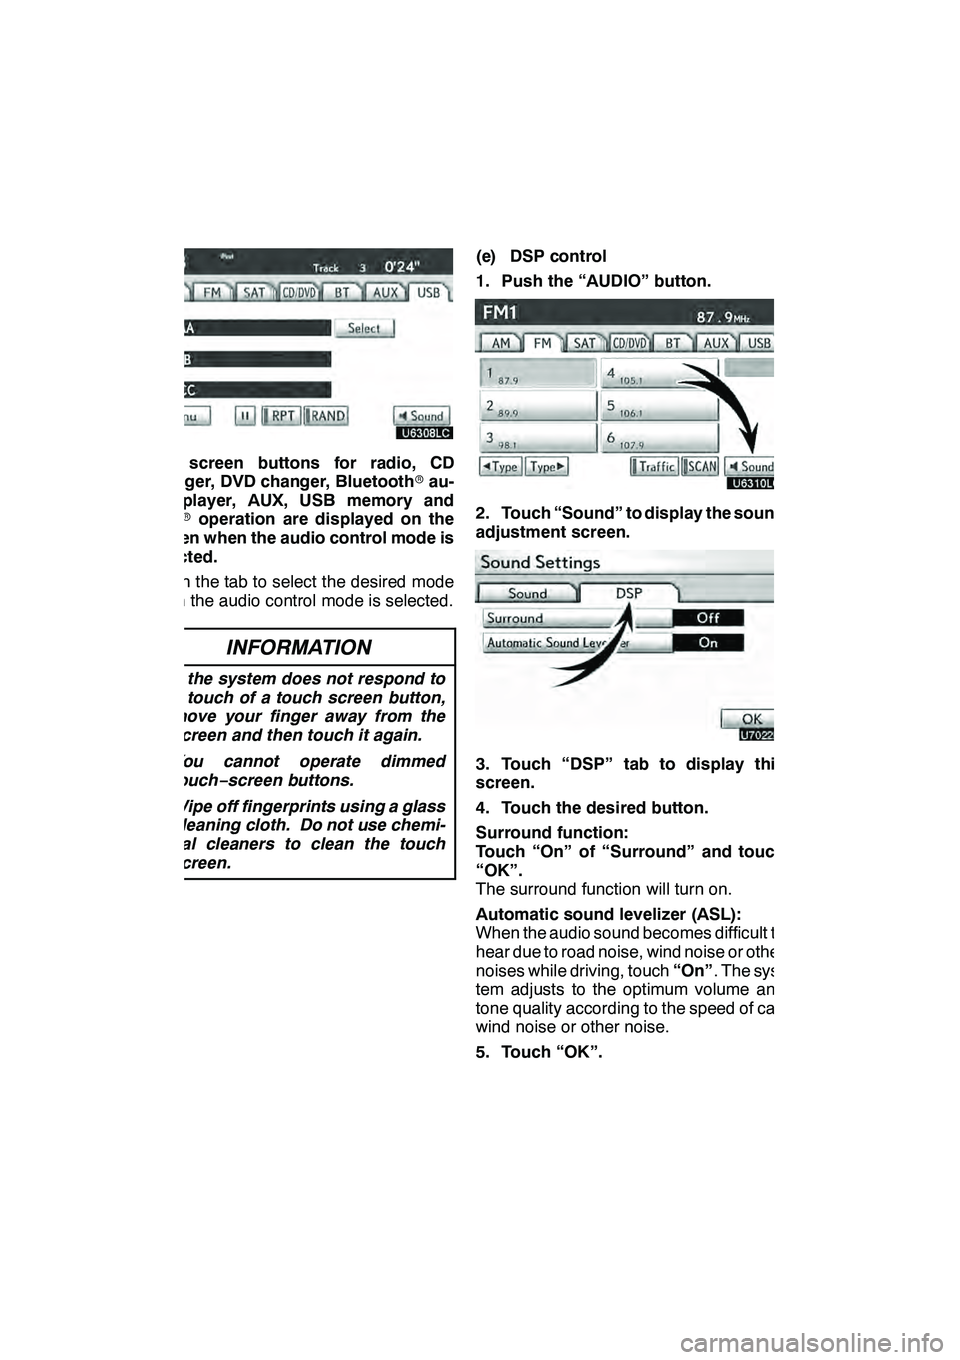
The screen buttons for radio, CD
changer, DVD changer, Bluetoothrau-
dio player, AUX, USB memory and
iPod roperation are displayed on the
screen when the audio control mode is
selected.
Touch the tab to select the desired mode
when the audio control mode is selected.
INFORMATION
D If the system does not respond to
a touch of a touch screen button,
move your finger away from the
screen and then touch it again.
D You cannot operate dimmed
touch− screen buttons.
D Wipe off fingerprints using a glass
cleaning cloth. Do not use chemi-
cal cleaners to clean the touch
screen.
(e) DSP control
1. Push the “AUDIO” button.
2. Touch “Sound” to display the sound
adjustment screen.
3. Touch “DSP” tab to display this
screen.
4. Touch the desired button.
Surround function:
Touch “On” of “Surround” and touch
“OK”.
The surround function will turn on.
Automatic sound levelizer (ASL):
When the audio sound becomes difficult to
hear due to road noise, wind noise or other
noises while driving, touch “On”. The sys-
tem adjusts to the optimum volume and
tone quality according to the speed of car,
wind noise or other noise.
5. Touch “OK”.
GX460 Navi (U)
OM60E73U
Finish
09.09.24
Page 196 of 428
AUDIO/VIDEO SYSTEM
195
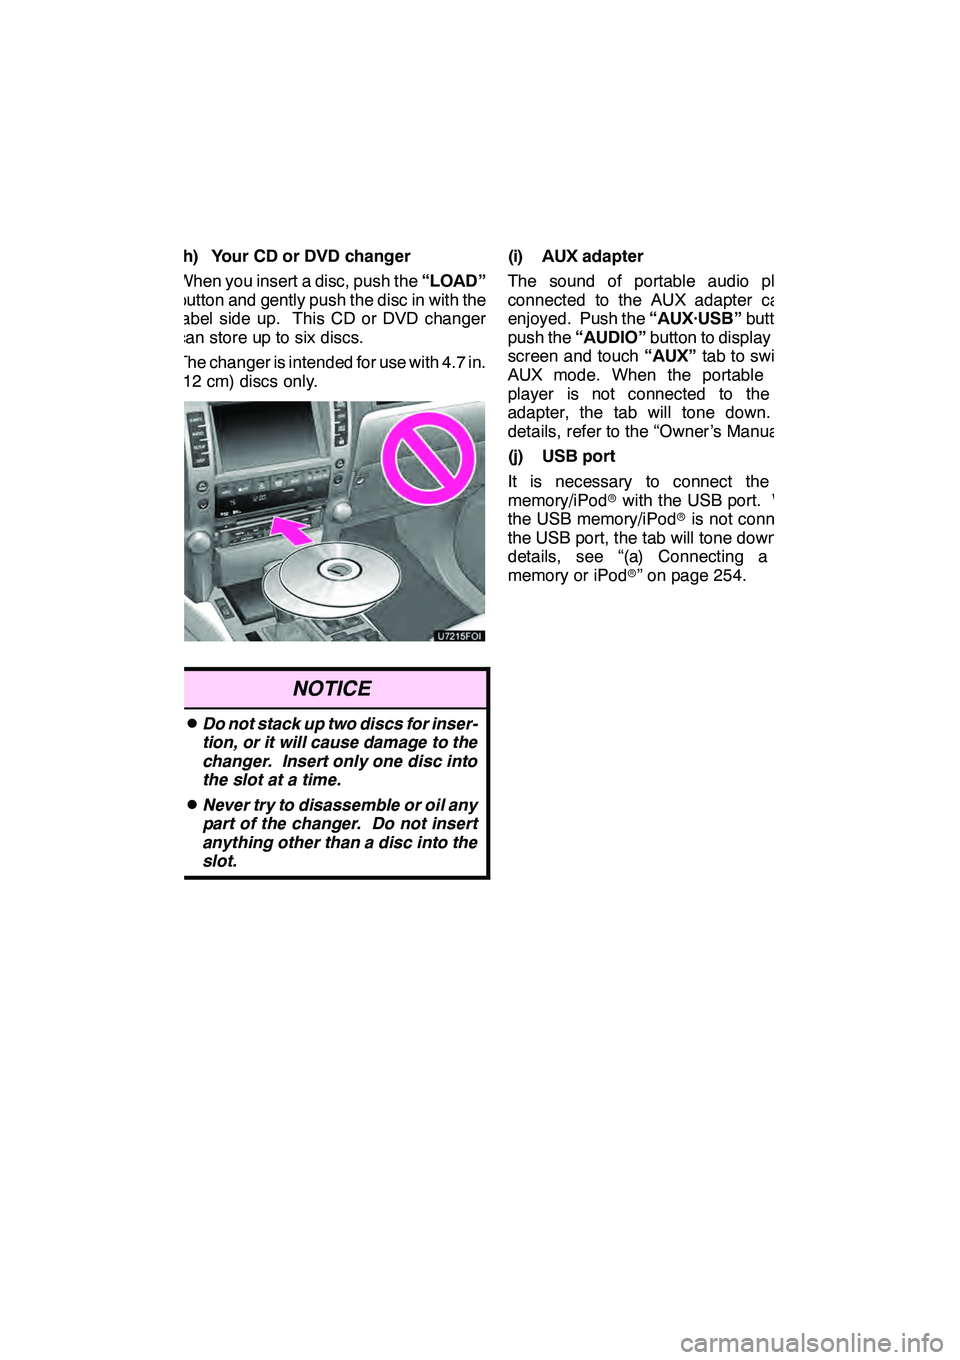
(h) Your CD or DVD changer
When you insert a disc, push the“LOAD”
button and gently push the disc in with the
label side up. This CD or DVD changer
can store up to six discs.
The changer is intended for use with 4.7 in.
(12 cm) discs only.
NOTICE
DDo not stack up two discs for inser-
tion, or it will cause damage to the
changer. Insert only one disc into
the slot at a time.
DNever try to disassemble or oil any
part of the changer. Do not insert
anything other than a disc into the
slot.
(i) AUX adapter
The sound of portable audio players
connected to the AUX adapter can be
enjoyed. Push the “AUX·USB”button, or
push the “AUDIO” button to display audio
screen and touch “AUX”tab to switch to
AUX mode. When the portable audio
player is not connected to the AUX
adapter, the tab will tone down. For
details, refer to the “Owner’s Manual”.
(j) USB port
It is necessary to connect the USB
memory/iPod rwith the USB port. When
the USB memory/iPod ris not connected
the USB port, the tab will tone down. For
details, see “(a) Connecting a USB
memory or iPod r” on page 254.
GX460 Navi (U)
OM60E73U
Finish
09.09.24
7