Page 99 of 407

driving position when the key is placed into the
ignition, and turned out of the LOCK position toward
the ACC/ON position.
The Easy Entry/Exit feature will be automatically dis-
abled if the seat is already positioned closer than 0.9 in
(23 mm) forward of the rear stop. At this position, there
is no benefit to the driver by moving the seat for Easy
Exit/Entry.
Each stored memory setting will have an associated Easy
Entry/Exit position.
NOTE: The Easy Entry/Exit feature is not enabled
when the vehicle is delivered from the factory. The Easy
Entry/Exit feature is enabled (or later disabled) through
the programmable features in the Electronic Vehicle
Information Center (EVIC). Refer to “Electronic Vehicle
Information Center (EVIC)/Customer-Programmable
Features” in “Understanding Your Instrument Panel” for
further information.TO OPEN AND CLOSE THE HOOD
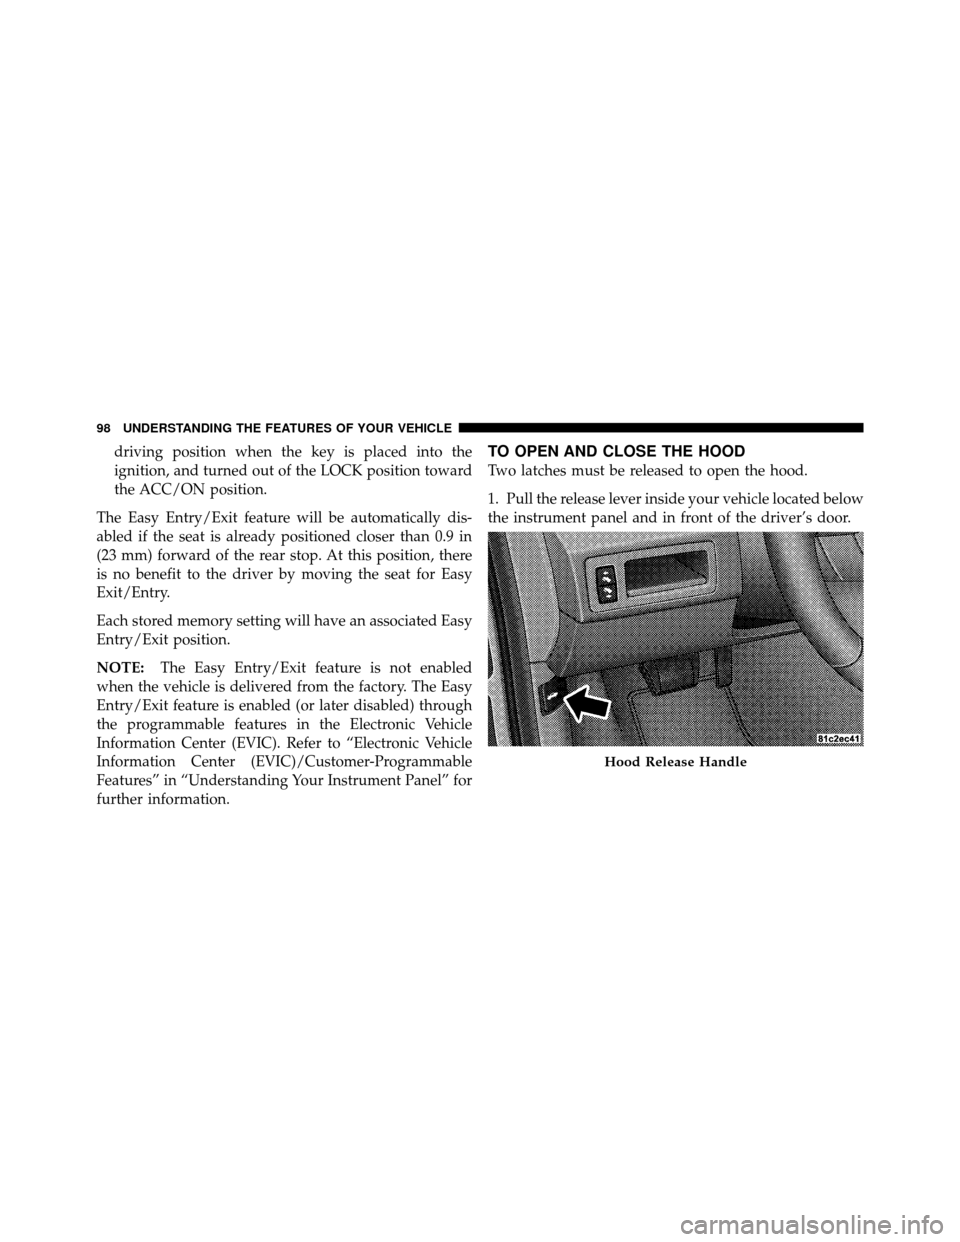
Two latches must be released to open the hood.
1. Pull the release lever inside your vehicle located below
the instrument panel and in front of the driver’s door.
Hood Release Handle
98 UNDERSTANDING THE FEATURES OF YOUR VEHICLE
Page 102 of 407

Automatic Headlights — If Equipped
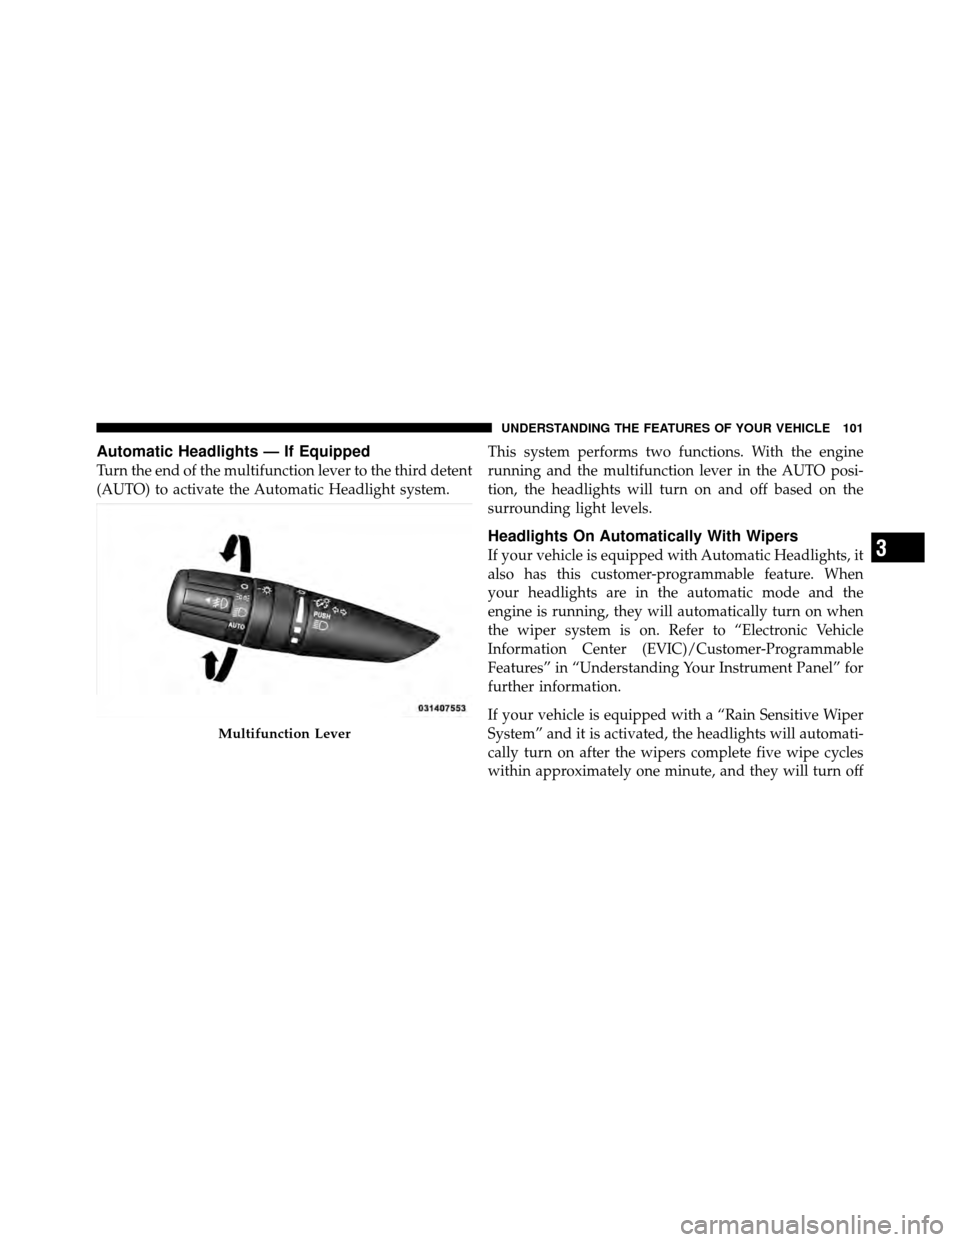
Turn the end of the multifunction lever to the third detent
(AUTO) to activate the Automatic Headlight system.This system performs two functions. With the engine
running and the multifunction lever in the AUTO posi-
tion, the headlights will turn on and off based on the
surrounding light levels.
Headlights On Automatically With Wipers
If your vehicle is equipped with Automatic Headlights, it
also has this customer-programmable feature. When
your headlights are in the automatic mode and the
engine is running, they will automatically turn on when
the wiper system is on. Refer to “Electronic Vehicle
Information Center (EVIC)/Customer-Programmable
Features” in “Understanding Your Instrument Panel” for
further information.
If your vehicle is equipped with a “Rain Sensitive Wiper
System” and it is activated, the headlights will automati-
cally turn on after the wipers complete five wipe cycles
within approximately one minute, and they will turn off
Multifunction Lever
3
UNDERSTANDING THE FEATURES OF YOUR VEHICLE 101
Page 103 of 407

approximately four minutes after the wipers completely
stop. Refer to “Windshield Wipers and Washers” in this
section for further information.
NOTE:When your headlights come on during the
daytime, the instrument panel lights will automatically
dim to the lower nighttime intensity. Refer to “Lights” in
this section for further information.
SmartBeam™ — If Equipped
The SmartBeam™ system provides increased forward
lighting at night by automating high beam control
through the use of a digital camera mounted on the
inside rearview mirror. This camera detects vehicle spe-
cific light and automatically switches from high beams to
low beams until the approaching vehicle is out of view.
NOTE: If the windshield or SmartBeam™ mirror is
replaced, the SmartBeam™ mirror must be re-aimed to
ensure proper performance. See your local authorized
dealer.
To Activate
1. Select “Auto High Beams.” Refer to “Electronic Ve-
hicle Information Center (EVIC)/Customer-
Programmable Features” in “Understanding Your Instru-
ment Panel” for further information.
2. Turn the end of the multifunction lever to the AUTO
headlight position.
3. Push the multifunction lever away from you (toward
front of vehicle) to engage the high beam mode.
NOTE: This system will not activate until the vehicle is
at or above 20 mph (32 km/h).
To Deactivate
1. Pull back on the multifunction lever to manually
deactivate the system (normal operation of low beams).
2. Push back on the multifunction lever once again to
reactivate the system.
102 UNDERSTANDING THE FEATURES OF YOUR VEHICLE
Page 104 of 407

NOTE:Broken, muddy, or obstructed headlights and
taillights of vehicles in the field of view will cause
headlights to remain on longer (closer to the vehicle).
Also, dirt, film, and other obstructions (sticker, toll box,
etc.) on the windshield or camera lens will cause the
system to function improperly.
Daytime Running Lights — If Equipped
The high beam headlights come on at a low intensity
level whenever the engine is running, and the transmis-
sion is not in the PARK position. The lights will remain
on until the ignition switch is turned to LOCK/ACC or
the parking brake is engaged. The headlight switch must
be used for normal nighttime driving.
Automatic Headlight Leveling — HID Headlights
Only
This feature prevents the headlights from interfering
with the vision of oncoming drivers. Headlight leveling
automatically adjusts the height of the headlight beam in
reaction to changes in vehicle pitch.
Instrument Panel Dimmer
Rotate the center potion of the lever to the extreme
bottom position to fully dim the instrument panel lights
and prevent the interior lights from illuminating when a
door is opened.
Rotate the center portion of the lever up to increase the
brightness of the instrument panel lights when the park-
ing lights or headlights are on.
Rotate the center portion of the lever upward to the next
detent position to brighten the odometer and radio when
the parking lights or headlights are on.
3
UNDERSTANDING THE FEATURES OF YOUR VEHICLE 103
Page 108 of 407

Headlight Time Delay
This feature delays turning off the headlights for 30, 60 or
90 seconds after the ignition switch is turned OFF. To
activate the headlight delay, the multifunction lever must
be rotated to the “Off” position after the ignition switch
is turned to LOCK/ACC. Only the headlights will illu-
minate during this time. Refer to “Electronic Vehicle
Information Center (EVIC)/Customer-Programmable
Features” in “Understanding Your Instrument Panel” for
further information.
Interior Lights
The interior lighting consists of courtesy lights (below the
instrument panel), an overhead console light (which
contains both driver and passenger reading lights), read-
ing lights (located above the rear doors), and a rear cargo
light. Opening a door, pressing the UNLOCK button on
the Remote Keyless Entry (RKE) transmitter or turning
the center of the multifunction lever to the extreme up
position, will activate all interior courtesy lights.
3
UNDERSTANDING THE FEATURES OF YOUR VEHICLE 107
Page 113 of 407

Rain Sensing Wipers — If Equipped
This feature senses moisture on the windshield and
automatically activates the wipers for the driver. The
feature is especially useful for road splash or overspray
from the windshield washers of the vehicle ahead. Rotate
the end of the multifunction lever to one of five settings
to activate this feature.
The sensitivity of the system can be adjusted with the
multifunction lever. Wiper delay position 1 is the least
sensitive, and wiper delay position 5 is the most sensi-
tive. Setting 3 should be used for normal rain conditions.
Settings 1 and 2 can be used if the driver desires less
wiper sensitivity. Settings 4 and 5 can be used if the
driver desires more sensitivity. Place the wiper switch in
the OFF position when not using the system.
NOTE:
•The Rain Sensing feature will not operate when the
wiper switch is in the low or high-speed position.
•The Rain Sensing feature may not function properly when
ice, or dried salt water is present on the windshield.
•Use of Rain-X�or products containing wax or silicone
may reduce Rain Sensing performance.
•A customer programmable feature in the Electronic
Vehicle Information Center (EVIC) allows the Rain
Sensing feature to be turned off. Refer to “Electronic
Vehicle Information Center (EVIC)/Personal Settings
(Customer-Programmable Features)” in “Understand-
ing Your Instrument Panel” for further information.
The Rain Sensing system has protection features for the
wiper blades and arms, and will not operate under the
following conditions:
•Low Ambient Temperature — When the ignition is
first turned ON, the Rain Sensing system will not
operate until the wiper switch is moved, vehicle speed
is greater than 0 mph (0 km/h), or the outside tem-
perature is greater than 32°F (0°C).
112 UNDERSTANDING THE FEATURES OF YOUR VEHICLE
Page 116 of 407

•The pedals can be adjusted while driving.
•The pedalscannotbe adjusted when the vehicle is in
REVERSE (R) or when the Electronic Speed Control is
on. A message will be displayed in the Electronic
Vehicle Information Center (EVIC) if the pedals are
attempted to be adjusted when the system is locked
out (“Adjustable Pedal Disabled — Cruise Control
Set” or “Adjustable Pedal Disabled — Shifter In Re-
verse”). Refer to “Electronic Vehicle Information Cen-
ter (EVIC)” in “Understanding Your Instrument
Panel” for further information.
CAUTION!
Do not place any article under the adjustable pedal’s
or impede its ability to move as it may cause damage
to the pedal controls. Pedal travel may become lim-
ited if movement is stopped by an obstruction in the
adjustable pedal’s path.
WARNING!
Do not adjust the pedals while the vehicle is moving.
You could lose control and have an accident. Always
adjust the pedals while the vehicle is parked.
3
UNDERSTANDING THE FEATURES OF YOUR VEHICLE 115
Page 122 of 407
WARNING DISPLAY DISTANCES
DISPLAY LED OBSTACLE DISTANCE FROM: LED COLOR AUDIBLE SIGNALREAR CORNERS REAR CENTER
1st LED 59 in (150 cm)YellowYes, Half Second
2nd LED 51 in (130 cm)YellowNone
3rd LED 45 in (115 cm)YellowNone
4th LED 31.5 in (80 cm) 39 in (100 cm) YellowNone
5th LED 25.5 in (65 cm) 33.5 in (85 cm) YellowNone
6th LED 20 in (50 cm) 28 in (70 cm) YellowNone
7th LED 16 in (40 cm) 20 in (50 cm) RedYes, Intermittent
8th LED 6 in (15 cm) 12 in (30 cm) RedYes, Continuous
NOTE: The Rear Park Assist system will MUTE the
radio, if on, when the system is sounding an audio tone.
Enable/Disable ParkSense�
ParkSense� can be enabled and disabled with a switch
located on the upper switch bank of the instrument
panel. Press the switch once to turn ParkSense�
on,
push the switch a second time to turn Park-
Sense� off.
3
UNDERSTANDING THE FEATURES OF YOUR VEHICLE 121