Page 2334 of 3039

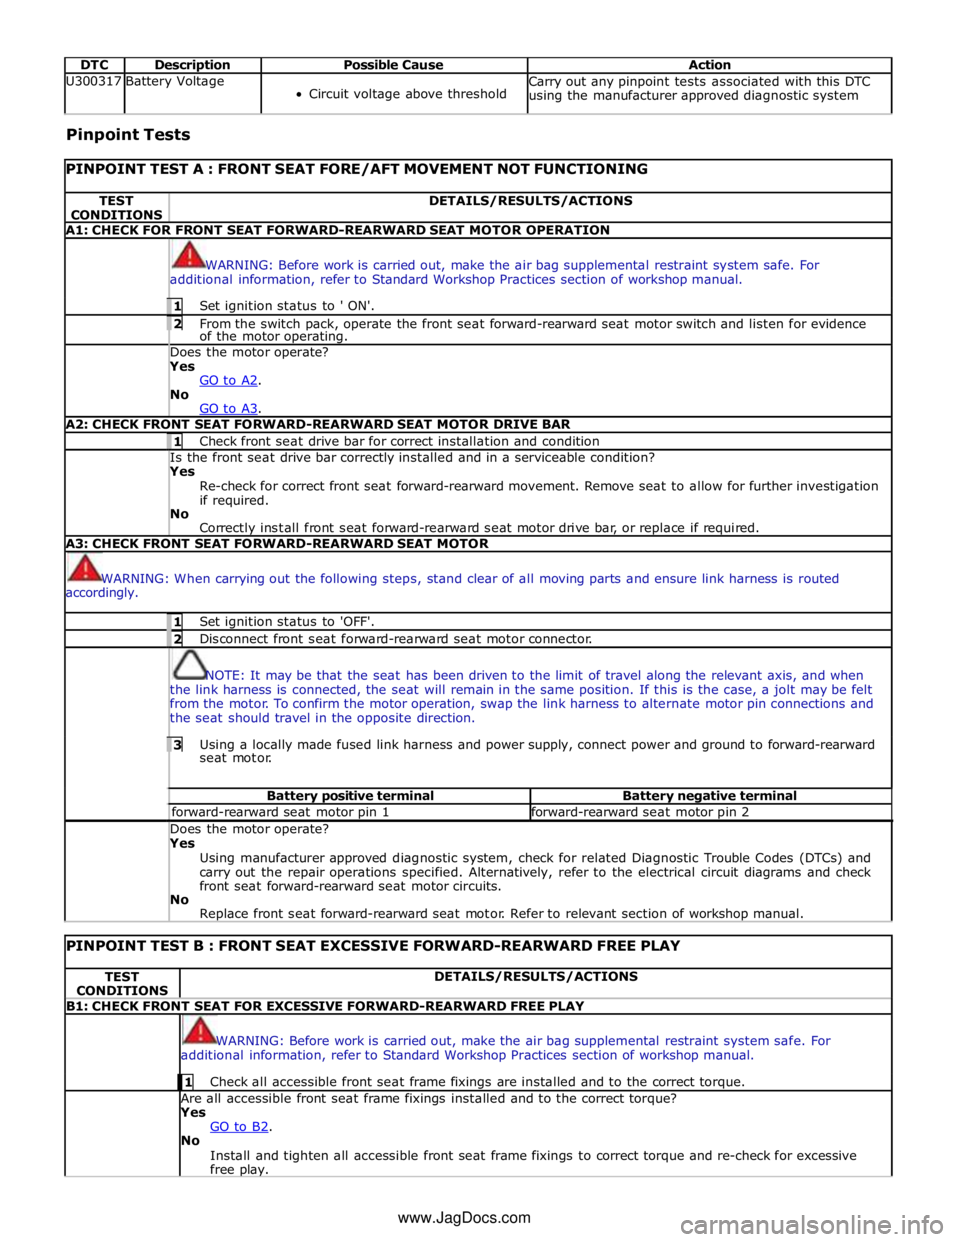
DTC Description Possible Cause Action U300317 Battery Voltage
Circuit voltage above threshold Carry out any pinpoint tests associated with this DTC
using the manufacturer approved diagnostic system Pinpoint Tests
PINPOINT TEST A : FRONT SEAT FORE/AFT MOVEMENT NOT FUNCTIONING TEST
CONDITIONS DETAILS/RESULTS/ACTIONS A1: CHECK FOR FRONT SEAT FORWARD-REARWARD SEAT MOTOR OPERATION
WARNING: Before work is carried out, make the air bag supplemental restraint system safe. For
additional information, refer to Standard Workshop Practices section of workshop manual. 1 Set ignition status to ' ON'. 2 From the switch pack, operate the front seat forward-rearward seat motor switch and listen for evidence of the motor operating. Does the motor operate? Yes
GO to A2. No
GO to A3. A2: CHECK FRONT SEAT FORWARD-REARWARD SEAT MOTOR DRIVE BAR 1 Check front seat drive bar for correct installation and condition Is the front seat drive bar correctly installed and in a serviceable condition? Yes
Re-check for correct front seat forward-rearward movement. Remove seat to allow for further investigation
if required.
No
Correctly install front seat forward-rearward seat motor drive bar, or replace if required. A3: CHECK FRONT SEAT FORWARD-REARWARD SEAT MOTOR
WARNING: When carrying out the following steps, stand clear of all moving parts and ensure link harness is routed
accordingly. 1 Set ignition status to 'OFF'. 2 Disconnect front seat forward-rearward seat motor connector.
NOTE: It may be that the seat has been driven to the limit of travel along the relevant axis, and when
the link harness is connected, the seat will remain in the same position. If this is the case, a jolt may be felt
from the motor. To confirm the motor operation, swap the link harness to alternate motor pin connections and
the seat should travel in the opposite direction. 3 Using a locally made fused link harness and power supply, connect power and ground to forward-rearward seat motor. Battery positive terminal Battery negative terminal forward-rearward seat motor pin 1 forward-rearward seat motor pin 2 Does the motor operate? Yes
Using manufacturer approved diagnostic system, check for related Diagnostic Trouble Codes (DTCs) and
carry out the repair operations specified. Alternatively, refer to the electrical circuit diagrams and check
front seat forward-rearward seat motor circuits.
No
Replace front seat forward-rearward seat motor. Refer to relevant section of workshop manual.
PINPOINT TEST B : FRONT SEAT EXCESSIVE FORWARD-REARWARD FREE PLAY TEST
CONDITIONS DETAILS/RESULTS/ACTIONS B1: CHECK FRONT SEAT FOR EXCESSIVE FORWARD-REARWARD FREE PLAY
WARNING: Before work is carried out, make the air bag supplemental restraint system safe. For
additional information, refer to Standard Workshop Practices section of workshop manual. 1 Check all accessible front seat frame fixings are installed and to the correct torque. Are all accessible front seat frame fixings installed and to the correct torque?
Yes
GO to B2. No
Install and tighten all accessible front seat frame fixings to correct torque and re-check for excessive
free play. www.JagDocs.com
Page 2335 of 3039

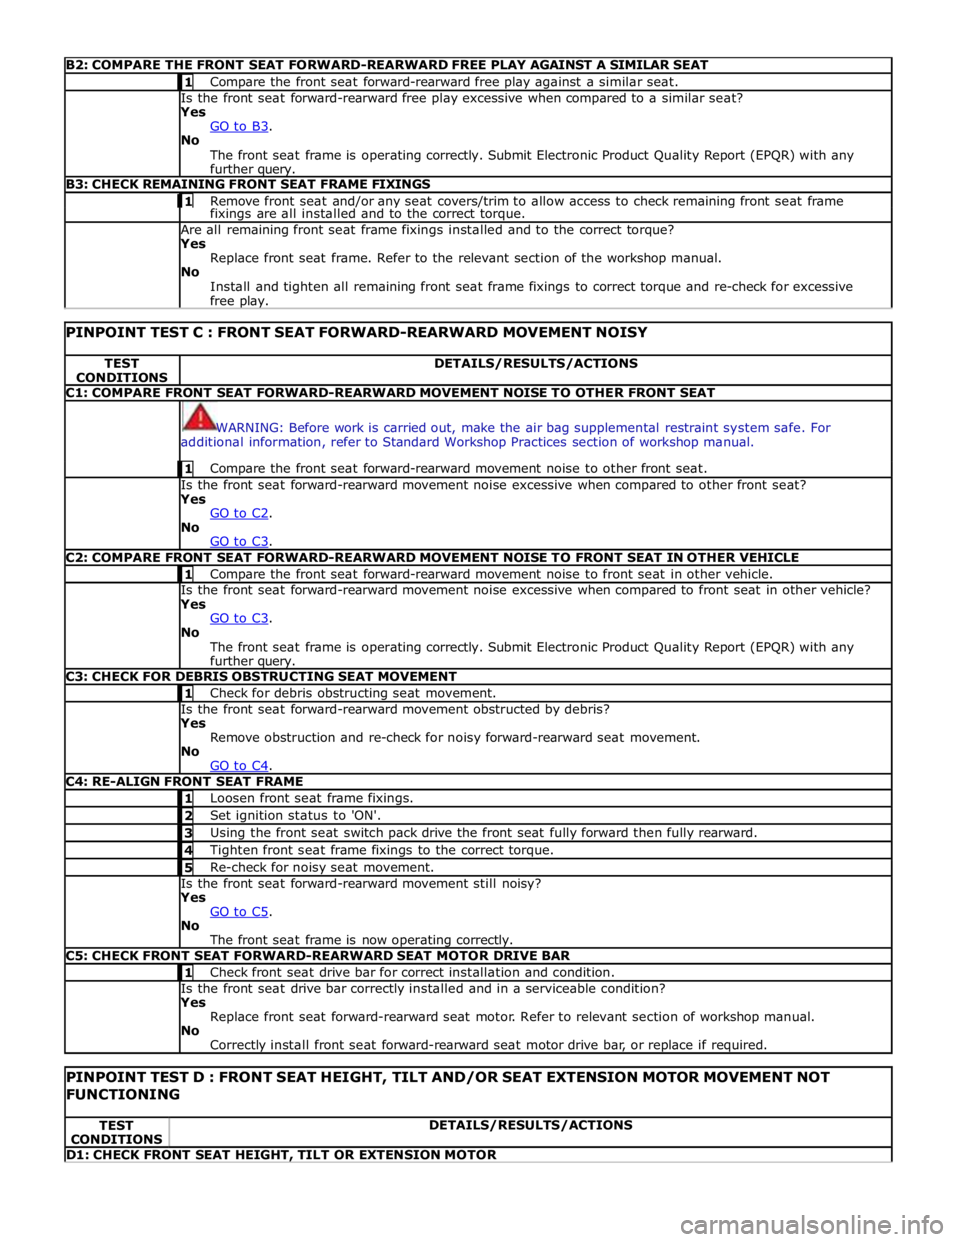
B2: COMPARE THE FRONT SEAT FORWARD-REARWARD FREE PLAY AGAINST A SIMILAR SEAT 1 Compare the front seat forward-rearward free play against a similar seat. Is the front seat forward-rearward free play excessive when compared to a similar seat?
Yes
GO to B3. No
The front seat frame is operating correctly. Submit Electronic Product Quality Report (EPQR) with any
further query. B3: CHECK REMAINING FRONT SEAT FRAME FIXINGS 1 Remove front seat and/or any seat covers/trim to allow access to check remaining front seat frame fixings are all installed and to the correct torque. Are all remaining front seat frame fixings installed and to the correct torque?
Yes
Replace front seat frame. Refer to the relevant section of the workshop manual.
No
Install and tighten all remaining front seat frame fixings to correct torque and re-check for excessive
free play.
PINPOINT TEST C : FRONT SEAT FORWARD-REARWARD MOVEMENT NOISY TEST
CONDITIONS DETAILS/RESULTS/ACTIONS C1: COMPARE FRONT SEAT FORWARD-REARWARD MOVEMENT NOISE TO OTHER FRONT SEAT
WARNING: Before work is carried out, make the air bag supplemental restraint system safe. For
additional information, refer to Standard Workshop Practices section of workshop manual. 1 Compare the front seat forward-rearward movement noise to other front seat. Is the front seat forward-rearward movement noise excessive when compared to other front seat?
Yes
GO to C2. No
GO to C3. C2: COMPARE FRONT SEAT FORWARD-REARWARD MOVEMENT NOISE TO FRONT SEAT IN OTHER VEHICLE 1 Compare the front seat forward-rearward movement noise to front seat in other vehicle. Is the front seat forward-rearward movement noise excessive when compared to front seat in other vehicle?
Yes
GO to C3. No
The front seat frame is operating correctly. Submit Electronic Product Quality Report (EPQR) with any
further query. C3: CHECK FOR DEBRIS OBSTRUCTING SEAT MOVEMENT 1 Check for debris obstructing seat movement. Is the front seat forward-rearward movement obstructed by debris?
Yes
Remove obstruction and re-check for noisy forward-rearward seat movement.
No
GO to C4. C4: RE-ALIGN FRONT SEAT FRAME 1 Loosen front seat frame fixings. 2 Set ignition status to 'ON'. 3 Using the front seat switch pack drive the front seat fully forward then fully rearward. 4 Tighten front seat frame fixings to the correct torque. 5 Re-check for noisy seat movement. Is the front seat forward-rearward movement still noisy?
Yes
GO to C5. No
The front seat frame is now operating correctly. C5: CHECK FRONT SEAT FORWARD-REARWARD SEAT MOTOR DRIVE BAR 1 Check front seat drive bar for correct installation and condition. Is the front seat drive bar correctly installed and in a serviceable condition?
Yes
Replace front seat forward-rearward seat motor. Refer to relevant section of workshop manual.
No
Correctly install front seat forward-rearward seat motor drive bar, or replace if required.
PINPOINT TEST D : FRONT SEAT HEIGHT, TILT AND/OR SEAT EXTENSION MOTOR MOVEMENT NOT FUNCTIONING TEST
CONDITIONS DETAILS/RESULTS/ACTIONS D1: CHECK FRONT SEAT HEIGHT, TILT OR EXTENSION MOTOR
Page 2358 of 3039
10. Disconnect the front seat harness electrical connectors.
Tilt the front seat rearwards to aid disconnecting the
front seat electrical connectors.
11. NOTES:
Make sure no damage is caused to the vehicle trim when
removing the front seat.
Left-hand shown, right-hand similar.
Remove the front seat.
Installation
1. To install, reverse the removal procedure.
TORQUE: 47 Nm
2. NOTE: Some variation in the illustrations may occur, but
the essential information is always correct.
TORQUE: 47 Nm
Page 2361 of 3039
Removal and Installation).
8. Remove the lumbar assembly.
For additional information, refer to: Lumbar Assembly (501-10 Seating, Removal and Installation).
9. Remove the front seat head restraint motor.
For additional information, refer to: Front Seat Head Restraint Motor (501-10 Seating, Removal and Installation).
Installation
1. To install, reverse the removal procedure.
TORQUE: 35 Nm
2. If a new component has been installed, configure using Jaguar approved
diagnostic equipment.
Page 2369 of 3039
7. WARNING: This step requires the aid of another
technician.
CAUTION: Take extra care when handling the
component.
Torque: 35 Nm
8.
9. www.JagDocs.com
Page 2387 of 3039
9.
10. WARNING: This step requires the aid of another
technician.
CAUTION: Take extra care when handling the
component.
Torque: 35 Nm
NOTE: Some variation in the illustrations may occur,
but the essential information is always correct.
Torque: 35 Nm
Page 2427 of 3039
3. WARNING: Do not allow the glass to drop.
NOTE: Left-hand shown, right-hand similar.
4. For additional information, refer to: Front Door Trim Panel (501-05 Interior Trim and Ornamentation, Removal and Installation).
5. NOTE: Right-hand shown, left-hand similar.
6. TORQUE: 7 Nm
Page 2435 of 3039
Published: 11-May-2011
Glass, Frames and Mechanisms - Rear Door Window Regulator and Motor
Removal and Installation
Removal
NOTE: Removal steps in this procedure may contain installation details.
1. Remove the rear door speaker.
Refer to: Rear Door Speaker (415-01A Information and Entertainment System, Removal and Installation).
2.
3. WARNING: Do not allow the glass to drop.
NOTE: The door glass should be lowered by
approximately one third.
Torque: 7 Nm
Installation
1. To install, reverse the removal procedure.