Page 2500 of 3039

Is there momentary power (for approx 8 seconds) between
terminals 5 and 7 left side and 5 and 7 right side when unlocking
the vehicle via the key-fob or smart key? Yes
The vehicle electrical system is unlocking correctly, providing
the signal to the latch GO to C4. No
Refer to the electrical circuit diagrams and investigate why
vehicle electrical system is not providing signals to the latch.
Using the manufacturer approved diagnostic system check for
logged DTCs to localize the fault C4: PHYSICAL TEST 1 1 Remove latch module from door 2 Inspect latch module for any visual damage 3 With the latch in hand, connect the electrical connector(s) to connect door latch to door harness
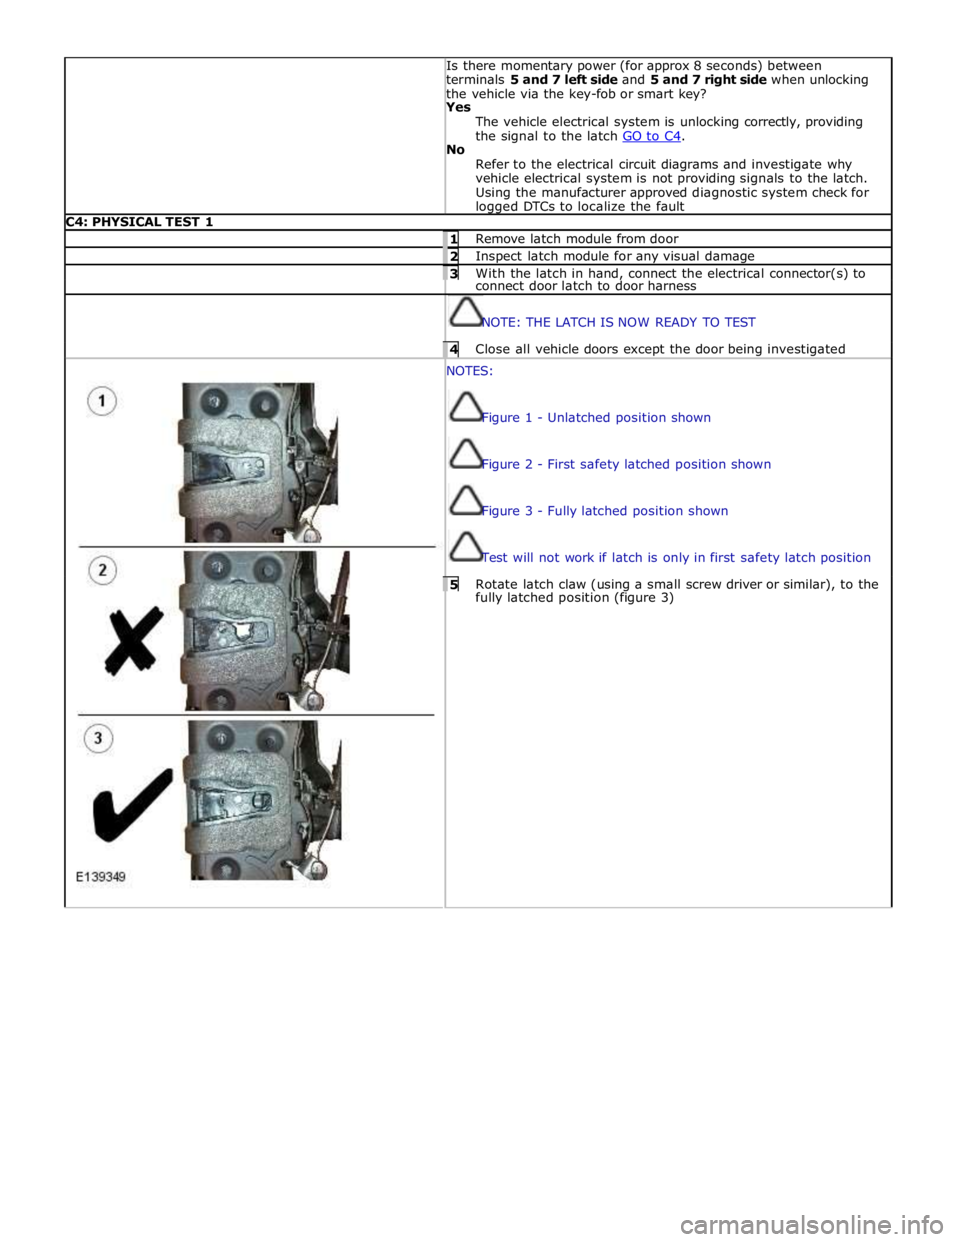
NOTE: THE LATCH IS NOW READY TO TEST 4 Close all vehicle doors except the door being investigated NOTES:
Figure 1 - Unlatched position shown
Figure 2 - First safety latched position shown
Figure 3 - Fully latched position shown
Test will not work if latch is only in first safety latch position 5 Rotate latch claw (using a small screw driver or similar), to the fully latched position (figure 3)
Page 2501 of 3039
NOTE: Unlocked position shown 6 Confirm that the latch interior release lever is in the unlocked position as shown
NOTE: Locked position shown 7 Press the lock button on the key-fob or smart key Does the latch interior release lever move from the unlocked
position to the locked position? Yes
GO to C5. No
If this is a repeat test and the vehicle electrical test section
has been completed and confirmed that vehicle is working
correctly, then replace the door latch. If replacing latch as part
of a warranty claim, please quote reference code LKINOP in
the technician comments section of the warranty claim C5: PHYSICAL TEST 2
Page 2502 of 3039

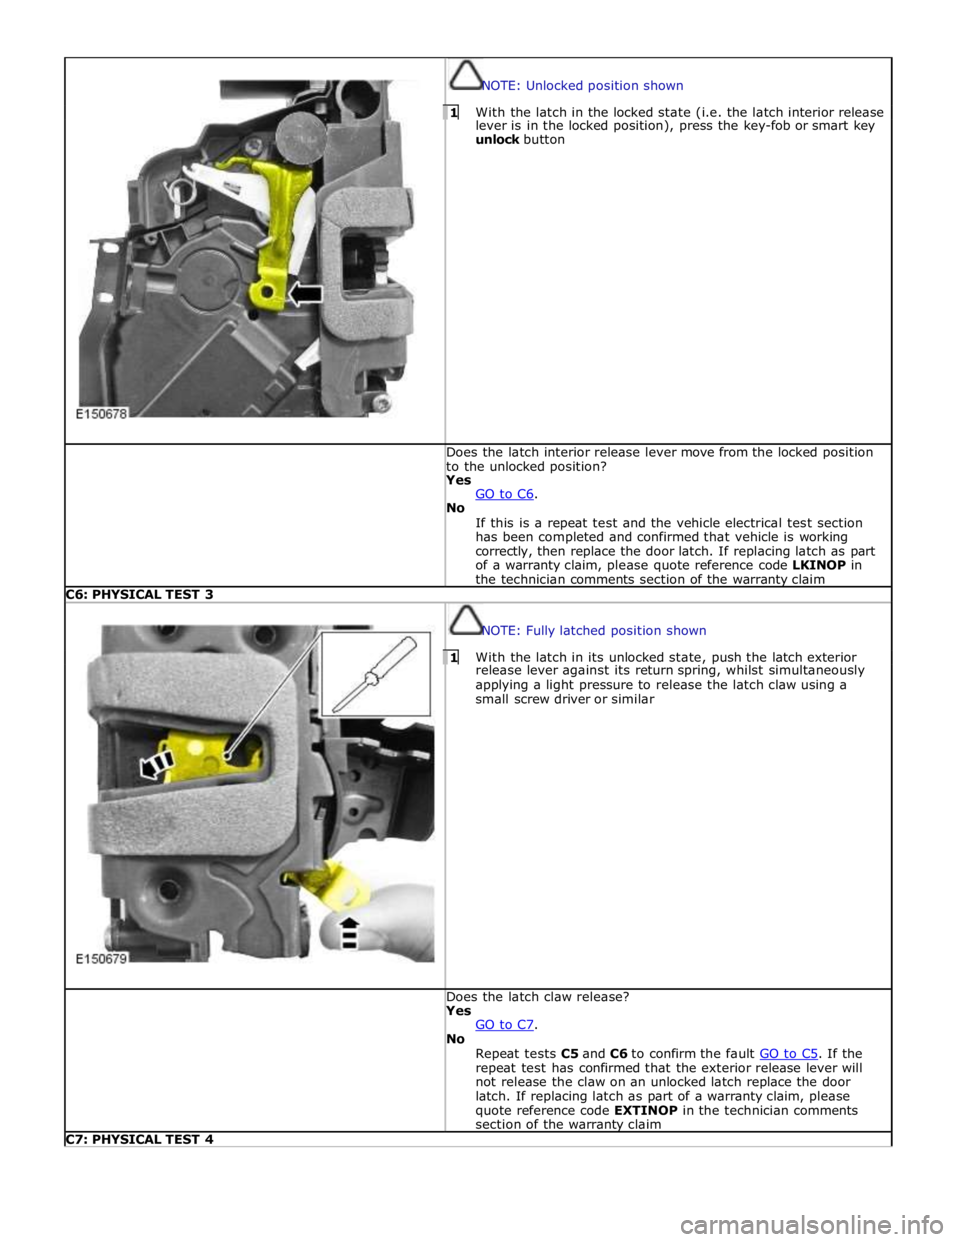
NOTE: Unlocked position shown 1 With the latch in the locked state (i.e. the latch interior release lever is in the locked position), press the key-fob or smart key
unlock button Does the latch interior release lever move from the locked position
to the unlocked position? Yes
GO to C6. No
If this is a repeat test and the vehicle electrical test section
has been completed and confirmed that vehicle is working
correctly, then replace the door latch. If replacing latch as part
of a warranty claim, please quote reference code LKINOP in
the technician comments section of the warranty claim C6: PHYSICAL TEST 3
NOTE: Fully latched position shown 1 With the latch in its unlocked state, push the latch exterior release lever against its return spring, whilst simultaneously
applying a light pressure to release the latch claw using a
small screw driver or similar Does the latch claw release? Yes
GO to C7. No
Repeat tests C5 and C6 to confirm the fault GO to C5. If the repeat test has confirmed that the exterior release lever will
not release the claw on an unlocked latch replace the door
latch. If replacing latch as part of a warranty claim, please
quote reference code EXTINOP in the technician comments
section of the warranty claim C7: PHYSICAL TEST 4
Page 2503 of 3039
NOTE: Fully latched position shown
1 Using a small screw driver or similar, rotate latch claw to the
second fully latched position
NOTE: Figure A - Child lock off position shown
2 If testing a rear door latch, ensure that the child lock is turned
to the off position
Page 2504 of 3039

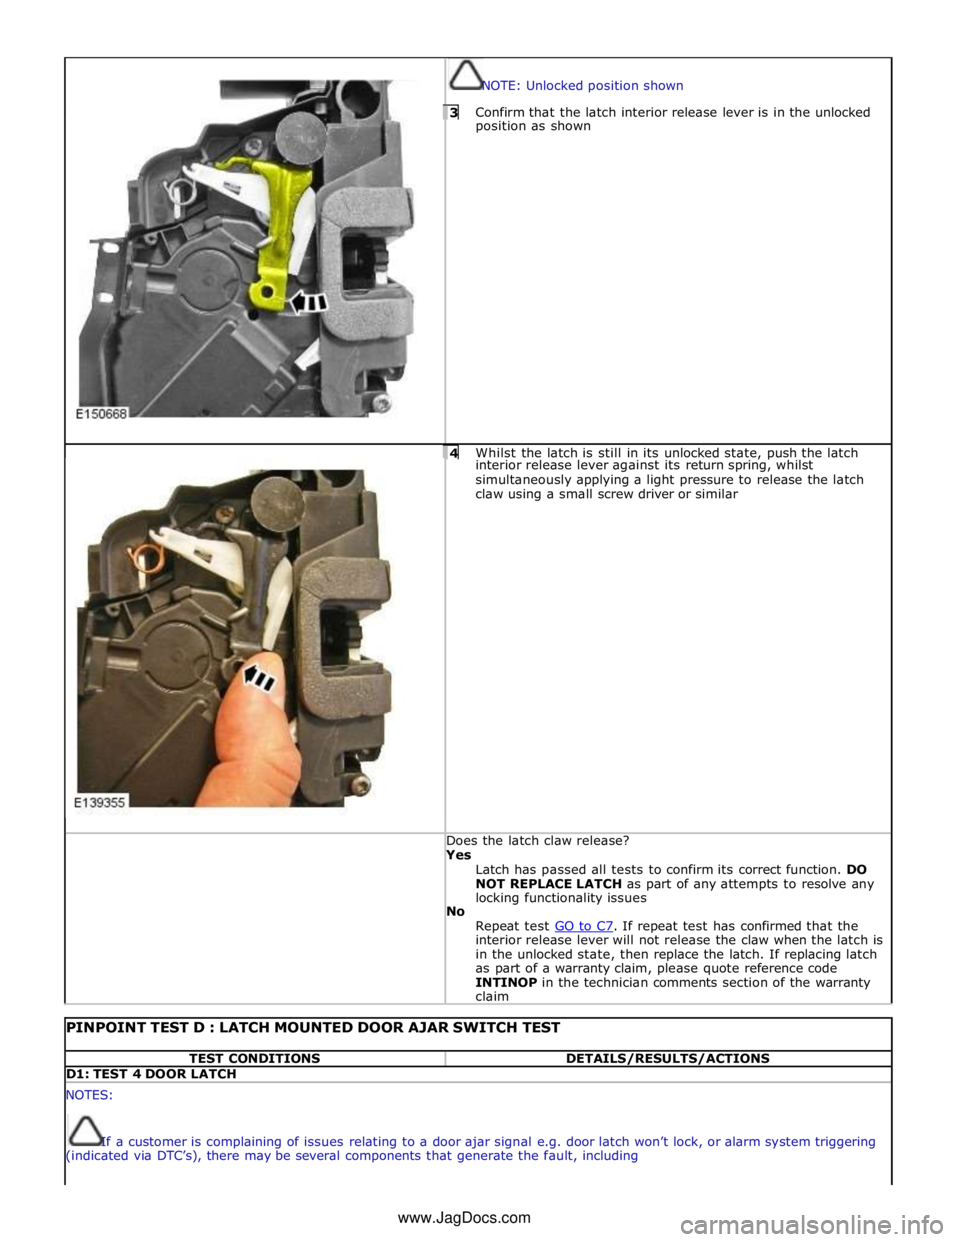
NOTE: Unlocked position shown 3 Confirm that the latch interior release lever is in the unlocked position as shown
4 Whilst the latch is still in its unlocked state, push the latch interior release lever against its return spring, whilst
simultaneously applying a light pressure to release the latch
claw using a small screw driver or similar Does the latch claw release? Yes
Latch has passed all tests to confirm its correct function. DO
NOT REPLACE LATCH as part of any attempts to resolve any
locking functionality issues
No
Repeat test GO to C7. If repeat test has confirmed that the interior release lever will not release the claw when the latch is
in the unlocked state, then replace the latch. If replacing latch
as part of a warranty claim, please quote reference code
INTINOP in the technician comments section of the warranty
claim
PINPOINT TEST D : LATCH MOUNTED DOOR AJAR SWITCH TEST TEST CONDITIONS DETAILS/RESULTS/ACTIONS D1: TEST 4 DOOR LATCH NOTES:
If a customer is complaining of issues relating to a door ajar signal e.g. door latch won’t lock, or alarm system triggering
(indicated via DTC’s), there may be several components that generate the fault, including www.JagDocs.com
Page 2507 of 3039
Published: 11-May-2011
Handles, Locks, Latches and Entry Systems - Door Lock Cylinder Cover
Removal and Installation
Removal
1. CAUTION: Make sure that excessive force is not used.
Failure to follow this instruction may result in damage to
the vehicle.
2.
Page 2508 of 3039
3.
Installation
1. CAUTION: Make sure that the door lock cylinder cover
is pushed firmly in the sequence shown to install all 3 clips,
and that the door lock cylinder cover is securely attached to
the vehicle. Failure to follow this instruction may result in
damage to the vehicle.
Page 2509 of 3039
Published: 11-May-2011
Handles, Locks, Latches and Entry Systems - Exterior Front Door Handle
Removal and Installation
Removal
NOTE: Removal steps in this procedure may contain installation details.
1. NOTE: Remove the screw sufficiently, only to release
the component.
Torque: 4 Nm
2. NOTE: Some variation in the illustrations may occur,
but the essential information is always correct. www.JagDocs.com