Page 2980 of 3039

Rear End Sheet Metal Repairs - Rear Wheelhouse Outer
Removal and Installation
Removal Published: 11-May-2011
1. NOTES:
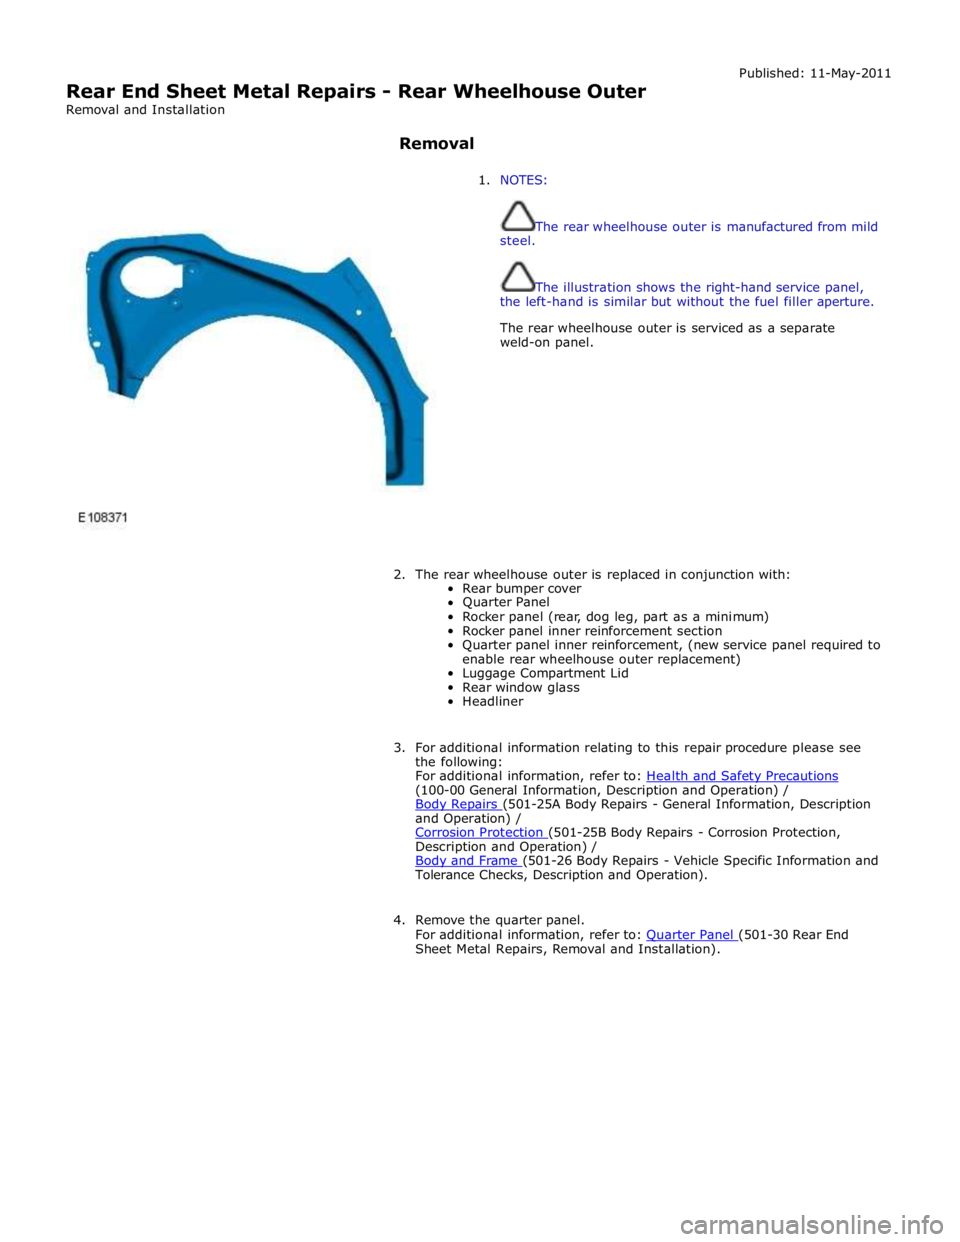
The rear wheelhouse outer is manufactured from mild
steel.
The illustration shows the right-hand service panel,
the left-hand is similar but without the fuel filler aperture.
The rear wheelhouse outer is serviced as a separate
weld-on panel.
2. The rear wheelhouse outer is replaced in conjunction with:
Rear bumper cover
Quarter Panel
Rocker panel (rear, dog leg, part as a minimum)
Rocker panel inner reinforcement section
Quarter panel inner reinforcement, (new service panel required to
enable rear wheelhouse outer replacement)
Luggage Compartment Lid
Rear window glass
Headliner
3. For additional information relating to this repair procedure please see
the following:
For additional information, refer to: Health and Safety Precautions (100-00 General Information, Description and Operation) /
Body Repairs (501-25A Body Repairs - General Information, Description and Operation) /
Corrosion Protection (501-25B Body Repairs - Corrosion Protection, Description and Operation) /
Body and Frame (501-26 Body Repairs - Vehicle Specific Information and Tolerance Checks, Description and Operation).
4. Remove the quarter panel.
For additional information, refer to: Quarter Panel (501-30 Rear End Sheet Metal Repairs, Removal and Installation).
Page 2982 of 3039

12.
13.
14.
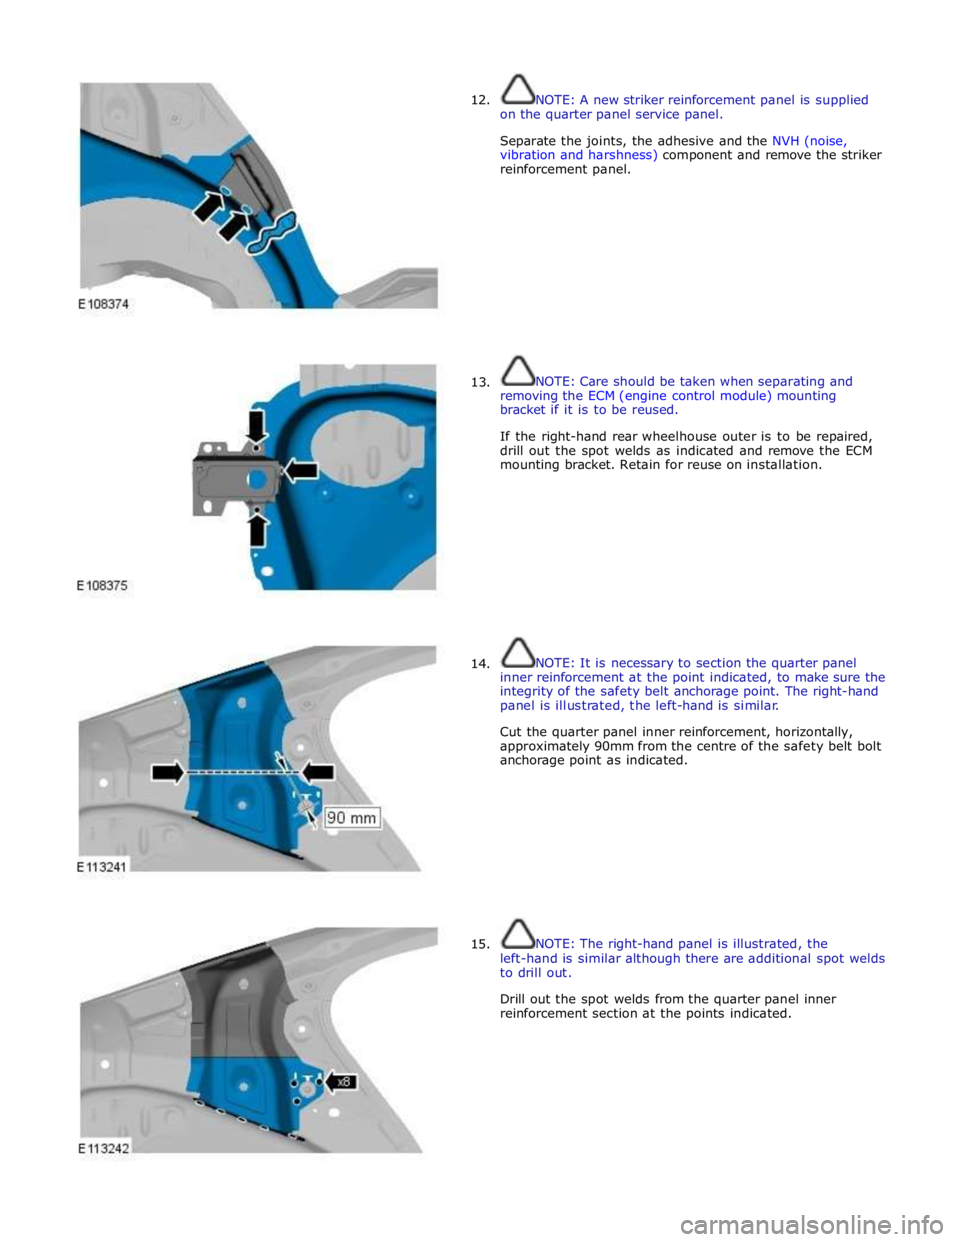
15. NOTE: A new striker reinforcement panel is supplied
on the quarter panel service panel.
Separate the joints, the adhesive and the NVH (noise,
vibration and harshness) component and remove the striker
reinforcement panel.
NOTE: Care should be taken when separating and
removing the ECM (engine control module) mounting
bracket if it is to be reused.
If the right-hand rear wheelhouse outer is to be repaired,
drill out the spot welds as indicated and remove the ECM
mounting bracket. Retain for reuse on installation.
NOTE: It is necessary to section the quarter panel
inner reinforcement at the point indicated, to make sure the
integrity of the safety belt anchorage point. The right-hand
panel is illustrated, the left-hand is similar.
Cut the quarter panel inner reinforcement, horizontally,
approximately 90mm from the centre of the safety belt bolt
anchorage point as indicated.
NOTE: The right-hand panel is illustrated, the
left-hand is similar although there are additional spot welds
to drill out.
Drill out the spot welds from the quarter panel inner
reinforcement section at the points indicated.
Page 2990 of 3039
34.
35. If the right-hand rear wheelhouse outer is being repaired,
prepare the NVH component at the fuel filler aperture,
apply sealer adhesive, and install as indicated.
NOTE: The NVH component at the striker
reinforcement panel should be installed with the new
quarter panel, sealer adhesive should be applied as the
new quarter panel is installed.
Remove the NVH component from the old striker
reinforcement panel, prepare, apply sealer adhesive and
install on the new striker reinforcement panel on the
quarter panel service panel.
Page 2992 of 3039

Rear End Sheet Metal Repairs - Spare Wheel Well
Removal and Installation
Removal Published: 11-May-2011
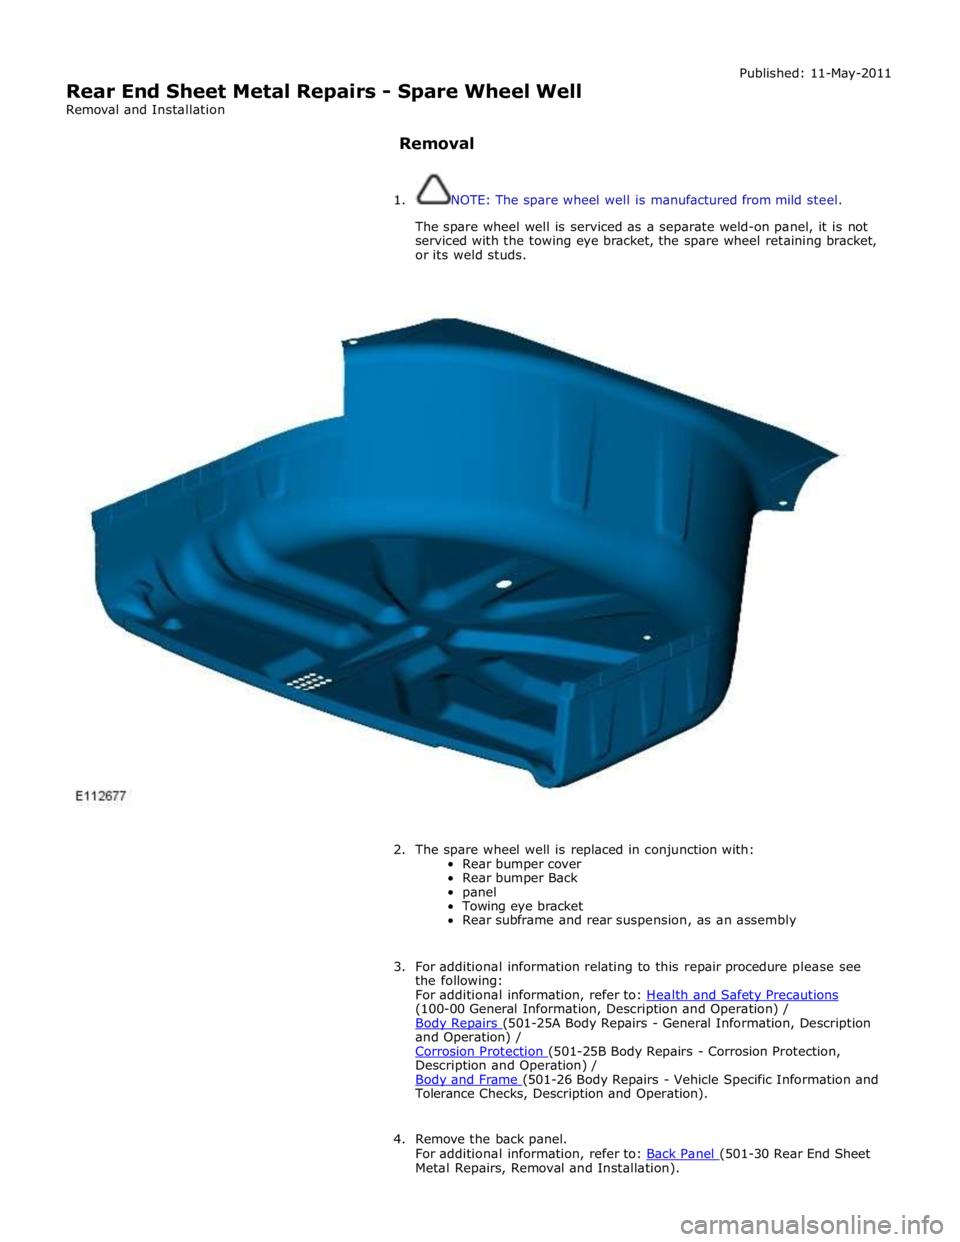
1. NOTE: The spare wheel well is manufactured from mild steel.
The spare wheel well is serviced as a separate weld-on panel, it is not
serviced with the towing eye bracket, the spare wheel retaining bracket,
or its weld studs.
2. The spare wheel well is replaced in conjunction with:
Rear bumper cover
Rear bumper Back
panel
Towing eye bracket
Rear subframe and rear suspension, as an assembly
3. For additional information relating to this repair procedure please see
the following:
For additional information, refer to: Health and Safety Precautions (100-00 General Information, Description and Operation) /
Body Repairs (501-25A Body Repairs - General Information, Description and Operation) /
Corrosion Protection (501-25B Body Repairs - Corrosion Protection, Description and Operation) /
Body and Frame (501-26 Body Repairs - Vehicle Specific Information and Tolerance Checks, Description and Operation).
4. Remove the back panel.
For additional information, refer to: Back Panel (501-30 Rear End Sheet Metal Repairs, Removal and Installation).