Page 3815 of 4210

TM-120
< ECU DIAGNOSIS >
TCM
*1: These numbers are prescribed by SAE J2012.
*2: These malfunctions cannot be displayed MIL if another malfunction is assigned to MIL.
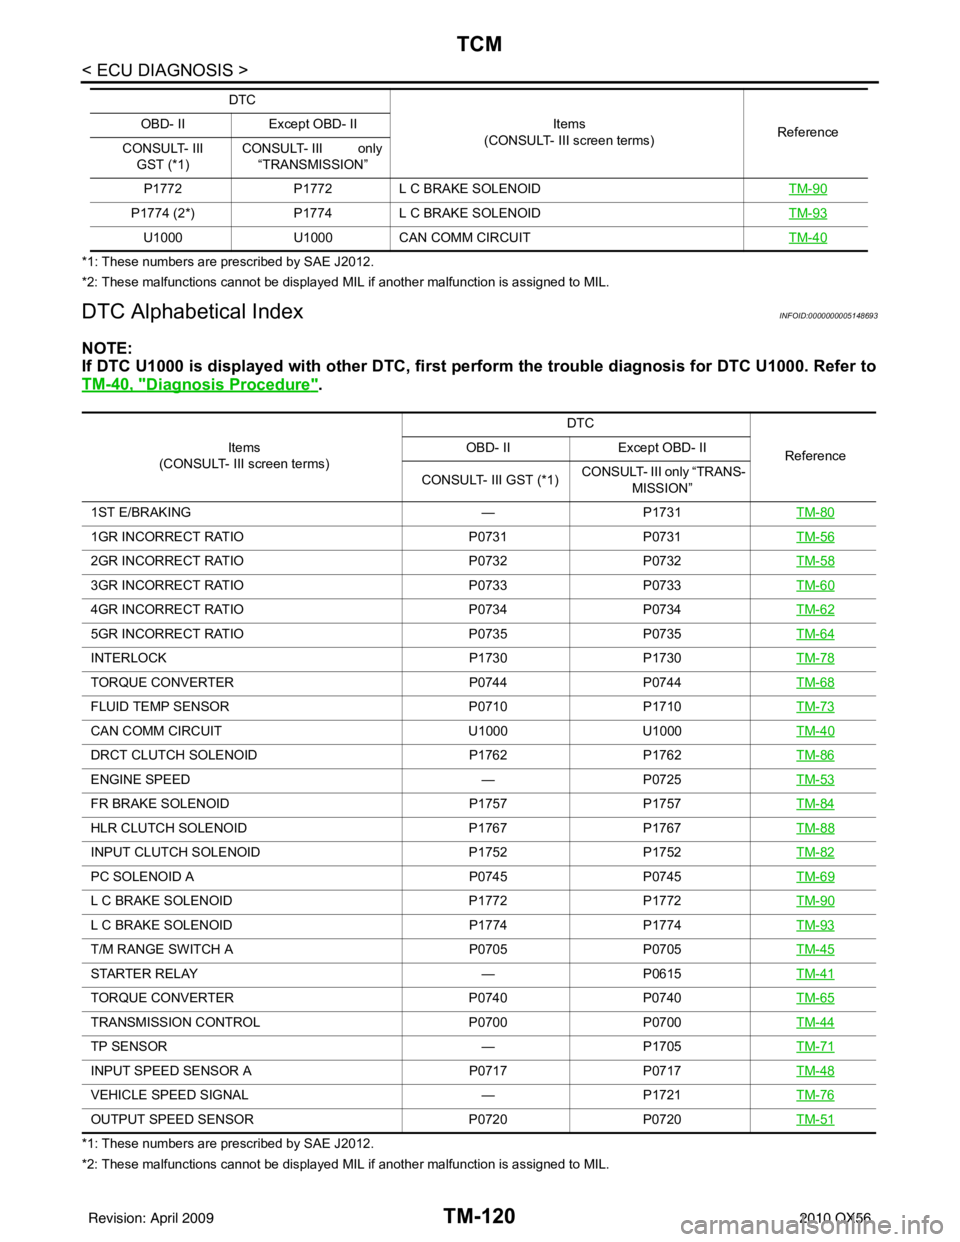
DTC Alphabetical IndexINFOID:0000000005148693
NOTE:
If DTC U1000 is displayed with other DTC, first perform the trouble diagnosis for DTC U1000. Refer to
TM-40, "
Diagnosis Procedure".
*1: These numbers are prescribed by SAE J2012.
*2: These malfunctions cannot be displayed MIL if another malfunction is assigned to MIL. P1772
P1772L C BRAKE SOLENOID TM-90
P1774 (2*) P1774 L C BRAKE SOLENOID TM-93
U1000U1000CAN COMM CIRCUIT TM-40
DTC
Items
(CONSULT- III screen terms) Reference
OBD- II
Except OBD- II
CONSULT- III GST (*1) CONSULT- III only
“TRANSMISSION”
Items
(CONSULT- III screen terms) DTC
Reference
OBD- II
Except OBD- II
CONSULT- III GST (*1) CONSULT- III only “TRANS-
MISSION”
1ST E/BRAKING —P1731TM-80
1GR INCORRECT RATIO P0731P0731TM-56
2GR INCORRECT RATIO P0732P0732TM-58
3GR INCORRECT RATIO P0733P0733TM-60
4GR INCORRECT RATIO P0734P0734TM-62
5GR INCORRECT RATIO P0735P0735TM-64
INTERLOCK P1730P1730TM-78
TORQUE CONVERTER P0744 P0744 TM-68
FLUID TEMP SENSOR P0710P1710TM-73
CAN COMM CIRCUIT U1000U1000TM-40
DRCT CLUTCH SOLENOID P1762P1762 TM-86
ENGINE SPEED —P0725TM-53
FR BRAKE SOLENOID P1757P1757TM-84
HLR CLUTCH SOLENOID P1767P1767TM-88
INPUT CLUTCH SOLENOID P1752P1752TM-82
PC SOLENOID A P0745P0745TM-69
L C BRAKE SOLENOID P1772P1772TM-90
L C BRAKE SOLENOID P1774 P1774 TM-93
T/M RANGE SWITCH A P0705P0705TM-45
STARTER RELAY —P0615TM-41
TORQUE CONVERTER P0740P0740TM-65
TRANSMISSION CONTROL P0700P0700TM-44
TP SENSOR —P1705TM-71
INPUT SPEED SENSOR A P0717P0717TM-48
VEHICLE SPEED SIGNAL —P1721TM-76
OUTPUT SPEED SENSOR P0720P0720TM-51
Revision: April 20092010 QX56
Page 3838 of 4210

PRECAUTIONSTM-143
< PRECAUTION >
CEF
G H
I
J
K L
M A
B
TM
N
O P
PRECAUTION
PRECAUTIONS
Precaution for Supplemental Restraint System (SRS) "AIR BAG" and "SEAT BELT
PRE-TENSIONER"
INFOID:0000000005148716
The Supplemental Restraint System such as “AIR BAG” and “SEAT BELT PRE-TENSIONER”, used along
with a front seat belt, helps to reduce the risk or severi ty of injury to the driver and front passenger for certain
types of collision. This system includes seat belt switch inputs and dual stage front air bag modules. The SRS
system uses the seat belt switches to determine the front air bag deployment, and may only deploy one front
air bag, depending on the severity of a collision and w hether the front occupants are belted or unbelted.
Information necessary to service the system safely is included in the SR and SB section of this Service Man-
ual.
WARNING:
• To avoid rendering the SRS inoper ative, which could increase the risk of personal injury or death in
the event of a collision which would result in air bag inflation, all maintenance must be performed by
an authorized NISSAN/INFINITI dealer.
• Improper maintenance, including in correct removal and installation of the SRS, can lead to personal
injury caused by unintentional act ivation of the system. For removal of Spiral Cable and Air Bag
Module, see the SR section.
• Do not use electrical test equipm ent on any circuit related to the SRS unless instructed to in this
Service Manual. SRS wiring harnesses can be identi fied by yellow and/or orange harnesses or har-
ness connectors.
Precaution for On Board Diagnosis (OBD) System of A/T and EngineINFOID:0000000005148717
The ECM has an on board diagnostic system . It will light up the malfunction indicator lamp (MIL) to warn the
driver of a malfunction causing emission deterioration.
CAUTION:
• Be sure to turn the ignition switch “OFF” and disconnect the negative battery cable before any repair or inspection work. The open/short circuit of related switches, sen sors, solenoid valves, etc. Will
cause the MIL to light up.
• Be sure to connect and lock the connectors secure ly after work. A loose (unlocked) connector will
cause the MIL to light up due to an open circuit. (Be sure the connector is free from water, grease,
dirt, bent terminals, etc.)
• Be sure to route and secure the harnesses properly after work. Interference of the harness with a
bracket, etc. May cause the MIL to li ght up due to a short circuit.
• Be sure to connect rubber tubes properly afte r work. A misconnected or disconnected rubber tube
may cause the MIL to light up due to a malfunction of the EGR system or fuel injection system, etc.
• Be sure to erase the unnecessary malfunction informa tion (repairs completed) from the TCM and
ECM before returning the vehicle to the customer.
PrecautionINFOID:0000000005148718
NOTE:
If any malfunctions occur in th e RE5R05A model transmission, repl ace the entire transmission assem-
bly.
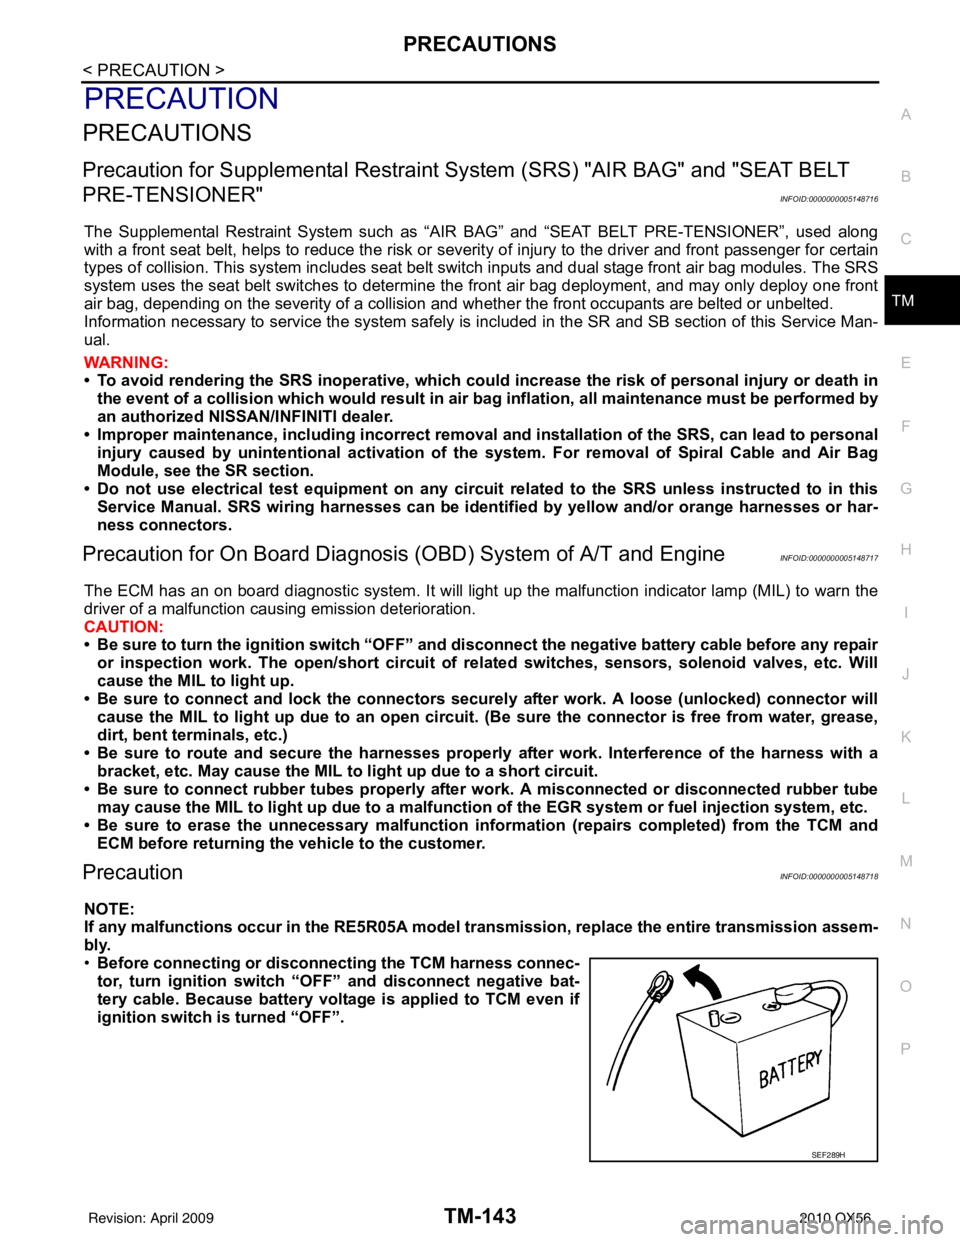
• Before connecting or disconn ecting the TCM harness connec-
tor, turn ignition switch “O FF” and disconnect negative bat-
tery cable. Because battery voltage is applied to TCM even if
ignition switch is turned “OFF”.
SEF289H
Revision: April 20092010 QX56
Page 3850 of 4210

STALL TESTTM-155
< ON-VEHICLE MAINTENANCE >
CEF
G H
I
J
K L
M A
B
TM
N
O P
STALL TEST
Inspection and JudgmentINFOID:0000000005148726
A/T FLUID CHECK
Fluid Leakage and Fluid Level Check
• Inspect for fluid leakage and check the fluid level. Refer to TM-148, "Checking the A/T Fluid (ATF)".
Fluid Condition Check
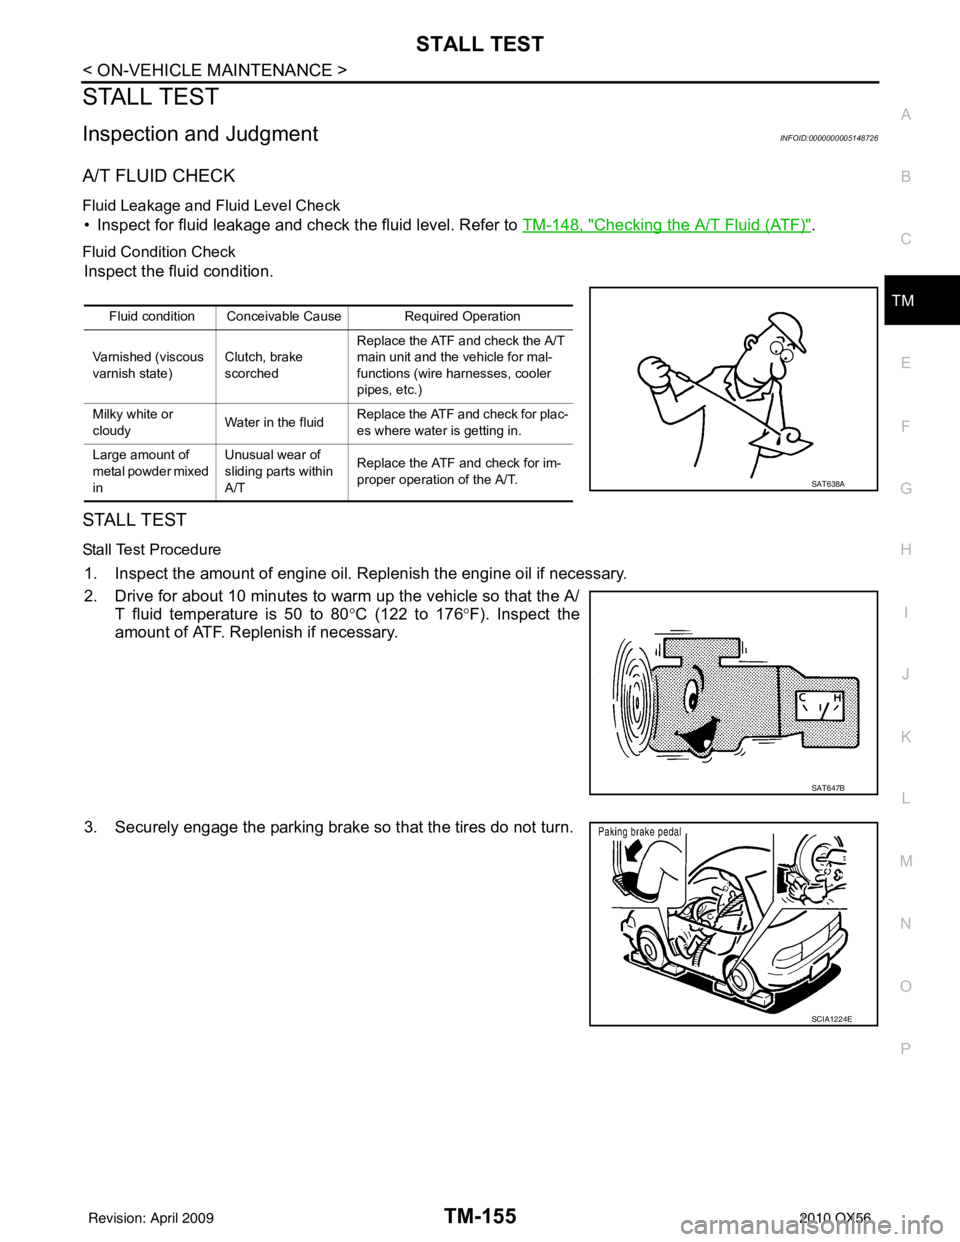
Inspect the fluid condition.
STALL TEST
Stall Test Procedure
1. Inspect the amount of engine oil. Replenish the engine oil if necessary.
2. Drive for about 10 minutes to warm up the vehicle so that the A/
T fluid temperature is 50 to 80 °C (122 to 176 °F). Inspect the
amount of ATF. Replenish if necessary.
3. Securely engage the parking brake so that the tires do not turn.
Fluid condition Conceivable Cause Required Operation
Varnished (viscous
varnish state) Clutch, brake
scorchedReplace the ATF and check the A/T
main unit and the vehicle for mal-
functions (wire harnesses, cooler
pipes, etc.)
Milky white or
cloudy Water in the fluidReplace the ATF and check for plac-
es where water is getting in.
Large amount of
metal powder mixed
in Unusual wear of
sliding parts within
A/T
Replace the ATF and check for im-
proper operation of the A/T.
SAT638A
SAT647B
SCIA1224E
Revision: April 20092010 QX56
Page 3852 of 4210
LINE PRESSURE TESTTM-157
< ON-VEHICLE MAINTENANCE >
CEF
G H
I
J
K L
M A
B
TM
N
O P
LINE PRESSURE TEST
Inspection and JudgmentINFOID:0000000005148727
LINE PRESSURE TEST
Line Pressure Test Port
Line Pressure Test Procedure
1. Inspect the amount of engine oil and replenish if necessary.
2. Drive the car for about 10 minutes to warm it up so that the ATF reaches in range of 50 to 80 °C (122 to
176° F), then inspect the amount of ATF and replenish if necessary.
NOTE:
The automatic fluid temperature rises in range of 50 to 80 °C (122 to 176° F) during 10 minutes of
driving.
3. After warming up remove the oil pressure detection plug and install the Tool.
CAUTION:
When using the oil pressure ga uge, be sure to use the O-
ring attached to the oil pressure detection plug.
4. Securely engage the parking brake so that the tires do not turn.
SCIA2187E
SCIA5309E
SCIA1224E
Revision: April 20092010 QX56
Page 3861 of 4210
TM-166
< ON-VEHICLE REPAIR >
AIR BREATHER HOSE
AIR BREATHER HOSE
Removal and InstallationINFOID:0000000005402587
REMOVAL and INSTALLATION
2WD
CAUTION:
• Install air breather hose with paint mark at upper side.
• When installing the air breather hose, do not crush or block by folding or bending the hose.
• When inserting the hose to the tran smission tube, be sure to insert it fully until its end reaches the
tube bend portion.
• Make sure clip is securely installed to bracket.
REMOVAL
AWDIA0554GB
A. Set air breather hose with
paint mark at upper side B. Clip (set securely to bracket)
Revision: April 20092010 QX56
Page 3873 of 4210
TM-178
< ON-VEHICLE REPAIR >
CONTROL VALVE WITH TCM
i. Install new O-ring (1) in plug (2).CAUTION:
• Do not reuse O-ring.
• Apply ATF to O-ring.
• O-ring should be free of contamination.
ii. Install plug (2) to bracket (1).
iii. Install plug (1) [with bracket (2)] to control valve with TCM. Tighten plug bolt ( ) to the specified torque.
CAUTION:
Adjust bolt hole of bracket to bolt hole of control valve with
TCM.
6. Install control valve with TCM in transmission case. CAUTION:
• Make sure that input speed sensor is securely installedinto input speed sensor hole (A).
• Hang down output speed sen sor harness toward outside
so as not to disturb installati on of control valve with TCM.
• Adjust A/T assembly harness co nnector of control valve
with TCM to terminal hole of transmission case.
• Assemble it so that manual valve cutout is engaged with manual plate projection.
JSDIA1313ZZ
JSDIA1312ZZ
JSDIA1311ZZ
1 : Brake band
JSDIA1318ZZ
SCIA5142E
Revision: April 20092010 QX56
Page 3874 of 4210

CONTROL VALVE WITH TCMTM-179
< ON-VEHICLE REPAIR >
CEF
G H
I
J
K L
M A
B
TM
N
O P
7. Install bolts (A), (B) and (C) in control valve with TCM. • : Front
8. Tighten bolt (1), (2) and (3) temporarily to prevent dislocation. After that tighten them in order (1 → 2 → 3). Then tighten other
bolts.
• : Front
9. Tighten control valve with TCM bolts to the specified torque.
10. After installing the A/T fluid temperature sensor 2, connect the A/T fluid temperature sensor 2 connector
as shown below.
a. Connect A/T fluid temperature sensor 2 connector (A).
b. Securely fasten terminal cord assembly and A/T fluid tempera- ture sensor 2 harness with terminal clips ( ).
11. Connect output speed sensor connector (1).
Bolt symbol Length mm (in) Number of bolts
A 42 (1.65) 5
B 55 (2.17) 6
C 40 (1.57) 1
SCIA8074E
Bolt symbolAB C
Number of bolts 56 1
Length mm (in) 42 (1.65) 55 (2.17)40 (1.57)
Tightening torque
N·m (km-g, in-lb) 7.9 (0.81, 70)With ATF applied
7.9 (0.81, 70)
SCIA8075E
SCIA8124E
JSDIA1319ZZ
Revision: April 20092010 QX56
Page 3875 of 4210
TM-180
< ON-VEHICLE REPAIR >
CONTROL VALVE WITH TCM
12. Securely fasten output speed sensor (1) harness with terminalclip ( ).
13. Install oil pan to transmission case. Refer to TM-170, "
Oil Pan".
14. Pull up A/T assembly harness connector. CAUTION:
Do not damage connector.
15. Install snap ring to A/T assembly harness connector.
16. Connect A/T assembly harness connector.
17. Connect the negative battery terminal.
18. Refill the A/T with fluid and check the fluid level and for fluid leakage. Refer to TM-148, "
Checking the A/T Fluid (ATF)".
REMOVAL AND INSTALLATION OF A/T FLUID TEMPERATURE SENSOR 2
Removal
1. Disconnect negative battery terminal.
2. Remove oil pan and oil pan gasket. Refer to TM-170, "
Oil Pan".
3. Disconnect A/T fluid temperat ure sensor 2 connector (A).
CAUTION:
Do not damage connector.
4. Straighten terminal clip ( ) to free A/T fluid temperature sensor 2 harness.
JSDIA1316ZZ
SCIA5038E
SCIA5039E
SCIA8125E
Revision: April 20092010 QX56