Page 429 of 526
Unscrew and remove the engine oil
fill cap on top of the valve cover.
Pour in the oil slowly and caref ully so
you do not spill. Clean up any spills
immediately. Spilled oil could
damage components in the engine
compartment.Oil is a major contributor to your
engine’s perf ormance and longevity.
Always use a premium-grade 5W-20
detergent oil displaying the API
Certif ication Seal. This seal indicates
the oil is energy conserving, and that
it meets the American Petroleum
Institute’s latest requirements.
Reinstall the engine oil f ill cap, and
tighten it securely. Wait a f ew
minutes, and recheck the oil level on
the engine oil dipstick. Do not f ill
above the upper mark; you could
damage the engine.
A dding Engine Oil
Recommended Engine Oil
426
ENGINE OIL FILL CAP
API CERTIFICATION SEAL
�����—�����—�
���y�
�������������y���
�(�����������y�������
�y
2010 Odyssey
Page 430 of 526
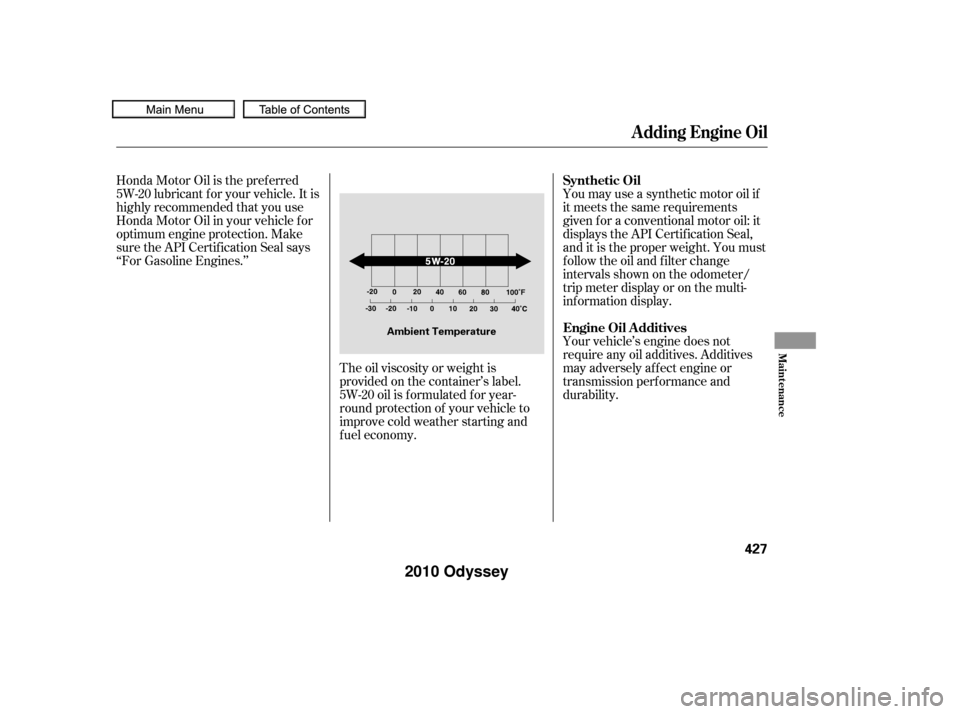
Honda Motor Oil is the pref erred
5W-20 lubricant f or your vehicle. It is
highly recommended that you use
Honda Motor Oil in your vehicle f or
optimum engine protection. Make
sure the API Certif ication Seal says
‘‘For Gasoline Engines.’’You may use a synthetic motor oil if
it meets the same requirements
given f or a conventional motor oil: it
displays the API Certif ication Seal,
and it is the proper weight. You must
f ollow the oil and f ilter change
intervals shown on the odometer/
trip meter display or on the multi-
inf ormation display.
Your vehicle’s engine does not
require any oil additives. Additives
may adversely af f ect engine or
transmission perf ormance and
durability.
The oil viscosity or weight is
provided on the container’s label.
5W-20 oil is f ormulated f or year-
round protection of your vehicle to
improve cold weather starting and
f uel economy.
A dding Engine Oil
Synthetic Oil
Engine Oil A dditives
Maint enance
427
Ambient Temperature
�����—�����—�
���y�
�����������
�y���
�(�����������y���������y
2010 Odyssey
Page 431 of 526
Always change the oil and f ilter
according to the maintenance
messages shown on the odometer/
trip meter display or on the multi-
inf ormation display. The oil and f ilter
collect contaminants that can dam-
age your engine if they are not
removed regularly.
Changing the oil and f ilter requires
special tools and access f rom
underneath the vehicle. The vehicle
should be raised on a service station-
type hydraulic lif t f or this service.
Unless you have the knowledge and
proper equipment, you should have
this maintenance done by a skilled
technician.Run the engine until it reaches
normal operating temperature,
then shut it off.
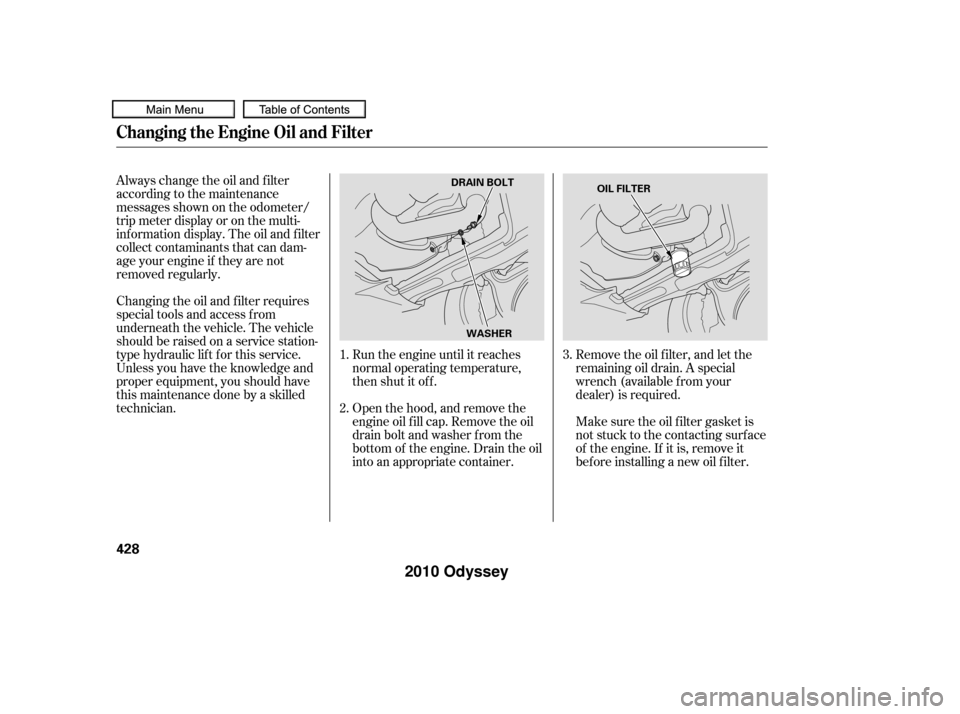
Open the hood, and remove the
engine oil f ill cap. Remove the oil
drain bolt and washer f rom the
bottom of the engine. Drain the oil
into an appropriate container.Remove the oil f ilter, and let the
remaining oil drain. A special
wrench (available from your
dealer) is required.
Make sure the oil f ilter gasket is
not stuck to the contacting surface
of the engine. If it is, remove it
bef ore installing a new oil f ilter.
1.
2.
3.
Changing the Engine Oil and Filter
428
WASHER
DRAIN BOLT
OIL FILTER
�����—�����—�
���y�
�������������y���
�(�����������y���������y
2010 Odyssey
Page 435 of 526
Check the f luid level in the
windshield washer reservoir at least
monthly during normal use. This
reservoir supplies the windshield and
rear window washers.
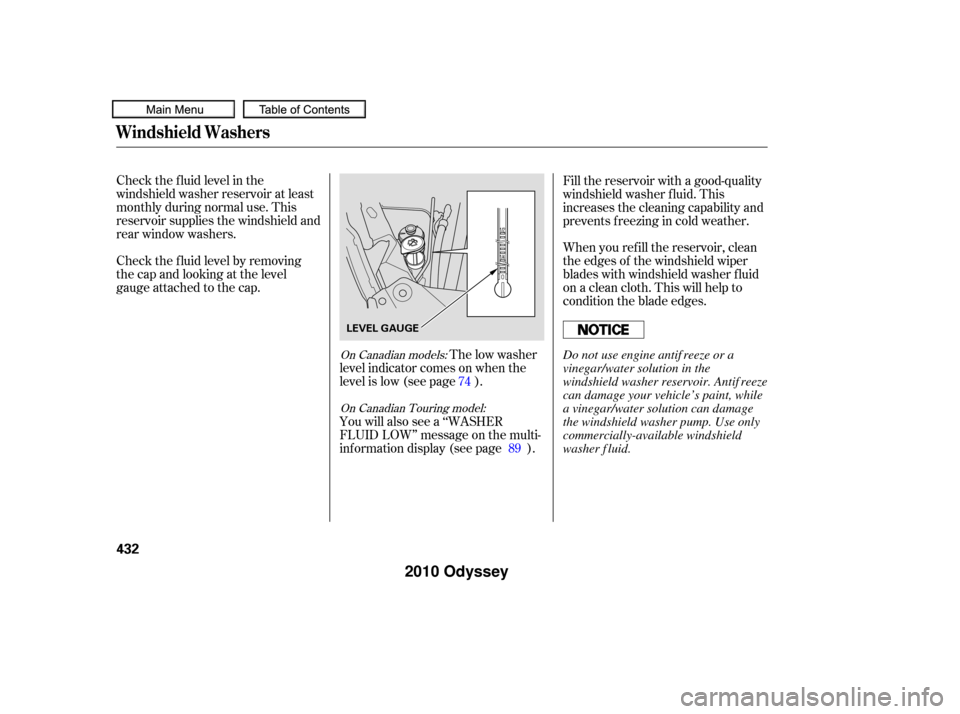
Check the f luid level by removing
the cap and looking at the level
gauge attached to the cap.The low washer
level indicator comes on when the
level is low (see page ).
You will also see a ‘‘WASHER
FLUID LOW’’ message on the multi-
inf ormation display (see page ). Fill the reservoir with a good-quality
windshield washer f luid. This
increases the cleaning capability and
prevents f reezing in cold weather.
When you ref ill the reservoir, clean
the edges of the windshield wiper
blades with windshield washer f luid
on a clean cloth. This will help to
condition the blade edges.
89
74
On Canadian models:
On Canadian Touring model:
Windshield Washers
432
LEVEL GAUGE
Do not use engine antif reeze or a
vinegar/water solution in the
windshield washer reservoir. Antif reeze
can damage your vehicle’s paint, while
a vinegar/water solution can damage
the windshield washer pump. Use only
commercially-available windshield
washer f luid.
�����—�����—�
���y�
�������������y���
�(�����������y���������y
2010 Odyssey
Page 437 of 526

Pour the f luid slowly and caref ully so
you do not spill any. Clean up any
spill immediately; it could damage
components in the engine
compartment.
If the level is below the lower
mark, add f luid into the dipstick
tube to bring it to the level
between the upper and lower
marks on the dipstick.
Always use Honda Genuine ATF-Z1
(automatic transmission f luid). Insert the dipstick all the way back
into the transmission securely as
shown in the illustration.
Make sure the rubber cap on the
dipstick fits in the dipstick guide
and that you push the dipstick in
all the way.
The transmission should be drained
and ref illed with new f luid when this
service is indicated on a maintenance
message on the inf ormation display
or on the multi-inf ormation display
(depending on models).
If you are not sure how to add f luid,
contact your dealer.
5.
6.
Automatic Transmission Fluid
434
Use only Honda Genuine ATF-Z1
(automatic transmission f luid). Do not
mix with other transmission f luids.
Using transmission f luid other than
Honda Genuine ATF-Z1 may cause
deterioration in transmission operation
and durability, and could result in
damage to the transmission.
Damage resulting f rom the use of
transmission f luid other than Honda
Genuine ATF-Z1 is not covered by the
Honda new vehicle warranty.
�����—�����—�
���y�
�������������y���
�(�����������y���������y
2010 Odyssey
Page 447 of 526
If your seat belts get dirty, use a sof t
brush with a mixture of mild soap
and warm water to clean them. Do
not use bleach, dye, or cleaning
solvents. Let the belts air dry bef ore
you use the vehicle.
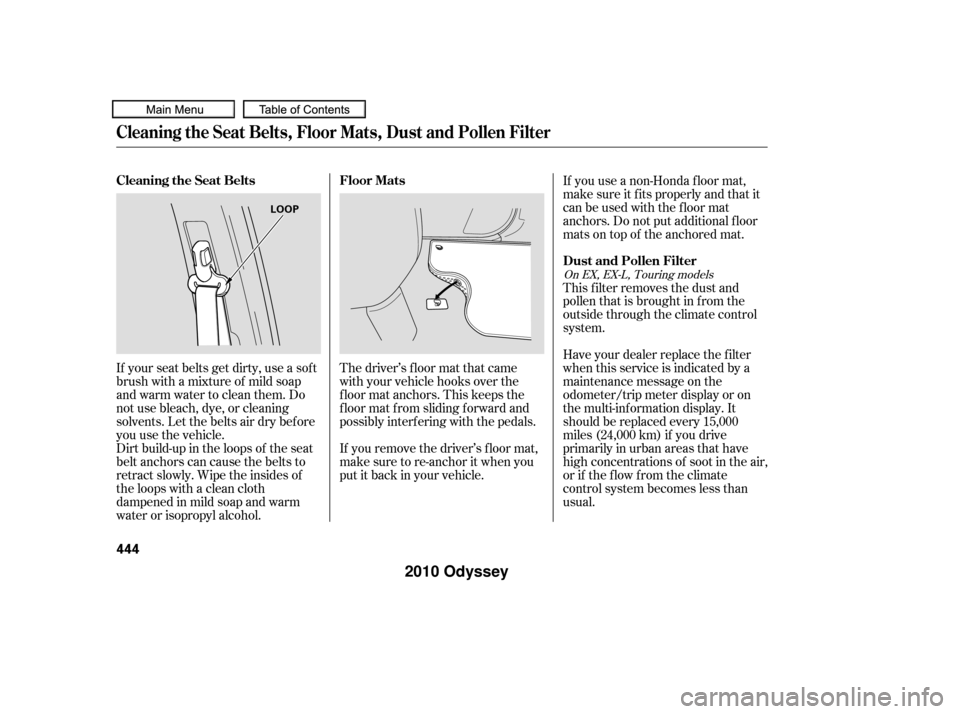
Dirt build-up in the loops of the seat
belt anchors can cause the belts to
retract slowly. Wipe the insides of
the loops with a clean cloth
dampened in mild soap and warm
water or isopropyl alcohol.If you remove the driver’s f loor mat,
make sure to re-anchor it when you
putitbackinyourvehicle. The driver’s f loor mat that came
with your vehicle hooks over the
f loor mat anchors. This keeps the
f loor mat f rom sliding f orward and
possibly interf ering with the pedals.If you use a non-Honda f loor mat,
make sure it f its properly and that it
canbeusedwiththefloormat
anchors. Do not put additional f loor
mats on top of the anchored mat.
This f ilter removes the dust and
pollenthatisbroughtinfromthe
outside through the climate control
system.
Have your dealer replace the filter
when this service is indicated by a
maintenance message on the
odometer/trip meter display or on
the multi-information display. It
should be replaced every 15,000
miles (24,000 km) if you drive
primarily in urban areas that have
high concentrations of soot in the air,
or if the f low f rom the climate
control system becomes less than
usual.
On EX, EX-L, Touring models
Floor Mats
Cleaning the Seat Belts
Dust and Pollen Filter
Cleaning the Seat Belts, Floor Mats, Dust and Pollen Filter
444
LOOP
�����—�����—�
���y�
���������
�
�y���
�(�����������y���������y
2010 Odyssey
Page 456 of 526
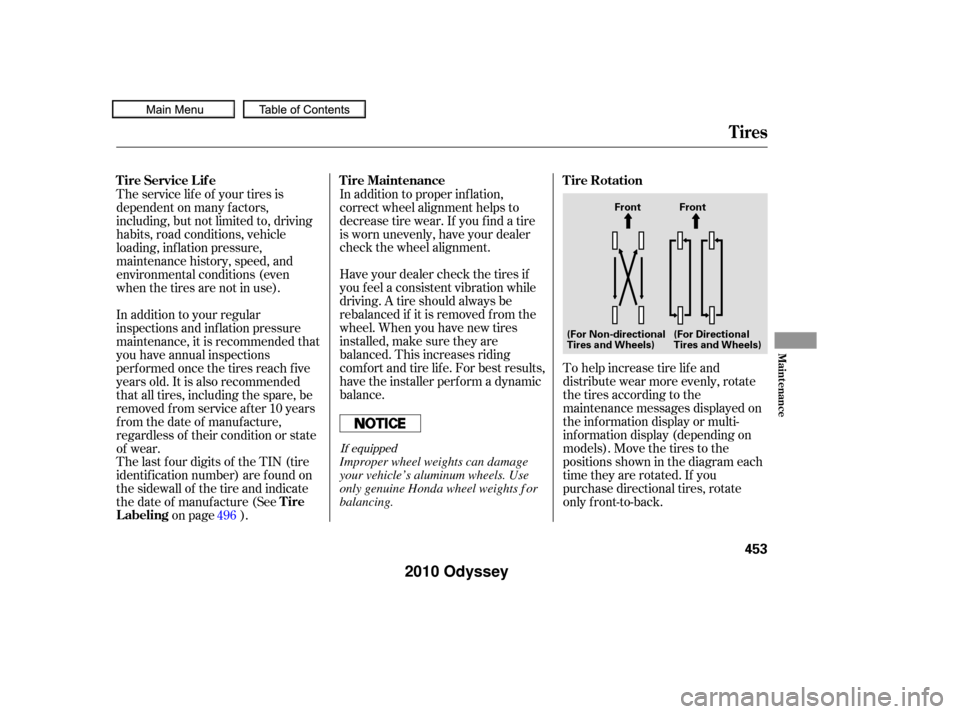
To help increase tire lif e and
distribute wear more evenly, rotate
the tires according to the
maintenance messages displayed on
the inf ormation display or multi-
inf ormation display (depending on
models). Move the tires to the
positions shown in the diagram each
time they are rotated. If you
purchase directional tires, rotate
only f ront-to-back.
In addition to proper inf lation,
correct wheel alignment helps to
decrease tire wear. If you f ind a tire
is worn unevenly, have your dealer
check the wheel alignment.
Have your dealer check the tires if
you f eel a consistent vibration while
driving. A tire should always be
rebalanced if it is removed f rom the
wheel. When you have new tires
installed, make sure they are
balanced. This increases riding
comf ort and tire lif e. For best results,
have the installer perform a dynamic
balance.
The service lif e of your tires is
dependent on many f actors,
including, but not limited to, driving
habits, road conditions, vehicle
loading, inf lation pressure,
maintenance history, speed, and
environmental conditions (even
when the tires are not in use).
The last f our digits of the TIN (tire
identif ication number) are f ound on
the sidewall of the tire and indicate
the date of manufacture (See
on page ).
In addition to your regular
inspections and inf lation pressure
maintenance, it is recommended that
you have annual inspections
perf ormed once the tires reach f ive
years old. It is also recommended
that all tires, including the spare, be
removed from service after 10 years
from the date of manufacture,
regardless of their condition or state
of wear.
496
If equipped
Tires
Tire Rotation
T ire Maintenance
Tire Service Lif e
Tire
Labeling
Maint enance
453
Front Front
(For Non-directional
Tires and Wheels) (For Directional
Tires and Wheels)
Improper wheel weights can damage
your vehicle’s aluminum wheels. Use
only genuine Honda wheel weights f or
balancing.
�����—�����—�
���y�
�������������y���
�(�����������y���������y
2010 Odyssey
Page 465 of 526
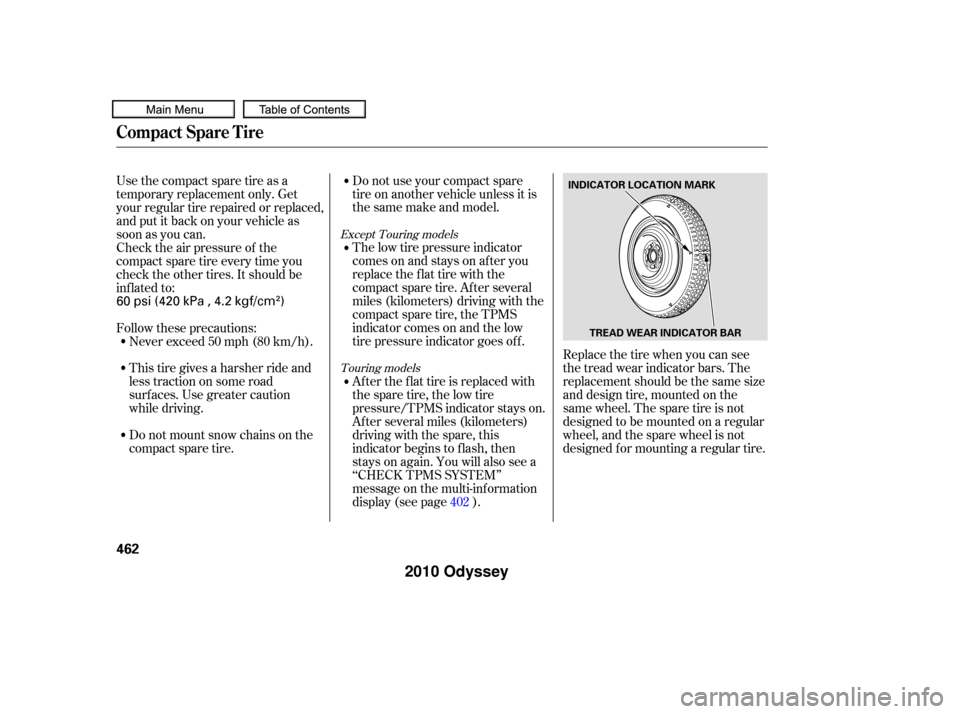
Replace the tire when you can see
the tread wear indicator bars. The
replacement should be the same size
and design tire, mounted on the
same wheel. The spare tire is not
designed to be mounted on a regular
wheel, and the spare wheel is not
designed f or mounting a regular tire.
Do not use your compact spare
tire on another vehicle unless it is
thesamemakeandmodel.
The low tire pressure indicator
comes on and stays on af ter you
replace the flat tire with the
compact spare tire. Af ter several
miles (kilometers) driving with the
compact spare tire, the TPMS
indicator comes on and the low
tire pressure indicator goes of f .
After the flat tire is replaced with
the spare tire, the low tire
pressure/TPMS indicator stays on.
Af ter several miles (kilometers)
driving with the spare, this
indicator begins to f lash, then
stays on again. You will also see a
‘‘CHECK TPMS SYSTEM’’
message on the multi-inf ormation
display (see page ).
Use the compact spare tire as a
temporary replacement only. Get
your regular tire repaired or replaced,
and put it back on your vehicle as
soon as you can.
Check the air pressure of the
compact spare tire every time you
check the other tires. It should be
inf lated to:
Follow these precautions:
Never exceed 50 mph (80 km/h).
This tire gives a harsher ride and
less traction on some road
surf aces. Use greater caution
while driving.
Do not mount snow chains on the
compact spare tire.
402
Except Touring models
Touring models
Compact Spare Tire
462
INDICATOR LOCATION MARK
TREAD WEAR INDICATOR BAR
60 psi (420 kPa , 4.2 kgf/cm)
�����—�����—�
���y�
������
������y���
�(�����������y���������y
2010 Odyssey