Page 308 of 526

�Ý�Û
Audio Language
If you select ‘‘Yes,’’ the display
changes to the language code input
mode. Select the f irst number digit
usingthe,,,or button, and press the ENT
button to enter it. Repeat this until all
f our digits are f illed. When the
f ourth digit is entered, the cursor
automatically moves to ‘‘ENT’’ on the
display. Press the ENT button on the
control panel to enter the new
language code. If you made a mistake entering a
number digit, select ‘‘DEL’’ on the
display with the , , ,
or button, and press the ENT
buttononthecontrolpanel.Then
select and enter the correct number
digit as described. The display
returns to the initial ‘‘Language’’
menu screen.
You can select the dubbed language
bef ore playing DVDs.
Select ‘‘Audio Language’’ by pressing
the or button. You will see the
submenu next to ‘‘Audio Language.’’
Follow the same instructions you
used to set the menu language.
CONT INUED
Rear Entertainment System
Features
305
�����—�����—�
���y�
�������������y���
�(�����������y�����
���y
2010 Odyssey
Page 310 of 526
�Ý�Û�Ý�Û
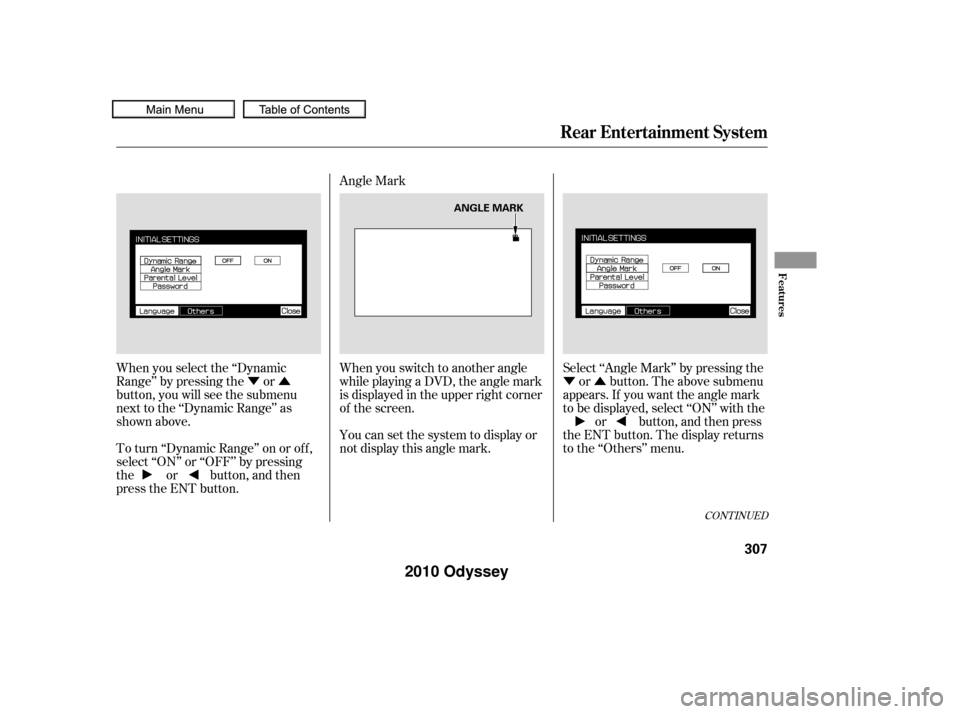
When you select the ‘‘Dynamic
Range’’ by pressing the or
button, you will see the submenu
next to the ‘‘Dynamic Range’’ as
shown above.
To turn ‘‘Dynamic Range’’ on or of f ,
select ‘‘ON’’ or ‘‘OFF’’ by pressing
the or button, and then
press the ENT button. Angle Mark
When you switch to another angle
while playing a DVD, the angle mark
is displayed in the upper right corner
of the screen.
You can set the system to display or
not display this angle mark.
Select ‘‘Angle Mark’’ by pressing the
or button. The above submenu
appears. If you want the angle mark
to be displayed, select ‘‘ON’’ with the or button, and then press
the ENT button. The display returns
to the ‘‘Others’’ menu.
CONT INUED
Rear Entertainment System
Features
307
ANGLE MARK
�����—�����—�
���y�
�������������y���
�(�����������y�����
���y
2010 Odyssey
Page 311 of 526
�Ý�Û
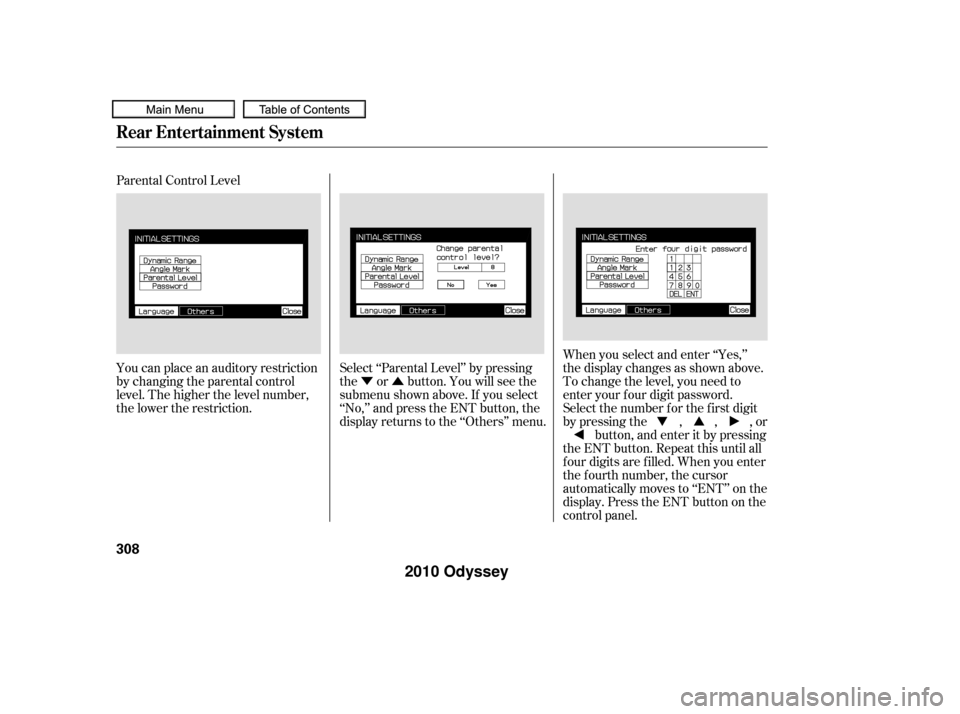
Parental Control Level
You can place an auditory restriction
by changing the parental control
level. The higher the level number,
the lower the restriction.
Select ‘‘Parental Level’’ by pressing
the or button. You will see the
submenu shown above. If you select
‘‘No,’’ and press the ENT button, the
display returns to the ‘‘Others’’ menu.When you select and enter ‘‘Yes,’’
the display changes as shown above.
To change the level, you need to
enter your f our digit password.
Select the number f or the f irst digit
by pressing the , , , or
button, and enter it by pressing
the ENT button. Repeat this until all
f our digits are f illed. When you enter
the f ourth number, the cursor
automatically moves to ‘‘ENT’’ on the
display. Press the ENT button on the
control panel.
Rear Entertainment System
308
�����—�����—�
���y�
���������
���y���
�(�����������y�����
���y
2010 Odyssey
Page 312 of 526
�Ý�Û
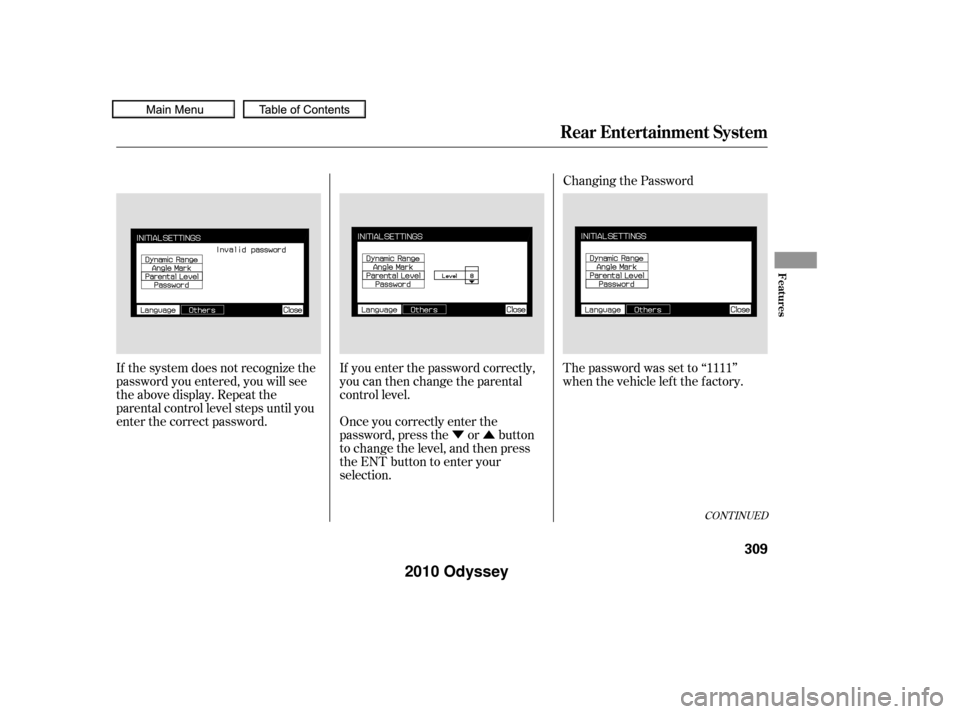
If the system does not recognize the
password you entered, you will see
the above display. Repeat the
parental control level steps until you
enter the correct password.
If you enter the password correctly,
you can then change the parental
control level.
Once you correctly enter the
password, press the or button
to change the level, and then press
the ENT button to enter your
selection.Changing the Password
The password was set to ‘‘1111’’
when the vehicle lef t the f actory.
CONT INUED
Rear Entertainment System
Features
309
�����—�����—�
���y�
�������������y���
�(�����������y�����
���y
2010 Odyssey
Page 313 of 526
To change the password, select
‘‘Password.’’ You will see the above
menu displayed. Select ‘‘Yes’’ by
pressing the or button,
then press the ENT button.
If you select ‘‘No,’’ and press the
ENT button, the display returns to
the ‘‘Others’’ menu.Select the f irst digit by pressing the
, , , or button,
and enter it by pressing the ENT
button. Repeat this until all f our
digits are entered. When you enter
the f ourth number, the cursor
automatically moves to ‘‘ENT’’ on the
display. Press the ENT button on the
control panel. If the system does not recognize the
password you entered, you will see
the above display. Repeat the
password setting steps until you
enter the correct password.
Rear Entertainment System
310
�����—�����—�
���y�
�������������y���
�(�����������y�����
���y
2010 Odyssey
Page 314 of 526
�Û
If you f orget the password, select
‘‘Password,’’ and press the button
10 times. The display changes as shown above.
If you want to use the def ault
password (1111), select ‘‘Yes,’’ and
press the ENT button.
The message ‘‘Def ault password
setting applied’’ is displayed f or
5 seconds.
Rear Entertainment System
Features
311
�����—�����—�
���y�
�������������y���
�(�����������y�����
���y
2010 Odyssey
Page 317 of 526

Message
Thechartontherightexplainsthe
error messages you may see in the
display while playing a disc.
If you see an error message in the
display while playing a disc, press
the eject button. After ejecting the
disc, check it for damage or
deformation. If there is no damage,
insert the disc again.
For additional information on
damaged discs, see page .
Theaudiosystemwilltrytoplaythe
disc. If there is still a problem, the
error message will reappear. Press
the eject button, and pull out the disc.
Insert a dif f erent disc. If the new
disc plays, there is a problem with
the f irst disc. If the error message
cycle repeats and you cannot clear it,
take your vehicle to a dealer. Solution
273
ERROR F0
ERROR F2
Invalid region code
Invalid disc
Parental control active.
Change level to view. Eject the disc and reinsert it.
Use a disc with the regional designation of ‘‘1’’ or ‘‘All’’.
The disc is not playable in this unit. Eject the disc, and insert a disc
compatible with this system.
Reinsert the disc, and increase the parental control level (see
pages
308and 309).
DVD Player Error Messages
Rear Entertainment System
314
�����—�����—�
���y�
�������������y���
�(�����������y�����
���y
2010 Odyssey
Page 329 of 526

With a linked phone, HFL allows you
to send and receive calls in your
vehicle without holding the phone.
The HFL system has a help f unction
to provide instructions f or pairing a
phone, and give hints on how to
operate HFL properly. If your
response or command is not correct,
or the system cannot recognize a
command, the HFL system will give
you an appropriate command or play
the help prompt.HFL can store up to 50 names and
phone numbers in its phonebook.
Withalinkedphone,youcanthen
automatically dial any name or
number in the phonebook.
Your vehicle’s HFL system has the
cellular phonebook import f unction.
This allows you to import your
cellular phonebook to HFL. Using
the navigation system, you can make
acalldirectlyandstoreadesired
number in HFL f rom the list shown
on the navigation display. For
more inf ormation on how to import
the phonebook, see page . To
make a call, see page . Your phone may not have
phonebook import f unction. Visit ,orcallthe
HandsFreeLink
consumer support
at (888) 528-7876. In Canada, call
(888) 9-HONDA-9. You can see your
phone’s owner’s manual f or
inf ormation.
You can also store the desired
number to the HFL phonebook
directly f rom your cell phone using
the receive contact f unction in HFL.
340351
handsf reelink.honda.com
BluetoothHandsFreeL ink
Incoming/Outgoing Calls
Help Assistance Phonebook
326
NOTE:
�����—�����—�
���y�
�������������y���
�(�����������y�������
�y
2010 Odyssey