Page 196 of 351
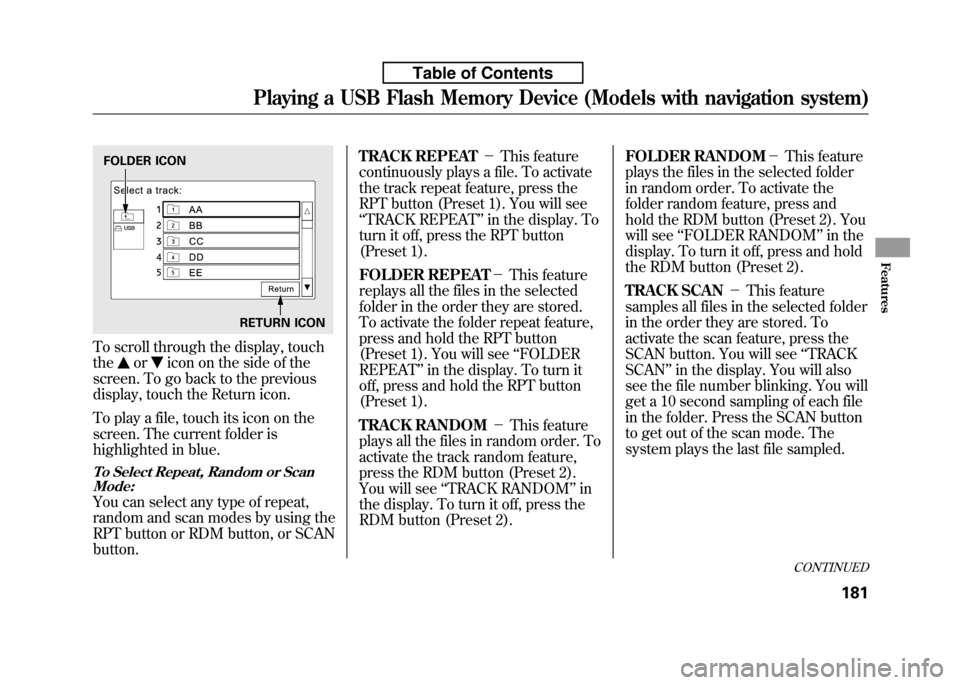
To scroll through the display, touch the
oricon on the side of the
screen. To go back to the previous
display, touch the Return icon.
To play a file, touch its icon on the
screen. The current folder is
highlighted in blue.
To Select Repeat, Random or Scan Mode:
You can select any type of repeat,
random and scan modes by using the
RPT button or RDM button, or SCANbutton. TRACK REPEAT
-This feature
continuously plays a file. To activate
the track repeat feature, press the
RPT button (Preset 1). You will see‘‘ TRACK REPEAT ’’in the display. To
turn it off, press the RPT button
(Preset 1).
FOLDER REPEAT -This feature
replays all the files in the selected
folder in the order they are stored.
To activate the folder repeat feature,
press and hold the RPT button
(Preset 1). You will see ‘‘FOLDER
REPEAT ’’in the display. To turn it
off, press and hold the RPT button
(Preset 1).
TRACK RANDOM -This feature
plays all the files in random order. To
activate the track random feature,
press the RDM button (Preset 2).
You will see ‘‘TRACK RANDOM ’’in
the display. To turn it off, press the
RDM button (Preset 2). FOLDER RANDOM
-This feature
plays the files in the selected folder
in random order. To activate the
folder random feature, press and
hold the RDM button (Preset 2). You
will see ‘‘FOLDER RANDOM ’’in the
display. To turn it off, press and hold
the RDM button (Preset 2).
TRACK SCAN -This feature
samples all files in the selected folder
in the order they are stored. To
activate the scan feature, press the
SCAN button. You will see ‘‘TRACK
SCAN ’’in the display. You will also
see the file number blinking. You will
get a 10 second sampling of each file
in the folder. Press the SCAN button
to get out of the scan mode. The
system plays the last file sampled.
FOLDER ICON
RETURN ICON
CONTINUED
Playing a USB Flash Memory Device (Models with navigation system)
181
Features
Table of Contents
Page 201 of 351
General Information● When using CD-R or CD-RW
discs, use only high quality discs
labeled for audio use.
● When recording a CD-R or
CD-RW, the recording must be
closed for it to be used by thesystem.
● Play only standard round discs.
Odd-shaped discs may jam in the
drive or cause other problems.
● Handle your discs properly to
prevent damage and skipping.
Do not use discs with adhesive labels.
The label can curl up and cause the
disc to jam in the unit. Protecting Discs
When a disc is not being played,
store it in its case to protect it from
dust and other contamination. To
prevent warpage, keep discs out of
direct sunlight and extreme heat.
To clean a disc, use a clean soft cloth.
Wipe across the disc from the center
to the outside edge.
A new disc may be rough on the
inner and outer edges. The small
plastic pieces causing this roughness
can flake off and fall on the recording
surface of the disc, causing skipping
or other problems. Remove these
pieces by rubbing the inner and
outer edges with the side of a pencil
or pen.
Never try to insert foreign objects in
the disc player.
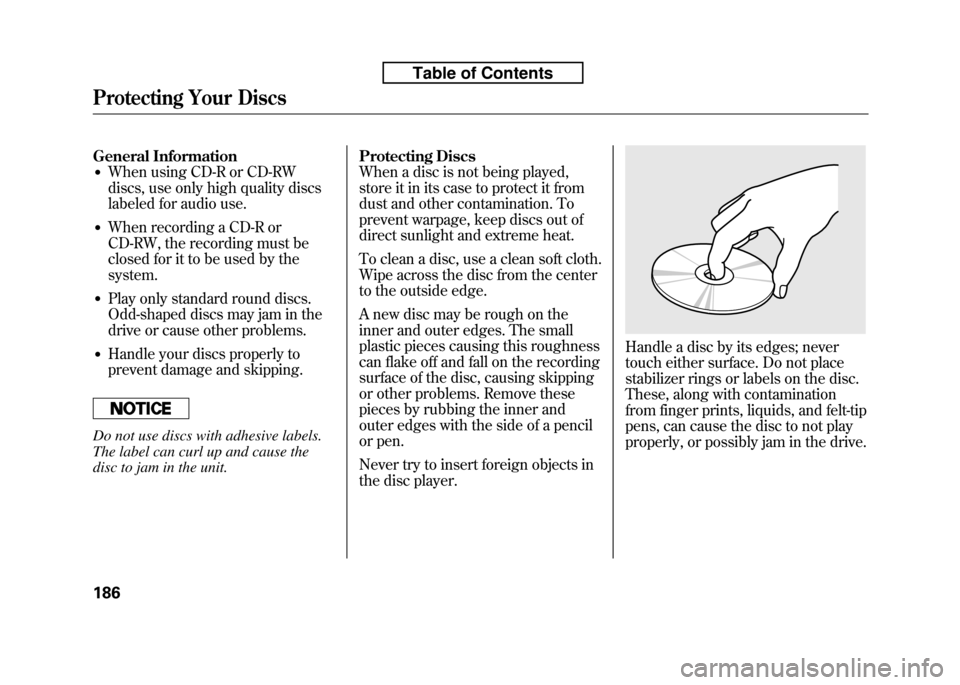
Handle a disc by its edges; never
touch either surface. Do not place
stabilizer rings or labels on the disc.
These, along with contamination
from finger prints, liquids, and felt-tip
pens, can cause the disc to not play
properly, or possibly jam in the drive.
Protecting Your Discs
186
Table of Contents
Page 208 of 351
On Sport model
The security system helps to protect
your vehicle and valuables from
theft. The horn sounds and a
combination of headlights, parking/
side marker lights and taillights
flashes if someone attempts to break
into your vehicle or remove the audio
unit. This alarm continues for 2
minutes, then the system resets. To
reset an activated system before the
2 minutes have elapsed, unlock the
driver's door with the key or the
remote transmitter.
The security system automatically
sets 15 seconds after you lock the
doors, hood, and the tailgate. For the
system to activate, you must lock the
doors and the tailgate from the
outside with the key, driver's lock
tab, door lock master switch, or
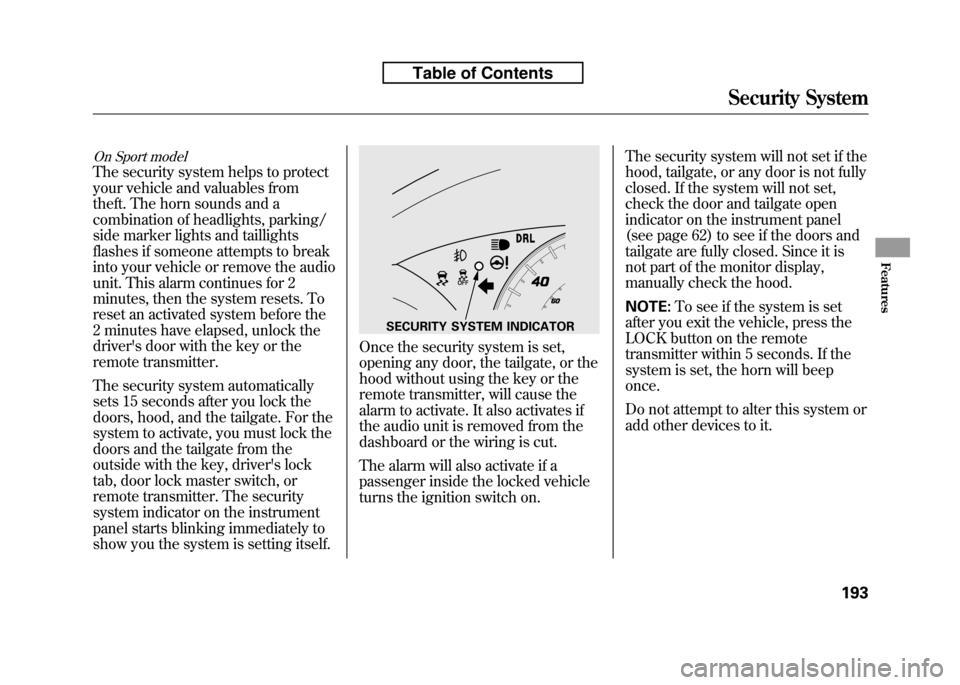
remote transmitter. The security
system indicator on the instrument
panel starts blinking immediately to
show you the system is setting itself.
Once the security system is set,
opening any door, the tailgate, or the
hood without using the key or the
remote transmitter, will cause the
alarm to activate. It also activates if
the audio unit is removed from the
dashboard or the wiring is cut.
The alarm will also activate if a
passenger inside the locked vehicle
turns the ignition switch on.The security system will not set if the
hood, tailgate, or any door is not fully
closed. If the system will not set,
check the door and tailgate open
indicator on the instrument panel
(see page 62) to see if the doors and
tailgate are fully closed. Since it is
not part of the monitor display,
manually check the hood. NOTE:
To see if the system is set
after you exit the vehicle, press the
LOCK button on the remote
transmitter within 5 seconds. If the
system is set, the horn will beeponce.
Do not attempt to alter this system or
add other devices to it.
SECURITY SYSTEM INDICATOR
Security System
193
Features
Table of Contents
Page 210 of 351

Changing the Set Speed
You can increase the set cruising
speed in any of these ways:● Press and hold the RES/ACCEL
button. When you reach the
desired cruising speed, release thebutton.
● To increase your speed in very
small amounts, tap the RES/
ACCEL button. Each time you do
this, the vehicle will speed up
about 1 mph (1.6 km/h).
● Push on the accelerator pedal.
Accelerate to the desired cruising
speed, then press the SET/
DECEL button. You can decrease the set cruising
speed in any of these ways:
● Press and hold the SET/DECEL
button. Release the button when
you reach the desired speed.
● To slow down in very small
amounts, tap the SET/DECEL
button. Each time you do this,
your vehicle will slow down about
1 mph (1.6 km/h).
● Tap the brake or clutch pedal
lightly with your foot. The CRUISE
CONTROL indicator on the
instrument panel goes out. When
the vehicle slows to the desired
speed, press the SET/DECELbutton. Even with the cruise control turned
on, you can still use the accelerator
pedal to speed up for passing. After
completing the pass, take your foot
off the accelerator pedal. The vehicle
will return to the set cruising speed.
Resting your foot on the brake or
clutch pedal causes the cruise
control to cancel.
CONTINUED
Cruise Control
195
Features
Table of Contents
Page 214 of 351
Refueling
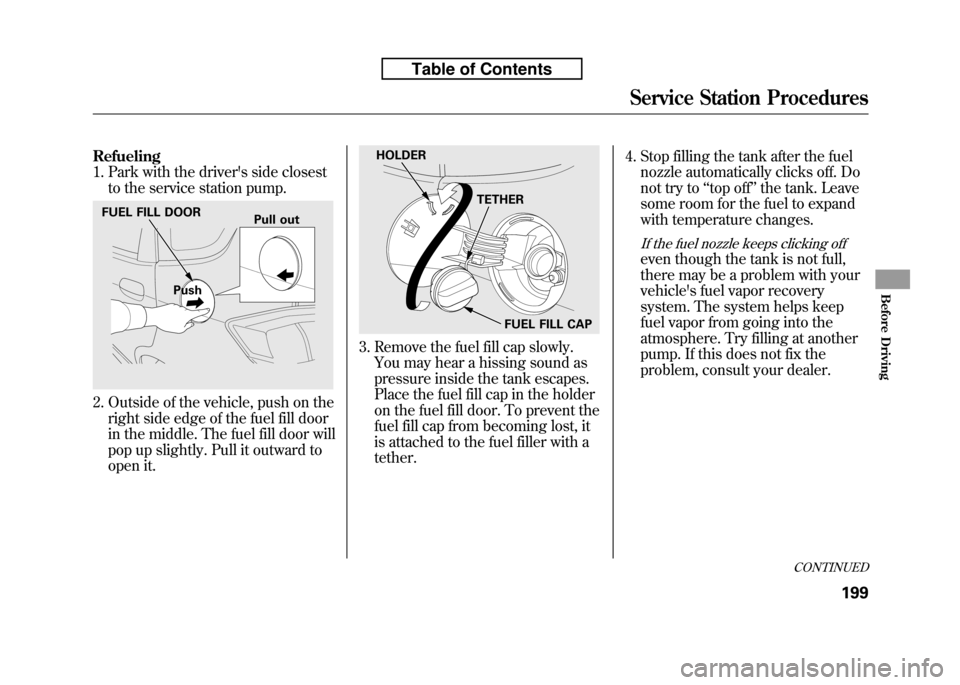
1. Park with the driver's side closestto the service station pump.
2. Outside of the vehicle, push on theright side edge of the fuel fill door
in the middle. The fuel fill door will
pop up slightly. Pull it outward to
open it.
3. Remove the fuel fill cap slowly.You may hear a hissing sound as
pressure inside the tank escapes.
Place the fuel fill cap in the holder
on the fuel fill door. To prevent the
fuel fill cap from becoming lost, it
is attached to the fuel filler with atether. 4. Stop filling the tank after the fuel
nozzle automatically clicks off. Do
not try to ‘‘top off ’’the tank. Leave
some room for the fuel to expand
with temperature changes.
If the fuel nozzle keeps clicking off
even though the tank is not full,
there may be a problem with your
vehicle's fuel vapor recovery
system. The system helps keep
fuel vapor from going into the
atmosphere. Try filling at another
pump. If this does not fix the
problem, consult your dealer.
FUEL FILL DOOR
Push Pull out
HOLDER
TETHER
FUEL FILL CAP
CONTINUED
Service Station Procedures
199
Before Driving
Table of Contents
Page 215 of 351

Gasoline is highly flammable
and explosive. You can be
burned or seriously injured
when handling fuel.● Stop the engine, and keep
heat, sparks, and flameaway.
● Handle fuel only outdoors.
● Wipe up spills immediately.
5. Screw the fuel fill cap back on until it clicks at least once. If you do not
properly tighten the cap, the
malfunction indicator lamp may
come on (see page 304). You will
also see a ‘‘CHECK FUEL CAP ’’
message on the informationdisplay.
6. Push the fuel fill door closed until it latches. Opening and Closing the Hood
1. Park the vehicle, and set the
parking brake. Pull the hood
release handle under the lower left
corner of the dashboard. The hood
will pop up slightly.
2. Put your fingers under the frontedge of the hood near the center.
Slide your hand to the left until
you feel the hood latch handle.
Push this handle up to release it.
Lift up the hood.
If the hood latch handle moves
stiffly, or if you can open the hood
without lifting the handle, the
mechanism should be cleaned andlubricated.
HOOD RELEASE HANDLELATCH
Service Station Procedures
200
Table of Contents
Page 216 of 351
3. Holding the grip, pull the supportrod out of its clip. Insert the end
into the designated hole in thehood.
To close the hood, lift it up slightly to
remove the support rod from the
hole. Put the support rod back into
its holding clip. Lower the hood to
about a foot (30 cm) above the
fender, then let it drop. Make sure it
is securely latched. Oil Check
Wait a few minutes after turning the
engine off before you check the oil.
1. Remove the dipstick (orange loop).
2. Wipe off the dipstick with a clean
cloth or paper towel.
3. Insert the dipstick all the way back into its hole.
4. Remove the dipstick again, andcheck the level. It should be
between the upper and lowermarks.
If it is near or below the lower mark,see Adding Engine Oil on page 253.
SUPPORT ROD
GRIP CLIP
DIPSTICK
UPPER MARK
LOWER MARK
Service Station Procedures
201
Before Driving
Table of Contents
Page 218 of 351
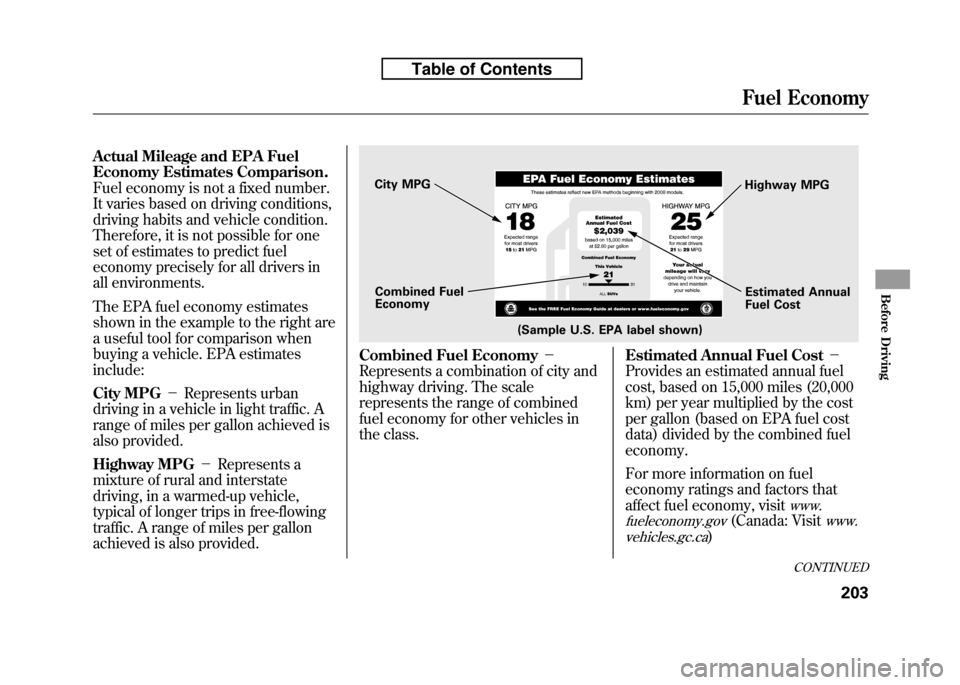
Actual Mileage and EPA Fuel
Economy Estimates Comparison.
Fuel economy is not a fixed number.
It varies based on driving conditions,
driving habits and vehicle condition.
Therefore, it is not possible for one
set of estimates to predict fuel
economy precisely for all drivers in
all environments.
The EPA fuel economy estimates
shown in the example to the right are
a useful tool for comparison when
buying a vehicle. EPA estimatesinclude:
City MPG-Represents urban
driving in a vehicle in light traffic. A
range of miles per gallon achieved is
also provided.
Highway MPG -Represents a
mixture of rural and interstate
driving, in a warmed-up vehicle,
typical of longer trips in free-flowing
traffic. A range of miles per gallon
achieved is also provided.
Combined Fuel Economy -
Represents a combination of city and
highway driving. The scale
represents the range of combined
fuel economy for other vehicles in
the class. Estimated Annual Fuel Cost
-
Provides an estimated annual fuel
cost, based on 15,000 miles (20,000
km) per year multiplied by the cost
per gallon (based on EPA fuel cost
data) divided by the combined fueleconomy.
For more information on fuel
economy ratings and factors that
affect fuel economy, visit
www.
fueleconomy.gov
(Canada: Visitwww.
vehicles.gc.ca
)
(Sample U.S. EPA label shown)
City MPG
Combined Fuel Economy Highway MPG
Estimated Annual
Fuel Cost
CONTINUED
Fuel Economy
203
Before Driving
Table of Contents