Page 341 of 550
To save fuel, run the engine for only short periods as
needed to warm the vehicle and then shut the engine
off and close the window most of the way to save heat.
Repeat this until help arrives but only when you feel
really uncomfortable from the cold. Moving about to
keep warm also helps.
If it takes some time for help to arrive, now and then
when you run the engine, push the accelerator pedal
slightly so the engine runs faster than the idle speed.
This keeps the battery charged to restart the vehicle
and to signal for help with the headlamps. Do this as
little as possible to save fuel.If Your Vehicle is Stuck in Sand,
Mud, Ice, or Snow
Slowly and cautiously spin the wheels to free the
vehicle when stuck in sand, mud, ice, or snow. See
Rocking Your Vehicle to Get It Out on page 5‑30.
If the vehicle has a traction system, it can often help to
free a stuck vehicle. Refer to the vehicle's traction
system in the Index. If stuck too severely for the traction
system to free the vehicle, turn the traction system off
and use the rocking method.
{WARNING:
If you let your vehicle's tires spin at high speed,
they can explode, and you or others could be
injured. The vehicle can overheat, causing an
engine compartment fire or other damage. Spin
the wheels as little as possible and avoid going
above 55 km/h (35 mph) as shown on the
speedometer.
For information about using tire chains on the vehicle,
see Tire Chains on page 6‑85.
5-29
Page 342 of 550
Rocking Your Vehicle to Get It Out
Turn the steering wheel left and right to clear the area
around the front wheels. Turn off any traction or stability
system. Shift back and forth between R (Reverse) and a
forward gear, spinning the wheels as little as possible.
To prevent transmission wear, wait until the wheels stop
spinning before shifting gears. Release the accelerator
pedal while shifting, and press lightly on the accelerator
pedal when the transmission is in gear. Slowly spinning
the wheels in the forward and reverse directions causes
a rocking motion that could free the vehicle. If that does
not get the vehicle out after a few tries, it might need to
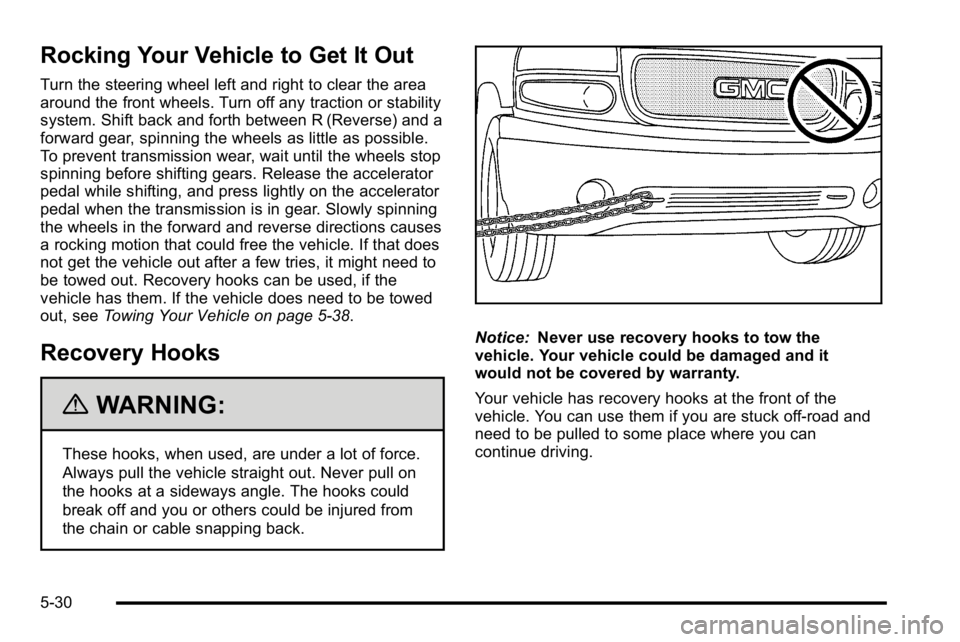
be towed out. Recovery hooks can be used, if the
vehicle has them. If the vehicle does need to be towed
out, seeTowing Your Vehicle on page 5‑38.
Recovery Hooks
{WARNING:
These hooks, when used, are under a lot of force.
Always pull the vehicle straight out. Never pull on
the hooks at a sideways angle. The hooks could
break off and you or others could be injured from
the chain or cable snapping back.
Notice:Never use recovery hooks to tow the
vehicle. Your vehicle could be damaged and it
would not be covered by warranty.
Your vehicle has recovery hooks at the front of the
vehicle. You can use them if you are stuck off-road and
need to be pulled to some place where you can
continue driving.
5-30
Page 360 of 550
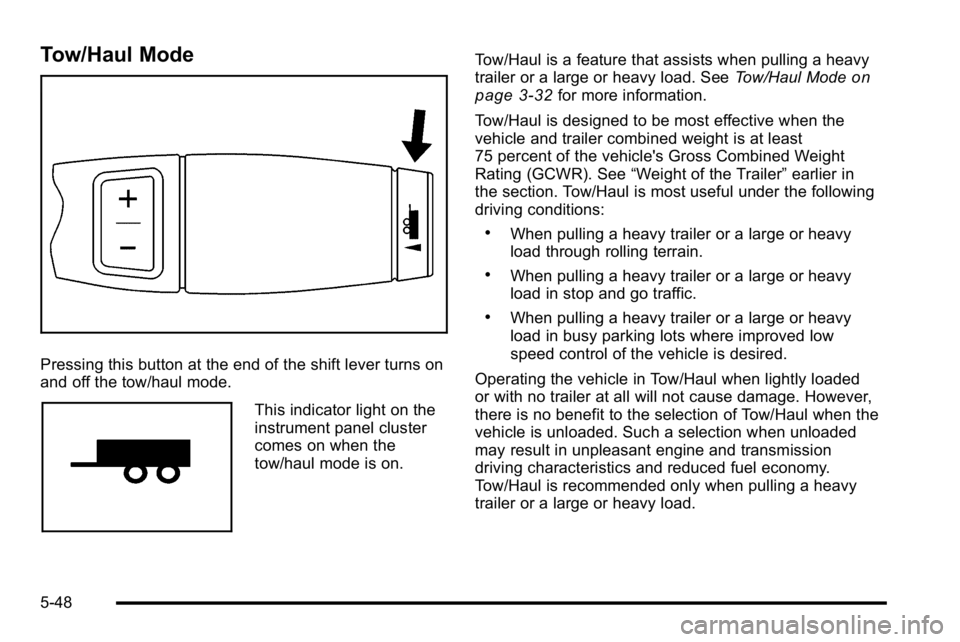
Tow/Haul Mode
Pressing this button at the end of the shift lever turns on
and off the tow/haul mode.
This indicator light on the
instrument panel cluster
comes on when the
tow/haul mode is on.Tow/Haul is a feature that assists when pulling a heavy
trailer or a large or heavy load. See
Tow/Haul Mode
on
page 3‑32for more information.
Tow/Haul is designed to be most effective when the
vehicle and trailer combined weight is at least
75 percent of the vehicle's Gross Combined Weight
Rating (GCWR). See “Weight of the Trailer” earlier in
the section. Tow/Haul is most useful under the following
driving conditions:
.When pulling a heavy trailer or a large or heavy
load through rolling terrain.
.When pulling a heavy trailer or a large or heavy
load in stop and go traffic.
.When pulling a heavy trailer or a large or heavy
load in busy parking lots where improved low
speed control of the vehicle is desired.
Operating the vehicle in Tow/Haul when lightly loaded
or with no trailer at all will not cause damage. However,
there is no benefit to the selection of Tow/Haul when the
vehicle is unloaded. Such a selection when unloaded
may result in unpleasant engine and transmission
driving characteristics and reduced fuel economy.
Tow/Haul is recommended only when pulling a heavy
trailer or a large or heavy load.
5-48
Page 372 of 550
Trailer Wiring Harness
Heavy-Duty Trailer Wiring Harness Package
The vehicle has a seven-pin universal heavy-duty trailer
connector attached to the rear bumper beam next to the
integrated trailer hitch.The seven-wire harness contains the following trailer
circuits:
.Yellow: Left Stop/Turn Signal
.Dark Green: Right Stop/Turn Signal
.Brown: Taillamps
.White: Ground
.Light Green: Back-up Lamps
.Red: Battery Feed*
.Dark Blue: Trailer Brake*
*The fuses for these two circuits are installed in the
underhood electrical center, but the wires are not
connected. They should be connected by your dealer/
retailer or a qualified service center.
If charging a remote (non-vehicle) battery, press the
tow/haul mode button located at the end of the shift
lever. This will boost the vehicle system voltage and
properly charge the battery. If the trailer is too light for
tow/haul mode, turn on the headlamps as a second way
to boost the vehicle system and charge the battery.
5-60
Page 373 of 550
Electric Brake Control Wiring
Provisions
These wiring provisions are included with the vehicle as
part of the trailer wiring package. These provisions are
for an electric brake controller. The instrument panel
contains blunt cut wires near the data link connector for
the trailer brake controller. The harness contains the
following wires:
.Dark Blue: Brake Signal to Trailer Connector
.Red/Black: Battery
.Light Blue/White: Brake Switch
.White: Ground
It should be installed by your dealer/retailer or a
qualified service center.
If the vehicle is equipped with an ITBC, the blunt cuts
exist, but are not connected further in the harness. If an
aftermarket trailer brake controller is installed, the ITBC
must be disconnected. Do not power both ITBC and
aftermarket controllers to control the trailer brakes at the
same time.
Trailer Recommendations
Subtract the hitch loads from the Cargo Weight Rating
(CWR). CWR is the maximum weight of the load the
vehicle can carry. It does not include the weight of the
people inside, but you can figure about 150 lbs. (68 kg)
for each passenger. The total cargo load must not be
more than the vehicles CWR.
Weigh the vehicle with the trailer attached, so the
GVWR or GAWR are not exceeded. If using a
weight-distributing hitch, weigh the vehicle without the
spring bars in place.
The best performance is obtained by correctly
spreading out the weight of the load and choosing the
correct hitch and trailer brakes.
For more information see Towing a Trailer
on
page 5‑42.
5-61
Page 381 of 550
Gasoline Octane
Use premium unleaded gasoline with a posted octane
rating of 91 or higher. You can also use regular
unleaded gasoline rated at 87 octane or higher, but the
vehicle's acceleration could be slightly reduced, and a
slight audible knocking noise, commonly referred to as
spark knock, might be heard. If the octane is less than
87, you might notice a heavy knocking noise when you
drive. If this occurs, use a gasoline rated at 87 octane
or higher as soon as possible. Otherwise, you could
damage the engine. If heavy knocking is heard when
using gasoline rated at 87 octane or higher, the engine
needs service.
Gasoline Specifications
At a minimum, gasoline should meet ASTM
specification D 4814 in the United States or
CAN/CGSB‐3.5 or 3.511 in Canada. Some gasolines
contain an octane-enhancing additive called
methylcyclopentadienyl manganese tricarbonyl (MMT).
We recommend against the use of gasolines containing
MMT. SeeAdditives
on page 6‑8for additional
information.
California Fuel
If the vehicle is certified to meet California Emissions
Standards, it is designed to operate on fuels that meet
California specifications. See the underhood emission
control label. If this fuel is not available in states
adopting California emissions standards, the vehicle will
operate satisfactorily on fuels meeting federal
specifications, but emission control system performance
might be affected. The malfunction indicator lamp could
turn on and the vehicle might fail a smog‐check test.
See Malfunction Indicator Lamp
on page 4‑38. If this
occurs, return to your authorized dealer/retailer for
diagnosis. If it is determined that the condition is caused
by the type of fuel used, repairs might not be covered
by the vehicle warranty.
6-7
Page 386 of 550
When replacing the fuel cap, turn it clockwise until it
clicks. It will require more effort to turn the fuel cap on
the last turn as you tighten it. Make sure the cap is fully
installed. The diagnostic system can determine if the
fuel cap has been left off or improperly installed. This
would allow fuel to evaporate into the atmosphere. See
Malfunction Indicator Lamp on page 4‑38.
The TIGHTEN GAS CAP message displays on the
Driver Information Center (DIC) if the fuel cap is not
properly installed. SeeDIC Warnings and Messages
on
page 4‑57for more information.
{WARNING:
If a fire starts while you are refueling, do not
remove the nozzle. Shut off the flow of fuel by
shutting off the pump or by notifying the station
attendant. Leave the area immediately.
Notice: If you need a new fuel cap, be sure to get
the right type. Your dealer/retailer can get one for
you. If you get the wrong type, it may not fit
properly. This may cause the malfunction indicator
lamp to light and may damage the fuel tank and
emissions system. See Malfunction Indicator Lamp
on page 4‑38.
6-12
Page 396 of 550
Engine Air Cleaner/Filter
SeeEngine Compartment Overviewon page 6‑16for
the location of the engine air cleaner/filter.
Inspect the air cleaner/filter at the Maintenance II
intervals and replace it at the first oil change after each
50,000 mile (80 000 km) interval. See Scheduled
Maintenance
on page 7‑3for more information.
If driving on dusty/dirty conditions, inspect the filter at
each engine oil change.
How to Inspect the Engine Air
Cleaner/Filter
To inspect the air cleaner/filter, remove the engine air
cleaner/filter from the vehicle by following Steps 1
through 6. When the engine air cleaner/filter is
removed, lightly shake it to release loose dust and dirt.
If the engine air cleaner/filter remains caked with dirt, a
new filter is required.
Replacing the Engine Air Cleaner/Filter
1. Locate the air cleaner/
filter assembly. See
Engine Compartment
Overview
on
page 6‑16.
2. Loosen the four screws on the cover of the housing and lift up the cover.
6-22