2010 GMC SIERRA DENALI start stop button
[x] Cancel search: start stop buttonPage 30 of 550
Sunroof
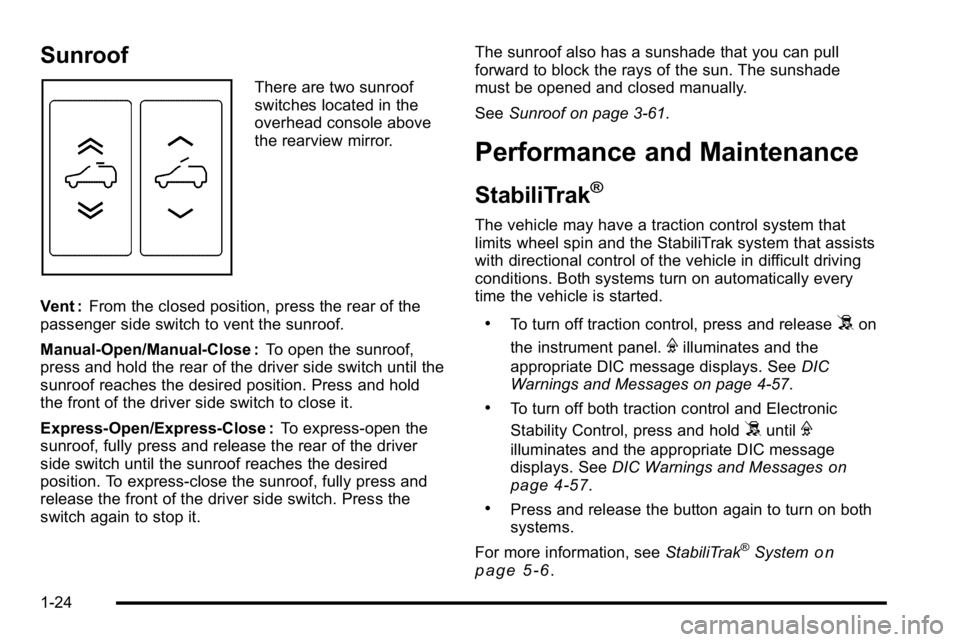
There are two sunroof
switches located in the
overhead console above
the rearview mirror.
Vent : From the closed position, press the rear of the
passenger side switch to vent the sunroof.
Manual-Open/Manual-Close : To open the sunroof,
press and hold the rear of the driver side switch until the
sunroof reaches the desired position. Press and hold
the front of the driver side switch to close it.
Express-Open/Express-Close : To express-open the
sunroof, fully press and release the rear of the driver
side switch until the sunroof reaches the desired
position. To express-close the sunroof, fully press and
release the front of the driver side switch. Press the
switch again to stop it. The sunroof also has a sunshade that you can pull
forward to block the rays of the sun. The sunshade
must be opened and closed manually.
See
Sunroof on page 3‑61.
Performance and Maintenance
StabiliTrak®
The vehicle may have a traction control system that
limits wheel spin and the StabiliTrak system that assists
with directional control of the vehicle in difficult driving
conditions. Both systems turn on automatically every
time the vehicle is started.
.To turn off traction control, press and release5on
the instrument panel.
Filluminates and the
appropriate DIC message displays. See DIC
Warnings and Messages on page 4‑57.
.To turn off both traction control and Electronic
Stability Control, press and hold
5untilF
illuminates and the appropriate DIC message
displays. See DIC Warnings and Messageson
page 4‑57.
.Press and release the button again to turn on both
systems.
For more information, see StabiliTrak
®Systemon
page 5‑6.
1-24
Page 32 of 550

Resetting the Oil Life System
To reset the Engine Oil Life System on most vehicles:1. Display the OIL LIFE REMAINING on the DIC. If the vehicle does not have DIC buttons, the
vehicle must be in P (Park) to access this display.
2. Press and hold the SET/RESET button on the DIC, or the trip odometer reset stem if the vehicle does
not have DIC buttons, for more than five seconds.
The oil life will change to 100%.
On all vehicles, the Engine Oil Life System can be reset
as follows: 1. Turn the ignition to ON/RUN with the engine off
2. Fully press the accelerator pedal slowly three times within five seconds.
3. Display the OIL LIFE REMAINING on the DIC. If the display shows 100%, the system is reset.
See Engine Oil Life System on page 6‑20.
Fuel E85 (85% Ethanol)
This vehicle has a yellow fuel cap and can use either
unleaded gasoline or ethanol fuel containing up to 85%
ethanol (E85). See Gasoline Octane
on page 6‑7and
Fuel E85 (85% Ethanol) on page 6‑9.
Driving for Better Fuel Economy
Driving habits can affect fuel mileage. Here are some
driving tips to get the best fuel economy possible.
.Avoid fast starts and accelerate smoothly.
.Brake gradually and avoid abrupt stops.
.Avoid idling the engine for long periods of time.
.When road and weather conditions are
appropriate, use cruise control, if equipped.
.Always follow posted speed limits or drive more
slowly when conditions require.
.Keep vehicle tires properly inflated.
.Combine several trips into a single trip.
.Replace the vehicle's tires with the same TPC
Spec number molded into the tire's sidewall near
the size.
.Follow recommended scheduled maintenance.
1-26
Page 61 of 550
Lap-Shoulder Belt
All seating positions in the vehicle have a lap-shoulder
belt except for the center front passenger position (if
equipped), which has a lap belt. SeeLap Belt
on
page 2‑31for more information.
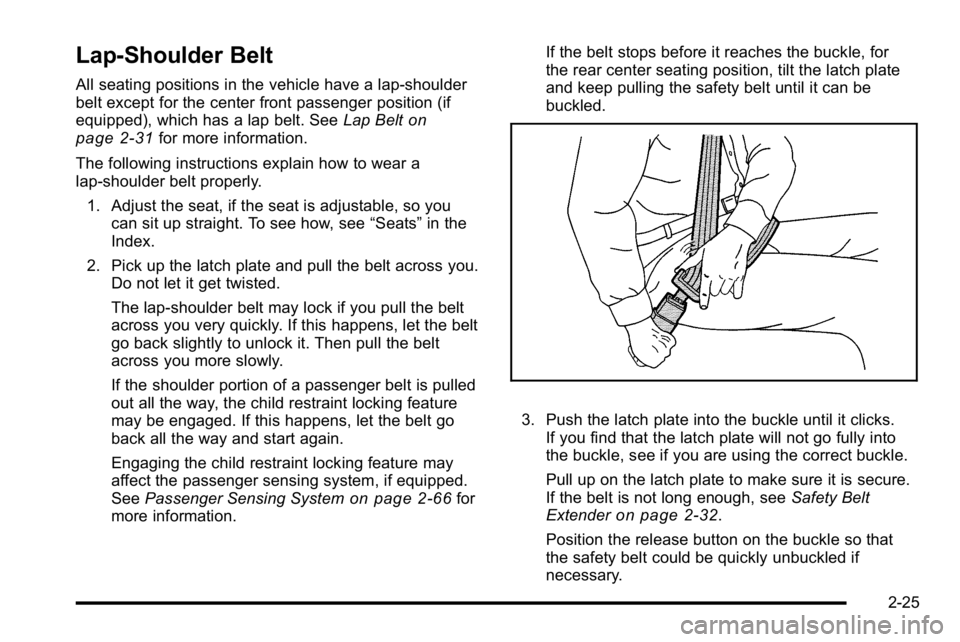
The following instructions explain how to wear a
lap-shoulder belt properly. 1. Adjust the seat, if the seat is adjustable, so you can sit up straight. To see how, see “Seats”in the
Index.
2. Pick up the latch plate and pull the belt across you. Do not let it get twisted.
The lap-shoulder belt may lock if you pull the belt
across you very quickly. If this happens, let the belt
go back slightly to unlock it. Then pull the belt
across you more slowly.
If the shoulder portion of a passenger belt is pulled
out all the way, the child restraint locking feature
may be engaged. If this happens, let the belt go
back all the way and start again.
Engaging the child restraint locking feature may
affect the passenger sensing system, if equipped.
See Passenger Sensing System
on page 2‑66for
more information. If the belt stops before it reaches the buckle, for
the rear center seating position, tilt the latch plate
and keep pulling the safety belt until it can be
buckled.
3. Push the latch plate into the buckle until it clicks.
If you find that the latch plate will not go fully into
the buckle, see if you are using the correct buckle.
Pull up on the latch plate to make sure it is secure.
If the belt is not long enough, see Safety Belt
Extender
on page 2‑32.
Position the release button on the buckle so that
the safety belt could be quickly unbuckled if
necessary.
2-25
Page 118 of 550
/(Remote Start) : This button will be on the RKE
transmitter if you have remote start.
To start the vehicle using the remote start feature:
1. Aim the transmitter at the vehicle.
2. Press and release the transmitter's lock button. The vehicle's doors will lock. Immediately press
and hold the transmitter's remote start button until
the turn signal lights flash. If you cannot see the
vehicle's lights, press and hold the remote start
button for two to four seconds. Pressing the remote
start button again after the vehicle has started will
turn the engine off.
When the vehicle starts, the parking lamps will turn
on and remain on while the vehicle is running.
If the vehicle is left running it will automatically shut
off after 10 minutes unless a time extension has
been done.
3. If it is the first remote start since the vehicle has been driven, repeat these steps, while the engine
is still running, to extend the engine running time
by 10 minutes. Remote start can be extended
one time. After entering the vehicle during a remote start, insert
and turn the key to RUN to drive the vehicle.
To manually shut off a remote start, do any of the
following:
.Aim the RKE transmitter at the vehicle and press
the remote start button until the parking lamps
turn off.
.Turn on the hazard warning flashers.
.Turn the ignition switch on and then off.
The vehicle can be remote started two separate times
between driving sequences. The engine will run for
10 minutes after each remote start.
Or, you can extend the engine run time by another
10 minutes within the first 10 minute remote start time
frame, and before the engine stops.
For example, if the lock button and then the remote start
buttons are pressed again after the vehicle has been
running for five minutes, 10 minutes are added, allowing
the engine to run for 15 minutes.
3-8
Page 128 of 550
Theft-Deterrent Systems
Vehicle theft is big business, especially in some cities.
This vehicle has theft-deterrent features, however, they
do not make it impossible to steal.
Content Theft-Deterrent
Your vehicle may have a content theft-deterrent alarm
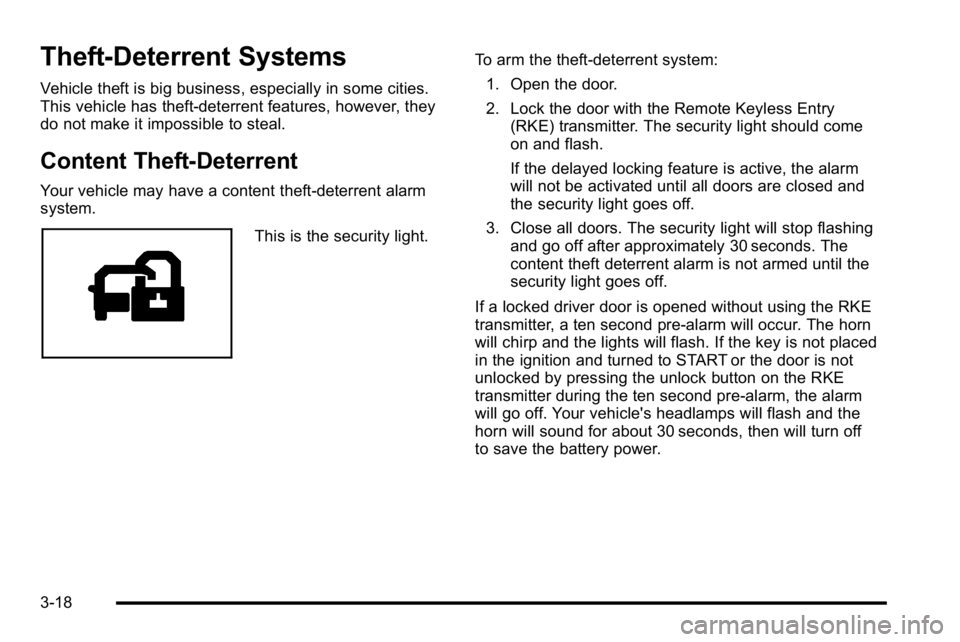
system.
This is the security light.To arm the theft-deterrent system:
1. Open the door.
2. Lock the door with the Remote Keyless Entry (RKE) transmitter. The security light should come
on and flash.
If the delayed locking feature is active, the alarm
will not be activated until all doors are closed and
the security light goes off.
3. Close all doors. The security light will stop flashing and go off after approximately 30 seconds. The
content theft deterrent alarm is not armed until the
security light goes off.
If a locked driver door is opened without using the RKE
transmitter, a ten second pre-alarm will occur. The horn
will chirp and the lights will flash. If the key is not placed
in the ignition and turned to START or the door is not
unlocked by pressing the unlock button on the RKE
transmitter during the ten second pre-alarm, the alarm
will go off. Your vehicle's headlamps will flash and the
horn will sound for about 30 seconds, then will turn off
to save the battery power.
3-18
Page 137 of 550
{WARNING:
Plugging the cord into an ungrounded outlet could
cause an electrical shock. Also, the wrong kind of
extension cord could overheat and cause a fire.
You could be seriously injured. Plug the cord into
a properly grounded three-prong 110-volt AC
outlet. If the cord will not reach, use a heavy-duty
three-prong extension cord rated for at least
15 amps.
4. Before starting the engine, be sure to unplug and store the cord as it was before to keep it away from
moving engine parts. If you do not, it could be
damaged.
The length of time the heater should remain plugged in
depends on several factors. Ask a dealer/retailer in the
area where you will be parking the vehicle for the best
advice on this.
Active Fuel Management™
Vehicles with V8 engines may have Active Fuel
Management™. This system allows the engine to
operate on either all or half of its cylinders, depending
on the driving conditions.
When less power is required, such as cruising at a
constant vehicle speed, the system will operate in the
half cylinder mode, allowing the vehicle to achieve
better fuel economy. When greater power demands are
required, such as accelerating from a stop, passing,
or merging onto a freeway, the system will maintain
full-cylinder operation.
If the vehicle has an Active Fuel Management™
indicator, see DIC Operation and Displays (Using Trip
Odometer Reset Stem)
on page 4‑44or DIC Operation
and Displays (Using DIC Buttons)on page 4‑48for
more information on using this display .
3-27
Page 222 of 550
Fuel Range
Press the trip/fuel button until FUEL RANGE displays.
This display shows the approximate number of
remaining miles (mi) or kilometers (km) the vehicle can
be driven without refueling. The display will show LOW
if the fuel level is low.
The fuel range estimate is based on an average of the
vehicle's fuel economy over recent driving history and
the amount of fuel remaining in the fuel tank. This
estimate will change if driving conditions change. For
example, if driving in traffic and making frequent stops,
this display may read one number, but if the vehicle is
driven on a freeway, the number may change even
though the same amount of fuel is in the fuel tank. This
is because different driving conditions produce different
fuel economies. Generally, freeway driving produces
better fuel economy than city driving. Fuel range cannot
be reset.
Average Economy
Press the trip/fuel button until AVG ECONOMY
displays. This display shows the approximate average
miles per gallon (mpg) or liters per 100 kilometers
(L/100 km). This number is calculated based on the
number of mpg (L/100 km) recorded since the last time
this menu item was reset. To reset AVG ECONOMY,
press and hold the set/reset button.
Fuel Used
Press the trip/fuel button until FUEL USED displays.
This display shows the number of gallons (gal) or
liters (L) of fuel used since the last reset of this menu
item. To reset the fuel used information, press and hold
the set/reset button while FUEL USED is displayed.
Timer
Press the trip/fuel button until TIMER displays. This
display can be used as a timer.
To start the timer, press the set/reset button while
TIMER is displayed. The display will show the amount
of time that has passed since the timer was last reset,
not including time the ignition is off. Time will continue
to be counted as long as the ignition is on, even if
another display is being shown on the DIC. The
timer will record up to 99 hours, 59 minutes and
59 seconds (99:59:59) after which the display will
return to zero.
To stop the timer, press the set/reset button briefly while
TIMER is displayed.
To reset the timer to zero, press and hold the set/reset
button while TIMER is displayed.
4-50
Page 233 of 550
PARK ASST BLOCKED SEE OWNERS
MANUAL
If your vehicle has the Ultrasonic Rear Parking Assist
(URPA) system, this message displays if there is
something interfering with the park assist system. See
Ultrasonic Rear Parking Assist (URPA)
on page 3‑43for more information.
PARK ASSIST OFF
On vehicles with the Ultrasonic Rear Parking Assist
(URPA) system, after the vehicle has been started, this
message displays to remind the driver that the URPA
system has been turned off. Press the set/reset button
or the trip odometer reset stem to acknowledge this
message and clear it from the DIC display. To turn the
URPA system back on, seeUltrasonic Rear Parking
Assist (URPA) on page 3‑43.
PASSENGER DOOR OPEN
This message displays and a chime sounds if the front
passenger door is not fully closed and the vehicle is
shifted out of P (Park). Stop and turn off the vehicle,
check the door for obstructions, and close the door
again. Check to see if the message still appears on
the DIC.
REMOTE KEY LEARNING ACTIVE
This message displays while you are matching a
Remote Keyless Entry (RKE) transmitter to your
vehicle. See “Matching Transmitter(s) to Your Vehicle”
under Remote Keyless Entry (RKE) System Operation
on page 3‑4and“DIC Operation and Displays (Using
DIC Buttons)” earlier in this section for more
information.
REPLACE BATTERY IN REMOTE KEY
This message displays if a Remote Keyless Entry
(RKE) transmitter battery is low. The battery needs to
be replaced in the transmitter. See “Battery
Replacement” underRemote Keyless Entry (RKE)
System Operation on page 3‑4.
RIGHT REAR DOOR OPEN
This message displays and a chime sounds if the
passenger side rear door is not fully closed and the
vehicle is shifted out of P (Park). Stop and turn off the
vehicle, check the door for obstructions, and close the
door again. Check to see if the message still appears
on the DIC.
4-61