2010 CHRYSLER 300 wheel
[x] Cancel search: wheelPage 3 of 88

INTRODUCTION/WELCOME
WELCOME FROM CHRYSLER
GROUPLLC ................ 2
CONTROLS AT A GLANCE
DRIVER COCKPIT.............4
INSTRUMENT CLUSTER .........6
GETTING STARTED
KEYFOB ..................8
PASSIVEENTRY .............9
KEYLESSGO™ ..............11
THEFT ALARM..............12
SEATBELT ................12
CHILD RESTRAINTS ...........12
FRONTSEATS...............14
REARSEAT ................16
HEATEDSEATS..............17
ADJUSTABLE PEDALS ..........18
TILT / TELESCOPING STEERING
COLUMN ..................19
PROGRAMMABLE FEATURES ..... 20
OPERATING YOUR VEHICLE
TURN SIGNAL/WIPER/WASHER/HIGH
BEAMLEVER ...............22
HEADLIGHT SWITCH...........23
SPEED CONTROL LEVER ........24
MANUAL CLIMATE CONTROLS .....27
AUTOMATIC TEMPERATURE
CONTROLS(ATC)............ 28
POWERSUNROOF ........... 28
WIND BUFFETING ............ 29
ELECTRONICS
NON-TOUCH-SCREEN RADIOS .... 30
TOUCH-SCREEN RADIOS .........32
REMOTE AUDIO CONTROLS .......37
UNIVERSAL CONSUMER
INTERFACE ................37
ELECTRONIC VEHICLE INFORMATION
CENTER (EVIC) ............. 38
UNIVERSAL GARAGE DOOR
OPENER ................. 38
POWER OUTLET ............ 39
UCONNECT™ PHONE .......... 40 VOICE COMMAND
............ 42
UTILITY
TRAILER TOWING WEIGHTS (MAXIMUM
TRAILER WEIGHT RATINGS) ...... 43
RECREATIONAL TOWING (BEHIND
MOTORHOME, ETC.) .......... 44
BRAKE/TRANSMISSION INTERLOCK
MANUAL OVERRIDE .......... 44
WHAT TO DO IN EMERGENCIES
24 HOUR TOWING ASSISTANCE
- U.S. ONLY............... 46
INSTRUMENT CLUSTER WARNING
LIGHTS .................. 46
IF YOUR ENGINE OVERHEATS .... 49
JACKING, TIRE CHANGING AND
TIREFIT TIRE REPAIR ......... 50
JUMP-STARTING ............ 57
TOWING A DISABLED VEHICLE .... 60
FREEING A STUCK VEHICLE .......61
EVENT DATA RECORDER (EDR) . . . 62
MAINTAINING YOUR VEHICLE
OPENING THE HOOD .......... 64
ENGINE COMPARTMENT ....... 65
FLUIDS AND CAPACITIES ....... 69
MAINTENANCE CHART .........72
FUSES ...................74
TIREPRESSURES.............77
WHEEL AND WHEEL TRIM CARE ....78
EXTERIOR BULBS .............78
CONSUMER ASSISTANCE
CHRYSLER GROUP LLC CUSTOMER
CENTER ..................79
CHRYSLER CANADA INC. CUSTOMER
CENTER ..................79
ASSISTANCE FOR THE HEARING
IMPAIRED .................79
PUBLICATIONS ORDERING .......79
REPORTING SAFETY DEFECTS IN
THE 50 UNITED STATES AND
WASHINGTON, D.C. ........... 80
TIREWARRANTY ............ 80
MOPAR ACCESSORIES
MOPAR®ACCESSORIES ........ 83
TABLE OF CONTENTS
Page 9 of 88

Indicators
- Turn Signal Indicators
- High Beam Indicator
- Front Fog Light Indicator
- Vehicle Security Indicator*
- Electronic SpeedControl/Adaptive Cruise
Control (ACC) Indicator
- Electronic Stability Program(ESP)/Traction Control
System (TCS) Indicator
- Windshield Washer FluidLow Indicator
- Door Ajar Indicator
- Decklid Ajar Indicator
Odometer Messages
ECO - Fuel Saver Indicator CHAngE OIL* - Change Engine Oil
2drivE - Vehicle is in Rear Wheel Drive (RWD) noFUSE* - Fuse Fault
4drivE - Vehicle is in All Wheel Drive (AWD) Lo tirE* - Low Tire Pressure
tCASE - AWD System Fault gASCAP - Fuel Cap Fault
* If equipped
** Bulb Check with Key On
7
CONTROLS AT A GLANCE
Page 21 of 88

TILT / TELESCOPING STEERING COLUMN
Manual - Tilt / Telescoping Steering Column
• The tilt/telescoping control handle islocated below the steering wheel at the
end of the steering column.
• Pull the handle rearward to unlock the steering column.
• To tilt the steering column, move the steering wheel upward or downward as
desired. To lengthen or shorten the
steering column, pull the steering wheel
outward or push it inward as desired.
• Push forward on the handle to lock the column firmly in place.
WARNING!
Do not adjust the steering wheel while driving. The tilt/telescoping adjustment
must be locked while driving. Adjusting the steering wheel while driving or driving
without the tilt/telescoping adjustment locked could cause the driver to lose
control of the vehicle. Failure to follow this warning may result in serious injury or
death.
Power - Tilt / Telescoping Steering Column
• The power tilt/telescoping steering lever is located below the turn signal/wiper/
washer/high beam lever on the steering
column.
• To tilt the steering column, move the power tilt/telescoping lever up or down as
desired. To lengthen or shorten the
steering column, pull the lever toward you
or push the lever away from you as
desired.
WARNING!
Moving the steering column while the vehicle is moving is dangerous. Without a
stable steering column, you could lose control of the vehicle and have an accident.
Adjust the column only while the vehicle is stopped.
19
GETTING STARTED
Page 39 of 88

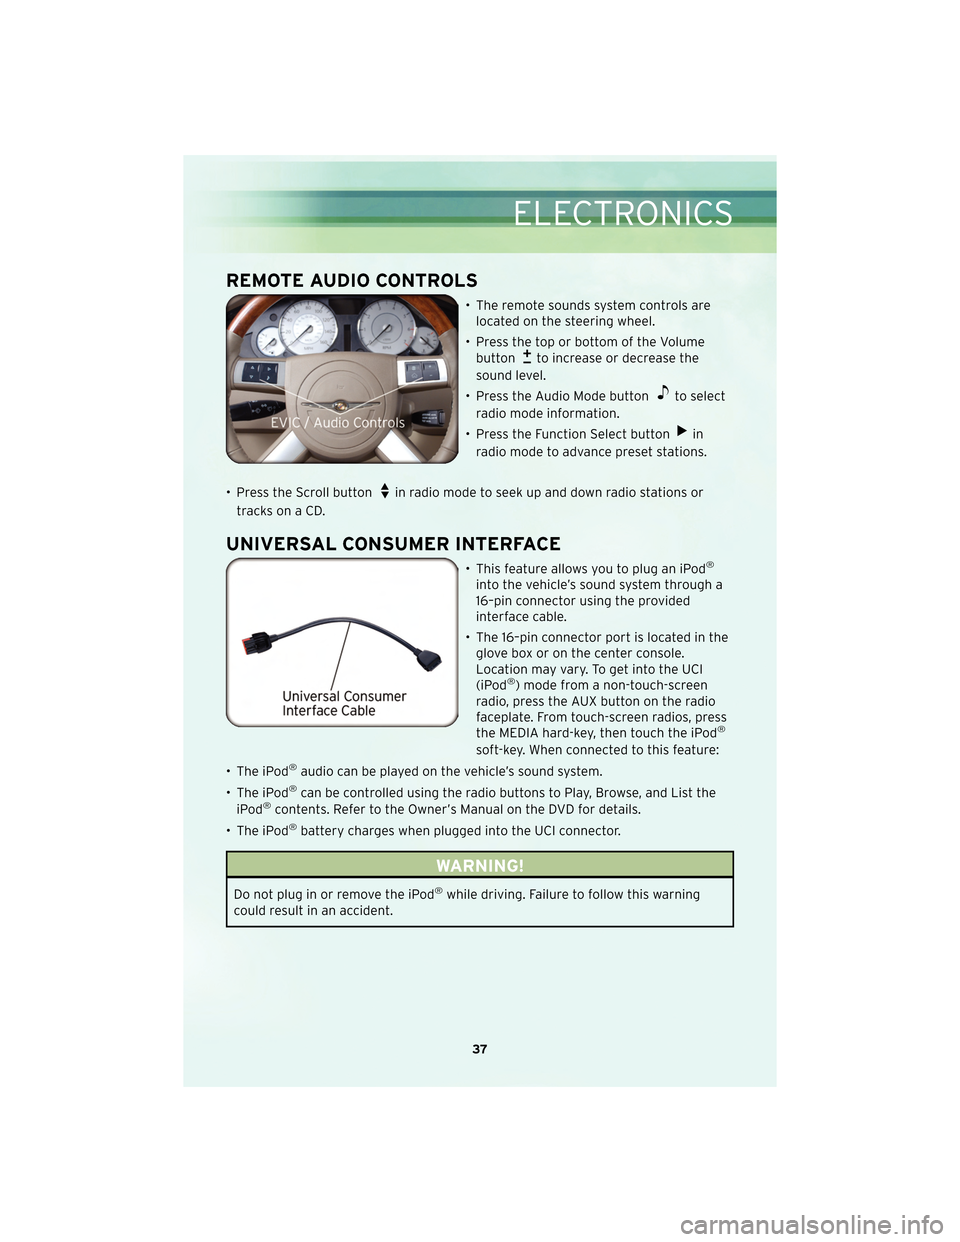
REMOTE AUDIO CONTROLS
• The remote sounds system controls arelocated on the steering wheel.
• Press the top or bottom of the Volume button
to increase or decrease the
sound level.
• Press the Audio Mode button
to select
radio mode information.
• Press the Function Select button
in
radio mode to advance preset stations.
• Press the Scroll button
in radio mode to seek up and down radio stations or
tracks on a CD.
UNIVERSAL CONSUMER INTERFACE
• This feature allows you to plug an iPod®
into the vehicle’s sound system through a
16–pin connector using the provided
interface cable.
• The 16–pin connector port is located in the glove box or on the center console.
Location may vary. To get into the UCI
(iPod
®) mode from a non-touch-screen
radio, press the AUX button on the radio
faceplate. From touch-screen radios, press
the MEDIA hard-key, then touch the iPod
®
soft-key. When connected to this feature:
• The iPod
®audio can be played on the vehicle’s sound system.
• The iPod
®can be controlled using the radio buttons to Play, Browse, and List the
iPod®contents. Refer to the Owner’s Manual on the DVD for details.
• The iPod
®battery charges when plugged into the UCI connector.
WARNING!
Do not plug in or remove the iPod®while driving. Failure to follow this warning
could result in an accident.
37
ELECTRONICS
Page 40 of 88

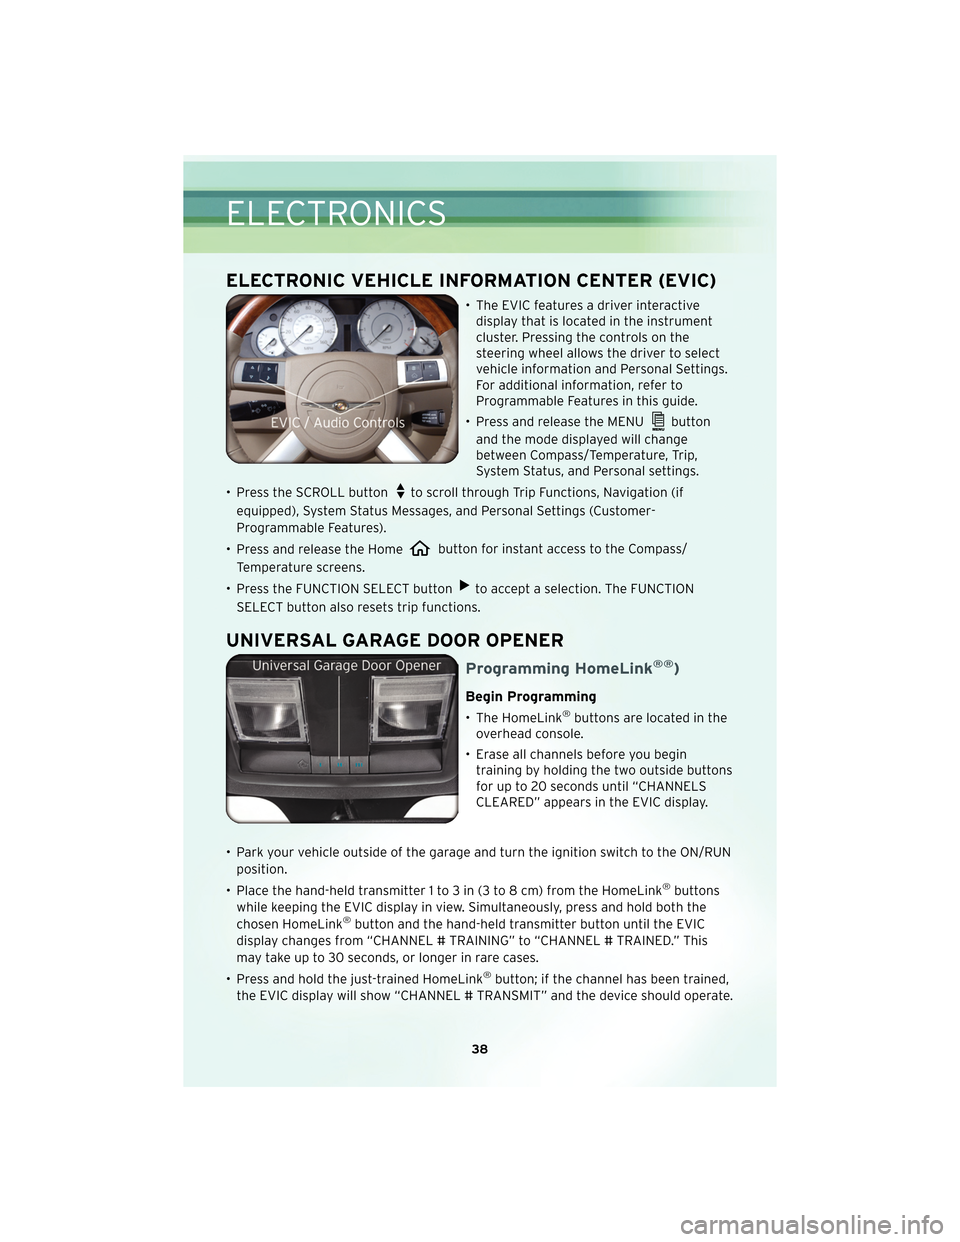
ELECTRONIC VEHICLE INFORMATION CENTER (EVIC)
• The EVIC features a driver interactivedisplay that is located in the instrument
cluster. Pressing the controls on the
steering wheel allows the driver to select
vehicle information and Personal Settings.
For additional information, refer to
Programmable Features in this guide.
• Press and release the MENU
button
and the mode displayed will change
between Compass/Temperature, Trip,
System Status, and Personal settings.
• Press the SCROLL button
to scroll through Trip Functions, Navigation (if
equipped), System Status Messages, and Personal Settings (Customer-
Programmable Features).
• Press and release the Home
button for instant access to the Compass/
Temperature screens.
• Press the FUNCTION SELECT button
to accept a selection. The FUNCTION
SELECT button also resets trip functions.
UNIVERSAL GARAGE DOOR OPENER
Programming HomeLink®®)
Begin Programming
• The HomeLink®buttons are located in the
overhead console.
• Erase all channels before you begin training by holding the two outside buttons
for up to 20 seconds until “CHANNELS
CLEARED” appears in the EVIC display.
• Park your vehicle outside of the garage and turn the ignition switch to the ON/RUN position.
• Place the hand-held transmitter 1 to 3 in (3 to 8 cm) from the HomeLink
®buttons
while keeping the EVIC display in view. Simultaneously, press and hold both the
chosen HomeLink
®button and the hand-held transmitter button until the EVIC
display changes from “CHANNEL # TRAINING” to “CHANNEL # TRAINED.” This
may take up to 30 seconds, or longer in rare cases.
• Press and hold the just-trained HomeLink
®button; if the channel has been trained,
the EVIC display will show “CHANNEL # TRANSMIT” and the device should operate.
ELECTRONICS
38
Page 45 of 88

TRAILER TOWING WEIGHTS (MAXIMUM TRAILER WEIGHT RATINGS)
Engine/TransmissionFrontal AreaMax. GTW
(Gross Trailer Wt.) Max. Tongue Wt.
(see note)
2.7L & 3.5L Rear Wheel
Drive (RWD) Automatic 22 sq ft (2.04 sq m)
1,000 lbs (454 kg) 100 lbs (45 kg)
3.5L All Wheel Drive (AWD)
& 5.7L Automatic 32 sq ft (2.97 sq m)
2,000 lbs (907 kg) 200 lbs (91 kg)
Refer to local laws for maximum trailer towing speeds.
NOTE: The trailer tongue weight must be considered as part of the combined weight of occupants and cargo, and it should
never exceed the weight referenced on the “Tire and Loading Information” placard.
43
UTILITY
Page 46 of 88

RECREATIONAL TOWING
(BEHIND MOTORHOME,
ETC.)
Two-Wheel Drive And
All-Wheel Drive
• Recreational towing (with all fourwheels on the ground) is allowed
ONLY if the rear driveshaft is
removed and the transmission is in
NEUTRAL (for both RWD and AWD
vehicles).
• Refer to your Owner’s Manual on the DVD for further details.
WARNING!
If the driveshaft is removed, the
vehicle can roll even if the
transmission is in PARK, which
could cause serious injury or death.
• The parking brake must be firmly engaged and the wheels chocked
during driveshaft removal and
installation. The parking brake must
remain engaged unless the vehicle is
securely and properly connected to
the tow vehicle, or the driveshaft is
completely reinstalled. See your
authorized dealer for proper
driveshaft removal and reinstallation
procedures, including flange
orientation/alignment, use of
thread-locking compound, proper
bolt torque specifications, etc.
CAUTION!
Towing this vehicle in violation of
the above requirements can cause
severe transmission and/or transfer
case damage. Damage from
improper towing is not covered
under your new vehicle warranties.
BRAKE/TRANSMISSION
INTERLOCK MANUAL
OVERRIDE
• The manual override may be used inthe event that the shift lever should
fail to move from PARK with the Key
Fob in the ON position and the brake
pedal pr essed.
• To operate the shift lock manual override, perform the following
steps:
UTILITY
44
Page 52 of 88

WARNING!
You or others can be badly burned by hot engine coolant (antifreeze) or steam
from your radiator. If you see or hear steam coming from under the hood, do not
open the hood until the radiator has had time to cool. Never try to open a cooling
system pressure cap when the radiator or coolant bottle is hot.
JACKING, TIRE CHANGING AND TIREFIT TIRE REPAIR
WARNING!
• Do not attempt to change or seal a tire on the side of the vehicle close to movingtraffic. Pull far enough off the road to avoid the danger of being hit when
operating the jack, changing the wheel or using the TIREFIT kit.
• Getting under a jacked-up vehicle is dangerous. The vehicle could slip off the jack and fall on you. You could be crushed. Never get any part of your body
under a vehicle that is on a jack. If you need to get under a raised vehicle, take it
to a service center where it can be raised on a lift.
• The jack is designed to use as a tool for changing tires only. The jack should not be used to lift the vehicle for service purposes. The vehicle should be jacked on a
firm, level surface only. Avoid ice or slippery areas.
WARNING!
• The compact spare tire is for emergency use only. Installation of this compact spare tire affects vehicle handling.
• Do not drive more than 50 mph (80 km/h) with a compact spare tire.
• Keep the compact spare tire inflated to the cold tire inflation pressure, listed on either your tire placard or limited use spare tire and wheel assembly.
• Replace (or repair) the original tire at the first opportunity and reinstall it on your vehicle. Failure to do so could result in loss of vehicle control.
• A loose tire, jack or TIREFIT kit thrown forward in a collision or hard stop, could endanger the occupants of the vehicle. Always stow the jack parts, spare tire and
TIREFIT kit in the places provided.
WHAT TO DO IN EMERGENCIES
50