Page 41 of 88

WARNING!
• Your motorized door or gate will open and close while you are training theuniversal transceiver. Do not train the transceiver if people or pets are in the
path of the door or gate. Only use this transceiver with a garage door opener
that has a “stop and reverse” feature as required by Federal safety standards.
This includes most garage door opener models manufactured after 1982. Do not
use a garage door opener without these safety features. Call toll-free
1–800–355–3515 or, on the Internet, at www.HomeLink.com for safety
information or assistance.
• Vehicle exhaust contains Carbon Monoxide (CO), a dangerous gas. Do not run your vehicle in the garage while training the transceiver. Exhaust gas can cause
serious injury or death.
NOTE: If you are having difficulty training your HomeLink
®and your garage door
was manufactured after 1995, you may have a rolling code system. Follow the steps
below for programming a rolling code system.
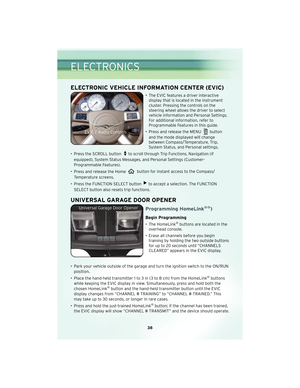
Programming A Rolling Code System
• At the garage door opener motor (in the garage), locate the “learn” or “training” button. This can usually be found where the hanging antenna wire is attached to
the garage door opener motor (it is NOT the button normally used to open and
close the door).
• Firmly press and release the “learn” or “training” button. The name and color of the button may vary by manufacturer. Within 30 seconds, return to the vehicle and
press the programmed HomeLink
®button twice (holding the button for two
seconds each time). If the device is plugged in and activates, programming is
complete.
• If the device does not activate, press the button a third time (for two seconds) to complete the training.
Using HomeLink®
• To operate, simply press and release the programmed HomeLink®button and the
trained device will operate.
• Refer to your Owner’s Manual on the DVD for further details. If you have any problems programming HomeLink
®, or require assistance, please call toll-free
1–800–355–3515, or on the Internet, at www.HomeLink.com.
POWER OUTLET
• There are two 12 Volt electrical outlets on this vehicle.
• The outlet on the front console has power available only when the ignition is in the ON position. If desired, this outlet can be converted by your authorized dealer to
provide power with the ignition switch in the LOCK position.
39
ELECTRONICS
Page 42 of 88
. Items plugged into this outlet may discharge the
battery and/or prevent engine starting.")
• The second outlet in the center console is powered directly from the battery(power available at all times). Items plugged into this outlet may discharge the
battery and/or prevent engine starting.
NOTE: Do not exceed the maximum power of 160 Watts (13 Amps) at 12 Volts. If the
160 Watt (13 Amp) power rating is exceeded the fuse protecting the system will need
to be replaced.
Uconnect™ Phone
• The Uconnect™ Phone is a voice-activated, hands-free, in-vehicle communications system.
• The Uconnect™ Phone allows you to dial a phone number with your cellular phone using simple voice commands.
• For vehicles equipped with Video Entertainment System (VES)™, refer to the Uconnect™ Phone section of the Uconnect™ User’s Manual on the DVD for further
details.
• For vehicles not equipped with VES™, refer to your vehicle Owner’s Manual on the DVD for further details.
WARNING!
• Any voice commanded system should be used only in safe driving conditionsfollowing local laws and phone use. All attention should be kept on the roadway
ahead. Failure to do so may result in an accident causing serious injury or death.
• Your phone must be turned on and paired to the Uconnect™ Phone to allow use of this vehicle feature in emergency situations, when the cellular phone has
network coverage and stays paired to the Uconnect™ Phone.
NOTE: The Uconnect™ Phone requires a cellular phone equipped with the
Bluetooth
®Hands-Free Profile, Version 0.96 or higher. For Uconnect™ customer
support, call 1–877–855–8400.
Phone Pairing
NOTE: Pairing is a one-time initial setup before using the phone. You will also need
to follow the Bluetooth®instructions in your cell phone user guide to complete the
phone pairing setup.
• Press the Phone button
to begin.
• Wait for the “ready” prompt and beep.
• (After the BEEP), say “Uconnect setup”.
• (After the BEEP), say “phone pairing”.
• (After the BEEP), say “pair a phone”.
• Follow the audible prompts.
ELECTRONICS
40
Page 43 of 88
.
• You will then be prompted to give the pho")
• You will be asked to create a four-digit PIN which you will later need to enter intoyour phone (typically...settings, Bluetooth®, device, list, new).
• You will then be prompted to give the phone pairing a name (each phone paired should have a unique name).
• Next you will be asked to give this new pairing a priority of 1 thru 7 (up to seven phones may be paired).
Making A Phone Call
• Press the Phone button.
• (After the BEEP), say “dial” (or “call” to a name).
• (After the BEEP), say number (or name).
Phonebook (Uconnect™ local) Edit
• Press the Phone button.
• (After the BEEP), say “phonebook”.
• (After the BEEP), say “new entry” or “list names” or “delete”.
• Follow the prompts.
Receiving A Call – Accept (And End)
• When an incoming call rings/is announced on Uconnect™, press the Phone button
.
• To end a call, press the Phone button
.
Mute (Or Unmute) Microphone During Call
• During a call, press the Voice Command button.
• (After the BEEP), say “mute on” (or “mute off”).
Transfer Ongoing Call Between Handset And Vehicle
• During a call, press the Voice Command button.
• (After the BEEP), say “transfer call”.
Changing The Volume
• Start a dialogue by pressing the Phone button, then adjust the volume during
a normal call.
• Use the radio ON/OFF VOLUME rotary knob to adjust the volume to a comfortable level while the Uconnect™ system is speaking. Please note the volume setting for
Uconnect™ is different than the audio system.
NOTE: To access the tutorial, press the Uconnect™ hard-key. After the BEEP, say
“tutorial”. Press any hard-key or touch the display to cancel the tutorial.
41
ELECTRONICS
Page 44 of 88

VOICE COMMAND
• The Voice Command system allows you to control your AM, FM radio, satellite radio,disc player, and a memo recorder. When you press the Voice Command
button
, you will hear a beep. The beep is your signal to give a command. If
you do not say a command within a few seconds, the system will present you with a
list of options. If you ever wish to interrupt the system while it lists options, press
the Voice Command button
, listen for the BEEP, and say your command.
• For vehicles equipped with Video Entertainment System (VES)™, refer to the Voice Command section of the Uconnect™ User’s Manual on the DVD for further details.
• For vehicles not equipped with VES™, refer to your vehicle Owner’s Manual on the DVD for Voice Command information.
Changing The Volume
• Start a dialogue by pressing the Voice Command button, then say a
command (e.g., “tutorial”).
• Use the radio ON/OFF VOLUME rotary knob to adjust the volume to a comfortable level while the Voice Command system is speaking. Please note the volume setting
for Voice Command is different than the audio system.
WARNING!
Any voice commanded system should be used only in safe driving conditions and
all attention should be kept on the roadway ahead. Failure to do so may result in
an accident causing serious injury or death.
NOTE: To access the tutorial, press the Voice Command button
. After the
BEEP, say “tutorial”. Press any hard-key or touch the display to cancel the tutorial.
ELECTRONICS
42
Page 45 of 88
TRAILER TOWING WEIGHTS (MAXIMUM TRAILER WEIGHT RATINGS)
Engine/TransmissionFrontal AreaMax. GTW
(Gross Trailer Wt.) Max. Tongue Wt.
(see note)
2.7L & 3.5L Rear Wheel
Drive (RWD) Automatic 22 sq ft (2.04 sq m)
1,000 lbs (454 kg) 100 lbs (45 kg)
3.5L All Wheel Drive (AWD)
& 5.7L Automatic 32 sq ft (2.97 sq m)
2,000 lbs (907 kg) 200 lbs (91 kg)
Refer to local laws for maximum trailer towing speeds.
NOTE: The trailer tongue weight must be considered as part of the combined weight of occupants and cargo, and it should
never exceed the weight referenced on the “Tire and Loading Information” placard.
43
UTILITY
Page 46 of 88

Two-Wheel Drive And
All-Wheel Drive
• Recreational towing (with all fourwheels on the ground) is allowed
ONLY if the rear driveshaft is
removed and the t")
RECREATIONAL TOWING
(BEHIND MOTORHOME,
ETC.)
Two-Wheel Drive And
All-Wheel Drive
• Recreational towing (with all fourwheels on the ground) is allowed
ONLY if the rear driveshaft is
removed and the transmission is in
NEUTRAL (for both RWD and AWD
vehicles).
• Refer to your Owner’s Manual on the DVD for further details.
WARNING!
If the driveshaft is removed, the
vehicle can roll even if the
transmission is in PARK, which
could cause serious injury or death.
• The parking brake must be firmly engaged and the wheels chocked
during driveshaft removal and
installation. The parking brake must
remain engaged unless the vehicle is
securely and properly connected to
the tow vehicle, or the driveshaft is
completely reinstalled. See your
authorized dealer for proper
driveshaft removal and reinstallation
procedures, including flange
orientation/alignment, use of
thread-locking compound, proper
bolt torque specifications, etc.
CAUTION!
Towing this vehicle in violation of
the above requirements can cause
severe transmission and/or transfer
case damage. Damage from
improper towing is not covered
under your new vehicle warranties.
BRAKE/TRANSMISSION
INTERLOCK MANUAL
OVERRIDE
• The manual override may be used inthe event that the shift lever should
fail to move from PARK with the Key
Fob in the ON position and the brake
pedal pr essed.
• To operate the shift lock manual override, perform the following
steps:
UTILITY
44
Page 47 of 88
• Remove the rubber tray from thestorage bin located to the right of
the shift lever. The override access
port is at the top of the bin to the
right of the shift lever gate.
• Turn the ignition switch to the ACC or ON position without
starting the engine.
• Firmly set the parking brake.
• Press and maintain firm pressure on the brake pedal. • Using a screwdriver, press and
hold the override tab through the
access port on the center console.
• Move the shift lever into the NEUTRAL position and start the
vehicle.
• Reinstall the override cover.
• Have your vehicle inspected by your local authorized dealer if the shift
lock manual override has been used.
45
UTILITY
Page 48 of 88

24 HOUR TOWING ASSISTANCE - U.S. ONLY
• Dial toll-free 1-800-521-2779 or 1-800-363-4869 for Canadian residents.
• Provide your name, vehicle identification number and license plate number.
• Provide your location, including telephone number, from which you are calling.
• Briefly describe the nature of the problem and answer a few simple questions.
• You will be given the name of the service provider and an estimated time of arrival.If you feel you are in an “unsafe situation”, please let us know. With your consent,
we will contact local police or safety authorities.
INSTRUMENT CLUSTER WARNING LIGHTS
- Electronic Stability Program (ESP) Indicator Light
• If this indicator light flashes during acceleration, apply as little throttle as possible.While driving, ease up on the accelerator. Adapt your speed and driving to the
prevailing road conditions. To improve the vehicle’s traction when starting off in
deep snow, sand or gravel, it may be desirable to switch the ESP system off.
- Tire Pressure Monitoring System (TPMS) Light
• A Tire Pressure Monitoring Light and a “low tire” message will display in yourinstrument cluster along with an audible chime if one or more of your vehicle’s four
road tires are significantly under-inflated.
• Check the inflation pressure of each tire and inflate to the recommended pressure for your vehicle. The tire pressures recommended for your vehicle are found on the
“Tire and Loading Information” label located on the driver’s side door opening. The
TPMS light should not be used as a tire pressure gauge when adjusting your tire
pressure.
• It is recommended that you check the tire pressure in the morning when tires are cool; inflate each tire to the recommended pressure for your vehicle. The light will
turn off after your vehicle’s tire pressures are properly inflated and the pressure
has been recognized. The vehicle may need to be driven for up to 20 minutes
above 15 mph (25 km/h) before the light will turn off.
• Temperature changes can affect tire pressure, causing the TPMS light to turn on. Tire pressures will also increase as the vehicle is driven – this is normal and you
should not adjust for this increased pressure.
• Driving on under-inflated tires reduces your vehicle’s fuel efficiency and tire tread life. If a spare tire is in use on the vehicle, the TPMS light may turn on.
- Engine Temperature Warning Light
• This light warns of an overheated engine condition.
• If the light turns on or flashes continuously while driving, safely pull over and stopthe vehicle. If the A/C system is on, turn it off. Also, shift the transmission into
NEUTRAL and idle the vehicle. If the temperature reading does not return to
normal, turn the engine off immediately.
WHAT TO DO IN EMERGENCIES
46


Engine/TransmissionFrontal AreaMax. GTW
(Gross Trailer Wt.) Max. Tongue Wt.
(see note)
2.7L & 3.5L Rear Wheel
Drive (RWD) Automatic 22 sq ft (2.")
