Page 474 of 608

SeeEngine Compartment Overviewon page 6‑16for more information on the location of the remote
positive (+) and remote negative (−) terminals.
{WARNING:
An electric fan can start up even when the engine
is not running and can injure you. Keep hands,
clothing and tools away from any underhood
electric fan.
{WARNING:
Using an open flame near a battery can cause
battery gas to explode. People have been hurt
doing this, and some have been blinded. Use a
flashlight if you need more light.
(Continued)
WARNING: (Continued)
Be sure the battery has enough water. You do not
need to add water to the battery installed in your
new vehicle. But if a battery has filler caps, be
sure the right amount of fluid is there. If it is low,
add water to take care of that first. If you do not,
explosive gas could be present.
Battery fluid contains acid that can burn you. Do
not get it on you. If you accidentally get it in your
eyes or on your skin, flush the place with water
and get medical help immediately.
6-48
Page 482 of 608
The vehicle should:
.Be placed so the headlamps are 25 ft. (7.6 m) from
a light colored wall.
.Have all four tires on a level surface which is level
all the way to the wall.
.Be placed so it is perpendicular to the wall.
.Not have any snow, ice, or mud on it.
.Be fully assembled and all other work stopped
while headlamp aiming is being performed.
.Be normally loaded with a full tank of fuel and one
person or 160 lbs (75 kg) sitting on the driver seat.
.Have tires properly inflated.
.Have the spare tire is in its proper location in the
vehicle.
Headlamp aiming is done with the vehicle's low-beam
headlamps. The high-beam headlamps will be correctly
aimed if the low-beam headlamps are aimed properly. To adjust the vertical aim:
1. Open the hood. See Hood Release
on page 6‑14for more information.
2. Locate the aim dot on the lens of the low‐beam
headlamp.
3. Record the distance from the ground to the aim dot on the low‐beam headlamp.
6-56
Page 483 of 608
4. At a wall measure from the ground upward (A) tothe recorded distance from Step 3 and mark it.
5. Draw or tape a horizontal line (B) on the wall or flat surface the width of the vehicle at the height of the
mark in Step 4.
Notice: Do not cover a headlamp to improve beam
cut-off when aiming. Covering a headlamp may
cause excessive heat build-up which may cause
damage to the headlamp.
6. Turn on the low-beam headlamps and place a piece of cardboard or equivalent in front of the
headlamp not being adjusted. This allows only the
beam of light from the headlamp being adjusted to
be seen on the flat surface.
7. Locate the vertical headlamp aiming screws, whichare under the hood near each headlamp assembly.
The adjustment screw can be turned with a
E8 Torx
®socket.
8. Turn the vertical aiming screw until the headlamp beam is aimed to the horizontal tape line. Turn it
clockwise or counterclockwise to raise or lower the
angle of the beam.
6-57
Page 484 of 608
9. Make sure that the light from the headlamp ispositioned at the bottom edge of the horizontal
tape line. The lamp on the left (A) shows the
correct headlamp aim. The lamp on the right (B)
shows the incorrect headlamp aim.
10. Repeat Steps 7 through 9 for the opposite headlamp.
Bulb Replacement
For the proper type of replacement bulbs, see
Replacement Bulbs on page 6‑60.
For any bulb changing procedure not listed in this
section, contact your dealer.
Halogen Bulbs
{WARNING:
Halogen bulbs have pressurized gas inside and
can burst if you drop or scratch the bulb. You or
others could be injured. Be sure to read and
follow the instructions on the bulb package.
6-58
Page 492 of 608

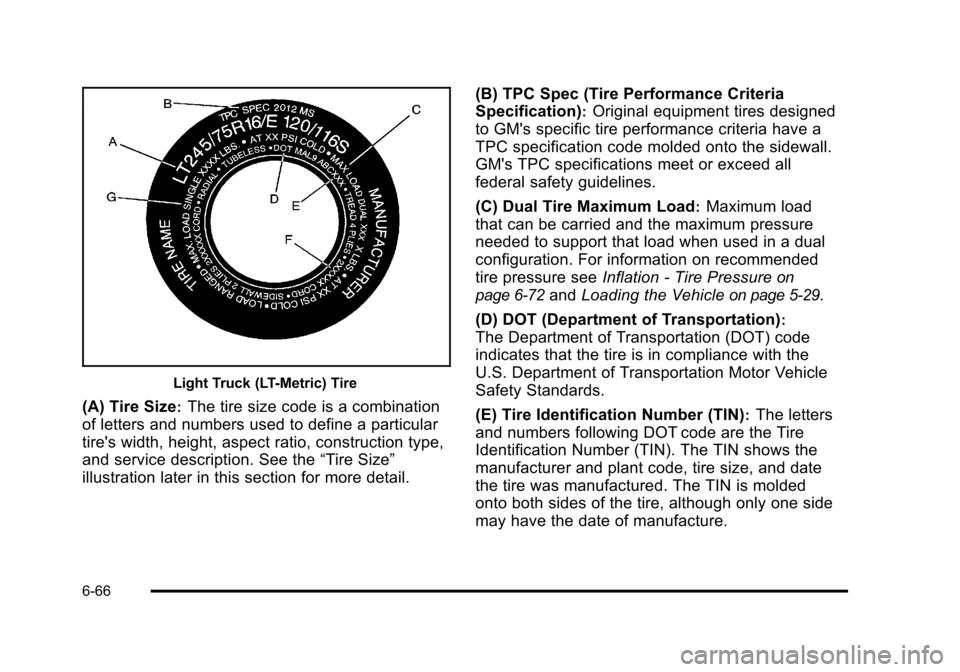
Light Truck (LT-Metric) Tire
(A) Tire Size:The tire size code is a combination
of letters and numbers used to define a particular
tire's width, height, aspect ratio, construction type,
and service description. See the “Tire Size”
illustration later in this section for more detail. (B) TPC Spec (Tire Performance Criteria
Specification)
:Original equipment tires designed
to GM's specific tire performance criteria have a
TPC specification code molded onto the sidewall.
GM's TPC specifications meet or exceed all
federal safety guidelines.
(C) Dual Tire Maximum Load
:Maximum load
that can be carried and the maximum pressure
needed to support that load when used in a dual
configuration. For information on recommended
tire pressure see Inflation - Tire Pressure
on
page 6‑72
and Loading the Vehicleon page 5‑29.
(D) DOT (Department of Transportation)
:
The Department of Transportation (DOT) code
indicates that the tire is in compliance with the
U.S. Department of Transportation Motor Vehicle
Safety Standards.
(E) Tire Identification Number (TIN)
:The letters
and numbers following DOT code are the Tire
Identification Number (TIN). The TIN shows the
manufacturer and plant code, tire size, and date
the tire was manufactured. The TIN is molded
onto both sides of the tire, although only one side
may have the date of manufacture.
6-66
Page 494 of 608

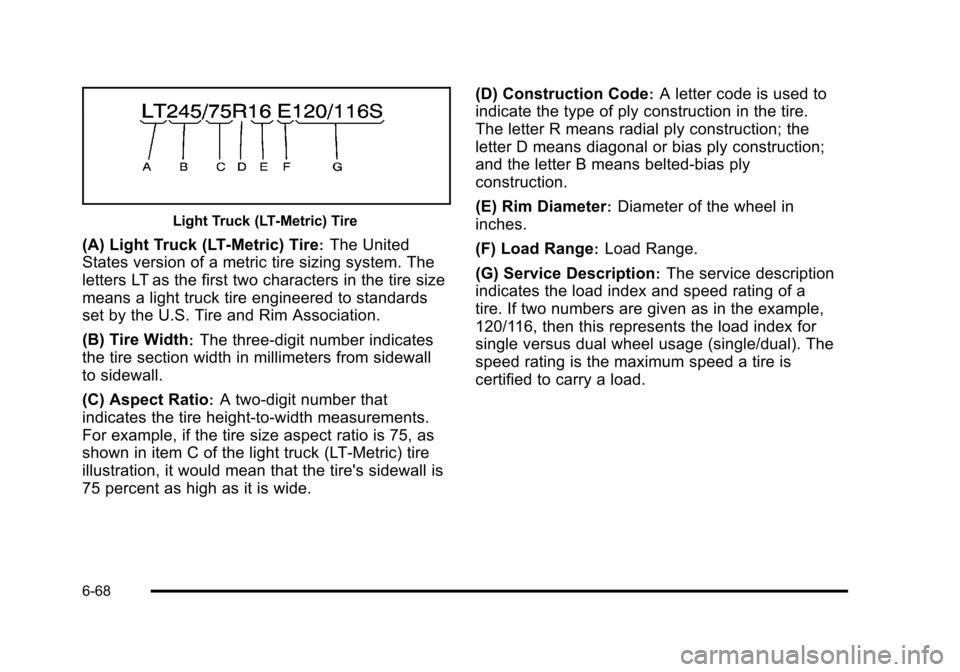
Light Truck (LT‐Metric) Tire
(A) Light Truck (LT‐Metric) Tire:The United
States version of a metric tire sizing system. The
letters LT as the first two characters in the tire size
means a light truck tire engineered to standards
set by the U.S. Tire and Rim Association.
(B) Tire Width
:The three‐digit number indicates
the tire section width in millimeters from sidewall
to sidewall.
(C) Aspect Ratio
:A two‐digit number that
indicates the tire height‐to‐width measurements.
For example, if the tire size aspect ratio is 75, as
shown in item C of the light truck (LT‐Metric) tire
illustration, it would mean that the tire's sidewall is
75 percent as high as it is wide. (D) Construction Code
:A letter code is used to
indicate the type of ply construction in the tire.
The letter R means radial ply construction; the
letter D means diagonal or bias ply construction;
and the letter B means belted‐bias ply
construction.
(E) Rim Diameter
:Diameter of the wheel in
inches.
(F) Load Range
:Load Range.
(G) Service Description
:The service description
indicates the load index and speed rating of a
tire. If two numbers are given as in the example,
120/116, then this represents the load index for
single versus dual wheel usage (single/dual). The
speed rating is the maximum speed a tire is
certified to carry a load.
6-68
Page 496 of 608

GAWR RR:Gross Axle Weight Rating for the rear
axle. See Loading the Vehicle
on page 5‑29.
Intended Outboard Sidewall
:The side of an
asymmetrical tire, that must always face outward
when mounted on a vehicle.
Kilopascal (kPa)
:The metric unit for air pressure.
Light Truck (LT‐Metric) Tire
:A tire used on light
duty trucks and some multipurpose passenger
vehicles.
Load Index
:An assigned number ranging from
1 to 279 that corresponds to the load carrying
capacity of a tire.
Maximum Inflation Pressure
:The maximum
air pressure to which a cold tire can be inflated.
The maximum air pressure is molded onto the
sidewall.
Maximum Load Rating
:The load rating for a tire
at the maximum permissible inflation pressure for
that tire.
Maximum Loaded Vehicle Weight
:The sum of
curb weight, accessory weight, vehicle capacity
weight, and production options weight. Normal Occupant Weight
:The number of
occupants a vehicle is designed to seat multiplied
by 150 lbs (68 kg). See Loading the Vehicle
on
page 5‑29
.
Occupant Distribution
:Designated seating
positions.
Outward Facing Sidewall
:The side of an
asymmetrical tire that has a particular side that
faces outward when mounted on a vehicle. The
side of the tire that contains a whitewall, bears
white lettering, or bears manufacturer, brand,
and/or model name molding that is higher or
deeper than the same moldings on the other
sidewall of the tire.
Passenger (P-Metric) Tire
:A tire used on
passenger cars and some light duty trucks and
multipurpose vehicles.
Recommended Inflation Pressure
:Vehicle
manufacturer's recommended tire inflation
pressure as shown on the tire placard. See
Inflation - Tire Pressure
on page 6‑72and Loading
the Vehicle
on page 5‑29.
6-70
Page 500 of 608

Please note that the TPMS is not a substitute for proper
tire maintenance, and it is the driver's responsibility to
maintain correct tire pressure, even if under‐inflation
has not reached the level to trigger illumination of the
TPMS low tire pressure telltale.
Your vehicle has also been equipped with a TPMS
malfunction indicator to indicate when the system is
not operating properly. The TPMS malfunction indicator
is combined with the low tire pressure telltale. When
the system detects a malfunction, the telltale will
flash for approximately one minute and then remain
continuously illuminated. This sequence will continue
upon subsequent vehicle start‐ups as long as the
malfunction exists.
When the malfunction indicator is illuminated, the
system may not be able to detect or signal low tire
pressure as intended. TPMS malfunctions may occur
for a variety of reasons, including the installation of
replacement or alternate tires or wheels on the vehicle
that prevent the TPMS from functioning properly.
Always check the TPMS malfunction telltale after
replacing one or more tires or wheels on your vehicle
to ensure that the replacement or alternate tires and
wheels allow the TPMS to continue to function properly.
SeeTire Pressure Monitor Operation
on page 6‑74for
additional information.
Federal Communications Commission
(FCC) and Industry Canada
See Radio Frequency Statementon page 8‑19for information regarding Part 15 of the Federal
Communications Commission (FCC) Rules and
RSS-210/211 of Industry Canada.
Tire Pressure Monitor Operation
If your vehicle is a Two‐mode Hybrid, see the
Two‐mode Hybrid manual for more information.
This vehicle may have a Tire Pressure Monitor System
(TPMS). The TPMS is designed to warn the driver when
a low tire pressure condition exists. TPMS sensors are
mounted onto each tire and wheel assembly, excluding
the spare tire and wheel assembly. The TPMS sensors
monitor the air pressure in the vehicle's tires and
transmit the tire pressure readings to a receiver located
in the vehicle.
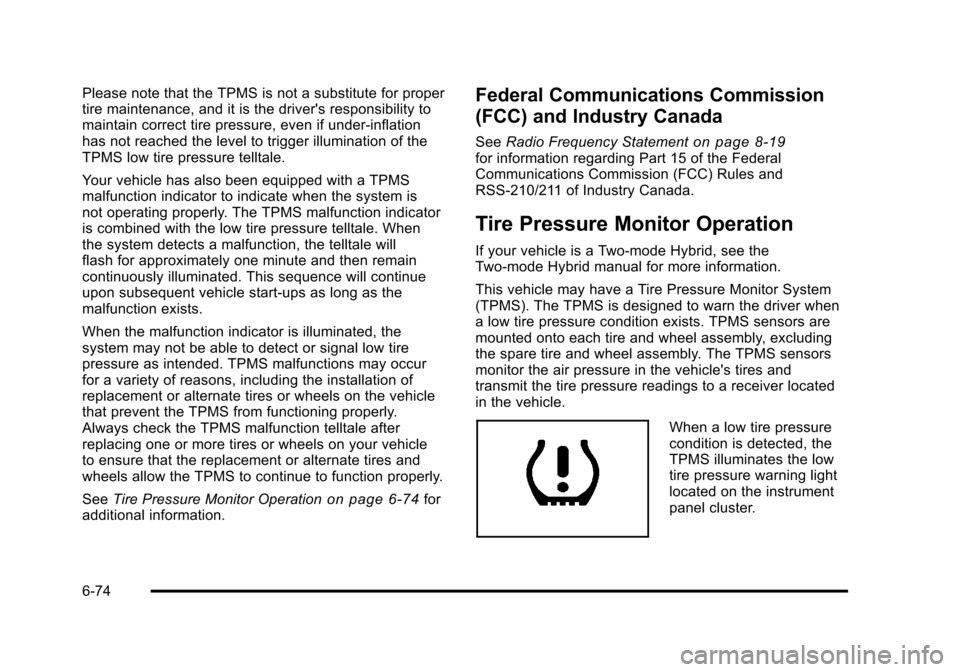
When a low tire pressure
condition is detected, the
TPMS illuminates the low
tire pressure warning light
located on the instrument
panel cluster.
6-74