2010 CHEVROLET EQUINOX dead battery
[x] Cancel search: dead batteryPage 170 of 394
6-40 Infotainment System
Battery Replacement
To change the remote control
batteries:
1. Slide back the rear cover on theremote control.
2. Replace the two batteries in the compartment.
3. Replace the battery cover.
Remove the batteries from the
remote control if unused for an
extended period of time.Tips and Troubleshooting Chart
Problem Recommended Action
No power. The ignition might not be turned to
ON/RUN or in ACC/ACCESSORY.
The picture does not fill the screen.
There are black borders on the top
and bottom or on both sides or it
looks stretched out. Check the display mode settings in
the setup menu by pressing the
display menu button on the remote
control.
In auxiliary mode, the picture moves
or scrolls. Check the auxiliary input
connections at both devices.
The remote control does not work. Check to make sure there is no obstruction between the remote
control and the transmitter window.
Check the batteries to make sure
they are not dead or installed
incorrectly.
After stopping the player, I push
Play but sometimes the DVD starts
where I left off and sometimes at the
beginning. If the stop button was pressed one
time, the DVD player resumes
playing where the DVD was
stopped. If the stop button was
pressed two times the DVD player
begins to play from the beginning of
the DVD.
Page 338 of 394
9-70 Vehicle Care
1. The vehicle used to jump startmust have 12-volt battery with a
negative ground.
Notice: If the other vehicle's
system is not a 12-volt system
with a negative ground, both
vehicles can be damaged. Only
use vehicles with 12-volt systems
with negative grounds to jump
start your vehicle.
2. The vehicles should be close enough for the jumper cables to
reach, but the vehicles should
not be touching. Touching could
cause grounding and possible
electrical system damage.
Put both vehicles in P (Park)
and set the parking brake firmly.
3. Unplug accessories plugged into the cigarette lighter or the
accessory power outlet. Turn off
the radio and all lamps that are
not needed. Turn off the ignition
on both vehicles. 4. Locate the positive (+) and
negative (−) terminals on both
vehicles. Some vehicles have
remote jump starting terminals.
{WARNING
An electric fan can start up even
when the engine is not running
and can injure you. Keep hands,
clothing and tools away from any
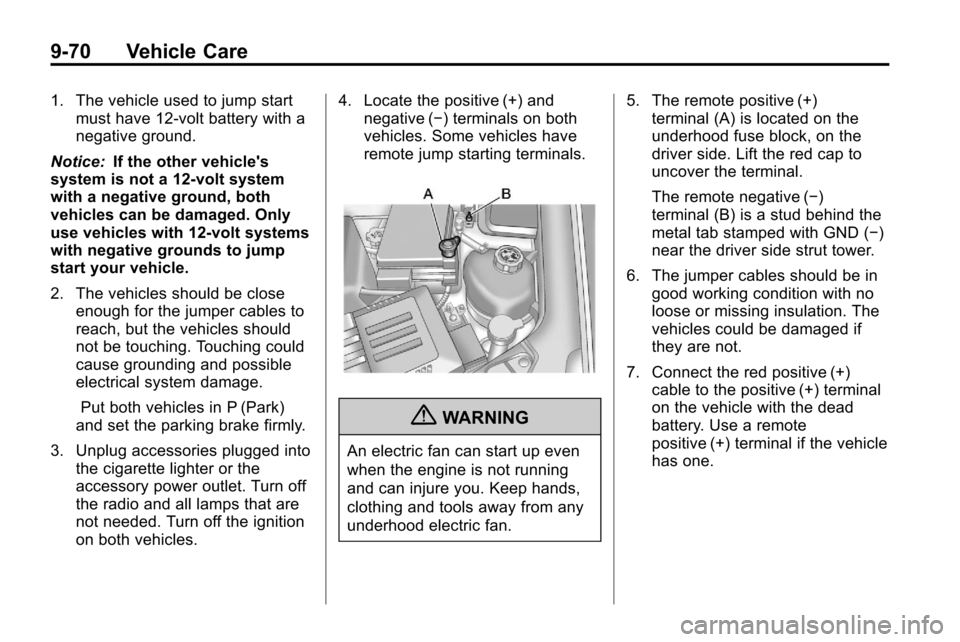
underhood electric fan. 5. The remote positive (+)
terminal (A) is located on the
underhood fuse block, on the
driver side. Lift the red cap to
uncover the terminal.
The remote negative (−)
terminal (B) is a stud behind the
metal tab stamped with GND (−)
near the driver side strut tower.
6. The jumper cables should be in good working condition with no
loose or missing insulation. The
vehicles could be damaged if
they are not.
7. Connect the red positive (+) cable to the positive (+) terminal
on the vehicle with the dead
battery. Use a remote
positive (+) terminal if the vehicle
has one.
Page 339 of 394
Vehicle Care 9-71
8. Do not let the other end touchmetal. Connect it to the
positive (+) terminal of the good
battery. Use a remote
positive (+) terminal if the vehicle
has one.
9. Connect the black negative (−) cable to the negative (−) terminal
of the good battery. Use a
remote negative (−) terminal if
the vehicle has one.
Do not let the other end touch
anything until the next step. The
other end of the negative (−)
cable does not go to the dead
battery. It goes to a heavy,
unpainted metal engine part or
to a remote negative (−) terminal
on the vehicle with the dead
battery.
10. Connect the other end of the negative (−) cable away from
the dead battery, but not near
engine parts that move. 11. Start the vehicle with the good
battery and run the engine.
12. Press the unlock symbol on the remote keyless entry
transmitter to disarm the
security system, if equipped.
13. Try to start the vehicle that had the dead battery. If it will not
start after a few tries, it needs
service.
Notice: If the jumper cables are
connected or removed in the
wrong order, electrical shorting
may occur and damage the
vehicle. The repairs would not be
covered by the vehicle warranty.
Always connect and remove the
jumper cables in the correct
order, making sure that the
cables do not touch each other or
other metal.
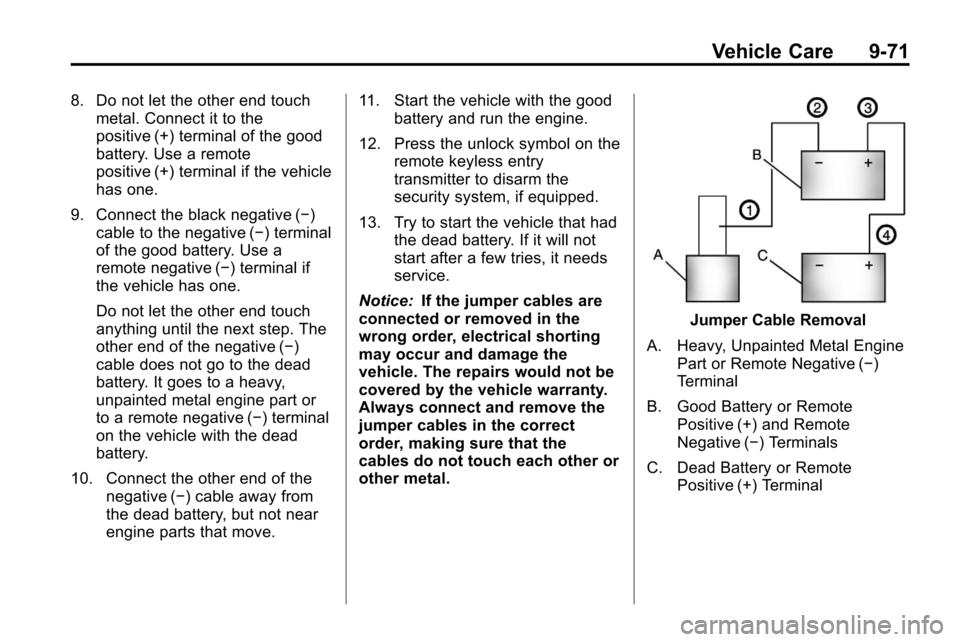
Jumper Cable Removal
A. Heavy, Unpainted Metal Engine Part or Remote Negative (−)
Terminal
B. Good Battery or Remote Positive (+) and Remote
Negative (−) Terminals
C. Dead Battery or Remote Positive (+) Terminal
Page 340 of 394
9-72 Vehicle Care
To disconnect the jumper cables
from both vehicles,
1. Disconnect the blacknegative (−) cable from the
vehicle that had the dead
battery.
2. Disconnect the black negative (−) cable from the
vehicle with the good battery.
3. Disconnect the red positive (+) cable from the vehicle with the
good battery.
4. Disconnect the red positive (+) cable from the other vehicle.
5. Return the underhood fuse block cover to its original position,
if applicable.Towing
Towing the Vehicle
To avoid damage, the disabled
vehicle should be towed with all four
wheels off the ground. Consult your
dealer or a professional towing
service if the disabled vehicle must
be towed. See Roadside Assistance
Program on page 12‑6.
To tow the vehicle behind
another vehicle for recreational
purposes —such as behind a
motorhome, see Recreational
Vehicle Towing following.
Recreational Vehicle
Towing
Recreational vehicle towing means
towing the vehicle behind another
vehicle –such as behind a
motorhome. The two most common
types of recreational vehicle towing
are known as dinghy towing and dolly towing. Dinghy towing is
towing the vehicle with all four
wheels on the ground. Dolly towing
is towing the vehicle with two
wheels on the ground and two
wheels up on a device known as a
dolly.
Here are some important things to
consider before recreational vehicle
towing:
.What is the towing capacity of
the towing vehicle? Be sure to
read the tow vehicle
manufacturer's
recommendations.
.What is the distance that will be
travelled? Some vehicles have
restrictions on how far and how
long they can tow.
.Is the proper towing equipment
going to be used? See your
dealer or trailering professional
for additional advice and
equipment recommendations.
Page 373 of 394
Customer Information 12-7
.Flat Tire Change:Service is
provided to change a flat tire
with the spare tire. The spare
tire, if equipped, must be in good
condition and properly inflated.
It is the owner's responsibility for
the repair or replacement of the
tire if it is not covered by the
warranty.
.Battery Jump Start: Service is
provided to jump start a dead
battery.
Services Not Included in
Roadside Assistance
.Impound towing caused by
violation of any laws.
.Legal fines.
.Mounting, dismounting or
changing of snow tires, chains,
or other traction devices.
.Towing or services for vehicles
driven on a non-public road or
highway.
Services Specific to Canadian
Purchased Vehicles
.Fuel delivery: Reimbursement
is approximately $5 Canadian.
Diesel fuel delivery may be
restricted. Propane and other
fuels are not provided through
this service.
.Lock-Out Service: Vehicle
registration is required.
.Trip Routing Service: Detailed
maps of North America are
provided when requested either
with the most direct route or the
most scenic route. There is a
limit of six requests per year.
Additional travel information is
also available. Allow three
weeks for delivery.
.Trip Interruption Benefits and
Assistance: Must be over
250 kilometres from where
your trip was started to
qualify. General Motors of Canada Limited requires
pre-authorization, original
detailed receipts, and a copy of
the repair orders. Once
authorization has been received,
the Roadside Assistance advisor
will help you make arrangements
and explain how to receive
payment.
.Alternative Service:
If
assistance cannot be provided
right away, the Roadside
Assistance advisor may give you
permission to get local
emergency road service. You will
receive payment, up to $100,
after sending the original receipt
to Roadside Assistance.
Mechanical failures may be
covered, however any cost for
parts and labor for repairs not
covered by the warranty are the
owner responsibility.