2010 CHEVROLET EQUINOX instrument panel
[x] Cancel search: instrument panelPage 247 of 394
Driving and Operating 8-43
StabiliTrak System
The vehicle has a vehicle stability
enhancement system called
StabiliTrak. It is an advanced
computer controlled system that
assists with directional control of the
vehicle in difficult driving conditions.
StabiliTrak activates when the
computer senses a difference
between the intended path and the
direction the vehicle is actually
traveling. StabiliTrak selectively
applies braking pressure at any one
of the vehicle's brakes to help steer
the vehicle in the intended direction.
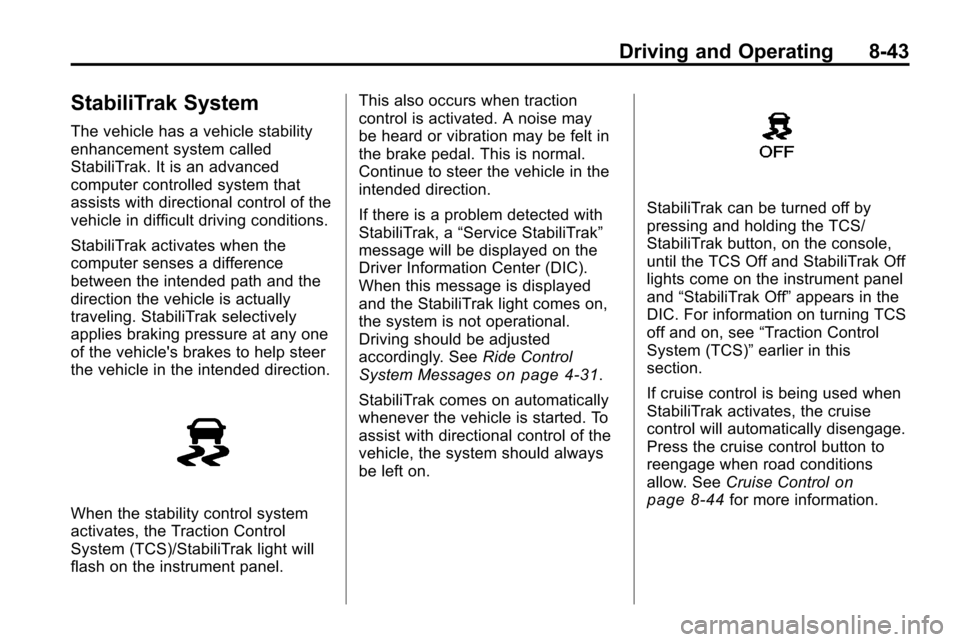
When the stability control system
activates, the Traction Control
System (TCS)/StabiliTrak light will
flash on the instrument panel.This also occurs when traction
control is activated. A noise may
be heard or vibration may be felt in
the brake pedal. This is normal.
Continue to steer the vehicle in the
intended direction.
If there is a problem detected with
StabiliTrak, a
“Service StabiliTrak”
message will be displayed on the
Driver Information Center (DIC).
When this message is displayed
and the StabiliTrak light comes on,
the system is not operational.
Driving should be adjusted
accordingly. See Ride Control
System Messages
on page 4‑31.
StabiliTrak comes on automatically
whenever the vehicle is started. To
assist with directional control of the
vehicle, the system should always
be left on.
StabiliTrak can be turned off by
pressing and holding the TCS/
StabiliTrak button, on the console,
until the TCS Off and StabiliTrak Off
lights come on the instrument panel
and “StabiliTrak Off” appears in the
DIC. For information on turning TCS
off and on, see “Traction Control
System (TCS)” earlier in this
section.
If cruise control is being used when
StabiliTrak activates, the cruise
control will automatically disengage.
Press the cruise control button to
reengage when road conditions
allow. See Cruise Control
on
page 8‑44for more information.
Page 249 of 394
Driving and Operating 8-45
SET/−(Set/Coast): Move the
thumbwheel down toward SET/−
to set a speed and activate cruise
control, or to make the vehicle
decelerate.
Setting Cruise Control
If the cruise button is on when not in
use, it could get bumped and go into
cruise when not desired. Keep the
cruise button turned off when cruise
control is not being used.
To set a speed:
1. Press
5to turn the cruise
control system on.
2. Get to the speed desired.
3. Move the thumbwheel down toward SET/− and release it.
The desired set speed briefly
appears in the instrument panel
cluster.
4. Take your foot off the accelerator pedal. Resuming a Set Speed
If the cruise control is set at a
desired speed and then the brakes
are applied or the Cancel button is
pressed, the cruise control is
disengaged without erasing the
set speed from memory.
Once the vehicle reaches about
40 km/h (25 mph) or more, move
the thumbwheel up toward RES/+
briefly. The vehicle returns to the
speed selected previously and stays
there.
Increasing Speed While Using
Cruise Control
If the cruise control system is
already activated,
.Move the thumbwheel up
toward RES/+ and hold it until
the vehicle accelerates to the
desired speed, and then
release it.
.To increase the speed in small
amounts, move the thumbwheel
up toward RES/+ briefly and
then release it. Each time this is
done, the vehicle goes about
1.6 km/h (1 mph) faster.
Reducing Speed While Using
Cruise Control
If the cruise control system is
already activated,
.Move the thumbwheel down
toward SET/− and hold until the
desired lower speed is reached,
then release it.
.To slow down in very small
amounts, move the thumbwheel
down toward SET/− briefly and
then release it. Each time this is
done, the vehicle goes about
1.6 km/h (1 mph) slower.
Page 264 of 394
8-60 Driving and Operating
Making Turns
Notice:Making very sharp turns
while trailering could cause the
trailer to come in contact with the
vehicle. The vehicle could be
damaged. Avoid making very
sharp turns while trailering.
When turning with a trailer, make
wider turns than normal so the
trailer will not strike soft shoulders,
curbs, road signs, trees or other
objects. Use the turn signal well in
advance and avoid jerky or sudden
maneuvers.
Turn Signals When Towing
a Trailer
The turn signal indicators on the
instrument panel flash whenever
signaling a turn or lane change.
Properly hooked up, the trailer
lamps also flash, telling other
drivers the vehicle is turning,
changing lanes or stopping.
When towing a trailer, the arrows
on the instrument panel flash for
turns even if the bulbs on the trailer are burned out. Check occasionally
to be sure the trailer bulbs are still
working.
Driving On Grades
Reduce speed and shift to a lower
gear before starting down a long or
steep downgrade. If the
transmission is not shifted down, the
brakes might have to be used so
much that they would get hot and no
longer work well.
The vehicle can tow in D (Drive).
Use a lower gear if the transmission
shifts too often.
When towing at high altitude on
steep uphill grades, engine coolant
will boil at a lower temperature than
at normal altitudes. If the engine is
turned off immediately after towing
at high altitude on steep uphill
grades, the vehicle may show signs
similar to engine overheating. To
avoid this, let the engine run while
parked, preferably on level ground,
with the transmission in P (Park) for
a few minutes before turning the
engine off. If the overheat warning
comes on, see
Engine Overheating
on page 9‑18.
Parking on Hills
{WARNING
Parking the vehicle on a hill with
the trailer attached can be
dangerous. If something goes
wrong, the rig could start to move.
People can be injured, and both
the vehicle and the trailer can be
damaged. When possible, always
park the rig on a flat surface.
If parking the rig on a hill:
1. Press the brake pedal, but do not shift into P (Park) yet. Turn
the wheels into the curb if facing
downhill or into traffic if facing
uphill.
2. Have someone place chocks under the trailer wheels.
Page 269 of 394
Vehicle Care 9-1
Vehicle Care
General Information
General Information . . . . . . . . . . . 9-3
California Proposition65 Warning . . . . . . . . . . . . . . . . . . 9-3
California Perchlorate Materials Requirements . . . . . . . . . . . . . . . 9-3
Accessories and Modifications . . . . . . . . . . . . . . . . 9-4
Vehicle Checks
Doing Your OwnService Work . . . . . . . . . . . . . . . . 9-4
Hood . . . . . . . . . . . . . . . . . . . . . . . . . . 9-5
Engine Compartment Overview . . . . . . . . . . . . . . . . . . . . 9-6
Engine Cover . . . . . . . . . . . . . . . . . 9-9
Engine Oil . . . . . . . . . . . . . . . . . . . 9-10
Engine Oil Life System . . . . . . . 9-11
Automatic Transmission Fluid . . . . . . . . . . . . . . . . . . . . . . . 9-12 Engine Air Cleaner/Filter . . . . . 9-13
Cooling System . . . . . . . . . . . . . . 9-14
Engine Coolant . . . . . . . . . . . . . . 9-15
Engine Overheating . . . . . . . . . 9-18
Power Steering Fluid (2.4L
L4 Engine) . . . . . . . . . . . . . . . . . 9-20
Power Steering Fluid (3.0L V6 Engine) . . . . . . . . . . . . . . . . . 9-20
Washer Fluid . . . . . . . . . . . . . . . . 9-21
Brakes . . . . . . . . . . . . . . . . . . . . . . . 9-21
Brake Fluid . . . . . . . . . . . . . . . . . . 9-22
Battery . . . . . . . . . . . . . . . . . . . . . . . 9-24
All-Wheel Drive . . . . . . . . . . . . . . 9-24
Starter Switch Check . . . . . . . . 9-25
Automatic Transmission Shift Lock Control System
Check . . . . . . . . . . . . . . . . . . . . . . 9-25
Ignition Transmission Lock Check . . . . . . . . . . . . . . . . . . . . . . 9-25
Park Brake and P (Park) Mechanism Check . . . . . . . . . 9-26
Wiper Blade Replacement . . . 9-26
Headlamp Aiming
Headlamp Aiming . . . . . . . . . . . . 9-27
Bulb Replacement
Bulb Replacement . . . . . . . . . . . 9-30
Headlamps, Front Turn Signal, Sidemarker, and Parking
Lamps . . . . . . . . . . . . . . . . . . . . . . 9-30
Fog Lamps . . . . . . . . . . . . . . . . . . 9-31
Taillamps, Turn Signal, Sidemarker, Stoplamps,
and Back-Up Lamps . . . . . . . 9-32
License Plate Lamp . . . . . . . . . . 9-33
Replacement Bulbs . . . . . . . . . . 9-34
Electrical System
Fuses . . . . . . . . . . . . . . . . . . . . . . . . 9-34
Engine Compartment Fuse Block . . . . . . . . . . . . . . . . . . . . . . . 9-34
Instrument Panel Fuse Block . . . . . . . . . . . . . . . . . . . . . . . 9-37
Page 273 of 394
Vehicle Care 9-5
If doing some of your own service
work, use the proper service
manual. It tells you much more
about how to service the vehicle
than this manual can. To order the
proper service manual, seeService
Publications Ordering Information
on
page 12‑12.
This vehicle has an airbag system.
Before attempting to do your own
service work, see Servicing the
Airbag-Equipped Vehicle
on
page 2‑34.
Keep a record with all parts receipts
and list the mileage and the date of
any service work performed. See
Maintenance Records
on
page 10‑10.
Hood
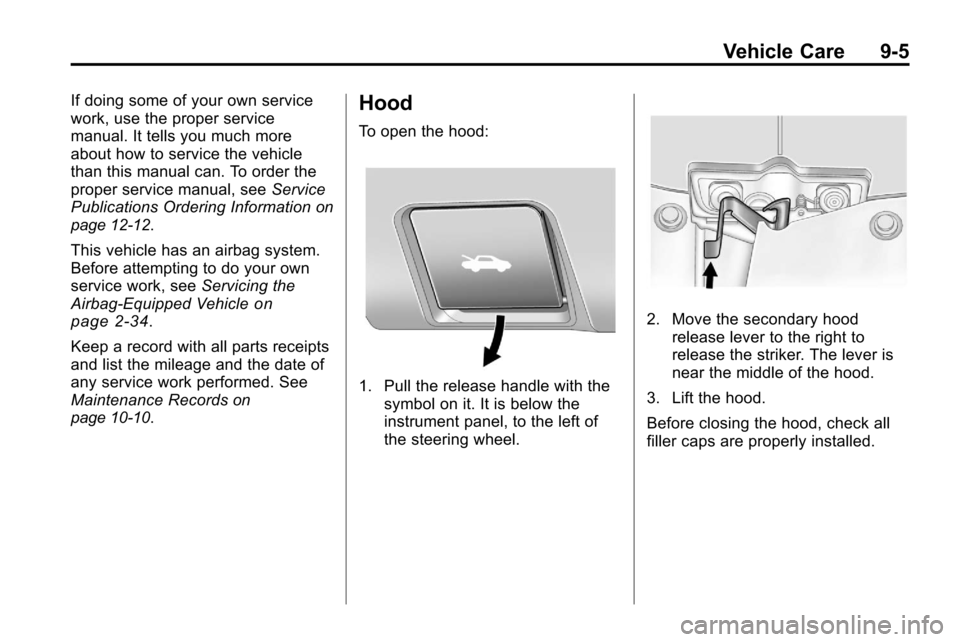
To open the hood:
1. Pull the release handle with the symbol on it. It is below the
instrument panel, to the left of
the steering wheel.
2. Move the secondary hoodrelease lever to the right to
release the striker. The lever is
near the middle of the hood.
3. Lift the hood.
Before closing the hood, check all
filler caps are properly installed.
Page 286 of 394
9-18 Vehicle Care
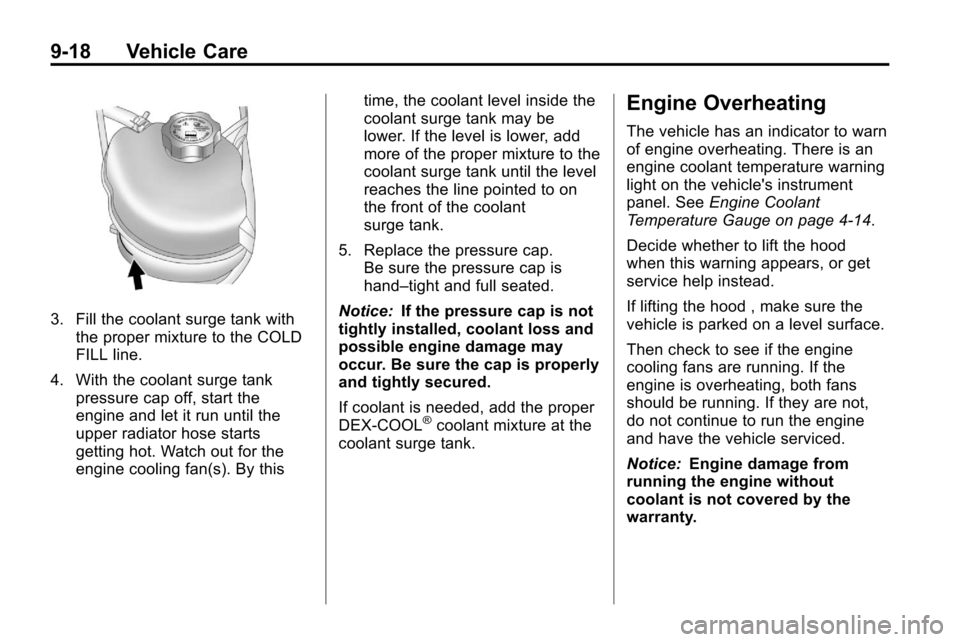
3. Fill the coolant surge tank withthe proper mixture to the COLD
FILL line.
4. With the coolant surge tank pressure cap off, start the
engine and let it run until the
upper radiator hose starts
getting hot. Watch out for the
engine cooling fan(s). By this time, the coolant level inside the
coolant surge tank may be
lower. If the level is lower, add
more of the proper mixture to the
coolant surge tank until the level
reaches the line pointed to on
the front of the coolant
surge tank.
5. Replace the pressure cap. Be sure the pressure cap is
hand–tight and full seated.
Notice: If the pressure cap is not
tightly installed, coolant loss and
possible engine damage may
occur. Be sure the cap is properly
and tightly secured.
If coolant is needed, add the proper
DEX-COOL
®coolant mixture at the
coolant surge tank.
Engine Overheating
The vehicle has an indicator to warn
of engine overheating. There is an
engine coolant temperature warning
light on the vehicle's instrument
panel. See Engine Coolant
Temperature Gauge on page 4‑14.
Decide whether to lift the hood
when this warning appears, or get
service help instead.
If lifting the hood , make sure the
vehicle is parked on a level surface.
Then check to see if the engine
cooling fans are running. If the
engine is overheating, both fans
should be running. If they are not,
do not continue to run the engine
and have the vehicle serviced.
Notice: Engine damage from
running the engine without
coolant is not covered by the
warranty.
Page 302 of 394
9-34 Vehicle Care
Replacement Bulbs
Exterior LampBulb
Number
Back-Up Lamp 921
Fog Lamp Front H11
Headlamp
High Beam HB3
Headlamp
Low Beam H11
License Plate Lamp W5WLL
Parking Lamp/Turn
Signal Front T20
Sidemarker Front
and Rear 194
Taillamp/Turn Signal
Lamp/Stop Lamp 3157K
For replacement bulbs not listed
here, contact your dealer.
Electrical System
Fuses
The wiring circuits in the vehicle are
protected from short circuits by
fuses. This greatly reduces the
chance of damage caused by
electrical problems.
Look at the silver-colored band
inside the fuse. If the band is broken
or melted, replace the fuse. Be sure
to replace a bad fuse with a new
one of the identical size and rating.
There are two fuse blocks in the
vehicle: one in the engine
compartment and one in the
instrument panel.
There is a fuse puller located in the
engine compartment fuse block.
See Engine Compartment Fuse
Block
on page 9‑34. It can be used
to easily remove fuses from the fuse
block.
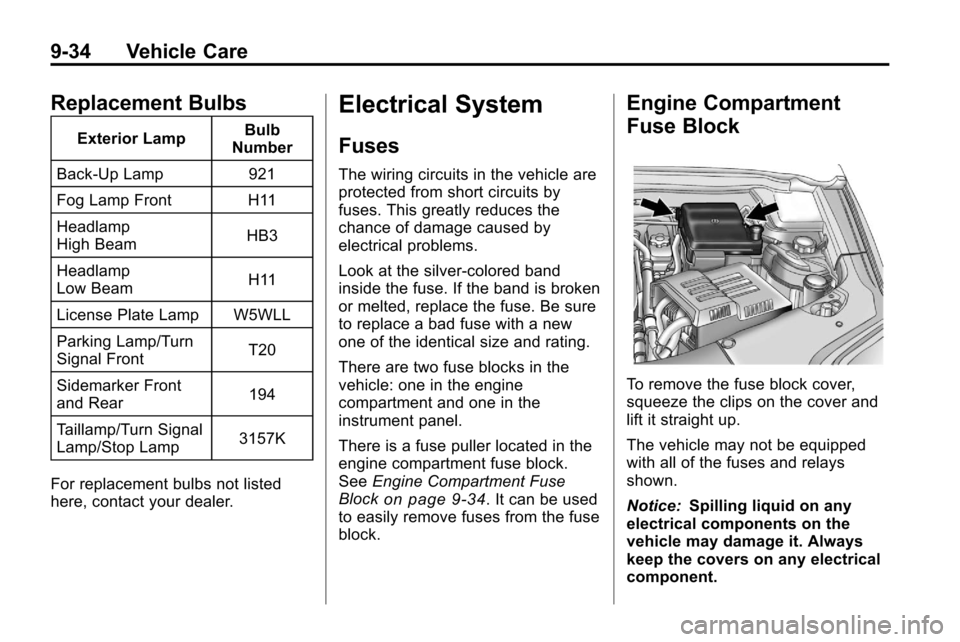
Engine Compartment
Fuse Block
To remove the fuse block cover,
squeeze the clips on the cover and
lift it straight up.
The vehicle may not be equipped
with all of the fuses and relays
shown.
Notice: Spilling liquid on any
electrical components on the
vehicle may damage it. Always
keep the covers on any electrical
component.
Page 303 of 394
Vehicle Care 9-35
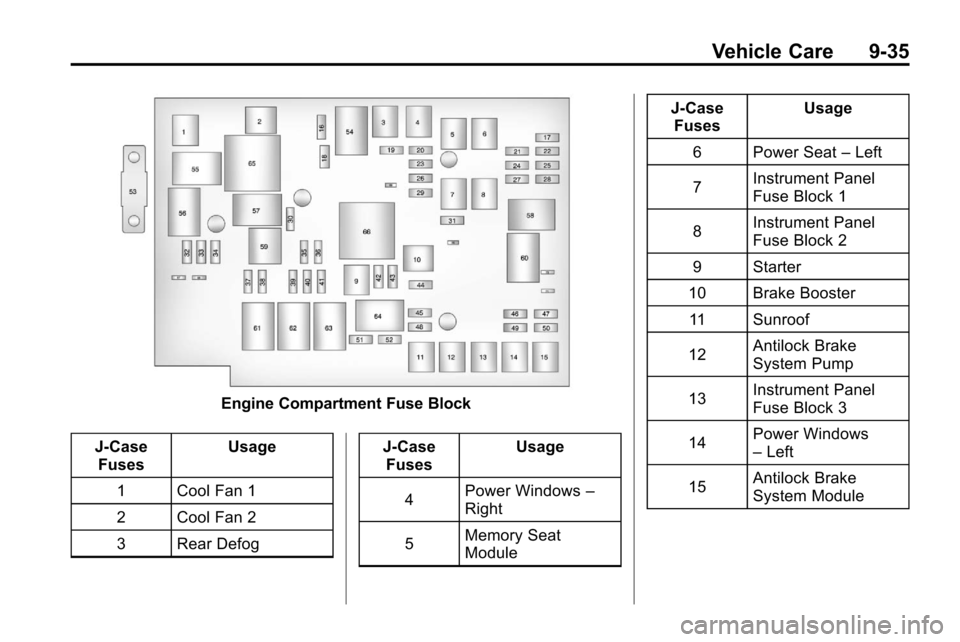
Engine Compartment Fuse Block
J-Case Fuses Usage
1 Cool Fan 1
2 Cool Fan 2
3 Rear Defog J-Case
Fuses Usage
4 Power Windows
–
Right
5 Memory Seat
Module J-Case
Fuses Usage
6 Power Seat –Left
7 Instrument Panel
Fuse Block 1
8 Instrument Panel
Fuse Block 2
9 Starter
10 Brake Booster 11 Sunroof
12 Antilock Brake
System Pump
13 Instrument Panel
Fuse Block 3
14 Power Windows
–
Left
15 Antilock Brake
System Module