2010 CHEVROLET EQUINOX instrument panel
[x] Cancel search: instrument panelPage 129 of 394
Lighting 5-3
Turn and Lane-Change
Signals
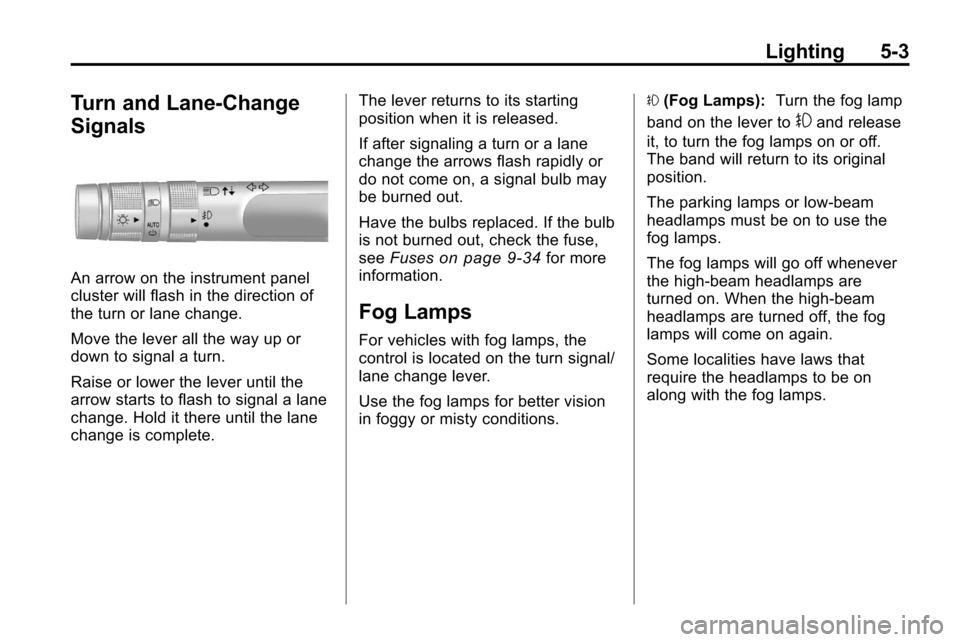
An arrow on the instrument panel
cluster will flash in the direction of
the turn or lane change.
Move the lever all the way up or
down to signal a turn.
Raise or lower the lever until the
arrow starts to flash to signal a lane
change. Hold it there until the lane
change is complete.The lever returns to its starting
position when it is released.
If after signaling a turn or a lane
change the arrows flash rapidly or
do not come on, a signal bulb may
be burned out.
Have the bulbs replaced. If the bulb
is not burned out, check the fuse,
see
Fuses
on page 9‑34for more
information.
Fog Lamps
For vehicles with fog lamps, the
control is located on the turn signal/
lane change lever.
Use the fog lamps for better vision
in foggy or misty conditions. #
(Fog Lamps): Turn the fog lamp
band on the lever to
#and release
it, to turn the fog lamps on or off.
The band will return to its original
position.
The parking lamps or low‐beam
headlamps must be on to use the
fog lamps.
The fog lamps will go off whenever
the high-beam headlamps are
turned on. When the high‐beam
headlamps are turned off, the fog
lamps will come on again.
Some localities have laws that
require the headlamps to be on
along with the fog lamps.
Page 130 of 394
5-4 Lighting
Interior Lighting
Instrument Panel
Illumination Control
This control is located on the
instrument panel, to the left of
the steering column.
D(Instrument Panel
Brightness): Turn clockwise or
counterclockwise to brighten or
dim the lights.
Dome Lamps
The dome lamp controls are located
in the overhead console. To change
the settings, press the following:
*(Dome Lamp Override): Turns
the lamp off, even when a door
is open.
1(Door): The lamp comes on
automatically when a door is
opened.
+(On): Turns the dome lamp on.
Reading Lamps
The reading lamps are located on
the overhead console. These lamps
come on automatically when any
door is opened.
For manual operation, press the
button next to each lamp to turn it
on or off.
Lighting Features
Entry Lighting
The dome lamp, cargo lamp and
foot lamp inside the vehicle come
on when any door is opened, if the
dome lamp is in the door position. In
addition, these lamps come on
when the Remote Keyless Entry
(RKE) unlock button is pressed.
They stay on for 20 seconds or until
a door is opened. After the door is
opened and then closed, the light
remains on for 20 seconds, or until
the ignition is turned to ON/RUN.
Page 198 of 394
7-2 Climate Controls
Air Delivery Mode Control:To
change the current mode, select
one of the following:
F (Vent): Air is directed to the
instrument panel outlets.
* (Bi-Level): Air is directed to the
instrument panel outlets and the
floor outlets.
7 (Floor): Air is directed to the
floor outlets.
W(Defog): Clears the windows of
fog or moisture. Air is directed to the
windshield and floor outlets.
0(Defrost): Clears the
windshield of fog or frost more
quickly. Air is directed to the
windshield and side window outlets.
For best results, clear all snow and
ice from the windshield before
defrosting.
Do not drive the vehicle until all the
windows are clear.
Air Conditioning
#(Air Conditioning): Press to
turn the air conditioning on or off.
If the fan is turned off or the outside
temperature falls below freezing, the
air conditioning will not work.
h(Recirculation): Press to turn
on the recirculation. An indicator
light comes on. Air is recirculated
inside the vehicle. It helps to quickly
cool the air inside the vehicle or
prevent outside air and odors from
entering.
%(Outside Air): Press to turn
on the outside air. An indicator light
comes on. Outside air is circulated
throughout the vehicle.
Rear Window Defogger
<(Rear Defogger): Press to turn
the rear window defogger on or off.
The rear window defogger turns off
after about 10 minutes. It can also
be turned off by turning the ignition
to ACC/ACCESSORY or LOCK/
OFF. If turned on again, it runs for
about five minutes before
turning off.
Do not drive the vehicle until all the
windows are clear.
Notice: Do not use a razor blade
or sharp object to clear the inside
rear window. Do not adhere
anything to the defogger grid
lines in the rear glass. These
actions may damage the rear
defogger. Repairs would not be
covered by your warranty.
Page 201 of 394
Climate Controls 7-5
H/G(Air Delivery Mode
Control): Press mode up or mode
down to cycle through the different
air delivery modes. The current
mode is shown on the display.
Select from the following:
F (Vent): Air is directed to the
instrument panel outlets.
* (Bi-Level): Air is directed to the
instrument panel outlets and the
floor outlets.
7 (Floor): Air is directed to the
floor outlets.
W(Defog): Clears the windows of
fog or moisture. Air is directed to the
windshield and floor outlets.
0(Defrost): Clears the
windshield of fog or frost more
quickly. Air is directed to the
windshield and side window outlets.
Selecting defrost disables the
automatic mode.
For best results, clear all snow and
ice from the windshield before
defrosting. Do not drive the vehicle until all the
windows are clear.
Air Conditioning
#(Air Conditioning):
Press to
turn the air conditioning on or off.
If the fan is turned off or the outside
temperature falls below freezing, the
air conditioning will not work. When
in AUTO, the air conditioning will
come on automatically as needed.
h(Recirculation): Press to turn
on the recirculation. Press to
alternate between recirculation and
outside air, if the vehicle does not
have a separate outside air button.
The indicator light turns on when
recirculation is selected. Air is
recirculated inside the vehicle.
It helps quickly cool the air inside
the vehicle or prevent outside air
and odors from entering.
%(Outside Air, If Equipped):
Press to turn on the outside air. An
indicator light comes on. Outside air
is circulated throughout the vehicle.
Rear Window Defogger
<(Rear Defogger): Press to turn
the rear window defogger on or off.
The rear window defogger turns off
after about 10 minutes. It can also
be turned off by turning the ignition
to ACC/ACCESSORY or LOCK/
OFF. If turned on again, it runs
for about five minutes before
turning off.
Do not drive the vehicle until all the
windows are clear.
Notice: Do not use a razor blade
or sharp object to clear the inside
rear window. Do not adhere
anything to the defogger grid
lines in the rear glass. These
actions may damage the rear
defogger. Repairs would not be
covered by your warranty.
L/M(Driver and Passenger
Heated Seats): For vehicles with
heated seats, see Heated Front
Seats on page 2‑7.
Page 202 of 394
7-6 Climate Controls
Sensors
The solar sensor, located on top of
the instrument panel near the
windshield, monitors the solar heat.
The climate control system uses the
information to adjust the
temperature, fan speed,
recirculation, and air delivery mode.
Do not cover the solar sensor or the
system will not work properly.
Air Vents
Use the air outlets, located in the
center and on the side of the
instrument panel, to direct the
airflow. Use the thumbwheels
located near the center air outlets,
to open or close off the airflow.
Operation Tips
.Clear away any ice, snow,
or leaves from air inlets at the
base of the windshield that could
block the flow of air into the
vehicle.
.Keep the path under the front
seats clear of objects to help
circulate the air inside of the
vehicle more effectively.
.Use of non‐GM approved hood
deflectors can adversely affect
the performance of the system.
Check with your dealer before
adding equipment to the outside
of the vehicle.
Maintenance
Passenger Compartment
Air Filter
The filter removes dust, pollen, and
other airborne irritants from outside
air that is pulled into the vehicle.
The filter should be replaced as part
of routine scheduled maintenance.
SeeScheduled Maintenance
on
page 10‑2for replacement
intervals. To find out what type of
filter to use, see Maintenance
Replacement Parts on page 10‑9.
Page 203 of 394
Climate Controls 7-7
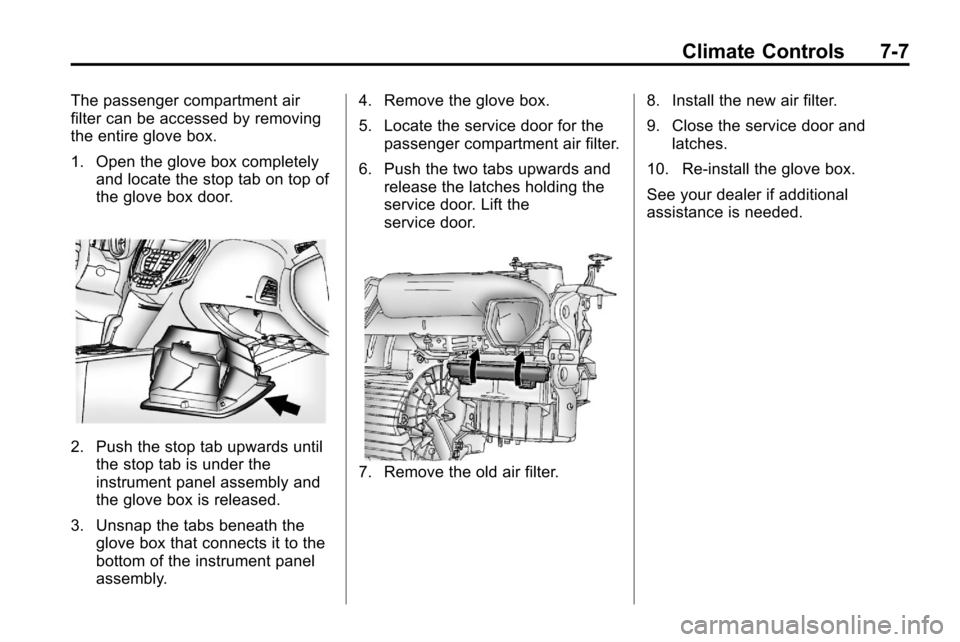
The passenger compartment air
filter can be accessed by removing
the entire glove box.
1. Open the glove box completelyand locate the stop tab on top of
the glove box door.
2. Push the stop tab upwards untilthe stop tab is under the
instrument panel assembly and
the glove box is released.
3. Unsnap the tabs beneath the glove box that connects it to the
bottom of the instrument panel
assembly. 4. Remove the glove box.
5. Locate the service door for the
passenger compartment air filter.
6. Push the two tabs upwards and release the latches holding the
service door. Lift the
service door.
7. Remove the old air filter. 8. Install the new air filter.
9. Close the service door and
latches.
10. Re‐install the glove box.
See your dealer if additional
assistance is needed.
Page 226 of 394
8-22 Driving and Operating
Blizzard Conditions
Being stuck in snow can be in a
serious situation. Stay with the
vehicle unless there is help nearby.
If possible, use theRoadside
Assistance Program
on page 12‑6.
To get help and keep everyone in
the vehicle safe:
.Turn on the hazard warning
flashers.
.Tie a red cloth to an outside
mirror.
{WARNING
Snow can trap engine exhaust
under the vehicle. This may
cause exhaust gases to get
inside. Engine exhaust contains
carbon monoxide (CO) which
cannot be seen or smelled. It can
cause unconsciousness and even
death.
(Continued)
WARNING (Continued)
If the vehicle is stuck in the snow:
.Clear away snow from around
the base of your vehicle,
especially any that is blocking
the exhaust pipe.
.Check again from time to
time to be sure snow does
not collect there.
.Open a window about 5 cm
(two inches) on the side of
the vehicle that is away from
the wind to bring in fresh air.
.Fully open the air outlets on
or under the instrument
panel.
.Adjust the Climate Control
system to a setting that
circulates the air inside the
vehicle and set the fan speed
to the highest setting. See
Climate Control System in the
Index.(Continued)
WARNING (Continued)
For more information about
carbon monoxide, see Engine
Exhaust on page 8‑34.
Snow can trap exhaust gases
under your vehicle. This can
cause deadly CO (carbon
monoxide) gas to get inside. CO
could overcome you and kill you.
You cannot see it or smell it, so
you might not know it is in your
vehicle. Clear away snow from
around the base of your vehicle,
especially any that is blocking the
exhaust.
Run the engine for short periods
only as needed to keep warm, but
be careful.
Page 246 of 394
8-42 Driving and Operating
TCS automatically comes on
whenever the vehicle is started. To
limit wheel spin, especially in
slippery road conditions, the system
should always be left on. But, TCS
can be turned off if needed.
Notice:Do not repeatedly brake
or accelerate heavily when TCS is
off. The vehicle's driveline could
be damaged.
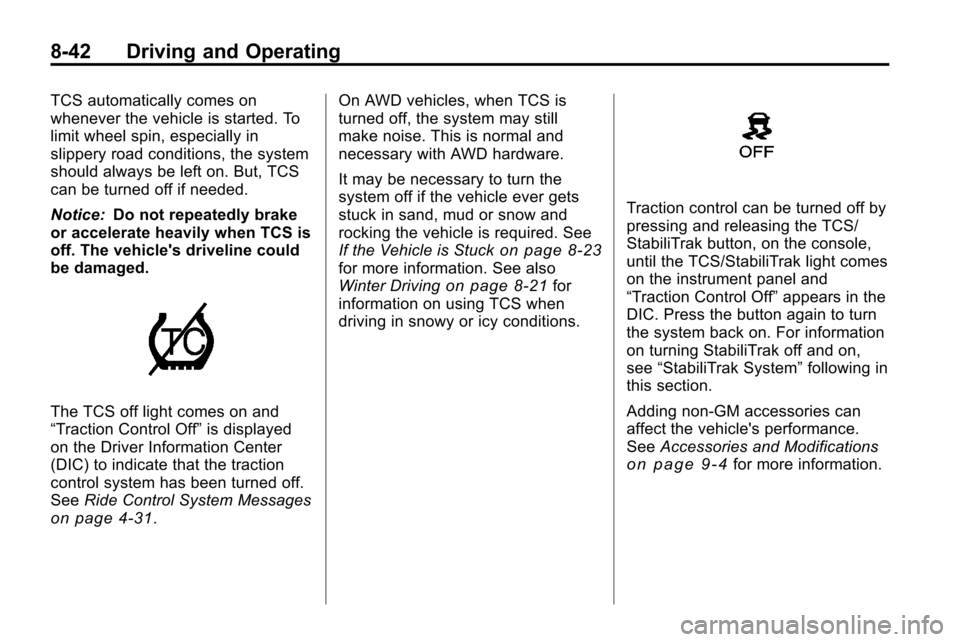
The TCS off light comes on and
“Traction Control Off” is displayed
on the Driver Information Center
(DIC) to indicate that the traction
control system has been turned off.
See Ride Control System Messages
on page 4‑31. On AWD vehicles, when TCS is
turned off, the system may still
make noise. This is normal and
necessary with AWD hardware.
It may be necessary to turn the
system off if the vehicle ever gets
stuck in sand, mud or snow and
rocking the vehicle is required. See
If the Vehicle is Stuck
on page 8‑23for more information. See also
Winter Drivingon page 8‑21for
information on using TCS when
driving in snowy or icy conditions.
Traction control can be turned off by
pressing and releasing the TCS/
StabiliTrak button, on the console,
until the TCS/StabiliTrak light comes
on the instrument panel and
“Traction Control Off” appears in the
DIC. Press the button again to turn
the system back on. For information
on turning StabiliTrak off and on,
see “StabiliTrak System” following in
this section.
Adding non‐GM accessories can
affect the vehicle's performance.
See Accessories and Modifications
on page 9‑4for more information.