Page 82 of 394
2-56 Seats and Restraints
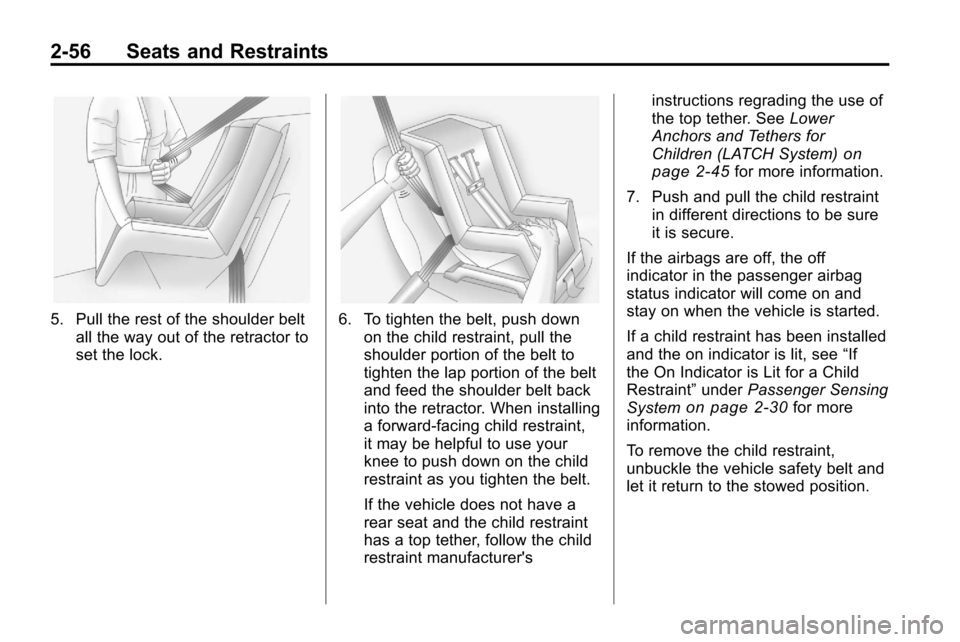
5. Pull the rest of the shoulder beltall the way out of the retractor to
set the lock.6. To tighten the belt, push downon the child restraint, pull the
shoulder portion of the belt to
tighten the lap portion of the belt
and feed the shoulder belt back
into the retractor. When installing
a forward-facing child restraint,
it may be helpful to use your
knee to push down on the child
restraint as you tighten the belt.
If the vehicle does not have a
rear seat and the child restraint
has a top tether, follow the child
restraint manufacturer's instructions regrading the use of
the top tether. See
Lower
Anchors and Tethers for
Children (LATCH System)
on
page 2‑45for more information.
7. Push and pull the child restraint in different directions to be sure
it is secure.
If the airbags are off, the off
indicator in the passenger airbag
status indicator will come on and
stay on when the vehicle is started.
If a child restraint has been installed
and the on indicator is lit, see “If
the On Indicator is Lit for a Child
Restraint” underPassenger Sensing
System
on page 2‑30for more
information.
To remove the child restraint,
unbuckle the vehicle safety belt and
let it return to the stowed position.
Page 84 of 394
3-2 Storage
Roof Rack System
{WARNING
If something is carried on top of
the vehicle that is longer or wider
than the roof rack—like paneling,
plywood, or a mattress— the wind
can catch it while the vehicle is
being driven. The item being
carried could be violently torn off,
and this could cause a collision,
and damage the vehicle. Never
carry something longer or wider
than the roof rack on top of the
vehicle unless using a GM
Certified accessory carrier.
This vehicle may be equipped with
a roof rack. For roof racks that do
not have cross rails included,
GM Certified cross rails can be
purchased as an accessory. See
your dealer for additional
information. Notice:
Loading cargo on the
roof rack that weighs more than
100 kg (220 lbs) or hangs over the
rear or sides of the vehicle may
damage the vehicle. Load cargo
so that it rests evenly between
the crossrails, making sure to
fasten cargo securely.
To prevent damage or loss of cargo
when driving, check to make sure
cross rails and cargo are securely
fastened. Loading cargo on the roof
rack will make the vehicle's center
of gravity higher. Avoid high speeds,
sudden starts, sharp turns, sudden
braking or abrupt maneuvers,
otherwise it may result in loss of
control. If driving for a long distance,
on rough roads, or at high speeds,
occasionally stop the vehicle to
make sure the cargo remains in its
place. Do not exceed the maximum
vehicle capacity when loading the
vehicle. For more information on
vehicle capacity and loading, see
Vehicle Load Limits on page 8‑24.
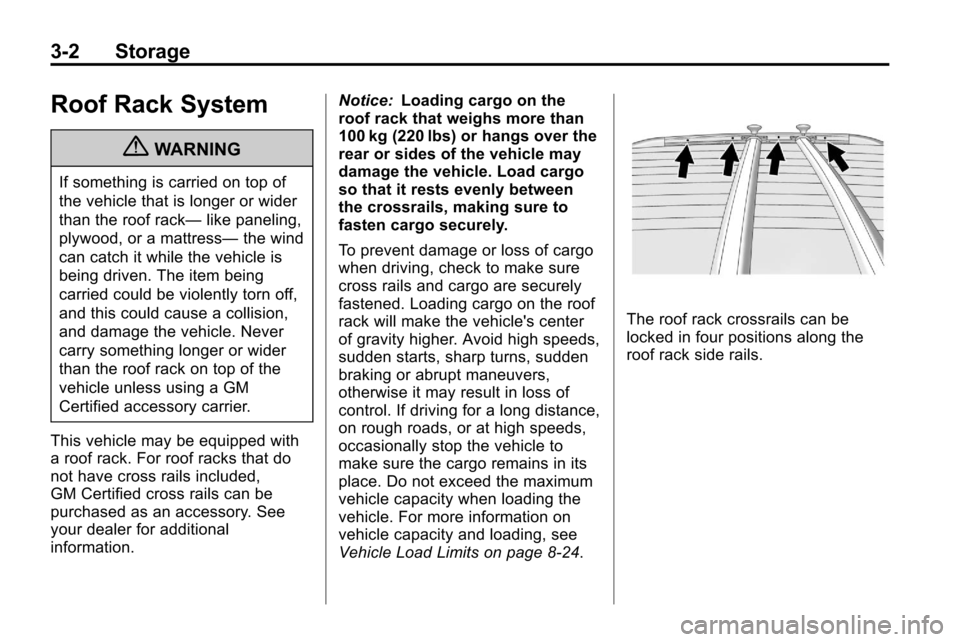
The roof rack crossrails can be
locked in four positions along the
roof rack side rails.
Page 85 of 394
Storage 3-3
Lift the lever to release and move
the crossrail.
Position the crossrail on both sides
of the vehicle at the same time.Push the lever down to completely
engage into the side rail holes.
Slide the crossrails back and forth
until the lock pins engage in the
holes and a click is heard as the
pins align and the crossrail locks.Try sliding the crossrails forward
and backward to ensure that they
are correctly secured and that the
levers stay tight to the cross rails.
Do not stand on the plastic lower
body panels when loading cargo
on the luggage carrier.
When the roof rack is not in use,
lock one crossrail at the furthest
forward position and lock the other
crossrail at the furthest rearward
position to reduce wind noise.
Page 87 of 394
Instruments and Controls 4-1
Instruments and
Controls
Instrument Panel Overview
Instrument Panel Overview . . . . 4-4
Controls
Steering Wheel Adjustment . . . 4-6
Steering Wheel Controls . . . . . . 4-6
Horn . . . . . . . . . . . . . . . . . . . . . . . . . . 4-7
Windshield Wiper/Washer . . . . . 4-7
Rear Window Wiper/Washer . . . . . . . . . . . . . . . . . . . . . . 4-8
Compass . . . . . . . . . . . . . . . . . . . . . 4-8
Clock (With Date Display) . . . . . 4-9
Clock (Without Date Display) . . . . . . . . . . . . . . . . . . . . 4-10
Power Outlets . . . . . . . . . . . . . . . 4-10
Warning Lights, Gauges, and
Indicators
Warning Lights, Gauges, and Indicators . . . . . . . . . . . . . . . . . . . 4-11
Instrument Cluster . . . . . . . . . . . 4-12
Speedometer . . . . . . . . . . . . . . . . 4-13
Odometer . . . . . . . . . . . . . . . . . . . . 4-13
Tachometer . . . . . . . . . . . . . . . . . . 4-13
Fuel Gauge . . . . . . . . . . . . . . . . . . 4-13
Engine Coolant Temperature Gauge . . . . . . . . . . . . . . . . . . . . . . 4-14
Safety Belt Reminders . . . . . . . 4-14
Airbag Readiness Light . . . . . . 4-15
Passenger Airbag Status Indicator . . . . . . . . . . . . . . . . . . . . 4-15
Charging System Light . . . . . . 4-16
Malfunction Indicator Lamp . . . . . . . . . . . . . 4-16
Brake System Warning Light . . . . . . . . . . . . . . . . . . . . . . . 4-19 Antilock Brake System (ABS)
Warning Light . . . . . . . . . . . . . . 4-20
Traction Off Light . . . . . . . . . . . . 4-20
StabiliTrak®OFF Light . . . . . . . 4-20
Traction Control System
(TCS)/StabiliTrak
®Light . . . . 4-21
Tire Pressure Light . . . . . . . . . . 4-21
Engine Oil Pressure Light . . . . 4-22
Fuel Economy Light . . . . . . . . . 4-22
Low Fuel Warning Light . . . . . . 4-22
Security Light . . . . . . . . . . . . . . . . 4-23
High-Beam on Light . . . . . . . . . 4-23
Fog Lamp Light . . . . . . . . . . . . . . 4-23
Lamps on Reminder . . . . . . . . . 4-23
Cruise Control Light . . . . . . . . . 4-24
Information Displays
Driver Information Center (DIC) . . . . . . . . . . . . . . . 4-24
Page 109 of 394
Instruments and Controls 4-23
periodically when the vehicle is low
on fuel. The light goes off when fuel
is added to the fuel tank.
For vehicles with a Driver
Information Center (DIC), seeFuel
System Messages
on page 4‑30for more information.
Security Light
This light comes on if there is a
problem with the security system,
or if the vehicle has been
tampered with.
For more information, see Vehicle
Security on page 1‑12.
High-Beam on Light
The high-beam on light comes on
when the high-beam headlamps are
in use.
See Headlamp High/Low-Beam
Changer
on page 5‑1for more
information.
Fog Lamp Light
The fog lamp light comes on when
the fog lamps are in use. The light goes out when the fog
lamps are turned off. See
Fog
Lamps
on page 5‑3for more
information.
Lamps on Reminder
For vehicles with the lamps on
reminder light, it comes on when the
lights are in use.
Page 125 of 394
Instruments and Controls 4-39
OnStar®System
OnStar®uses several innovative
technologies and live advisors to
provide a wide range of safety,
security, navigation, diagnostics,
and calling services.
Automatic Crash Response
In a crash, built in sensors can
automatically alert an OnStar
advisor who is immediately
connected to the vehicle to see if
you need help.
How OnStar Service Works
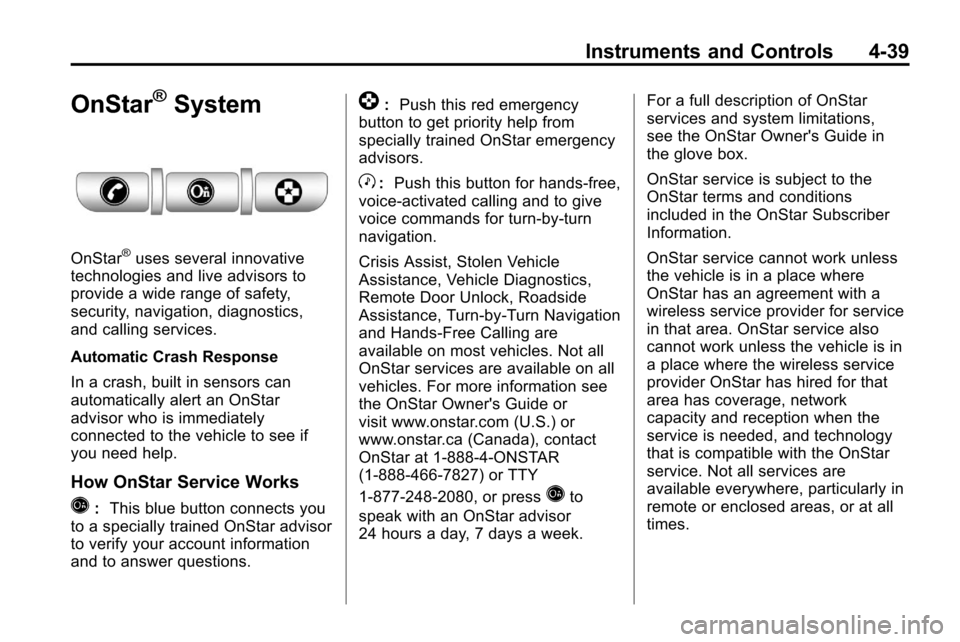
Q: This blue button connects you
to a specially trained OnStar advisor
to verify your account information
and to answer questions.
]: Push this red emergency
button to get priority help from
specially trained OnStar emergency
advisors.
X: Push this button for hands‐free,
voice‐activated calling and to give
voice commands for turn‐by‐turn
navigation.
Crisis Assist, Stolen Vehicle
Assistance, Vehicle Diagnostics,
Remote Door Unlock, Roadside
Assistance, Turn‐by‐Turn Navigation
and Hands‐Free Calling are
available on most vehicles. Not all
OnStar services are available on all
vehicles. For more information see
the OnStar Owner's Guide or
visit www.onstar.com (U.S.) or
www.onstar.ca (Canada), contact
OnStar at 1-888-4-ONSTAR
(1‐888‐466‐7827) or TTY
1‐877‐248‐2080, or press
Qto
speak with an OnStar advisor
24 hours a day, 7 days a week. For a full description of OnStar
services and system limitations,
see the OnStar Owner's Guide in
the glove box.
OnStar service is subject to the
OnStar terms and conditions
included in the OnStar Subscriber
Information.
OnStar service cannot work unless
the vehicle is in a place where
OnStar has an agreement with a
wireless service provider for service
in that area. OnStar service also
cannot work unless the vehicle is in
a place where the wireless service
provider OnStar has hired for that
area has coverage, network
capacity and reception when the
service is needed, and technology
that is compatible with the OnStar
service. Not all services are
available everywhere, particularly in
remote or enclosed areas, or at all
times.
Page 213 of 394
Driving and Operating 8-9
Loading Your Vehicle for
Off-Road Driving
{WARNING
.Cargo on the load floor piled
higher than the seatbacks
can be thrown forward during
a sudden stop. You or your
passengers could be injured.
Keep cargo below the top of
the seatbacks.
.Unsecured cargo on the
load floor can be tossed
about when driving over
rough terrain. You or your
passengers can be struck by
flying objects. Secure the
cargo properly.(Continued)
WARNING (Continued)
.Heavy loads on the roof raise
the vehicle's center of gravity,
making it more likely to roll
over. You can be seriously or
fatally injured if the vehicle
rolls over. Put heavy loads
inside the cargo area, not on
the roof. Keep cargo in the
cargo area as far forward and
low as possible. There are some important things to
remember about how to load your
vehicle..The heaviest things should be
on the floor, forward of the rear
axle. Put heavier items as far
forward as you can.
.Be sure the load is properly
secured, so things are not
tossed around.
You will find other important
information under Vehicle Load
Limits
on page 8‑24and Tireson
page 9‑40.
Page 231 of 394
Driving and Operating 8-27
Weight Rating (GVWR). The
GVWR includes the weight of
the vehicle, all occupants, fuel,
and cargo. Never exceed the
GVWR for the vehicle, or the
Gross Axle Weight Rating
(GAWR) for either the front or
rear axle.
If the vehicle is carrying a heavy
load, it should be spread out.
See“Steps for Determining
Correct Load Limit” earlier in this
section.
{WARNING
Do not load the vehicle any
heavier than the Gross
Vehicle Weight Rating
(GVWR), or either the
maximum front or rear Gross
Axle Weight Rating (GAWR).
If you do, parts on the vehicle
can break, and it can change
(Continued)
WARNING (Continued)
the way the vehicle handles.
These could cause you to lose
control and crash. Also,
overloading can shorten the
life of the vehicle.
{WARNING
Things you put inside the
vehicle can strike and injure
people in a sudden stop or
turn, or in a crash.
.Put things in the cargo
area of the vehicle. In the
cargo area, put them as
far forward as you can. Try
to spread the weight
evenly.
(Continued)
WARNING (Continued)
.Never stack heavier
things, like suitcases,
inside the vehicle so that
some of them are above
the tops of the seats.
.Do not leave an
unsecured child restraint
in the vehicle.
.When you carry something
inside the vehicle, secure
it whenever you can.
.Do not leave a seat folded
down unless you need to.