2010 CHEVROLET EQUINOX low beam
[x] Cancel search: low beamPage 5 of 394
Introduction v
Notice:This means there is
something that could result in
property or vehicle damage. This
would not be covered by the
vehicle's warranty.
A circle with a slash through it is a
safety symbol which means “Do
Not,” “Do not do this” or“Do not let
this happen.”
Symbols
The vehicle has components and
labels that use symbols instead of
text. Symbols are shown along with
the text describing the operation or
information relating to a specific
component, control, message,
gauge, or indicator.
M: This symbol is shown when
you need to see your owner manual
for additional instructions or
information.
*: This symbol is shown when
you need to see a service manual
for additional instructions or
information.
Vehicle Symbol Chart
Here are some additional symbols
that may be found on the vehicle
and what they mean. For more
information on the symbol, refer to
the index.
9: Airbag Readiness Light
#:Air Conditioning
!:Antilock Brake System (ABS)
g:Audio Steering Wheel Controls
or OnStar®
$: Brake System Warning Light
":Charging System
I:Cruise Control
d:Electronic Stability
Control (ESC)
B: Engine Coolant Temperature
O:Exterior Lamps
.:Fuel Gauge
+:Fuses
3: Headlamp High/Low-Beam
Changer
j: LATCH System Child
Restraints
*: Malfunction Indicator Lamp
::Oil Pressure
}:Power
/:Remote Vehicle Start
>:Safety Belt Reminders
7:Tire Pressure Monitor
M:Windshield Washer Fluid
Page 87 of 394
Instruments and Controls 4-1
Instruments and
Controls
Instrument Panel Overview
Instrument Panel Overview . . . . 4-4
Controls
Steering Wheel Adjustment . . . 4-6
Steering Wheel Controls . . . . . . 4-6
Horn . . . . . . . . . . . . . . . . . . . . . . . . . . 4-7
Windshield Wiper/Washer . . . . . 4-7
Rear Window Wiper/Washer . . . . . . . . . . . . . . . . . . . . . . 4-8
Compass . . . . . . . . . . . . . . . . . . . . . 4-8
Clock (With Date Display) . . . . . 4-9
Clock (Without Date Display) . . . . . . . . . . . . . . . . . . . . 4-10
Power Outlets . . . . . . . . . . . . . . . 4-10
Warning Lights, Gauges, and
Indicators
Warning Lights, Gauges, and Indicators . . . . . . . . . . . . . . . . . . . 4-11
Instrument Cluster . . . . . . . . . . . 4-12
Speedometer . . . . . . . . . . . . . . . . 4-13
Odometer . . . . . . . . . . . . . . . . . . . . 4-13
Tachometer . . . . . . . . . . . . . . . . . . 4-13
Fuel Gauge . . . . . . . . . . . . . . . . . . 4-13
Engine Coolant Temperature Gauge . . . . . . . . . . . . . . . . . . . . . . 4-14
Safety Belt Reminders . . . . . . . 4-14
Airbag Readiness Light . . . . . . 4-15
Passenger Airbag Status Indicator . . . . . . . . . . . . . . . . . . . . 4-15
Charging System Light . . . . . . 4-16
Malfunction Indicator Lamp . . . . . . . . . . . . . 4-16
Brake System Warning Light . . . . . . . . . . . . . . . . . . . . . . . 4-19 Antilock Brake System (ABS)
Warning Light . . . . . . . . . . . . . . 4-20
Traction Off Light . . . . . . . . . . . . 4-20
StabiliTrak®OFF Light . . . . . . . 4-20
Traction Control System
(TCS)/StabiliTrak
®Light . . . . 4-21
Tire Pressure Light . . . . . . . . . . 4-21
Engine Oil Pressure Light . . . . 4-22
Fuel Economy Light . . . . . . . . . 4-22
Low Fuel Warning Light . . . . . . 4-22
Security Light . . . . . . . . . . . . . . . . 4-23
High-Beam on Light . . . . . . . . . 4-23
Fog Lamp Light . . . . . . . . . . . . . . 4-23
Lamps on Reminder . . . . . . . . . 4-23
Cruise Control Light . . . . . . . . . 4-24
Information Displays
Driver Information Center (DIC) . . . . . . . . . . . . . . . 4-24
Page 109 of 394
Instruments and Controls 4-23
periodically when the vehicle is low
on fuel. The light goes off when fuel
is added to the fuel tank.
For vehicles with a Driver
Information Center (DIC), seeFuel
System Messages
on page 4‑30for more information.
Security Light
This light comes on if there is a
problem with the security system,
or if the vehicle has been
tampered with.
For more information, see Vehicle
Security on page 1‑12.
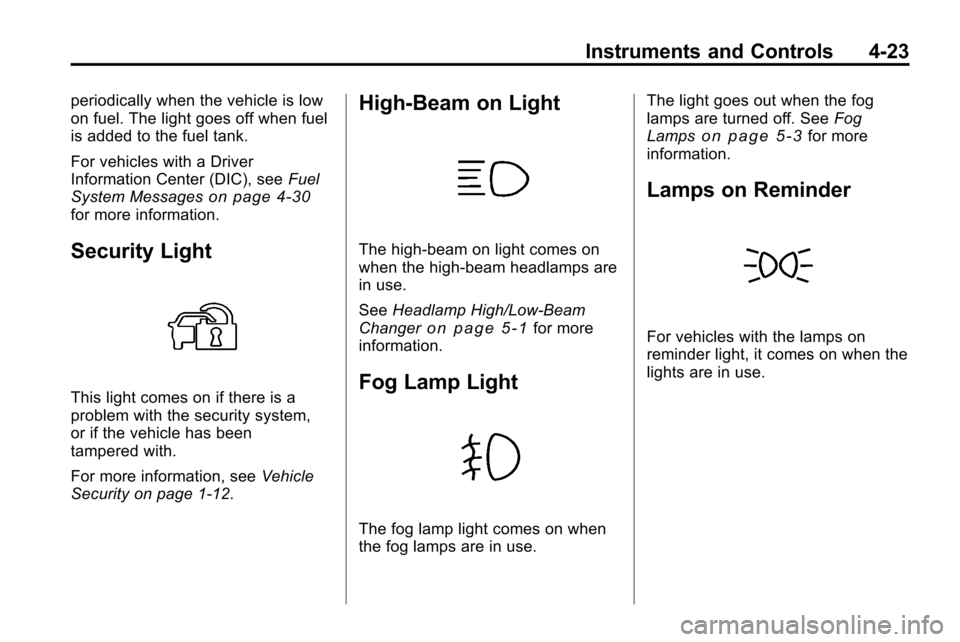
High-Beam on Light
The high-beam on light comes on
when the high-beam headlamps are
in use.
See Headlamp High/Low-Beam
Changer
on page 5‑1for more
information.
Fog Lamp Light
The fog lamp light comes on when
the fog lamps are in use. The light goes out when the fog
lamps are turned off. See
Fog
Lamps
on page 5‑3for more
information.
Lamps on Reminder
For vehicles with the lamps on
reminder light, it comes on when the
lights are in use.
Page 127 of 394
Lighting 5-1
Lighting
Exterior Lighting
Exterior Lamp Controls . . . . . . . . 5-1
Headlamp High/Low-BeamChanger . . . . . . . . . . . . . . . . . . . . . 5-1
Flash-to-Pass . . . . . . . . . . . . . . . . . 5-2
Daytime Running Lamps (DRL) . . . . . . . . . . . . . . . . 5-2
Hazard Warning Flashers . . . . . 5-2
Turn and Lane-Change Signals . . . . . . . . . . . . . . . . . . . . . . 5-3
Fog Lamps . . . . . . . . . . . . . . . . . . . . 5-3
Interior Lighting
Instrument Panel Illumination Control . . . . . . . . . . . . . . . . . . . . . . 5-4
Dome Lamps . . . . . . . . . . . . . . . . . 5-4
Reading Lamps . . . . . . . . . . . . . . . 5-4
Lighting Features
Entry Lighting . . . . . . . . . . . . . . . . . 5-4
Exterior Lighting
Exterior Lamp Controls
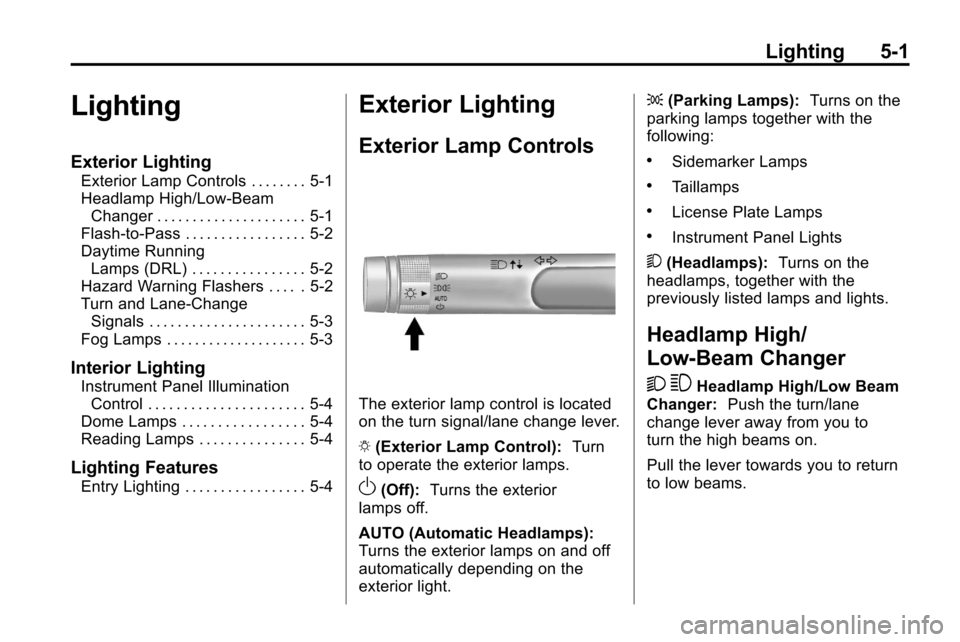
The exterior lamp control is located
on the turn signal/lane change lever.
O (Exterior Lamp Control): Turn
to operate the exterior lamps.
O(Off): Turns the exterior
lamps off.
AUTO (Automatic Headlamps):
Turns the exterior lamps on and off
automatically depending on the
exterior light. ;
(Parking Lamps): Turns on the
parking lamps together with the
following:
.Sidemarker Lamps
.Taillamps
.License Plate Lamps
.Instrument Panel Lights
5 (Headlamps): Turns on the
headlamps, together with the
previously listed lamps and lights.
Headlamp High/
Low-Beam Changer
2 3
Headlamp High/Low Beam
Changer: Push the turn/lane
change lever away from you to
turn the high beams on.
Pull the lever towards you to return
to low beams.
Page 128 of 394
5-2 Lighting
This indicator light turns on in the
instrument panel cluster when the
high beam headlamps are on.
Flash-to-Pass
The flash‐to‐pass feature works with
the low‐beams or Daytime Running
Lamps (DRL) on or off.
To flash the high beams, pull the
turn signal/lane change lever all the
way towards you. Then release it.
Daytime Running
Lamps (DRL)
Daytime Running Lamps (DRL)
system makes the low-beam
headlamps come on at a reduced
brightness in daylight when the
following conditions are met:
.The ignition is on.
.The exterior lamp band is in the
automatic position.
.The transmission is not in
P (Park).
.The light sensor determines it is
daytime.
.The parking brake is released.
Fully functional Daytime Running
Lamps (DRL) are required on all
vehicles first sold in Canada.
When the DRL are on the taillamps,
sidemarker, instrument panel lights
and other lamps will not be on. The
instrument panel cluster will be lit. When the exterior lamp band is
turned to the headlamp position, the
low-beam headlamps come on. The
other lamps that come on with the
headlamps will also come on.
To idle your vehicle with the DRL
off, move the shift lever to P (Park).
The DRL will stay off until the shift
lever is moved out of the P (Park)
position.
The regular headlamp system
should be turned on when needed.
Hazard Warning Flashers
|
(Hazard Warning Flasher):
Press this button, located on the
center of the instrument panel, to
make the front and rear turn signal
lamps flash on and off. This warns
others that you are having trouble.
Press
|again to turn the
flashers off.
Page 129 of 394
Lighting 5-3
Turn and Lane-Change
Signals
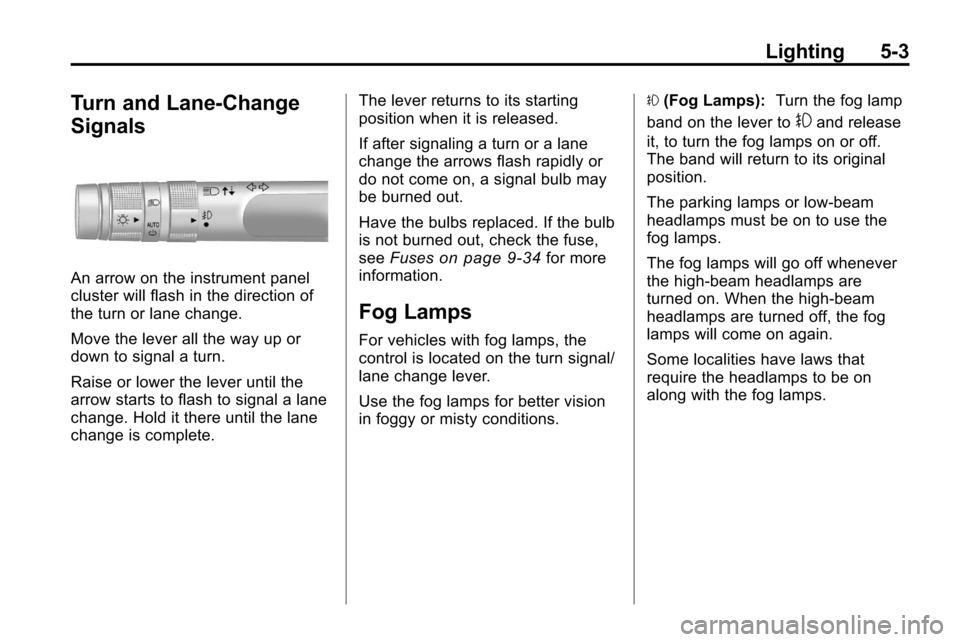
An arrow on the instrument panel
cluster will flash in the direction of
the turn or lane change.
Move the lever all the way up or
down to signal a turn.
Raise or lower the lever until the
arrow starts to flash to signal a lane
change. Hold it there until the lane
change is complete.The lever returns to its starting
position when it is released.
If after signaling a turn or a lane
change the arrows flash rapidly or
do not come on, a signal bulb may
be burned out.
Have the bulbs replaced. If the bulb
is not burned out, check the fuse,
see
Fuses
on page 9‑34for more
information.
Fog Lamps
For vehicles with fog lamps, the
control is located on the turn signal/
lane change lever.
Use the fog lamps for better vision
in foggy or misty conditions. #
(Fog Lamps): Turn the fog lamp
band on the lever to
#and release
it, to turn the fog lamps on or off.
The band will return to its original
position.
The parking lamps or low‐beam
headlamps must be on to use the
fog lamps.
The fog lamps will go off whenever
the high-beam headlamps are
turned on. When the high‐beam
headlamps are turned off, the fog
lamps will come on again.
Some localities have laws that
require the headlamps to be on
along with the fog lamps.
Page 256 of 394
8-52 Driving and Operating
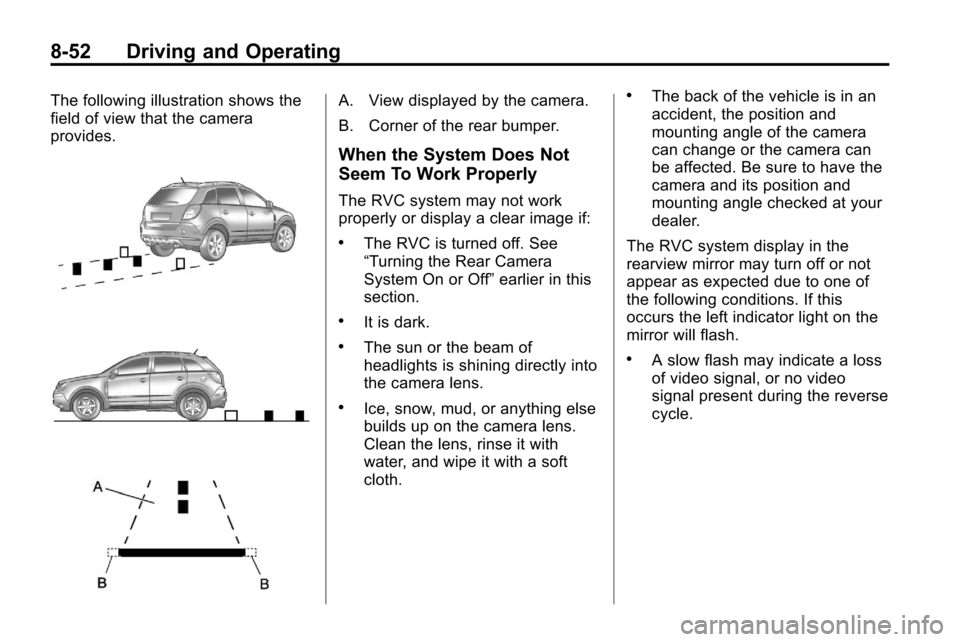
The following illustration shows the
field of view that the camera
provides.A. View displayed by the camera.
B. Corner of the rear bumper.
When the System Does Not
Seem To Work Properly
The RVC system may not work
properly or display a clear image if:
.The RVC is turned off. See
“Turning the Rear Camera
System On or Off”earlier in this
section.
.It is dark.
.The sun or the beam of
headlights is shining directly into
the camera lens.
.Ice, snow, mud, or anything else
builds up on the camera lens.
Clean the lens, rinse it with
water, and wipe it with a soft
cloth.
.The back of the vehicle is in an
accident, the position and
mounting angle of the camera
can change or the camera can
be affected. Be sure to have the
camera and its position and
mounting angle checked at your
dealer.
The RVC system display in the
rearview mirror may turn off or not
appear as expected due to one of
the following conditions. If this
occurs the left indicator light on the
mirror will flash.
.A slow flash may indicate a loss
of video signal, or no video
signal present during the reverse
cycle.
Page 296 of 394
9-28 Vehicle Care
.Should not have any snow, ice,
or mud on it.
.Should be fully assembled and
all other work stopped while
headlamp aiming is being
performed.
.Should be normally loaded with
a full tank of fuel and one person
or 75 kg (160 lbs) sitting on the
driver's seat.
.Tires should be properly inflated.
Headlamp aiming is done with the
vehicle's low-beam headlamps. The
high-beam headlamps will be
correctly aimed if the low-beam
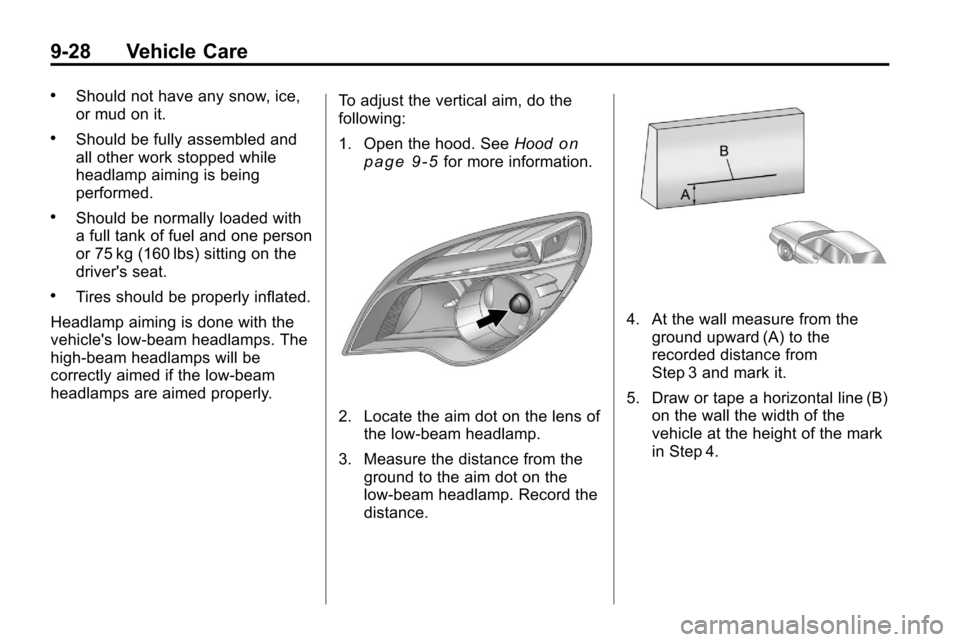
headlamps are aimed properly. To adjust the vertical aim, do the
following:
1. Open the hood. See
Hood
on
page 9‑5for more information.
2. Locate the aim dot on the lens of the low‐beam headlamp.
3. Measure the distance from the ground to the aim dot on the
low‐beam headlamp. Record the
distance.
4. At the wall measure from the
ground upward (A) to the
recorded distance from
Step 3 and mark it.
5. Draw or tape a horizontal line (B) on the wall the width of the
vehicle at the height of the mark
in Step 4.