2010 CHEVROLET EQUINOX lights
[x] Cancel search: lightsPage 124 of 394
4-38 Instruments and Controls
Remote Lock Feedback
This allows selection of what type of
feedback is given when unlocking
the vehicle with the RKE transmitter.
Press the MENU / SELECT knob
when“Remote Lock Feedback” is
highlighted. Turn the knob to select
“Lights and Horn”, “Lights Only”,
“Horn Only”, or “Off”. Press the knob
to confirm and go back to the
last menu.
Remote Door Unlock
This allows selection of which doors
will unlock when pressing the unlock
button on the RKE transmitter.
Press the MENU / SELECT knob
when “Remote Door Unlock” is
highlighted. Turn the knob to select
“All Doors” or“Driver Door”. Press
the knob to confirm and go back to
the last menu. Memory Remote Recall
This allows the
“Memory Remote
Recall” feature to be turned on or
off. “Memory Remote Recall” is
when the memorized settings will be
recalled as you unlock the vehicle.
Press the MENU / SELECT knob
when “Memory Remote Recall” is
highlighted to toggle between “On”
or “Off”. Press
0BACK to confirm
the selection and go back to the
last menu.
Remote Vehicle Start
This allows the “Remote Vehicle
Start” to be turned on or off, if the
vehicle has this feature. Press the MENU / SELECT knob
when
“Remote Vehicle Start” is
highlighted to toggle between “On”
or “Off”. Press
0BACK to confirm
the selection and go back to the
last menu.
Return to Factory Settings
Select “Return to Factory Settings”
to return all of the vehicle
personalization to the default
settings. Turn the knob to select
“Yes” or“No”. Press the knob to
confirm and go back to the
last menu.
Page 127 of 394
Lighting 5-1
Lighting
Exterior Lighting
Exterior Lamp Controls . . . . . . . . 5-1
Headlamp High/Low-BeamChanger . . . . . . . . . . . . . . . . . . . . . 5-1
Flash-to-Pass . . . . . . . . . . . . . . . . . 5-2
Daytime Running Lamps (DRL) . . . . . . . . . . . . . . . . 5-2
Hazard Warning Flashers . . . . . 5-2
Turn and Lane-Change Signals . . . . . . . . . . . . . . . . . . . . . . 5-3
Fog Lamps . . . . . . . . . . . . . . . . . . . . 5-3
Interior Lighting
Instrument Panel Illumination Control . . . . . . . . . . . . . . . . . . . . . . 5-4
Dome Lamps . . . . . . . . . . . . . . . . . 5-4
Reading Lamps . . . . . . . . . . . . . . . 5-4
Lighting Features
Entry Lighting . . . . . . . . . . . . . . . . . 5-4
Exterior Lighting
Exterior Lamp Controls
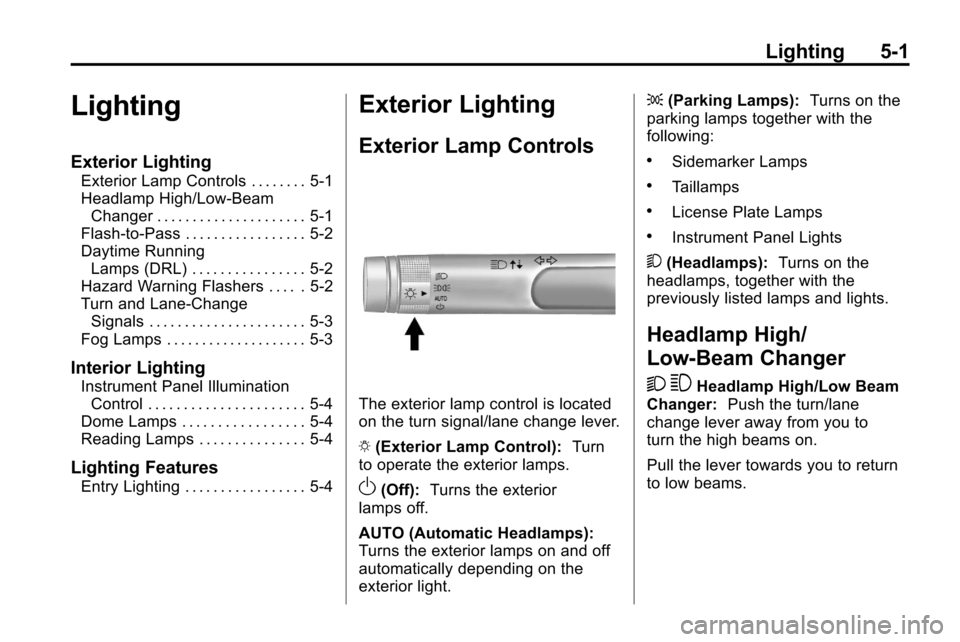
The exterior lamp control is located
on the turn signal/lane change lever.
O (Exterior Lamp Control): Turn
to operate the exterior lamps.
O(Off): Turns the exterior
lamps off.
AUTO (Automatic Headlamps):
Turns the exterior lamps on and off
automatically depending on the
exterior light. ;
(Parking Lamps): Turns on the
parking lamps together with the
following:
.Sidemarker Lamps
.Taillamps
.License Plate Lamps
.Instrument Panel Lights
5 (Headlamps): Turns on the
headlamps, together with the
previously listed lamps and lights.
Headlamp High/
Low-Beam Changer
2 3
Headlamp High/Low Beam
Changer: Push the turn/lane
change lever away from you to
turn the high beams on.
Pull the lever towards you to return
to low beams.
Page 128 of 394
5-2 Lighting
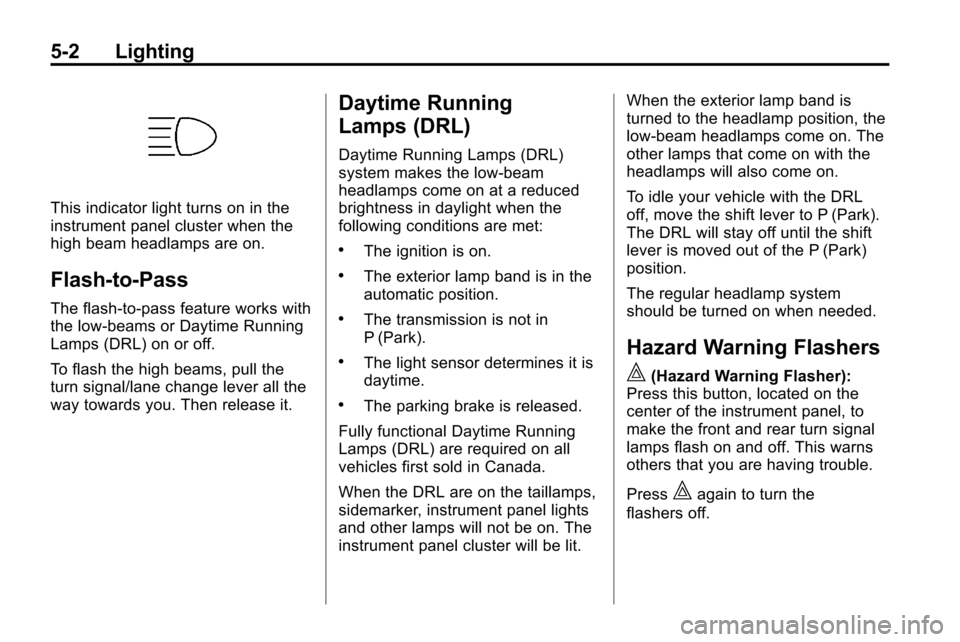
This indicator light turns on in the
instrument panel cluster when the
high beam headlamps are on.
Flash-to-Pass
The flash‐to‐pass feature works with
the low‐beams or Daytime Running
Lamps (DRL) on or off.
To flash the high beams, pull the
turn signal/lane change lever all the
way towards you. Then release it.
Daytime Running
Lamps (DRL)
Daytime Running Lamps (DRL)
system makes the low-beam
headlamps come on at a reduced
brightness in daylight when the
following conditions are met:
.The ignition is on.
.The exterior lamp band is in the
automatic position.
.The transmission is not in
P (Park).
.The light sensor determines it is
daytime.
.The parking brake is released.
Fully functional Daytime Running
Lamps (DRL) are required on all
vehicles first sold in Canada.
When the DRL are on the taillamps,
sidemarker, instrument panel lights
and other lamps will not be on. The
instrument panel cluster will be lit. When the exterior lamp band is
turned to the headlamp position, the
low-beam headlamps come on. The
other lamps that come on with the
headlamps will also come on.
To idle your vehicle with the DRL
off, move the shift lever to P (Park).
The DRL will stay off until the shift
lever is moved out of the P (Park)
position.
The regular headlamp system
should be turned on when needed.
Hazard Warning Flashers
|
(Hazard Warning Flasher):
Press this button, located on the
center of the instrument panel, to
make the front and rear turn signal
lamps flash on and off. This warns
others that you are having trouble.
Press
|again to turn the
flashers off.
Page 130 of 394
5-4 Lighting
Interior Lighting
Instrument Panel
Illumination Control
This control is located on the
instrument panel, to the left of
the steering column.
D(Instrument Panel
Brightness): Turn clockwise or
counterclockwise to brighten or
dim the lights.
Dome Lamps
The dome lamp controls are located
in the overhead console. To change
the settings, press the following:
*(Dome Lamp Override): Turns
the lamp off, even when a door
is open.
1(Door): The lamp comes on
automatically when a door is
opened.
+(On): Turns the dome lamp on.
Reading Lamps
The reading lamps are located on
the overhead console. These lamps
come on automatically when any
door is opened.
For manual operation, press the
button next to each lamp to turn it
on or off.
Lighting Features
Entry Lighting
The dome lamp, cargo lamp and
foot lamp inside the vehicle come
on when any door is opened, if the
dome lamp is in the door position. In
addition, these lamps come on
when the Remote Keyless Entry
(RKE) unlock button is pressed.
They stay on for 20 seconds or until
a door is opened. After the door is
opened and then closed, the light
remains on for 20 seconds, or until
the ignition is turned to ON/RUN.
Page 134 of 394

6-4 Infotainment System
F. FAV
.Radio: Opens the
favorites list.
G. TONE
.Opens the tone menu.
H. CONFIG
.Opens the settings menu.
I. MENU/SEL
.Press: Opens the menus
and selects menu items.
.Turn: Highlights menu
items or sets values while
in a menu. Manually
selects radio stations while
listening to the radio.
J. CD Slot
.Insert a CD. K.
k
.CD: Pauses the CD.
L. CD
.Selects the CD player
when listening to a
different audio source.
M.
ZCD Eject
.Removes a disc from the
CD slot.
N.
lSEEK
.Radio: Seeks the next
station.
.CD: Selects the next track
or fast forwards within a
track. O. INFO
.Radio: Shows available
information about the
current station.
.CD: Shows available
information about the
current track.
P.
5/0
.Opens the phone
main menu.
.Mutes the audio system.
Q.
H
.Opens the clock menu.
R.
0BACK
.Menu: Moves one
level back.
.Character Input: Deletes
the last character.
Page 136 of 394

6-6 Infotainment System
E. Buttons 1 to 6
.Radio: Saves and selects
favorite stations.
.MEM: Saves and selects
favorite tracks and
playlists.
F. FAV
.Radio: Opens the
favorites list.
.MEM: Opens the
favorites list.
G. TONE
.Opens the tone menu.
H. CONFIG
.Opens the settings menu.
I. MENU/SEL
.Press: Opens menus and
selects menu items.
.Turn: Highlights menu
items or sets values while
in a menu. Manually
selects radio stations while
listening to the radio. J. CD/DVD Slot
.Insert a disc.
K.
k(Play/Pause)
.Radio: Pauses time shifted
content.
.CD/DVD: Pauses CD/DVD‐
A and DVD‐V playback.
Stops DVD‐V playback.
.MEM: Pauses MEM
playback.
L.
OREC
.CD/DVD: Records content
from audio CDs and MP3/
WMA CDs.
.AUX: Records content
from USB mass storage
devices.
M.
ZCD Eject
.Removes a disc from the
CD/DVD slot. N.
lSEEK
.Radio: Seeks the next
station.
.CD/DVD: Selects the next
track or fast forwards
within a track.
.MEM: Selects the next
track or fast forwards
within a track.
O. INFO
.Radio: Shows available
information about the
current station.
.CD/DVD: Shows available
information about the
current track.
.MEM: Shows available
information about the
current track.
P.
5/0(Phone/Mute)
.Opens the phone
main menu.
.Mutes the audio system.
Page 216 of 394
8-12 Driving and Operating
Some things to consider:
.Is the path ahead clear?
.Will the surface texture change
abruptly up ahead?
.Does the travel take you uphill or
downhill?
.Will you have to stop suddenly
or change direction quickly?
When driving over obstacles or
rough terrain, keep a firm grip on
the steering wheel. Ruts, troughs,
or other surface features can jerk
the wheel out of your hands.
When driving over bumps, rocks,
or other obstacles, the wheels can
leave the ground. If this happens,
even with one or two wheels, you
cannot control the vehicle as well or
at all.
Because you will be on an unpaved
surface, it is especially important to
avoid sudden acceleration, sudden
turns, or sudden braking. Off-roading requires a different kind
of alertness from driving on paved
roads and highways. There are no
road signs, posted speed limits,
or signal lights. Use good judgment
about what is safe and what is not.
Driving on Hills
Off-road driving often takes you up,
down, or across a hill. Driving safely
on hills requires good judgment
and an understanding of what the
vehicle can and cannot do. There
are some hills that simply cannot be
driven, no matter how well built the
vehicle.
{WARNING
Many hills are simply too steep
for any vehicle. If you drive up
them, you will stall. If you drive
down them, you cannot control
your speed. If you drive across
(Continued)
WARNING (Continued)
them, you will roll over. You could
be seriously injured or killed.
If you have any doubt about the
steepness, do not drive the hill.
Approaching a Hill
When you approach a hill, decide if
it is too steep to climb, descend,
or cross. Steepness can be hard to
judge. On a very small hill, for
example, there may be a smooth,
constant incline with only a small
change in elevation where you can
easily see all the way to the top.
On a large hill, the incline may get
steeper as you near the top, but you
might not see this because the crest
of the hill is hidden by bushes,
grass, or shrubs.
Page 233 of 394
Driving and Operating 8-29
A (LOCK/OFF):This is the only
position from which the key can be
removed. This locks the steering
wheel, ignition and automatic
transmission.
On vehicles with an automatic
transmission, the shift lever must be
in P (Park) to turn the ignition switch
to the LOCK/OFF position.
The ignition switch can bind in the
LOCK/OFF position with the wheels
turned off center. If this happens,
move the steering wheel from right
to left while turning the key to ACC/
ACCESSORY. If this does not work,
then the vehicle needs service.
B (ACC/ACCESSORY): This
position provides power to some of
the electrical accessories. It unlocks
the steering wheel and ignition. The
transmission is also unlocked in this
position on automatic transmission
vehicles. To move the key from
ACC/ACCESSORY to LOCK/OFF,
push in the key and then turn it to
LOCK/OFF. C (ON/RUN):
The ignition switch
stays in this position when the
engine is running. This position can
be used to operate the electrical
accessories, including the
ventilation fan and 12 volt power
outlet, as well as to display some
warning and indicator lights.
The battery could be drained if the
key is left in the ACC/ACCESSORY
or ON/RUN position with the engine
off. The vehicle might not start if the
battery is allowed to drain for an
extended period of time.
D (START): This position starts the
engine. When the engine starts,
release the key. The ignition switch
will return to ON/RUN for normal
driving.
A warning tone sounds when the
driver door is opened if the ignition
is still in ACC/ACCESSORY and the
key is in the ignition.Retained Accessory
Power (RAP)
These vehicle accessories can be
used for up to 10 minutes after the
engine is turned off:
.Audio System
.Power Windows
.Sunroof (if equipped)
Power to the audio system will
continue to operate for up to
10 minutes or until the driver door is
opened.
Power to the power windows and
sunroof will continue to operate for
up to 10 minutes or until any door is
opened.
All these features will work when
the key is in ON/RUN or ACC/
ACCESSORY.