Page 285 of 394

Vehicle Care 9-17
How to Add Coolant to the
Coolant Surge Tank
{WARNING
You can be burned if you spill
coolant on hot engine parts.
Coolant contains ethylene glycol
and it will burn if the engine parts
are hot enough. Do not spill
coolant on a hot engine.
Notice: This vehicle has a
specific coolant fill procedure.
Failure to follow this procedure
could cause the engine to
overheat and be severely
damaged.
{WARNING
An electric engine cooling fan
under the hood can start up even
when the engine is not running
and can cause injury. Keep
hands, clothing, and tools away
from any underhood electric fan.
{WARNING
Steam and scalding liquids from a
hot cooling system can blow out
and burn you badly. They are
under pressure, and if you turn
the surge tank pressure
cap —even a little —they can
come out at high speed. Never
turn the cap when the cooling
system, including the surge tank
pressure cap, is hot. Wait for the
cooling system and surge tank
pressure cap to cool if you ever
have to turn the pressure cap. If coolant is needed, add the proper
DEX-COOL
®coolant mixture at the
coolant surge tank.
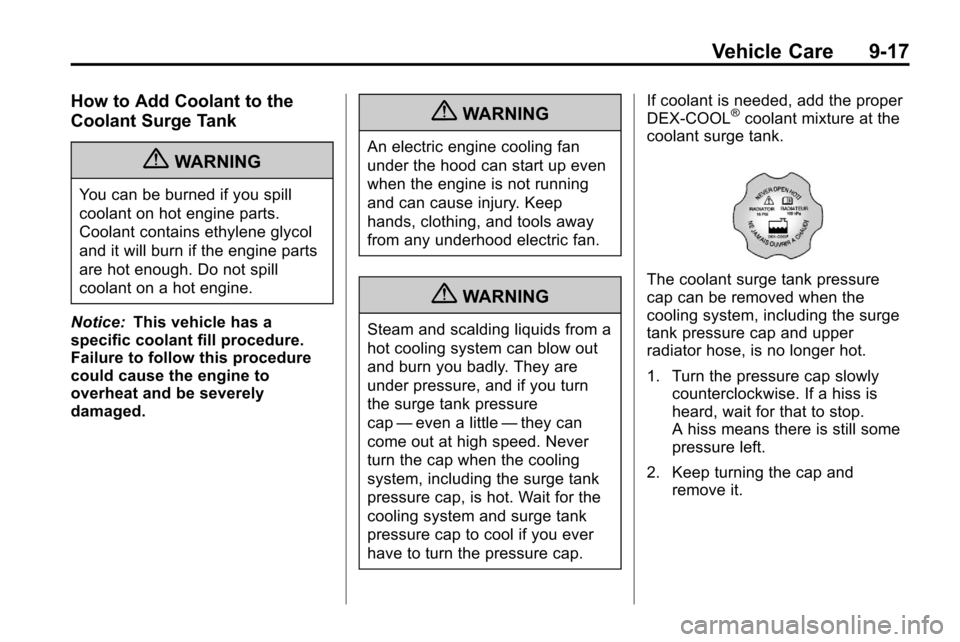
The coolant surge tank pressure
cap can be removed when the
cooling system, including the surge
tank pressure cap and upper
radiator hose, is no longer hot.
1. Turn the pressure cap slowly counterclockwise. If a hiss is
heard, wait for that to stop.
A hiss means there is still some
pressure left.
2. Keep turning the cap and remove it.
Page 297 of 394

Vehicle Care 9-29
Notice:Do not cover a headlamp
to improve beam cut-off when
aiming. Covering a headlamp may
cause excessive heat build-up
which may cause damage to the
headlamp.
6. Turn on the low-beam
headlamps and place a piece of
cardboard or equivalent in front
of the headlamp not being
adjusted. This allows only the
beam of light from the headlamp
being adjusted to be seen on the
flat surface.
7. Locate the vertical headlampaiming screws, which are under
the hood near each headlamp
assembly.
The adjustment screw can be
turned with a E8 Torx
®socket.
8. Turn the vertical aiming screw until the headlamp beam is
aimed to the horizontal tape line.
Turn it clockwise or
counterclockwise to raise or
lower the angle of the beam.
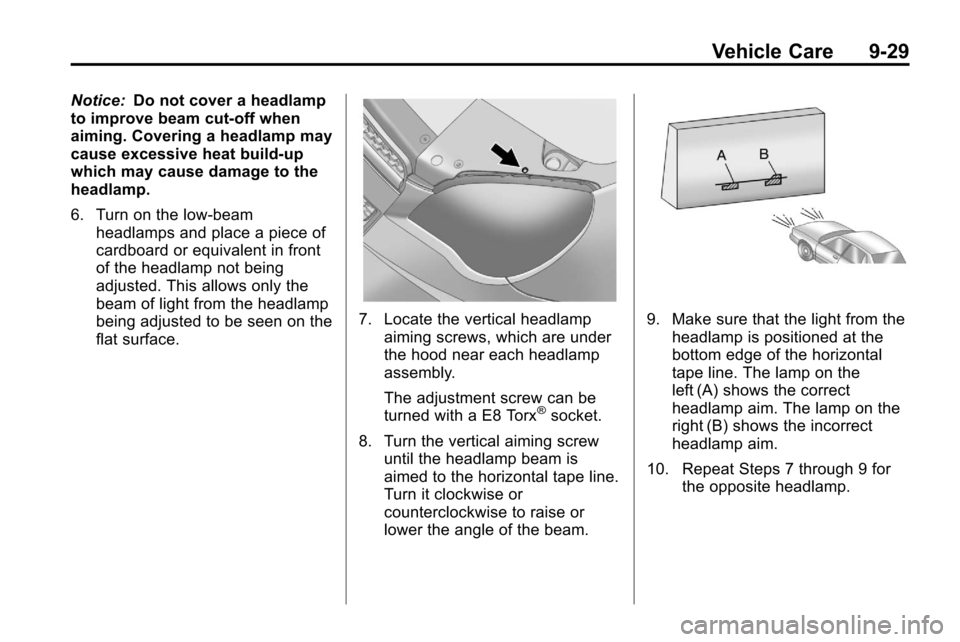
9. Make sure that the light from theheadlamp is positioned at the
bottom edge of the horizontal
tape line. The lamp on the
left (A) shows the correct
headlamp aim. The lamp on the
right (B) shows the incorrect
headlamp aim.
10. Repeat Steps 7 through 9 for the opposite headlamp.
Page 298 of 394
9-30 Vehicle Care
Bulb Replacement
For the proper type of replacement
bulbs, seeReplacement Bulbson
page 9‑34.
For any bulb changing procedure
not listed in this section, contact
your dealer.
Headlamps, Front Turn
Signal, Sidemarker, and
Parking Lamps
A. Low Beam Headlamp
B. High Beam headlamp
C. Park/Turn Signal Lamp
D. Side Marker Lamp To replace:
1. Turn the tire to reach the access
port cap located on front of
wheel well cover.A. Screw
B. Access Port Cap
2. Remove screw (A) and turn access port cap (B)
counterclockwise to remove.
Page 299 of 394

Vehicle Care 9-31
3. If replacing low/high headlampbulb, remove the dust cover cap
from the back of the headlamp
housing by turning the cap
counterclockwise.
4. Turn the bulb socket counterclockwise to remove from
lamp assembly.
5. Remove the bulb from the socket or disconnect bulb
assembly from harness
connector.
6. Install new bulb.
7. Reinstall the lamp socket to lamp assembly turning
clockwise.
8. Replace the dust cover cap on headlamps.
9. Reinstall the wheel well cover access port cap and secure by
installing screw.Fog Lamps
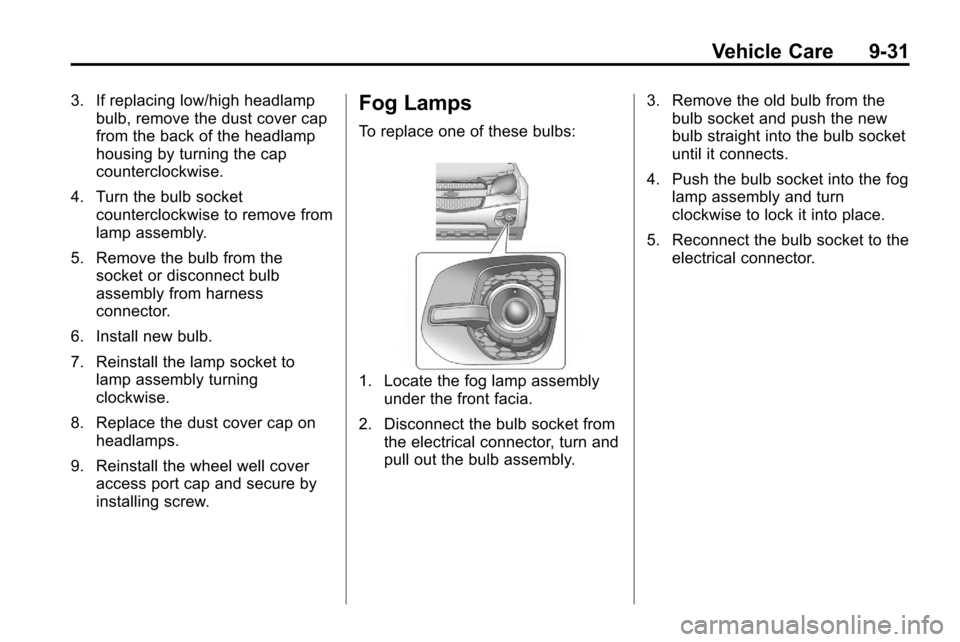
To replace one of these bulbs:
1. Locate the fog lamp assembly
under the front facia.
2. Disconnect the bulb socket from the electrical connector, turn and
pull out the bulb assembly. 3. Remove the old bulb from the
bulb socket and push the new
bulb straight into the bulb socket
until it connects.
4. Push the bulb socket into the fog lamp assembly and turn
clockwise to lock it into place.
5. Reconnect the bulb socket to the electrical connector.
Page 300 of 394
9-32 Vehicle Care
Taillamps, Turn Signal,
Sidemarker, Stoplamps,
and Back-Up Lamps
A. Sidemarker
B. Stoplamp/Turn Signal Lamp/Taillamp
C. Back-up Lamp To replace one of these lamps:
1. Open the liftgate. See
Liftgate
(Manual)
on page 1‑8or
Liftgate (Power) on page 1‑8.
A. Screw
B. Screw Cover
2. Remove the two screw covers (B) from the taillamp
assembly.
3. Remove the two screws (A) securing the taillamp assembly.
4. Pull taillamp assembly out of vehicle body. 5. Disconnect the lamp wiring
harness.
6. Turn the bulb socketcounterclockwise and pull it out.
7. Pull the bulb straight out of the socket.
8. Install the new bulb.
9. Push the bulb socket in and turn it clockwise.
10. Reverse steps 2 through 5 to reinstall lamp assembly.
Page 301 of 394
Vehicle Care 9-33
License Plate Lamp
To replace one of these bulbs:
1. Open the liftgate partway. SeeLiftgate (Manual)
on page 1‑8orLiftgate (Power)on
page 1‑8for more information.
Passenger side shown, driver side
similar
2. Push the left end of the lamp assembly towards the right. 3. Pull the lamp assembly down to
remove from liftgate.
A. Bulb Socket
B. Bulb
C. Lamp Assembly
4. Turn the bulb socket (A) counterclockwise to remove from
lamp assembly (C). 5. Pull the bulb (B) straight out of
the bulb socket.
6. Push the replacement bulb straight into the bulb socket and
turn the bulb socket clockwise to
install into lamp assembly.
7. Turn the lamp assembly into the liftgate engaging the clip side
first.
8. Push on the lamp side opposite the clip until the lamp assembly
snaps into place.
Page 329 of 394
Vehicle Care 9-61
Tire Changing
Removing the Spare Tire and
Tools
To access the spare tire and tools:
1. Open the liftgate. SeeLiftgate
(Manual)
on page 1‑8or
Liftgate (Power) on page 1‑8.
2. Lift the load floor up.
3. Remove the extension (A), wheel wrench (B) and jack (C).
Place the tools next to the tire
being changed.
4. Turn the retainer nutcounterclockwise and remove
the spare tire.
5. Place the spare tire next to the tire being changed.
Removing the Flat Tire and
Installing the Spare Tire
1. Do a safety check beforeproceeding. See If a Tire Goes
Flat
on page 9‑59for more
information.
2. For vehicles with wheel nut caps, turn the wheel wrench
counterclockwise to loosen and
remove them.
Do not try to remove plastic caps
from the cover or center cap.
3. For vehicles with a wheel cover or center cap, pull the cover or
center cap away from the wheel
to remove it. Store the wheel
cover in the cargo area until you
have the flat tire repaired or
replaced.
Page 330 of 394
9-62 Vehicle Care
4. Turn the wheel wrenchcounterclockwise to loosen all
the wheel nuts, but do not
remove them yet.
5. Place the jack near the flat tire.
Notice: Make sure that the jack
lift head is in the correct position
or you may damage your vehicle.
The repairs would not be covered
by your warranty.Front
Rear 6. Position the jack lift head at the
jack location nearest the flat tire.
The location is indicated by a
mark on the bottom edge of the
front and rear door plastic
molding. The jack must not be
used in any other position.
Place the jack notch (A) under
the frame rail seam (B).
7. Put the compact spare tire near you.