2010 CHEVROLET EQUINOX climate control
[x] Cancel search: climate controlPage 1 of 394

2010 Chevrolet Equinox Owner ManualM
Keys, Doors and Windows. . . 1-1
Keys and Locks . . . . . . . . . . . . . . . 1-2
Doors . . . . . . . . . . . . . . . . . . . . . . . . . . 1-8
Vehicle Security . . . . . . . . . . . . . . 1-12
Exterior Mirrors . . . . . . . . . . . . . . . 1-14
Interior Mirrors . . . . . . . . . . . . . . . . 1-15
Windows . . . . . . . . . . . . . . . . . . . . . 1-16
Roof . . . . . . . . . . . . . . . . . . . . . . . . . . 1-18
Seats and Restraints . . . . . . . . . 2-1
Head Restraints . . . . . . . . . . . . . . . 2-2
Front Seats . . . . . . . . . . . . . . . . . . . . 2-3
Rear Seats . . . . . . . . . . . . . . . . . . . . 2-8
Safety Belts . . . . . . . . . . . . . . . . . . . . 2-9
Airbag System . . . . . . . . . . . . . . . . 2-22
Child Restraints . . . . . . . . . . . . . . 2-37 Storage
. . . . . . . . . . . . . . . . . . . . . . . 3-1
Storage Compartments . . . . . . . . 3-1
Additional Storage Features . . . 3-1
Roof Rack System . . . . . . . . . . . . . 3-2
Instruments and Controls . . . . 4-1
Instrument Panel Overview . . . . 4-4
Controls . . . . . . . . . . . . . . . . . . . . . . . 4-6
Warning Lights, Gauges, and Indicators . . . . . . . . . . . . . . . . . . . 4-11
Information Displays . . . . . . . . . . 4-24
Vehicle Messages . . . . . . . . . . . . 4-27
Vehicle Personalization . . . . . . . 4-34
OnStar
®System . . . . . . . . . . . . . . 4-39 Lighting
. . . . . . . . . . . . . . . . . . . . . . . 5-1
Exterior Lighting . . . . . . . . . . . . . . . 5-1
Interior Lighting . . . . . . . . . . . . . . . . 5-4
Lighting Features . . . . . . . . . . . . . . 5-4
Infotainment System . . . . . . . . . 6-1
Introduction . . . . . . . . . . . . . . . . . . . . 6-1
Radio . . . . . . . . . . . . . . . . . . . . . . . . . 6-11
Audio Players . . . . . . . . . . . . . . . . 6-19
Rear Seat Infotainment . . . . . . . 6-33
Phone . . . . . . . . . . . . . . . . . . . . . . . . 6-42
Climate Controls . . . . . . . . . . . . . 7-1
Climate Control Systems . . . . . . 7-1
Air Vents . . . . . . . . . . . . . . . . . . . . . . . 7-6
Maintenance . . . . . . . . . . . . . . . . . . . 7-6
Page 11 of 394
Keys, Doors and Windows 1-5
Remote Vehicle Start
The vehicle may have this feature
that allows you to start the engine
from outside the vehicle.
/(Remote Vehicle Start):This
button will be on the RKE
transmitter if the vehicle has remote
start. To enable and disable remote
start, see “Remote Vehicle Start”
under Vehicle Personalization
on
page 4‑34.
Vehicles with an automatic climate
control system will default to a
heating or cooling mode depending
on the outside temperature during a
remote start. Once the key is turned
to ON/RUN, the system will turn on
at the setting the vehicle was last
set to.
Laws in some local communities
may restrict the use of remote
starters. For example, some laws
require a person using remote
start to have the vehicle in view.
Check local regulations for any
requirements. There are other conditions which
can affect the performance of the
transmitter, see
Remote Keyless
Entry (RKE) System
on page 1‑3for additional information.
Starting the Engine Using Remote
Start
To start the engine using the remote
start feature:
1. Press
Qon the RKE transmitter.
2. Press and hold /for about
two seconds. The turn signal
lamps will briefly flash to confirm
the vehicle has been started.
The parking lamps will turn on
and remain on as long as the
engine is running. The vehicle's
doors will be locked.
3. The key must be inserted and turned to ON/RUN before
driving.
The engine will shut off after
10 minutes unless a time
extension is done or the key is
inserted and turned to ON/RUN. Extending Engine Run Time
For a 10-minute extension, repeat
Steps 1 and 2 while the engine is
still running. The remote start can
be extended once.
When the remote start is extended,
the second 10 minutes will start
immediately.
For example, if the engine has been
running for five minutes, and
10 minutes are added, the engine
will run for a total of 15 minutes.
A maximum of two remote starts or
remote start attempts are allowed
between ignition cycles.
The vehicle's ignition switch must
be turned to ON/RUN and then back
to LOCK/OFF using the key, before
the remote start procedure can be
used again.
Page 14 of 394

1-8 Keys, Doors and Windows
Doors
Liftgate (Manual)
{WARNING
Exhaust gases can enter the
vehicle if it is driven with the
liftgate, trunk/hatch open, or with
any objects that pass through the
seal between the body and the
trunk/hatch or liftgate. Engine
exhaust contains Carbon
Monoxide (CO) which cannot be
seen or smelled. It can cause
unconsciousness and even death.
If the vehicle must be driven with
the liftgate, or trunk/hatch open:
.Close all of the windows.
.Fully open the air outlets on
or under the instrument
panel.(Continued)
WARNING (Continued)
.Adjust the Climate Control
system to a setting that
brings in only outside air and
set the fan speed to the
highest setting. See Climate
Control System in the Index.
For more information about
carbon monoxide, see Engine
Exhaust on page 8‑34.
Notice: If you open the liftgate
without checking for overhead
obstructions such as a garage
door, you could damage the
liftgate or the liftgate glass.
Always check to make sure the
area above and behind the liftgate
is clear before opening it.
Press the touchpad located in the
handle of the liftgate, above the
license plate, and lift up to open. Do not press the touchpad while
closing the liftgate. This will cause
the liftgate to be unlatched.
Always close the liftgate before
driving.
Liftgate (Power)
Power Liftgate Operation
{WARNING
Exhaust gases can enter the
vehicle if it is driven with the
liftgate, trunk/hatch open, or with
any objects that pass through the
seal between the body and the
trunk/hatch or liftgate. Engine
exhaust contains Carbon
Monoxide (CO) which cannot be
seen or smelled. It can cause
unconsciousness and even death.
(Continued)
Page 15 of 394
Keys, Doors and Windows 1-9
WARNING (Continued)
If the vehicle must be driven with
the liftgate, or trunk/hatch open:
.Close all of the windows.
.Fully open the air outlets on
or under the instrument
panel.
.Adjust the Climate Control
system to a setting that
brings in only outside air and
set the fan speed to the
highest setting. See Climate
Control System in the Index.
.If the vehicle is equipped with
a power liftgate, disable the
power liftgate function.
For more information about
carbon monoxide, see Engine
Exhaust on page 8‑34.
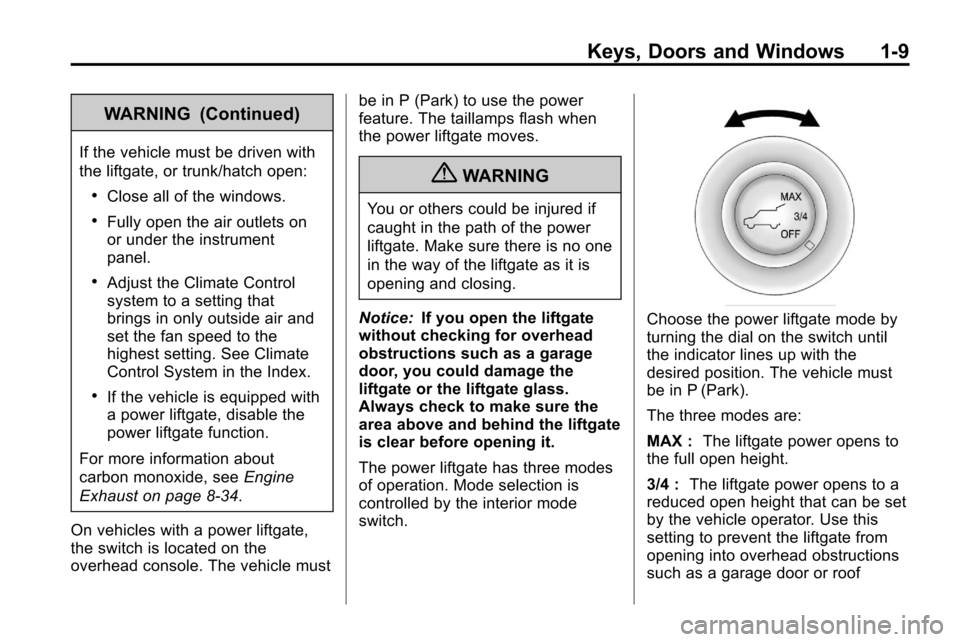
On vehicles with a power liftgate,
the switch is located on the
overhead console. The vehicle must be in P (Park) to use the power
feature. The taillamps flash when
the power liftgate moves.
{WARNING
You or others could be injured if
caught in the path of the power
liftgate. Make sure there is no one
in the way of the liftgate as it is
opening and closing.
Notice: If you open the liftgate
without checking for overhead
obstructions such as a garage
door, you could damage the
liftgate or the liftgate glass.
Always check to make sure the
area above and behind the liftgate
is clear before opening it.
The power liftgate has three modes
of operation. Mode selection is
controlled by the interior mode
switch.
Choose the power liftgate mode by
turning the dial on the switch until
the indicator lines up with the
desired position. The vehicle must
be in P (Park).
The three modes are:
MAX : The liftgate power opens to
the full open height.
3/4 : The liftgate power opens to a
reduced open height that can be set
by the vehicle operator. Use this
setting to prevent the liftgate from
opening into overhead obstructions
such as a garage door or roof
Page 20 of 394
1-14 Keys, Doors and Windows
Exterior Mirrors
Convex Mirrors
{WARNING
A convex mirror can make things,
like other vehicles, look farther
away than they really are. If you
cut too sharply into the right lane,
you could hit a vehicle on the
right. Check the inside mirror or
glance over your shoulder before
changing lanes.
The passenger side mirror is convex
shaped. A convex mirror's surface is
curved so more can be seen from
the driver seat.
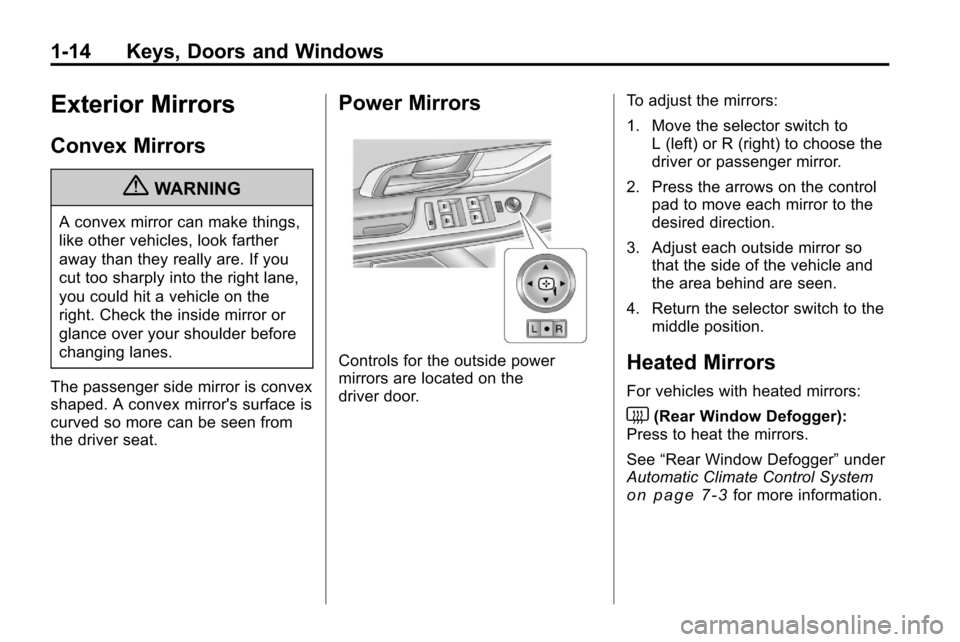
Power Mirrors
Controls for the outside power
mirrors are located on the
driver door. To adjust the mirrors:
1. Move the selector switch to
L (left) or R (right) to choose the
driver or passenger mirror.
2. Press the arrows on the control pad to move each mirror to the
desired direction.
3. Adjust each outside mirror so that the side of the vehicle and
the area behind are seen.
4. Return the selector switch to the middle position.Heated Mirrors
For vehicles with heated mirrors:
<(Rear Window Defogger):
Press to heat the mirrors.
See “Rear Window Defogger” under
Automatic Climate Control System
on page 7‑3for more information.
Page 33 of 394
Seats and Restraints 2-7
Heated Front Seats
{WARNING
If you cannot feel temperature
change or pain to the skin, the
seat heater may cause burns
even at low temperatures. To
reduce the risk of burns, people
with such a condition should use
care when using the seat heater,
especially for long periods of
time. Do not place anything on
the seat that insulates against
heat, such as a blanket, cushion,
cover or similar item. This may
cause the seat heater to
overheat. An overheated seat
heater may cause a burn or may
damage the seat.
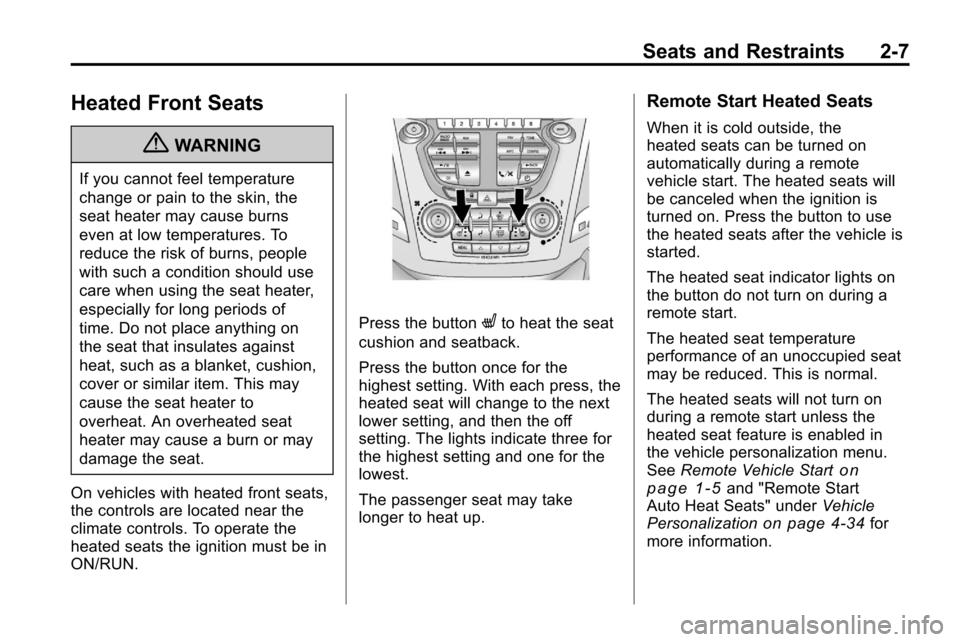
On vehicles with heated front seats,
the controls are located near the
climate controls. To operate the
heated seats the ignition must be in
ON/RUN.
Press the buttonLto heat the seat
cushion and seatback.
Press the button once for the
highest setting. With each press, the
heated seat will change to the next
lower setting, and then the off
setting. The lights indicate three for
the highest setting and one for the
lowest.
The passenger seat may take
longer to heat up.
Remote Start Heated Seats
When it is cold outside, the
heated seats can be turned on
automatically during a remote
vehicle start. The heated seats will
be canceled when the ignition is
turned on. Press the button to use
the heated seats after the vehicle is
started.
The heated seat indicator lights on
the button do not turn on during a
remote start.
The heated seat temperature
performance of an unoccupied seat
may be reduced. This is normal.
The heated seats will not turn on
during a remote start unless the
heated seat feature is enabled in
the vehicle personalization menu.
See Remote Vehicle Start
on
page 1‑5and "Remote Start
Auto Heat Seats" under Vehicle
Personalization
on page 4‑34for
more information.
Page 91 of 394

Instruments and Controls 4-5
A.Air Vents on page 7‑6.
B. Turn and Lane-Change Signals
on page 5‑3.Exterior Lamp
Controlson page 5‑1. Fog
Lampson page 5‑3(If
Equipped).
C. Instrument Cluster
on
page 4‑12.
D. Windshield Wiper/Washer
on
page 4‑7. Rear Window
Wiper/Washer on page 4‑8.
E. Power Door Locks
on
page 1‑7.
F. Instrument Panel Storage
on
page 3‑1.
G. Safety Locks on page 1‑7. H.
AM-FM Radio
on page 6‑11.
Navigation System (If
Equipped). See Navigation
System Manual.
I. Cruise Control
on page 8‑44.
J. Instrument Panel Illumination
Control
on page 5‑4.
K. Steering Wheel Adjustment
on
page 4‑6.
L. Horn on page 4‑7.
M. Steering Wheel Controls
on
page 4‑6.
N. Ignition Positions on page 8‑28.
O. Climate Control Systems
on
page 7‑1or Automatic Climate
Control System on page 7‑3. P. Shift Lever. See
Shifting Into
Park on page 8‑32.
Q. Fuel Economy Mode
on
page 8‑37(If Equipped).
R. StabiliTrak System
on
page 8‑43.
S. Cupholders on page 3‑1.
T. Power Outlets on page 4‑10.
U. CD Player on page 6‑19.
V. Driver Information Center Buttons. See Driver Information
Center (DIC) on page 4‑24.
W. Hazard Warning Flashers
on
page 5‑2.
X. Glove Box on page 3‑1.
Page 120 of 394
4-34 Instruments and Controls
Vehicle Reminder
Messages
Ice Possible Drive With Care
This message is displayed when ice
conditions are possible.
Turn Wiper Control to
Intermittent First
This message is displayed when
attempting to adjust the intermittent
wiper speed without intermittent
selected on the wiper control. See
Windshield Wiper/Washer
on
page 4‑7.
Vehicle
Personalization
The audio system controls are used
to access the personalization
menus for customizing vehicle
features.
CONFIG (Configuration): Press to
access the Configuration
Settings Menu.
MENU / SELECT Knob: Press the
center of this knob to enter the
menus and select menu items. Turn
the knob to scroll through the
menus.
0BACK: Press to exit or move
backwards in a menu.
Entering the Personalization
Menus
1. Turn the infotainment system on and press the CONFIG button to
access the Configuration
Settings menu.
2. Turn the MENU / SELECT knob to highlight Vehicle Settings. 3. Press the center of the
MENU / SELECT knob to select
the Vehicle Settings menu.
The following list of menu items will
be available:
.Climate and Air Quality
.Comfort and Convenience
.Collision/Detection Systems
.Languages
.Lighting
.Power Door Locks
.Remote Lock/Unlock/Start
.Return to Factory Settings
Turn the MENU / SELECT knob to
highlight the menu. Press the knob
to select it. Each of the menus is
detailed in the following information.
All of the menus may not be
available. Only those tied to the
features on your vehicle will be
shown.