2010 CHEVROLET CORVETTE stop start
[x] Cancel search: stop startPage 123 of 472
{WARNING:
It is dangerous to get out of the vehicle if the shift
lever is not fully in P (Park) with the parking brake
firmly set. The vehicle can roll.
Do not leave the vehicle when the engine is
running unless you have to. If you have left the
engine running, the vehicle can move suddenly.
You or others could be injured. To be sure the
vehicle will not move, even when you are on fairly
level ground, always set the parking brake and
move the shift lever to P (Park). See Shifting Into
Park (Automatic Transmission) on page 3‑35.
Be sure the shift lever is fully in P (Park) before starting
the engine. The vehicle has an automatic transmission shift lock
control system. You have to fully apply the brakes and
then press the shift lever button before you can shift
from P (Park) when the vehicle is running. If you cannot
shift out of P (Park), ease pressure on the shift lever
and push the shift lever all the way into P (Park) as you
maintain brake application. Then press the shift lever
button and move the shift lever into another gear.
See
Shifting Out of Park on page 3‑36.
R (Reverse) : Use this gear to back up.
Notice: Shifting to R (Reverse) while the vehicle is
moving forward could damage the transmission.
The repairs would not be covered by the vehicle
warranty. Shift to R (Reverse) only after the vehicle
is stopped.
To rock the vehicle back and forth to get out of snow,
ice, or sand without damaging the transmission, see
If Your Vehicle is Stuck in Sand, Mud, Ice, or Snow
on
page 5‑27.
3-27
Page 125 of 472
Manual Paddle Shift
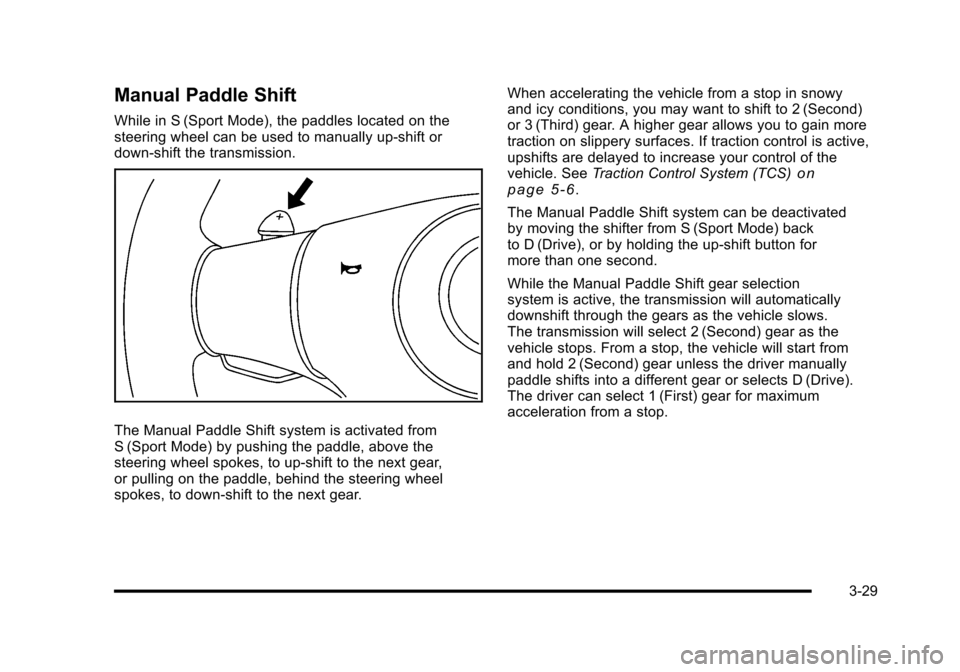
While in S (Sport Mode), the paddles located on the
steering wheel can be used to manually up-shift or
down-shift the transmission.
The Manual Paddle Shift system is activated from
S (Sport Mode) by pushing the paddle, above the
steering wheel spokes, to up-shift to the next gear,
or pulling on the paddle, behind the steering wheel
spokes, to down-shift to the next gear. When accelerating the vehicle from a stop in snowy
and icy conditions, you may want to shift to 2 (Second)
or 3 (Third) gear. A higher gear allows you to gain more
traction on slippery surfaces. If traction control is active,
upshifts are delayed to increase your control of the
vehicle. See
Traction Control System (TCS)
on
page 5‑6.
The Manual Paddle Shift system can be deactivated
by moving the shifter from S (Sport Mode) back
to D (Drive), or by holding the up‐shift button for
more than one second.
While the Manual Paddle Shift gear selection
system is active, the transmission will automatically
downshift through the gears as the vehicle slows.
The transmission will select 2 (Second) gear as the
vehicle stops. From a stop, the vehicle will start from
and hold 2 (Second) gear unless the driver manually
paddle shifts into a different gear or selects D (Drive).
The driver can select 1 (First) gear for maximum
acceleration from a stop.
3-29
Page 128 of 472
Manual Transmission Operation
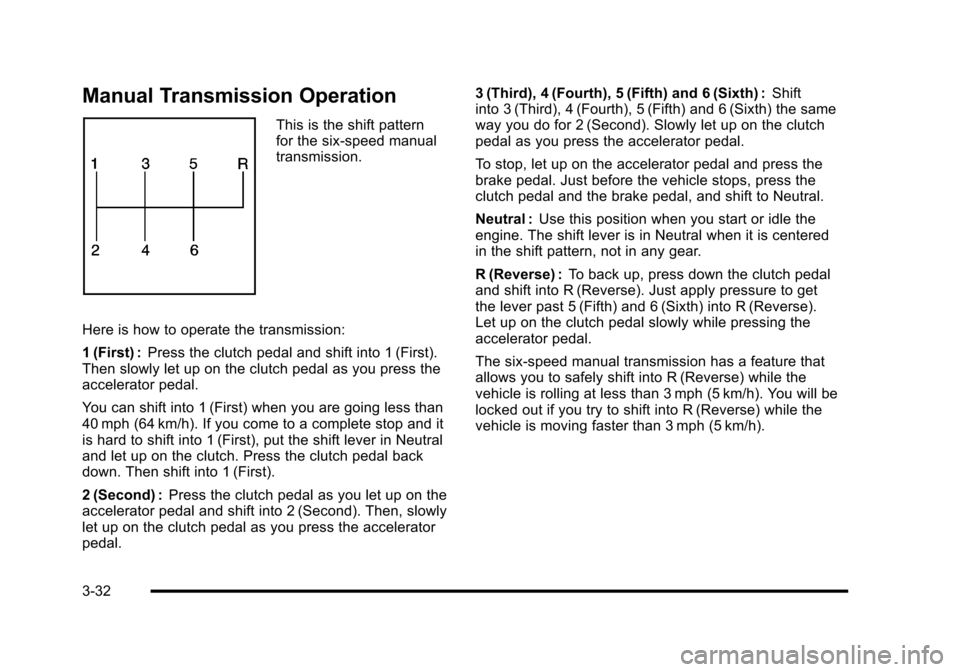
This is the shift pattern
for the six-speed manual
transmission.
Here is how to operate the transmission:
1 (First) : Press the clutch pedal and shift into 1 (First).
Then slowly let up on the clutch pedal as you press the
accelerator pedal.
You can shift into 1 (First) when you are going less than
40 mph (64 km/h). If you come to a complete stop and it
is hard to shift into 1 (First), put the shift lever in Neutral
and let up on the clutch. Press the clutch pedal back
down. Then shift into 1 (First).
2 (Second) : Press the clutch pedal as you let up on the
accelerator pedal and shift into 2 (Second). Then, slowly
let up on the clutch pedal as you press the accelerator
pedal. 3 (Third), 4 (Fourth), 5 (Fifth) and 6 (Sixth) :
Shift
into 3 (Third), 4 (Fourth), 5 (Fifth) and 6 (Sixth) the same
way you do for 2 (Second). Slowly let up on the clutch
pedal as you press the accelerator pedal.
To stop, let up on the accelerator pedal and press the
brake pedal. Just before the vehicle stops, press the
clutch pedal and the brake pedal, and shift to Neutral.
Neutral : Use this position when you start or idle the
engine. The shift lever is in Neutral when it is centered
in the shift pattern, not in any gear.
R (Reverse) : To back up, press down the clutch pedal
and shift into R (Reverse). Just apply pressure to get
the lever past 5 (Fifth) and 6 (Sixth) into R (Reverse).
Let up on the clutch pedal slowly while pressing the
accelerator pedal.
The six-speed manual transmission has a feature that
allows you to safely shift into R (Reverse) while the
vehicle is rolling at less than 3 mph (5 km/h). You will be
locked out if you try to shift into R (Reverse) while the
vehicle is moving faster than 3 mph (5 km/h).
3-32
Page 139 of 472
Universal Home Remote System
Operation
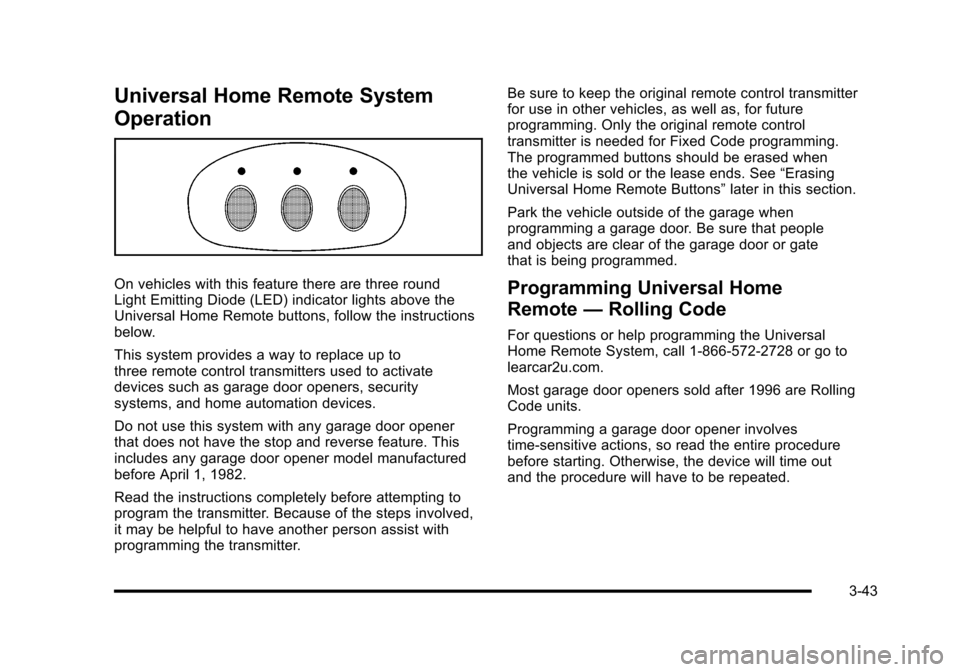
On vehicles with this feature there are three round
Light Emitting Diode (LED) indicator lights above the
Universal Home Remote buttons, follow the instructions
below.
This system provides a way to replace up to
three remote control transmitters used to activate
devices such as garage door openers, security
systems, and home automation devices.
Do not use this system with any garage door opener
that does not have the stop and reverse feature. This
includes any garage door opener model manufactured
before April 1, 1982.
Read the instructions completely before attempting to
program the transmitter. Because of the steps involved,
it may be helpful to have another person assist with
programming the transmitter. Be sure to keep the original remote control transmitter
for use in other vehicles, as well as, for future
programming. Only the original remote control
transmitter is needed for Fixed Code programming.
The programmed buttons should be erased when
the vehicle is sold or the lease ends. See
“Erasing
Universal Home Remote Buttons” later in this section.
Park the vehicle outside of the garage when
programming a garage door. Be sure that people
and objects are clear of the garage door or gate
that is being programmed.Programming Universal Home
Remote —Rolling Code
For questions or help programming the Universal
Home Remote System, call 1-866-572-2728 or go to
learcar2u.com.
Most garage door openers sold after 1996 are Rolling
Code units.
Programming a garage door opener involves
time-sensitive actions, so read the entire procedure
before starting. Otherwise, the device will time out
and the procedure will have to be repeated.
3-43
Page 205 of 472
This light comes on briefly while starting the engine. If it
does not come on, have it fixed so it is ready to warn if
there is a problem.
{WARNING:
The brake system might not be working properly if
the brake system warning light is on. Driving with
the brake system warning light on can lead to a
crash. If the light is still on after the vehicle has
been pulled off the road and carefully stopped,
have the vehicle towed for service.
If this warning light stays on after the engine is started,
the parking brake may still be set or there could be a
brake problem. Refer to Parking Brake
on page 3‑34to
see if it is set. If the parking brake is not set, have the
brake system inspected right away.
If the light comes on while driving and a CHECK
BRAKE FLUID message shows on the DIC, pull off the
road and stop carefully. The pedal may be harder to
push or the pedal may go closer to the floor. It may take
longer to stop. If the light is still on, have the vehicle
towed for service. See Towing Your Vehicle
on
page 5‑33and DIC Warnings and Messageson
page 4‑52for more information.
Antilock Brake System (ABS)
Warning Light
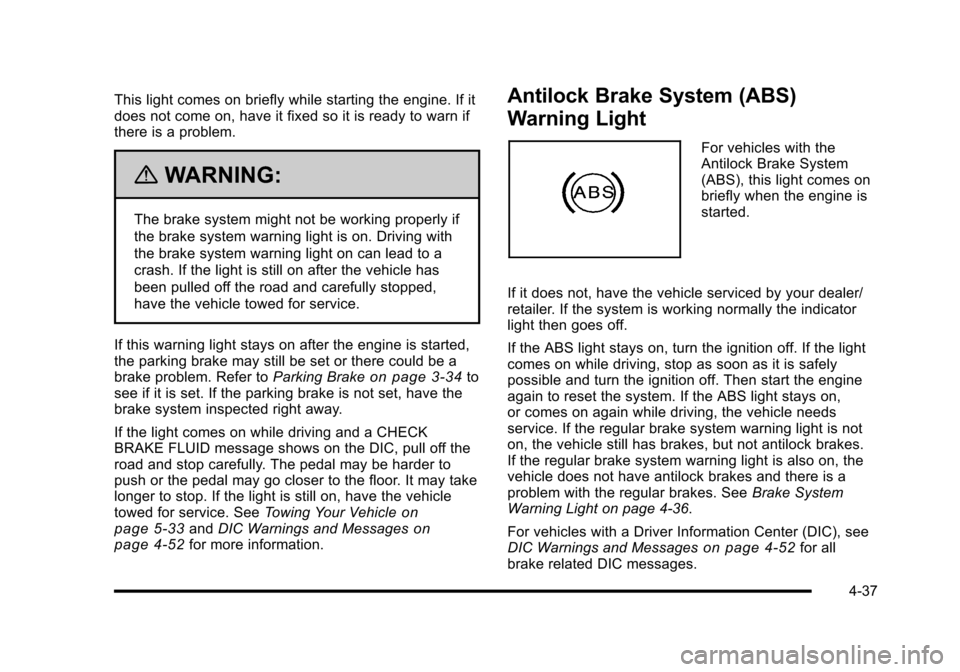
For vehicles with the
Antilock Brake System
(ABS), this light comes on
briefly when the engine is
started.
If it does not, have the vehicle serviced by your dealer/
retailer. If the system is working normally the indicator
light then goes off.
If the ABS light stays on, turn the ignition off. If the light
comes on while driving, stop as soon as it is safely
possible and turn the ignition off. Then start the engine
again to reset the system. If the ABS light stays on,
or comes on again while driving, the vehicle needs
service. If the regular brake system warning light is not
on, the vehicle still has brakes, but not antilock brakes.
If the regular brake system warning light is also on, the
vehicle does not have antilock brakes and there is a
problem with the regular brakes. See Brake System
Warning Light on page 4‑36.
For vehicles with a Driver Information Center (DIC), see
DIC Warnings and Messages
on page 4‑52for all
brake related DIC messages.
4-37
Page 208 of 472
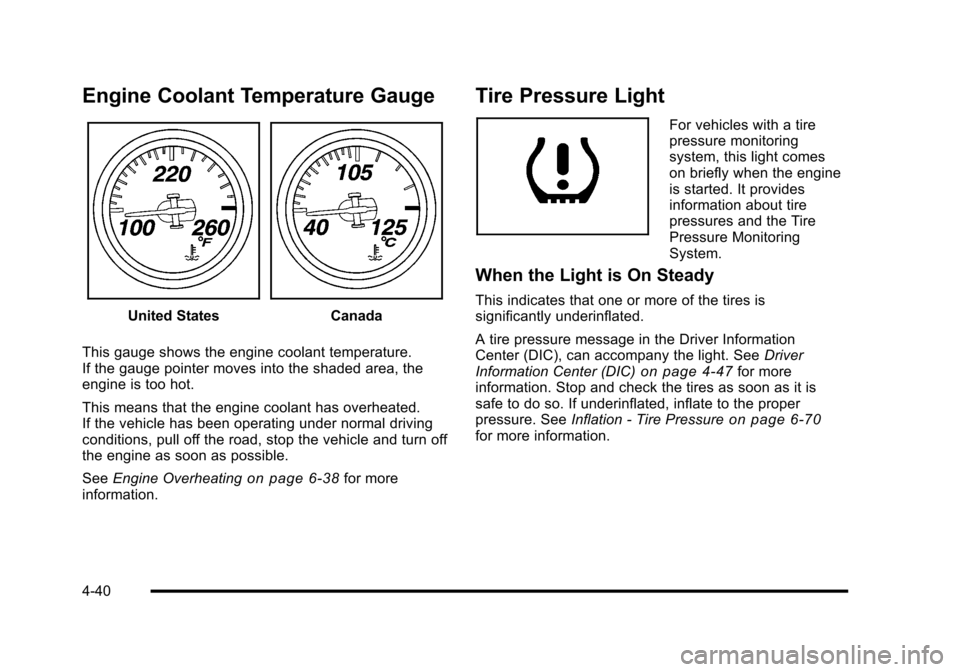
Engine Coolant Temperature Gauge
United StatesCanada
This gauge shows the engine coolant temperature.
If the gauge pointer moves into the shaded area, the
engine is too hot.
This means that the engine coolant has overheated.
If the vehicle has been operating under normal driving
conditions, pull off the road, stop the vehicle and turn off
the engine as soon as possible.
See Engine Overheating
on page 6‑38for more
information.
Tire Pressure Light
For vehicles with a tire
pressure monitoring
system, this light comes
on briefly when the engine
is started. It provides
information about tire
pressures and the Tire
Pressure Monitoring
System.
When the Light is On Steady
This indicates that one or more of the tires is
significantly underinflated.
A tire pressure message in the Driver Information
Center (DIC), can accompany the light. See Driver
Information Center (DIC)
on page 4‑47for more
information. Stop and check the tires as soon as it is
safe to do so. If underinflated, inflate to the proper
pressure. See Inflation - Tire Pressure
on page 6‑70for more information.
4-40
Page 210 of 472
This light comes on during a malfunction in one of
two ways:
Light Flashing : A misfire condition has been detected.
A misfire increases vehicle emissions and could
damage the emission control system on the vehicle.
Diagnosis and service might be required.
The following can prevent more serious damage to the
vehicle:
.Reduce vehicle speed.
.Avoid hard accelerations.
.Avoid steep uphill grades.
If the light continues to flash, when it is safe to do so,
stop the vehicle. Find a safe place to park the vehicle.
Turn off the ignition, wait at least 10 seconds, and
restart the engine. If the light is still flashing, follow the
previous steps and see your dealer/retailer for service
as soon as possible.
Light On Steady : An emission control system
malfunction has been detected on the vehicle.
Diagnosis and service might be required. An emission system malfunction might be corrected by
doing the following:
.Make sure the fuel cap is fully installed. See
Filling
the Tankon page 6‑9. The diagnostic system
can determine if the fuel cap has been left off or
improperly installed. A loose or missing fuel cap
allows fuel to evaporate into the atmosphere. A few
driving trips with the cap properly installed should
turn the light off.
.If the vehicle has been driven through a deep
puddle of water, the vehicle's electrical system
might be wet. The condition is usually corrected
when the electrical system dries out. A few driving
trips should turn the light off.
.Make sure to fuel the vehicle with quality fuel.
Poor fuel quality causes the engine not to run as
efficiently as designed and may cause: stalling
after start-up, stalling when the vehicle is changed
into gear, misfiring, hesitation on acceleration,
or stumbling on acceleration. These conditions
might go away once the engine is warmed up.
If one or more of these conditions occurs, change
the fuel brand used. It will require at least one full
tank of the proper fuel to turn the light off.
See Gasoline Octane on page 6‑7.
4-42
Page 219 of 472
TRIP Button
The TRIP button displays the odometer, trip distance,
elapsed time, average speed, and oil life remaining
information.
Odometer : The odometer shows how far your vehicle
has been driven in either kilometers or miles. Press the
TRIP button to display odometer readings, such as:
.ODOMETER 20008 km or
.ODOMETER 12345 MI
You can also display the odometer by turning on the
parking lamps.
Trip Odometers : There are two trip odometers.
Press the TRIP button to display TRIP ODOMETER A
readings and press the button again to display TRIP
ODOMETER B readings, such as:
.TRIP ODOMETER A 209.9 km or
.TRIP ODOMETER A 130.5 MI
.TRIP ODOMETER B 483.5 km or
.TRIP ODOMETER B 300.5 MI
Both of the trip odometers can be used simultaneously.
The trip odometers can be reset by pressing the RESET
button on the DIC. There is also a miles since last ignition feature that
displays the number of kilometers (miles) driven since
you last started the vehicle. Press and hold the RESET
button for three seconds, then release it. The kilometers
(miles) since the last ignition cycle will be set into the
trip odometer.
Elapsed Timer :
Press the TRIP button until ELAPSED
TIMER is displayed, such as ELAPSED TIMER .00.
When the ignition is in on, the DIC can be used as a
stopwatch. The display can show hours, minutes and
seconds. The elapsed time indicator will record up to
23 hours, 59 minutes and 59 seconds, then it will reset
to zero and continue counting. The display appears as
ELAPSED TIMER .00 in the elapsed time function.
You can start or stop the elapsed time by pressing the
RESET button. To reset the elapsed time to zero, press
the RESET button for three seconds while the timer is
displayed.
Pressing and holding the RESET button for at least
10 seconds will reset the timer display to the time since
last ignition cycle.
Average Speed : Press the TRIP button until the
average speed is displayed, such as:
.AVERAGE SPEED 100 km/h or
.AVERAGE SPEED 62 MPH
4-51